(→The Maku Tree: next image) |
TriforceTony (talk | contribs) mNo edit summary |
||
| (28 intermediate revisions by 2 users not shown) | |||
| Line 1: | Line 1: | ||
{{Header Nav|game=The Legend of Zelda: Oracle of Seasons}} | {{Header Nav|game=The Legend of Zelda: Oracle of Seasons}} | ||
== Introduction == | |||
[[File:LOZ OOS The Very Beginning.PNG|frame|left|The Triforce calls upon Link]] | |||
[[File:LOZ Oos Din and Link.PNG|frame|right|Link and the Oracle of Seasons dance together]] | |||
[[File:LOZ Oos Din Sealed.PNG|frame|left|Onox seals up Din]] | |||
[[File:LOZ Oos Templeofseasons.PNG|frame|right|The Temple of Seasons sinks underground]] | |||
''Link, a hero from the land of Hyrule, has seen much evil appear in a short time. Not long ago, his destiny changed, and he became a mighty force of good, defeating the Evil King Ganon, rescuing Princess Zelda, and restoring peace to the kingdom of Hyrule. Ganon sought out a force, that of the Triforce, and could not obtain it all. Instead, that very force was split into three parts: Power, Wisdom and Courage. One of those parts, Courage, is within Link. Another, Wisdom, lies in Princess Zelda. Ganon held the last force, Power, but it was lost upon his demise. However, a mysterious new enemy is about to make themself known, and could very well bring the force of Power back...'' | |||
Link, the Legendary Hero, is called by the Triforce to Princess Zelda's castle in Hyrule. The Triforce warps him to the land of Holodrum, where he lands unconscious. He is discovered by a dancer named Din and by Impa, another envoy from Princess Zelda. | |||
Short after Link wakes up, General Onox of Darkness crashes in like a tornado, knocks everybody off and abducts Din. Even Link is helpless against him. | |||
Then, he seals Din up and sends the Temple of Seasons sinking into the earth, wreaking havoc over all the land! The seasons are thrown out of balance, and Onox casts his destruction across Holodrum and beyond! | |||
{{-}} | {{-}} | ||
[[File:LOZ Oos | == The adventure begins == | ||
=== Horon Village === | |||
{{sidebar | |||
|width=30% | |||
|title=Linked game start | |||
|contents=If [[The Legend of Zelda: Oracle of Ages|Oracle of Ages]] has already been completed and linked to this game, Link will start with two '''extra items''': the L-1 wooden sword and a 4th heart container.}} | |||
[[File:LOZ Oos The Quest.PNG|frame|left|Impa requests your help...]] | |||
After General Onox imprisons Din, Link finds himself awakening elsewhere. Impa asks Link to take a message to the Maku Tree in Horon Village. She is too injured to carry on the task herself, and she knows that Link is the Triforce Hero, because his hand bears the symbol of the Triforce of Courage. | |||
{{-}} | {{-}} | ||
[[ | {{sidebar | ||
[[File:LOZ Oos | |width=30% | ||
|title=Linked game: <br/> Ring secret | |||
|contents=If [[The Legend of Zelda: Oracle of Ages|Oracle of Ages]] has already been completed and linked to this game, Link can get all the rings he collected in ''Oracle of Ages'' using the '''Ring Secret'''. First, switch to ''Oracle Of Ages'', go to the jewelry and talk to the Red Snake: he will tell you a password. Then, switch back to ''Oracle of Seasons'', go to the jewelry in Horon Village and tell the password to the Red Snake there. Your collection of rings will be copied into this game.}} | |||
[[File:LOZ Oos Horon Shop.PNG|frame|left|Horon Village shop.]] | |||
Two places of interest can be found in Horon Village: the first one is '''Vasu Jewelry''', where Link will be given a '''L-1 Ring Box''' that allows him to carry (and use) one '''Magic Ring''', after he will find any. | |||
The second one is the '''shop'''; inside, there are three items available: some Hearts, which replenish health (10 Rupees), some Bombs (20 Rupees), and a shield (30 Rupees). If you want to buy one, you'll need to pick up the item you want and talk to the store clerk. | |||
Anyway, you will find the Bombs for free in the first dungeon, and you can buy the [[File:Zelda Oracles L-1 Shield.png]] Wooden Shield for a cheaper price just before the second dungeon. | |||
{{-}} | {{-}} | ||
[[File:LOZ Oos | [[File:LOZ Oos Horon Path.PNG|frame|left|The door to the right is open only if you play on a '''[[Game Boy Advance]]'''.]] | ||
In the north-west corner of the Village, Link can visit the hut of the '''Know-It-All Birds''', that consist of an in-game tutorial. One last location is the '''Advance shop''', that is open only if playing on a [[GBA]] (but not on a [[DS]] or [[3DS]]); there, Link can buy three items for 100 Rupees each, but later, because he starts the game with no money. | |||
{{-}} | {{-}} | ||
Now, the real adventure has begun. You must now find a way to restore Holodrum from its state of frequently-changing seasons, and the first step is to deliver Impa's message to the Maku Tree. | |||
{{-}} | {{-}} | ||
=== Western coast === | |||
[[File:LOZ Oos First Enemy.PNG|frame|left|Jump down from here, and avoid the Octoroks.]] | |||
The way to the tree is blocked, so you can't go there yet. First, you must find a sword to clear the path. Head west through Horon Village, and you'll reach a small path that heads into the coast. | |||
From here, go south. There is a shortcut you can take down to the coast from a ledge above. However, there are Octoroks to avoid along the way. You need a weapon to defeat the evil monsters like these you'll meet. Look for a cave entrance in the cliff wall near a dock. This is the entrance to the Hero's Cave. | |||
{{-}} | |||
=== Hero's Cave === | |||
The Hero's Cave is a sort of mini-dungeon, with very simple puzzles to solve. However, you can't defend yourself from enemies yet, so avoid them all. | |||
[[File:LOZ Oos HerosCave.PNG|frame|right|Hero's Cave entrance]] | |||
[[File:Heros cave.png|thumb|left|Map of the Hero's Cave]] | |||
{{-}} | {{-}} | ||
[[File:LOZ Oos HerosCave | [[File:LOZ Oos HerosCave Push First Block.PNG|frame|right|(Room 2) Push the block. Very simple!]] | ||
* '''Room 1:''' Once inside the cave, head through the door to the east, avoiding the Keese. | |||
* '''Room 2:''' Once inside the next room, all of the doors will close. This puzzle is often common, and you'll see it many more times to come. Push the block in the center of the room to open the doors again, then head through the door to the north. | |||
{{-}} | {{-}} | ||
[[File:LOZ Oos HerosCave Push Two Blocks.PNG|frame|right|(Room 3) Push the left block south, and the right east.]] | |||
[[File:LOZ Oos | * '''Room 3:''' Once in the next room, you'll need to go down a narrow path. Falling is not an option. Push the block up to access the path. Across the path, there are two more blocks push the left block south and the right block east. This opens the way to the key chamber. | ||
{{-}} | {{-}} | ||
[[File:LOZ Oos HerosCave Switch.PNG|frame|right|(Room 4) Avoid the enemies and press the switch!]] | |||
* '''Room 4:''' Inside the key chamber, avoid the Keese and Gels, and step on the round floor switch next to the strange spot on the floor, revealing a chest. Walk up to the south side of the chest and press {{gb|A}} to open it, and you'll find a [[File:Zelda Oracles Small Key.png]] '''Small Key'''. Small Keys can open locked paths in a dungeon, but only fit locks inside the dungeon they're found, and can be used just once. | |||
[[File:LOZ Oos | * '''Room 5:''' Return to the second room (the one with the doors that close when you enter), and head south after pushing the block to find a locked door to the east. You can open it now. | ||
* '''Room 6:''' The room following has more Gels, and Green Zols. Press the switch here to open the path forward. Head on through and avoid the enemies. | |||
{{-}} | {{-}} | ||
You'll | [[File:LOZ Oos HerosCave Wooden Sword.PNG|frame|right|You got the Wooden Sword!]] | ||
* '''Room 7:''' Here is a chest. Open it, and you'll get the first item in the game: the [[File:Zelda Oracles L-1 Sword.png]]'''Wooden Sword'''. Now, you can defeat enemies. After picking up the Wooden Sword, you'll be sent back to the entrance. | |||
{{-}} | {{-}} | ||
[[File:LOZ Oos HerosCave Secret Entrance.PNG|frame|left|Jump down from here. This is a secret entrance.]] | |||
You can now return to Horon Village. | |||
However, before going to the Maku Tree, you can get yourself another item. On the way back to Horon Village is a small ledge above the Hero's Cave that leads to a secret room. Jump off the ledge, and you'll find yourself landing in the cave before a chest. Open it, and you get 30 Rupees. To get out, head left, push the block, and then go back to Horon Village. | |||
{{Footer Nav|game=The Legend of Zelda: Oracle of Seasons|nextpage=North Horon and Gnarled Root Dungeon|nextname=Gnarled Root Dungeon}} | |||
{{Footer Nav|game=The Legend of Zelda: Oracle of Seasons|nextpage=Gnarled Root Dungeon}} | |||
Latest revision as of 01:23, 25 July 2022
Introduction[edit | edit source]
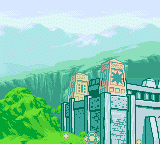
Link, a hero from the land of Hyrule, has seen much evil appear in a short time. Not long ago, his destiny changed, and he became a mighty force of good, defeating the Evil King Ganon, rescuing Princess Zelda, and restoring peace to the kingdom of Hyrule. Ganon sought out a force, that of the Triforce, and could not obtain it all. Instead, that very force was split into three parts: Power, Wisdom and Courage. One of those parts, Courage, is within Link. Another, Wisdom, lies in Princess Zelda. Ganon held the last force, Power, but it was lost upon his demise. However, a mysterious new enemy is about to make themself known, and could very well bring the force of Power back...
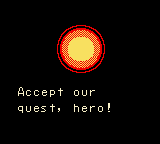
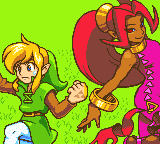
Link, the Legendary Hero, is called by the Triforce to Princess Zelda's castle in Hyrule. The Triforce warps him to the land of Holodrum, where he lands unconscious. He is discovered by a dancer named Din and by Impa, another envoy from Princess Zelda.
Short after Link wakes up, General Onox of Darkness crashes in like a tornado, knocks everybody off and abducts Din. Even Link is helpless against him.
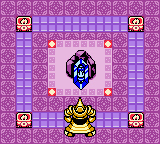
Then, he seals Din up and sends the Temple of Seasons sinking into the earth, wreaking havoc over all the land! The seasons are thrown out of balance, and Onox casts his destruction across Holodrum and beyond!
The adventure begins[edit | edit source]
Horon Village[edit | edit source]
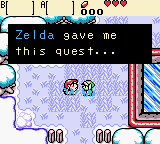
After General Onox imprisons Din, Link finds himself awakening elsewhere. Impa asks Link to take a message to the Maku Tree in Horon Village. She is too injured to carry on the task herself, and she knows that Link is the Triforce Hero, because his hand bears the symbol of the Triforce of Courage.
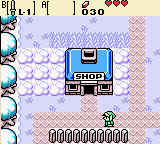
Two places of interest can be found in Horon Village: the first one is Vasu Jewelry, where Link will be given a L-1 Ring Box that allows him to carry (and use) one Magic Ring, after he will find any.
The second one is the shop; inside, there are three items available: some Hearts, which replenish health (10 Rupees), some Bombs (20 Rupees), and a shield (30 Rupees). If you want to buy one, you'll need to pick up the item you want and talk to the store clerk.
Anyway, you will find the Bombs for free in the first dungeon, and you can buy the ![]() Wooden Shield for a cheaper price just before the second dungeon.
Wooden Shield for a cheaper price just before the second dungeon.
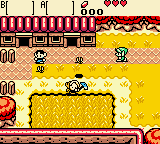
In the north-west corner of the Village, Link can visit the hut of the Know-It-All Birds, that consist of an in-game tutorial. One last location is the Advance shop, that is open only if playing on a GBA (but not on a DS or 3DS); there, Link can buy three items for 100 Rupees each, but later, because he starts the game with no money.
Now, the real adventure has begun. You must now find a way to restore Holodrum from its state of frequently-changing seasons, and the first step is to deliver Impa's message to the Maku Tree.
Western coast[edit | edit source]
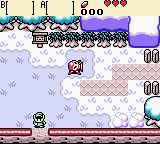
The way to the tree is blocked, so you can't go there yet. First, you must find a sword to clear the path. Head west through Horon Village, and you'll reach a small path that heads into the coast.
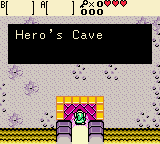
From here, go south. There is a shortcut you can take down to the coast from a ledge above. However, there are Octoroks to avoid along the way. You need a weapon to defeat the evil monsters like these you'll meet. Look for a cave entrance in the cliff wall near a dock. This is the entrance to the Hero's Cave.
Hero's Cave[edit | edit source]
The Hero's Cave is a sort of mini-dungeon, with very simple puzzles to solve. However, you can't defend yourself from enemies yet, so avoid them all.
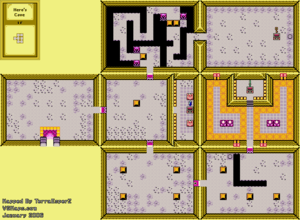
- Room 1: Once inside the cave, head through the door to the east, avoiding the Keese.
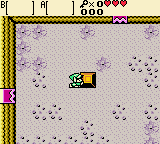
- Room 2: Once inside the next room, all of the doors will close. This puzzle is often common, and you'll see it many more times to come. Push the block in the center of the room to open the doors again, then head through the door to the north.
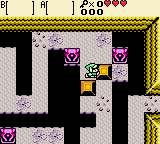
- Room 3: Once in the next room, you'll need to go down a narrow path. Falling is not an option. Push the block up to access the path. Across the path, there are two more blocks push the left block south and the right block east. This opens the way to the key chamber.
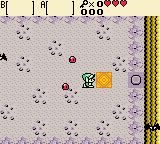
- Room 4: Inside the key chamber, avoid the Keese and Gels, and step on the round floor switch next to the strange spot on the floor, revealing a chest. Walk up to the south side of the chest and press
to open it, and you'll find a
 Small Key. Small Keys can open locked paths in a dungeon, but only fit locks inside the dungeon they're found, and can be used just once.
 - Room 5: Return to the second room (the one with the doors that close when you enter), and head south after pushing the block to find a locked door to the east. You can open it now.
- Room 6: The room following has more Gels, and Green Zols. Press the switch here to open the path forward. Head on through and avoid the enemies.
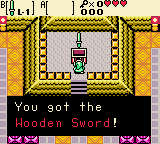
- Room 7: Here is a chest. Open it, and you'll get the first item in the game: the
 Wooden Sword. Now, you can defeat enemies. After picking up the Wooden Sword, you'll be sent back to the entrance.
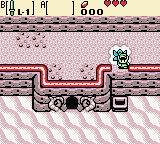
You can now return to Horon Village.
However, before going to the Maku Tree, you can get yourself another item. On the way back to Horon Village is a small ledge above the Hero's Cave that leads to a secret room. Jump off the ledge, and you'll find yourself landing in the cave before a chest. Open it, and you get 30 Rupees. To get out, head left, push the block, and then go back to Horon Village.
