From StrategyWiki, the video game walkthrough and strategy guide wiki
Jump to navigation Jump to search
(Y is shoot, B is jump)
 
(40 intermediate revisions by 11 users not shown)
Line 1: Line 1:
{{All Game Nav|game=Mega Man 7}}
{{Header Nav|game=Mega Man 7}}
This guide works best when fighting bosses within the Wily levels.  For bosses within game progression, see the pertaining walkthrough section as well.
__TOC__
''Boss attack names and miniboss names are unofficial.  Also note W. Coil is sometimes referred to as "Spring."''
== Weapons ==
 
{|{{prettytable|sortable=1|notwide=1}}
==Boss Weaknesses and Immunities==
! Robot<br />Master !! Weapon !! Trajectory !! Effect
===Main Bosses===
|-
{| class="wikitable"
| Mega Man || '''Mega Buster''' || <small>Straight</small> || Charges up: press and hold {{snes|Y}}
!Name||Weak to||Immune to
|-
| Burst Man || '''Danger Wrap''' || Multi-directional (parable, up, down, forward) || Encases small enemies, destroys Gabyolls <br/>Press {{snes|neutral|Dpad}} + {{snes|Y}}
|-
|-
|Burstman||Freeze/Turbo||Burst/Adapter Punch
| Cloud Man || '''Thunder Bolt''' || Split || Activates devices, lights dark areas
|-
|-
|Cloudman||D Wrap/Burst/Adapter Punch||Junk
| Junk Man || '''Junk Shield''' || Barrier & split || Press {{snes|Y}} once to create a barrier, twice to spread junks
|-
|-
|Freezeman||Junk/Adapter Punch||Nothing
| Freeze Man || '''Freeze Cracker''' || Multi-directional (forward, fwd-up, fwd-down) & split || Destroy lava walls <br/> Press {{snes|Up|Dpad}}/{{snes|Down|Dpad}} + {{snes|Y}}
|-
|-
|Junkman||Buster/Thunder/Adapter Punch||Junk/Slash/Turbo
| Slash Man || '''Slash Claw''' || Short range || -
|-
|-
|Shademan||Spring (Charged)||Shade
| Spring Man || '''Wild Coil''' || Backward & forward || Charges up: press and hold {{snes|Y}} and/or {{snes|Up|Dpad}}
|-
|-
|Slashman||Freeze/Turbo||Nothing
| Shade Man || '''Noise Crush''' || Straight & rebound || Charges up: get hit by the ricocheted shot
|-
|-
|Springman||Slash Claw||Spring & Thunder
| Turbo Man || '''Scorch Wheel''' || Along the floor || Burns trees, lights candles
|-
|-
|TurboMan||Sonic/Adapter Punch||Turbo & Thunder
| Proto Man || '''Proto Shield''' || Shield || Blocks projectiles (from the front)
|}
|}


===Mini Bosses===
== Damage chart ==
{| class="wikitable"
The most effective weapon against a boss is highlighted in green; the weapon obtained from the same boss is highlighted
!Name||Level||Weak to||Immune to
{|{{prettytable|text center=1|notwide=1}}
! || Mega <br/>Buster || Super <br/>Adapter ||rowspan=20| || Danger <br/>Wrap || Thunder <br/>Bolt || Junk <br/>Shield || Freeze <br/>Cracker || Slash <br/>Claw || Wild <br/>Coil || Noise <br/>Crush || Scorch <br/>Wheel
|-
|-
|Jester||Robot Museum (Mid Game)||Everything||Nothing
|''' Burst Man  '''|| {{yes|1;2}} || 0 || {{no|0}} || 1 || 1 || 4;3 || 1 || 1 || 1;2 || {{yes|4}}
|-
|-
|Pumpkin||Shade Man's Level|| ?? || ??
|''' Cloud Man  '''|| 1;2 || 3 || {{yes|4}} || {{no|2}} || 0 || 1 || 1 || 1 || 1;2 || 1
|-
|-
|Protoman||Shade Man's Level|| ?? || ??
|''' Junk Man  '''|| 1;2 || 2 || 1 || {{yes|4}} || {{no|0}} || 1 || 2 || 1 || 1;2 || 0
|}
|-
 
|''' Freeze Man '''|| 1;2 || 2 || 1 || 1 || {{yes|4}} || {{no|(+4)}} || 1 || 1 || 1;2 || 3
===Wily Stage Bosses===
|-
{| class="wikitable"
|''' Slash Man  '''|| 1;2 || 2 || 0 || 1 || 1 || {{yes|6;4}} || {{no|1}} || 1 || 1;2 || 4
!Name||Wily Level||Weak to||Immune to
|-
|''' Spring Man '''|| 1;2 || 2 || 1 || (+) || 1 || 1 || {{yes|4}} || {{no|0}} || 1;2 || 1
|-
|''' Shade Man '''|| 1;2 || 4 || 1 || 1 || 1 || 1 || 1 || {{yes|3;6}} || {{no|0}} || 1
|-
|''' Turbo Man  '''|| 1;2 || 2 || 1 || 0 || 1 || 1 || 1 || 1 || {{yes|3;6}} || {{no|0}}
|-
!colspan=3| !!colspan=8| Intermission
|-
|''' Mash      '''|| 1;2 || 3 || {{yes|4}} || 2 || 0 || 1 || {{n/a|-}} || {{n/a|-}} || {{n/a|-}} || {{n/a|-}}
|-
!colspan=3| !!colspan=8| Wily Fortress
|-
|-
|Bass Version 1||1||Super Adapter||Nothing
|''' Bass         '''|| 1;2 || {{yes|6}} || 2 || 2 || 1 || 2;1 || 1 || 1;2 || 2 || 2
|-
|-
|Revised Gutsman||1||Super Adapter, Megabuster, Slash (Noise Crush on rock)||All except weaknesses
|''' Guts Man G    '''|| 1;2 || 2 || 0 || 0 || 0 || 0 || {{yes|2;4}} || 0 || 0 || 0
|-
|-
|Bass and Treble||2||Super Adapter||Nothing
|''' Bass & Treble '''|| 1;2 || {{yes|4}} || 2 || 2 || 1 || 2;1 || 1 || 1;2 || 2 || 2
|-
|-
|Robot Turtle||2||Megabuster, Coil, Burst||All except weaknesses
|''' Kameriser    '''|| 1;2 || 0 || {{yes|1;8}} || 0 || 1 || 0 || 0 || {{yes|2;3}} || 0 || 0
|-
|-
|Robot Crab||3||Megabuster/Adapter Punch/Slash||Thunder
|''' HannyaNED²    '''|| 1;2 || 0 || 0 || 2 || 2 || 0 || {{yes|3}} || 0 || 2;4 || 0
|-
|-
|Flying Face (Chase Boss)||3||Mega Buster/Noise Crush, Slash Claw||All except weaknesses
|''' Wily Machine  '''|| 1;2 || 1 || 0 || {{yes|2}} || 0 || 1 || 0 || 0 || 0 || 2
|-
|-
|Wily Form 1||4||Buster/Super Adapter/Thunder Bolts|| Nothing
|''' Wily Capsule  '''|| 0;1 || 1 || 0 || 0* || 0 || 1 || 0 || {{yes|0;2}} || 0 || 0
|-
|-
|Wily Form 2||4||Buster/Super Adapter/Coil/Thunder Bolts(No damage)
! || Mega <br/>Buster || Super <br/>Adapter || Danger <br/>Wrap || Thunder <br/>Bolt || Junk <br/>Shield || Freeze <br/>Cracker || Slash <br/>Claw || Wild <br/>Coil || Noise <br/>Crush || Scorch <br/>Wheel
|}
|}


==Boss Strategies==
'''Notes:'''
===Freezeman===
* '''Mega Buster:''' the first value is the damage dealt by a normal shot, the second one is dealt by a charged shot.
;Weakness Strategy
* '''Noise Crusher''' and '''Wild Coil:''' where two values are listed, the first one is the damage by a normal shot, the second one by a charged shot.
Attack using Junk Shield, it will cause him to pause, often ending an attack sequence. You can often get two uses of the shield before it runs out, sometimes you will lose it on a single hit. Also, the shield  lasts when frozen on both the ground and after being hit with one of his shots.
* '''Freeze Cracker:''' it restores Freeze Man's energy; where two values are listed, the first one refers to whole shot, the second one to split shot.
* '''Thunder Bolt:''' it upgrades Spring Man, it stuns Wily Capsule without dealing damage.
* '''Slash Claw vs. Guts Man:''' if you hit a boulder and push it into Guts Man, it deals 4 damages.
* '''Danger Wrap vs. Kameriser:''' if you wrap a small Kameriser and push it into the large one, it deals 8 damages.


;Attacks
== Characters comments ==
#'''Charge''': He just runs across the ground at a normal pace.
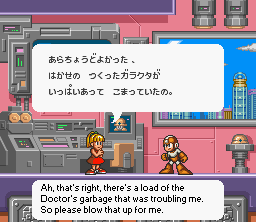
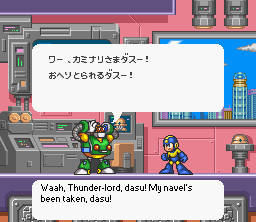
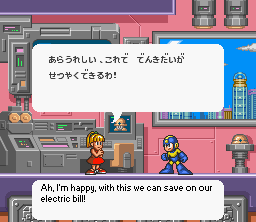
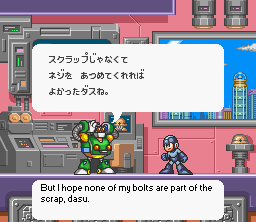
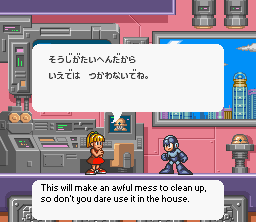
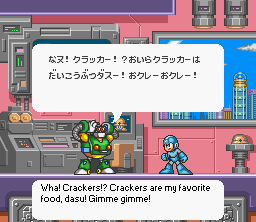
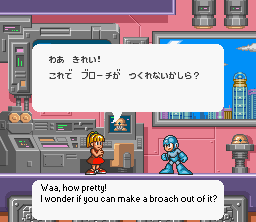
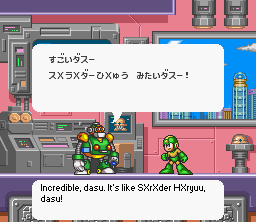
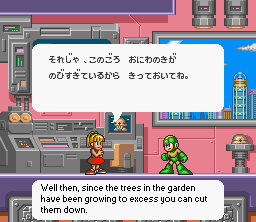
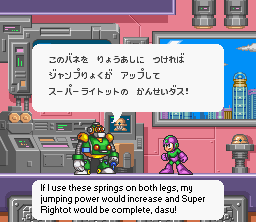
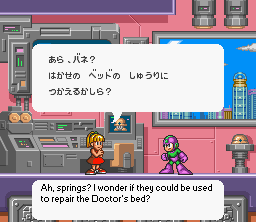
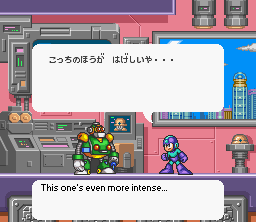
In the Japanese version, not only Dr. Light, but also Roll and Rightot (Auto) may comment any special weapon that Mega Man just obtained.
#*''Solution'': Jump over him.
#'''Stalactites''': He summons the ceiling to grow iceicles, which then fall in a random pattern.  Also uses Charge at the same time.
#*''Solution'': Jump over him when he gets close, and try to dodge the falling iceicles at the same time.  Look for which ones to fall first, and try to find a gap.
#'''Frozen Ground''': Not really an attack, but causes you to slide around when running.
#*''Solution'': Jump more.
#'''Freeze Shot''': Fires a circular ball which freezes you in place, he then Charges you.
#*''Solution'': Jump over the shot, and then him (usually charges at the same time). Make sure you use Junk Shield before that in case you get frozen, because it will damage him and save you a bit of life  (stops Charge).


===Slashman===
{|{{prettytable|text center=1|notwide=1}}
;Weakness Strategy
! Danger Wrap
Use either the Scorch Wheel weapon or Freeze Cracker to defeat him. Both use a similar strategy, but take a bit of skill to be perfect. As well, the best way is to use either of these strategies while adding a few Mega Buster shots when possible, it will increase damage with reduced amounts of Egg Drops.
|-
 
| MEGA MAN: The Danger Wrap shoots out a bomb encased in a bubble, right? <br/> [[File:MM7 weaponDrLight DangerWrap.png]] [[File:MM7 weaponRightot DangerWrap.png]] [[File:MM7 weaponRoll DangerWrap.png]]
;Scorch Wheel Strat
|-
Attack using the Scorch Wheel.  The best time to hit him is when he is jumping at you, or standing still.  Right before he jumps at you,  you can use the shield to hit him no matter what.  When standing still you have to worry about timing and what direction you are running.  After you hit him, he will jump into the ceiling and drop eggs  containing red goo.  If you get covered or stuck in the goo on the floor you won't be able to attack, so try moving back and forth to  break free (not sure if it works).  When you have a chance, hit him  again and continue the cycle.
! Thunder Bolt (Thunder Strike)
 
|-
;Freeze Cracker Strat
| MEGA MAN: The Thunder Bolt fires out electrically charged spheres, right? <br/> [[File:MM7 weaponDrLight ThunderBolt.png]] [[File:MM7 weaponRightot ThunderBolt.png]] [[File:MM7 weaponRoll ThunderBolt.png]]
Basically the same as the Turbo Strat, hit him when you can and dodge the goo filled eggs. The best way to shoot using Freeze Crackers is in  the air, because it will either hit him in the air or break into parts  and hit him below. Standing on the ground might make you miss because  he jumps randomly (sometimes the smaller parts can hit him). Continue the cycle to win.
|-
! Junk Shield
The difference between these two weapons is that the Freeze Crackers can hit him if you miss and the Scorch Wheels can act as a shield if  immediately summoned when being pounced on.  Also, Freeze Crackers  cause him to slide and bounce off the walls so if you hit him and you  are near a wall, he might bounce back and hit you.
|-
 
| MEGA MAN: The Junk Shield will protect the user with rotating spheres, right? <br/> [[File:MM7 weaponDrLight JunkShield.png]] [[File:MM7 weaponRightot JunkShield.png]] [[File:MM7 weaponRoll JunkShield.png]]
;Attacks
|-
#'''Slash''': Will try to pounce on you and then attack with his claws.
! Freeze Cracker
#*''Solution'': Run or use a Freeze Cracker/Scorch Wheel to end his attack.
|-
#'''Egg Drop''': Will disappear into the ceiling (becoming invincible).  Eggs will begin to drop, containing a red goo that can either cover you (disabling jump/slide/shots) or stick you to the ground (disabling all movement/weapons). After four or five fall, he will return on one side of the room.  He will be glowing red, and after a few seconds he will either spring towards your current position or fall to the ground and begin his Slash attacks.
| MEGA MAN: The Freeze Cracker shoots ice bullets, doesn't it? <br/> [[File:MM7 weaponDrLight FreezeCracker.png]] [[File:MM7 weaponRightot FreezeCracker.png]] [[File:MM7 weaponRoll FreezeCracker.png]]
#*''Solution'': Dodge the eggs, try sliding out of the way (but not into any goo on the ground).  If free, stay close to him when he is glowing red, then move quickly before he charges, hopefully you get away unscathed.  If try to break free or run in one direction, also pray.
|-
#'''Ice Slide''': If frozen, will slide on the ground for a few seconds.  In this state he can still harm you if touched.
! Slash Claw
#*''Solution'': Dodge if close, otherwise no worries.  If you hit him with a richochet and he is in mid air, DO NOT JUMP IF CLOSE, he will move horizontally before falling.
|-
 
| MEGA MAN: The Slash Claw cuts things apart, doesn't it? <br/> [[File:MM7 weaponDrLight SlashClaw.png]] [[File:MM7 weaponRightot SlashClaw.png]] [[File:MM7 weaponRoll SlashClaw.png]] <br/><small> Rightot refers to the manga and {{c|Capcom}} series '''''{{c|Strider}}'''''.</small>
===Junkman===
|-
;Weakness Strategy
! Wild Coil
If you don't have Thunder Bolts, just blast him when you can with the Mega Buster and dodge the attacks listed below. Otherwise, use  Thunder Bolts to send Junkman into an infinate cycle of easy to dodge  moves.  He will use his Mid-Air Junk Throw every time, and it's only  a single shot so it's easy to dodge.  Blast him every time he lands.
|-
 
| MEGA MAN: The Wild Coil launches one coil forward and one coil backward, right? <br/> [[File:MM7 weaponDrLight WildCoil.png]] [[File:MM7 weaponRightot WildCoil.png]] [[File:MM7 weaponRoll WildCoil.png]]
The Super Adapter can come in handy if you can't use Thunder Bolts, it lets you dodge his Junk Cube and Junk Beam much easier and it  does more damage than the Mega Buster.
 
;Attacks
#'''Stomp''': Freezes Megaman (if touching the ground) and causes multiple blocks of 'junk' to fall from the ceiling.
#*''Solution'': Jump just before he stomps to be unfrozen, then dodge the blocks that fall.
#'''Junk Cube''': Magnatizes his fist (charges) until it is covered with a huge block of junk. He then sends it  sliding towards Megaman.  Junkman then launches  himself through the ceiling to land on top of the cube, absorbing it into a Junk Shield.
#*''Solution'': Jump and move to the other side when the cube slides towards you.
#'''Junk Beam''': After gaining his Junk Shield (after landing on the Junk Cube) he will jump on your current position  and then fire the remaining part of the shield at you. If hit, you will be trapped within a Junk Shield,  unable to do anything.  Junkman will proceed in  jumping on you.
#*''Solution'':  Slide under the initial jump, then jump towards him after he fires the beam.
#'''Mid-Air Junk Throw''': After using Junk Beam, he will jump from one side of the room to the other.  Half way across he  will throw a block of junk at your current position.
#*''Solution'': Stay in the middle, and then slide in the opposite direction of the way he is jumping.
 
===Cloudman===
;Weakness Strategy
When he is not charging, fire a Damage Wrap towards him (I recommend doing this next to him).  If you hit him with a Damage Wrap, you can  easily take him down without him doing anything for the rest of the  fight.  Just after he recovers, he will do his Lightning Bolt attack; at the point before he is struck he is vulnerable against anything, so get him then.  If you wait too long, he becomes invincible.
 
;Attacks
#'''Lightning Bolt''': Summons a bolt of lightning to hit him, thus charging him with energy. He then releases it in your  direction.  If it hits the ground, it sends electricity  along the ground in both directions.
#*''Solution'': Interrupt with a D Wrap or jump over the bolt and the electricity on the ground.
#'''Weather''': Makes the weather stormy, thus it rains and you are pushed in either direction.
#*''Solution'': Run into the wind, don't fall off or run into Cloudman.
#'''Ground Sparks''': After Weather, he summons a bolt of lightning to him, which he then sends along the ground in both  directions in pairs of two (basically at the same time).
#*''Solution'': Jump just after he charges, it takes about half a second before he releases the energy.
#'''Patrol''': After Ground Sparks, Cloudman will hover back and forth above you.
#*''Solution'': Slide underneath or hit 'em with a D Wrap
 
===Springman===
;Weakness Strategy
Attack with Slash Claw and you will put him into an infinate loop of the attack in which he jumps, spins his arms, and then tries to punch  you at your current location (very easy to dodge by running/sliding).
 
If you plan on using the Super Adapter (Hard way to win), here
are some tips:
-Attack at all times when not on the defense.
-When he launches the springs, use the regular Buster shots to get rid of them.
-When he throws mid air punches, jump into the wall and use your jet pack.
-Stay away from him when he jumps or is standing, he can do the pile drive either way.
 
;Attacks
#'''Stretch punch''': Hovers in air, throws easy to dodge punches.
#*''Solution'': Just run or slide to get away. Fire when he lands.
#'''Dual Springs''': Fires 2 bouncing springs in both directions.
#*''Solution'': Destroy the springs with your Buster, otherwise you will take damage when trying to dodge.
#'''Pile Drive (grab)''': If close, will grab Megaman and pile drive him into the ceiling.
#*''Solution'': Stay far away unless using Slash Claws.
#'''Vortex''': If shot with Thunder Bolts, creates a vacuum like effect towards him.  If too close, will grab Megaman and pile drive him.
#*''Solution'': DON'T SHOOT WITH THUNDER BOLTS!!! Also slide away from him towards the walls.
 
===Turboman===
;Weakness Strategy
Basically just power your Noise Crush and wait for an open shot. Dodge him as best you can and he will be a sinch.  If you can hit him  with Noise Crush, it will send him into an infinite loop of  Collision Courses, so take advantage of his stupidity. If you hit  'em with a Thunder Bolt, be prepared to dodge, he will unleash his  "ULTIMATE COLLISION COURSE."  It's actually not that special.
 
;Attacks
#'''Scorch Wheel''': Summons a fire shield around him, leaps into the air and fires it at your current position (without hesitation).  It then bursts into four or five smaller flames.
#*''Solution'': Right when he hits the point where he fires the wheel, dodge towards him.  I recommend staying at  the corner of the room, because if you dodge towards  him you will go right underneath.  Otherwise, stay  close, then run away and leap over it when it chases  you down.  When it breaks, look for a gap between the  flames.
#'''Turbo Suck''': Turboman has a spasm and begins to suck you towards him (for no physically apparent reason).
#*''Solution'': Run/slide the opposite way.
#'''Collision Course''': Turboman transforms into a vehicle, revs his engine and then charges.
#*''Solution'': Jump towards him just as he begins to move.
#'''ULTIMATE COLLISION COURSE''': If hit with a Thunder Bolt, he will immediately do this.  Exactly like the  Collision Course, Turboman will charge up right before  and will begin to glow.  Basically he is now  invincible for a short time. Way to go!
#*''Solution'': Don't shoot with Thunder Bolts! Jump towards him just as he begins to move.
 
===Burstman===
;Weakness Strategy
Use Freeze Crackers to take this guy down easily.  When the fight begins jump just a little bit so that the shot will go over his head.  One of the pieces will recochet downwards and hit him, cutting off  his attack.  Repeat this so that he cannot fire at all.  Easy huh?
 
;Attacks
#'''Bubble Wall''': Sends out 3 yellow bubbles that are both somewhat hard to destroy and which push you backwards  against the wall.  At the same time, bubbles form  from the floor which try to push you against  the ceiling.
#*''Solution'': Simply destroy the bubbles and fall off the sides of any ascending bubbles.
#'''Triple Bubble Wrap''': Fires 3 sequential bubble bombs which will put you into a bubble that tries to smash  into the ceiling with you in it.  If destroyed,  it drops the bomb that was inside.
#*''Solution'': Jump over the bubbles when they come, they don't fly upwards until you jump over them.  If caught  inside, fire like crazy, then get out of the way of  the other bubbles.  The bombs will fall to the ground,  so be cautious of them when they are about to explode.
#'''Time bomb craze''': If hit by either a Freeze Cracker or a Scorch Wheel, he will jump backwards and throw five  of those yellow bombs.
#*''Solution'': Stay against the far wall, jump when they explode.
 
===Shademan===
;Weakness Strategy
Try to stay underneath him as he floats around, when he's about to dive, slide out of the way.  When you have an open shot, release a  charged Coil attack.  Otherwise, he's pretty generic in his attacks,  just slide when need be.
 
;Attacks
#'''Suck Your Blood''': Dives down, grabs you, then sucks your blood, draining your health and reviving his! Make sure he doesn't do this too much, or you might  have to fight the equivelent of two or more Shademans(men?).
#*''Solution'': Stay underneath, then slide out when he dives. It's difficult to master the timing.
#'''Banshee Sight''': Fires two glowing lasers that fire forward in a curving path. These will turn you to stone if  you get hit, watch out!
#*''Solution'': Jump, easy to dodge.
#'''Dual Sonic Blast''': Releases sequential sonic blasts after 'Banshee Sight.' Dodge these, and then watch out for his upgraded shots.
#*''Solution'':If he is on the ground, jump over it, if he is off, then it should either go over your  head or leave enough room to slide under.
#'''Super Sonic Shot''': If shot with a Noise Crush, Shademan will release an upgraded version back at you.  Most of the time he will then go into his Suck Your Blood reutine  after being hit.
#*''Solution'': Don't shoot him with Noise Crush, dodge as best you can.
 
===Jester===
Possibly the easiest boss in the game...
;Weakness Strategy
I recommend just standing in the left corner and firing whatever you like. When you hit his head, it will pop off, making it easier to hit.
 
;Attacks
#'''Hop''': Jumps in small arcs, not rapidly.
#*''Solution'': Slide underneath.
#'''Headache''': After getting hit in the head, it will pop off, bouncing around a bit until it comes to a stand still. When it's not moving, it can still hurt you.
#*''Solution'': Stay away and you won't get hurt.
 
===Bass V.1===
;Weakness Strategy
Transform using the S Adapter, then take Bass out with powered up punches.  Each shot will hit him, and they are superior to his weaponry. Dodge in between shots, and when he charges, make sure you jump. You  can usually avoid all shots by using the jet pack.  If you don't have  the Super Adapter, use Damage Wraps when he gets close or is on the  left side of the little pit (and you are close) or use charged Mega Buster shots.
 
;Attacks
#'''Bass Buster''': Fires a blue laser, much like one of your Mega Buster shots.
#*''Solution'': Jump or hide in the little pit on the left side; if bass is on the right platform and he shoots, he can't hit you.
#'''Mega Bass Buster''': Charges up his shot and releases one that rivals Megamans.
#*''Solution'': Jump, do not hide.  It's larger than the Bass Buster and thus you cannot stay in the little pit. It's easy to see anyways.
 
===Gutsman V.2 (a.k.a. Guts Tank)===
;Weakness Strategy
If you have the Super Adapter, use it.  You can dodge his Land Slide attacks and his Charge easily, plus it does more damage than other  weapons and it is easy to aim (make sure you are close and above when  you release the arm otherwise it will bounce off him).  His weakness is  the top of his helmet.
 
Another easy way is to blast* the rock that falls when he performs 'Land Slide,' it will knock it into him and damage him immensely.  Make sure you hit it after it has hit the ground at least once  (it bounces).  The problem is that you will cause him to use  Homing Land Slide, which is just like Land Slide but instead of  dropping the rock in front of him, he will target your current  position and it will drop wherever you are.  Slide out of the way just  before it falls. I also recommend using Slash on him as  much as possible.
 
 
;Attacks
#'''Land Slide''': The ceiling rumbles and dirt starts falling. A large chunk of rock/dirt falls from the ceiling and then he pushes it at you.
#*''Solution'': Using Super Adapter, jump.  Otherwise jump right when he moves (before pushing the block) or you will  be hit.  Also, you can destroy the block if you wish  by blasting* it.
#'''Charge''': Zooms across the screen, grabs you with his huge clamp, then throws you into the ceiling.
#*''Solution'': Using Super Adapter, jump.  Otherwise too bad, you will take damage but to minimize it, just jump  so that he rams you with his head.
#'''Homing Land Slide''':  Same as normal Land Slide, but he drops the rock on your current position. Most likely he will do this if you hit him with his own rock.
#*''Solution'': Slide right before it falls, no matter where.
 
*Only these weapons work to move/destroy the rock: Noise Crush
 
===Bass V.2 (Bass and Treble)===
At the start of the fight, Bass will talk and then he will combine with Treble, giving him the ability of flight.
 
;Weakness Strategy
Using the Super Adapter, dodge his shots whenever you can, when he flys at you, jump over in his direction and then let loose when he charges. Dodge his blasts of three by using the jet pack and put distance  between you and him when he releases his fist.  The easiest way is to  get away from his jumping/shots and then have him chase you by flying,  then jump on the platform above and let him circle around and charge,  right then release a powered S Adapter Punch.  You might have to try  this fight a few times as well as use an E Tank.
 
;Attacks
#'''Bass Buster Barrage''': Hops around and fires a few shots, sometimes even a charged one.
#*''Solution'': Get far away, attack at all times, and try to jump over/dodge everything.
#'''Bass Punch''': He will fly around in an arch, power up somewhere, then chase you down and release his version of the S Adapter Punch.
#*''Solution'': Take advantage of him charging, he's open to damage.  When he chases you, try to get on the side of a platform, then when he shoots, drop down and run away, it only goes so far.
 
===Robot Turtle===
;Weakness Strategy
Either use his weakness weapons (Powered up Coil or D-Wraps) or use the Megabuster (safer). You can only damage his head, so if he's hiding  focus on dodging.  He has 2 attacks, and the babies have 3.  The babies allow you to replenish some of your weapon energy, if need be, but  it's not worth it.  To take out the turtles easily, use weapons such as Thunder to take them down in a single shot.
 
;Attacks
#'''Fire Breath''': Releases a short burst of flame that slowly curves upwards, evaporates when it hits the wall.  Often creates 2 of these with a pause in between  before charging.
#*''Solution'': Simply jump over.
#'''Charge''': Hides in it's shell, and flys straight into the wall.  It then backs up and either attacks again or comes back to the ground.
#*''Solution'': Stand out from the wall, about half way between where the turtle lands and the wall.  When it flys at you, slide underneath and when it returns, promptly slide back.  You might have to do this a few times  before it rests.
#'''Baby Turtles''': Drops a little bunker which holds 3 turtles and a value on the top.  The value tells you what  the little buggers are going to do.  1) means they  walk into the wall and back, in between they hop,  the easiest of all the attacks to defend against.  2)They spin at you, flying around the room.  3)The turtles leave the barracks, dig under ground, pop  up randomly, and then spin around.
#*''Solution'': Blast 'em with Thunder Bolts just as they leave the barracks, give them a little room because they are invincible while inside and they move slow  enough to give you a breather.
 
===Robot Crab===
;Weakness Strategy
You can either use the normal Buster shots to bring him down rather quickly, or you can reduce his healthy much faster by using Slash, each hit is equivelant to like 10 buster shots.
 
;Attacks
#'''Bubble Barrage''': Fires 3 bubbles that rise to the ceiling, if they pop, the split into two smaller bubbles.
#*''Solution'': Blast them, and stay against the left wall, do not move.  Take this time to damage the crab.
#'''Triple shot''': Fires 3 energy blasts, depending on your position, it will either shoot straight or at an angle if you jump or are in the air within a close proximity of its possible shot.
#*''Solution'': Jump forward when the first shot comes, don't get too close to the crab or its 3rd shot will hit you when it shoots at an angle.
#'''Ram''': Uses its jets to smash into the left wall, it then pauses, and then returns to its original spot.
#*''Solution'': Jump over it to the right, then back to the left when it moves again.
 
NOTE: Do not jump after you defeat it, or else you will fly up through the water much faster than normal. This can be  dangerous if you don't know where the spikes are.
 
===Flying Face===
;Weakness Strategy
This guy's hot spot is his nose and lower forehead, so aim for that area.  Either wait for him to bob, or jump off of the missles to get  high enough.  Do not use the Super Adapter, he is immune to the fists,  and it can't outrun anything because slide is denied. The most damage  comes from Noise Crush, since it can't be charged and each hit reduces 2 or 3 sections of life. The Mega Buster does the same when charged  and it takes three or so normal shots to take it down a single section.
 
;Attacks
#'''Missle Barrage''': Releases a few missles, easy to dodge and you can even stand on them.  Watch out for high flying missles, some are too high to jump on.
#*''Solution'': Jump on top of them, shoot them, or duck underneath (only the high ones).
#'''Laser Beam''': Charges a laser, it then tilts it which reaches almost to the other side of the screen.  After it shoots forward once, it will come back for a breif moment and  go out again.
#*''Solution'': Stay against the right side of the screen, sliding to stay away from the laser.
#'''Double Bomb''': The two large circles on its sides open and it fires two bombs sequentially.
#*''Solution'': Stay in between or destroy them by shooting them.
 
===Wily Form 1===
;Strategy
I recommend focusing on dodging and destroying his little creatures. Throw in a few good hits when you can, but think defensively.  The charged Mega Buster shots will do just as much as a Thunder Bolt, so  use them to take him down quicker.
 
;Attacks
#'''Bounce Crush''': Hops across the room, if caught underneath his chin you will feel the pain of the spikes.
#*''Solution'': Slide underneath, this is also a good time to blast Wily in the face.
#'''Minion Creation''': When he returns (after jumping off screen) he will throw out two replicas of the robot which will try to crash into you. He will slowly walk across the  room, about 1/4 of the way across, he will leap the  remaining space and smash you if you are in the corner. Often when you destroy the robots, he will rush the  rest of the way instead of slowly hopping.
#*''Solution'': Blast them away and watch out for Wily. Use Junk Shield to remove them easily.
 
===Wily Form 2===
;Strategy
Blast him when he appears, since he becomes invisible between attacks. Try charging a coil shot every once in a while to speed up the battle. To eliminate the four balls from being summoned, use Thunder Bolts (strike him),  this should increase your health capacity by a ton. Have fun, he takes  28 normal hits so this might take a few tries.  If he's not in the  top 1/3 of the screen, you should be able to hit him, even with the coils, since they shoot upwards a bit when released.  Try to hit him  with a charged coil, change to Thunder Bolts (through the menu) and  then jump up and hit him with a Thunder Bolt immediately after he stops flashing.  This way you will damage him and he won't be able to hit you (easily).  The best time to dodge the 4 balls (Energy Swarm) is if he is at the top of the screen in one of the corners.  If this is the case, simply  stand under him, wait for the balls to summon, dash to the opposite corner, and as they chase you, jump over towards them.  This way they will be low to the ground and grouped in a way that you can get over all 4 at the same time (almost in a line).  Remember to jump at the right time to dodge the 4 sparks.  Most likely you will die the first few times when facing this boss.  By the time you do beat him, you'll be able contribute to this guide.
 
;Attacks
#'''Energy Swarm''': Summons four energy balls to come at you, they move in two spurts, each time towards your position. Afterwards, he will send a wave of energy along the ground: two sparks, like Cloudman's attack, in each direction.
#*''Solution'': Try to dodge the balls, jump over the dual "shockwave". (See Strategy for more information.)
 
==Main 8 Boss Numbers and their Creators==
{| align="center" cellpadding="3" cellspacing="6" style="text-align: center"
|-style="background:#56B4E5"
||<big>'''Boss Name'''</big>||<big>'''No.'''</big>||<big>'''Boss Designer'''</big>
|-
|-
|Freezeman||49||Shigeaki Shimoto
! Noise Crush (Crush Noise)
|-style="background:#f0f8ff"
|Junkman||50||Jun Akiba
|-
|-
|Burstman||51||Keishi Tsuchiya
| MEGA MAN: The Noise Crush generates a powerful sound wave, doesn't it? <br/> [[File:MM7 weaponDrLight NoiseCrush.png]] [[File:MM7 weaponRightot NoiseCrush.png]] [[File:MM7 weaponRoll NoiseCrush.png]] <br/><small> Rockman refers to Rightot's snoring.</small>
|-style="background:#f0f8ff"
|Cloudman||52||Isao Nakagiri
|-
|-
|Springman||53||Akira Ito
! Scorch Wheel (Burning Wheel)
|-style="background:#f0f8ff"
|Slashman||54||Yoichi Amano
|-
|-
|Shademan||55||Tetsuya Watada
| MEGA MAN: The Scorch Wheel launches a flaming wheel, right? <br/> [[File:MM7 weaponDrLight ScorchWheel.png]] [[File:MM7 weaponRightot ScorchWheel.png]] [[File:MM7 weaponRoll ScorchWheel.png]]
|-style="background:#f0f8ff"
|Turboman||56||Takashi Kino
|}
|}
{{Footer Nav|game=Mega Man 7|nextpage=Enemies and bosses}}

Latest revision as of 00:00, 13 January 2018

Weapons[edit]

Robot
Master
Weapon Trajectory Effect
Mega Man Mega Buster Straight Charges up: press and hold Y Button
Burst Man Danger Wrap Multi-directional (parable, up, down, forward) Encases small enemies, destroys Gabyolls
Press Neutral Dpad + Y Button
Cloud Man Thunder Bolt Split Activates devices, lights dark areas
Junk Man Junk Shield Barrier & split Press Y Button once to create a barrier, twice to spread junks
Freeze Man Freeze Cracker Multi-directional (forward, fwd-up, fwd-down) & split Destroy lava walls
Press Up Dpad/Down Dpad + Y Button
Slash Man Slash Claw Short range -
Spring Man Wild Coil Backward & forward Charges up: press and hold Y Button and/or Up Dpad
Shade Man Noise Crush Straight & rebound Charges up: get hit by the ricocheted shot
Turbo Man Scorch Wheel Along the floor Burns trees, lights candles
Proto Man Proto Shield Shield Blocks projectiles (from the front)

Damage chart[edit]

The most effective weapon against a boss is highlighted in green; the weapon obtained from the same boss is highlighted

Mega
Buster
Super
Adapter
Danger
Wrap
Thunder
Bolt
Junk
Shield
Freeze
Cracker
Slash
Claw
Wild
Coil
Noise
Crush
Scorch
Wheel
Burst Man 1;2 0 0 1 1 4;3 1 1 1;2 4
Cloud Man 1;2 3 4 2 0 1 1 1 1;2 1
Junk Man 1;2 2 1 4 0 1 2 1 1;2 0
Freeze Man 1;2 2 1 1 4 (+4) 1 1 1;2 3
Slash Man 1;2 2 0 1 1 6;4 1 1 1;2 4
Spring Man 1;2 2 1 (+) 1 1 4 0 1;2 1
Shade Man 1;2 4 1 1 1 1 1 3;6 0 1
Turbo Man 1;2 2 1 0 1 1 1 1 3;6 0
Intermission
Mash 1;2 3 4 2 0 1 - - - -
Wily Fortress
Bass 1;2 6 2 2 1 2;1 1 1;2 2 2
Guts Man G 1;2 2 0 0 0 0 2;4 0 0 0
Bass & Treble 1;2 4 2 2 1 2;1 1 1;2 2 2
Kameriser 1;2 0 1;8 0 1 0 0 2;3 0 0
HannyaNED² 1;2 0 0 2 2 0 3 0 2;4 0
Wily Machine 1;2 1 0 2 0 1 0 0 0 2
Wily Capsule 0;1 1 0 0* 0 1 0 0;2 0 0
Mega
Buster
Super
Adapter
Danger
Wrap
Thunder
Bolt
Junk
Shield
Freeze
Cracker
Slash
Claw
Wild
Coil
Noise
Crush
Scorch
Wheel

Notes:

  • Mega Buster: the first value is the damage dealt by a normal shot, the second one is dealt by a charged shot.
  • Noise Crusher and Wild Coil: where two values are listed, the first one is the damage by a normal shot, the second one by a charged shot.
  • Freeze Cracker: it restores Freeze Man's energy; where two values are listed, the first one refers to whole shot, the second one to split shot.
  • Thunder Bolt: it upgrades Spring Man, it stuns Wily Capsule without dealing damage.
  • Slash Claw vs. Guts Man: if you hit a boulder and push it into Guts Man, it deals 4 damages.
  • Danger Wrap vs. Kameriser: if you wrap a small Kameriser and push it into the large one, it deals 8 damages.

Characters comments[edit]

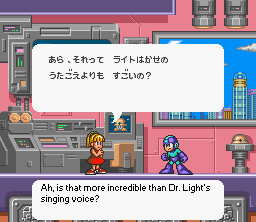
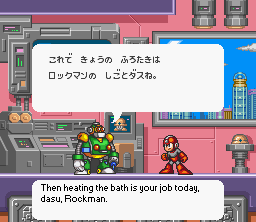
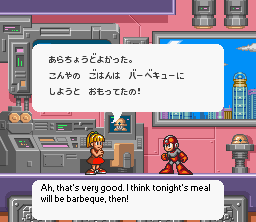
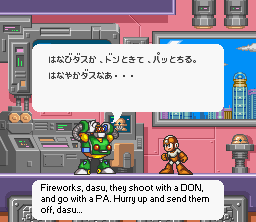
In the Japanese version, not only Dr. Light, but also Roll and Rightot (Auto) may comment any special weapon that Mega Man just obtained.

Danger Wrap
MEGA MAN: The Danger Wrap shoots out a bomb encased in a bubble, right?
MM7 weaponDrLight DangerWrap.png MM7 weaponRightot DangerWrap.png MM7 weaponRoll DangerWrap.png
Thunder Bolt (Thunder Strike)
MEGA MAN: The Thunder Bolt fires out electrically charged spheres, right?
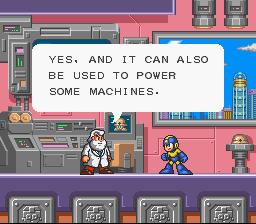
MM7 weaponDrLight ThunderBolt.png MM7 weaponRightot ThunderBolt.png MM7 weaponRoll ThunderBolt.png
Junk Shield
MEGA MAN: The Junk Shield will protect the user with rotating spheres, right?
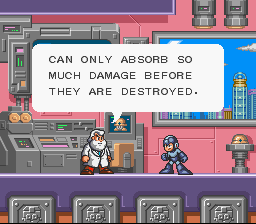
MM7 weaponDrLight JunkShield.png MM7 weaponRightot JunkShield.png MM7 weaponRoll JunkShield.png
Freeze Cracker
MEGA MAN: The Freeze Cracker shoots ice bullets, doesn't it?
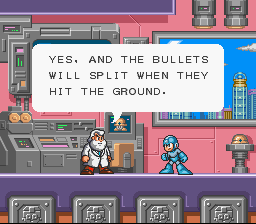
MM7 weaponDrLight FreezeCracker.png MM7 weaponRightot FreezeCracker.png MM7 weaponRoll FreezeCracker.png
Slash Claw
MEGA MAN: The Slash Claw cuts things apart, doesn't it?
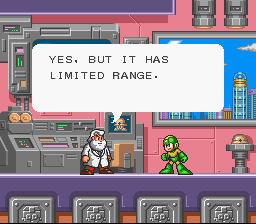
MM7 weaponDrLight SlashClaw.png MM7 weaponRightot SlashClaw.png MM7 weaponRoll SlashClaw.png
Rightot refers to the manga and Capcom series Strider.
Wild Coil
MEGA MAN: The Wild Coil launches one coil forward and one coil backward, right?
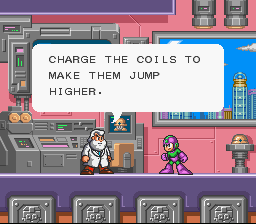
MM7 weaponDrLight WildCoil.png MM7 weaponRightot WildCoil.png MM7 weaponRoll WildCoil.png
Noise Crush (Crush Noise)
MEGA MAN: The Noise Crush generates a powerful sound wave, doesn't it?
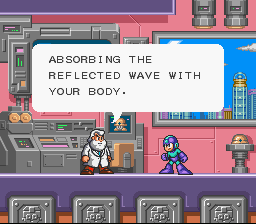
MM7 weaponDrLight NoiseCrush.png MM7 weaponRightot NoiseCrush.png MM7 weaponRoll NoiseCrush.png
Rockman refers to Rightot's snoring.
Scorch Wheel (Burning Wheel)
MEGA MAN: The Scorch Wheel launches a flaming wheel, right?
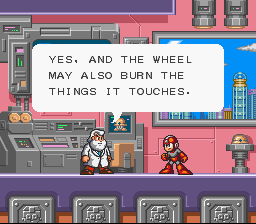
MM7 weaponDrLight ScorchWheel.png MM7 weaponRightot ScorchWheel.png MM7 weaponRoll ScorchWheel.png