Items to collect
Elves Obtained: 4:
- File:MMZ Animal Elf Icon.PNG Cyber-Elf Bircarry
- File:MMZ Animal Elf Icon.PNG Cyber-Elf Beebite
- File:MMZ Nurse Elf Icon.PNG Cyber-Elf Estan/ File:MMZ2-4 Normal Subtank.PNG Cyber-Elf Sub Tank #1
- File:MMZ Nurse Elf Icon.PNG Cyber-Elf Rireff
Mission requirements
- Clear Time Limit: 2:20
- Enemies Killed: 28
Notes for Ultimate Form
As soon as you return to the control room, don not leave the room, but go straight back to the Forest of Dysis to collect any Cyber-Elf you skipped. After you got them all, go to Ciel's room and use at once the cyber-elves you don't want in the next two missions. In fact, between this mission and the next there is no time to equip three new cyber-elves.
Here are the eight cyber-elves from the Forest of Dysis:
- File:MMZ Animal Elf Icon.PNG Cyber-Elf Bomserow: you wasted one earlier, now you might choose to use this one;
- File:MMZ Hacker Elf Icon.PNG Cyber-Elf Ashiro: the next boss gives no EX Skill, therefore you might choose to equip this one right now and keep it until you get after it;
- File:MMZ Animal Elf Icon.PNG Cyber-Elf Stickah
- File:MMZ Nurse Elf Icon.PNG Cyber-Elf Kereff
- File:MMZ Animal Elf Icon.PNG Cyber-Elf Beeshot: you used two already, you can waste this one.
- File:MMZ Hacker Elf Icon.PNG Cyber-Elf Menite: you need to feed it 300 crystals before you can use it; save your crystals for the hacker cyber-elves, and wait until you get the Filter Shield EX Skill in a late stage.
- File:MMZ Nurse Elf Icon.PNG Cyber-Elf Yeppie: you need to feed it 250 crystals before you can use it; save your crystals for the hacker cyber-elves, and wait until you get the Filter Shield EX Skill in a late stage.
- File:MMZ Animal Elf Icon.PNG Cyber-Elf Putick: you need to feed it 700 crystals before you can use it; save your crystals for the hacker cyber-elves, and wait until you get the Filter Shield EX Skill in a late stage.
Operation: Righteous Strike
If you've completed all four missions, you'll find that Elpizo finally has everything prepared for "Operation Righteous Strike." Now that you've cleared out the four mission areas, go back and get the hidden Sub Tank, whatever Cyber-Elves you haven't obtained, and then go to Ciel and save your data. After you exit the command center, you'll need to be ready for what happens next...
The strike begins
Once you've completed the list of missions Elpizo has requested, leave the command center and return to trigger a cutscene.
When Zero returns to the command center, a soldier will also arrive to report in to Elpizo. Elpizo has already sent a large amount of his troops to Neo Arcadia to prepare to begin "Operation Righteous Strike." The soldier says his men are ready to open fire, and his lieutenant Pasosu awaits his signal. Elpizo's eagerness to begin his attack is evidenced by his desire to destroy Neo Arcadia once and for all. He gives his thanks to Zero, and then gives the order to attack, but is halted by Ciel.
Ciel immediately rushes into the room, followed by Cerveau. Ciel tries to convince Elpizo he's making a mistake, because this attack is to be conducted on a weaker, residential district, and could very well mean extremely high casualties. Elpizo's simply accepts that possibility and dismisses her concerns. However, Cerveau tries to intervene as well and mentions Ciel's research is almost complete, and she'll have the solution to the energy crisis that would stop Neo Arcadia from doing anymore harm. Elpizo thinks Neo Arcadia can't be trusted, and refuses to stop his attack again.
When Ciel tries to plead with Elpizo again, he finally snaps and loses his gentle demeanor. In a fit of rage, he reveals how worried he is about everyone, and shows how much paranoia and frustration Neo Arcadia has really caused him.
Enraged beyond reason, Elpizo gives the order to engage and open fire. Everyone is too afraid from his outburst to question him again. Jaune, the operator on the right, relays the order to the troops, and they begin the attack. Elpizo requests transfer to the front lines to give commands, and he and the last soldier in the attack force are sent there as such, but not before Elpizo tries to justify his anger.
Ciel runs off in anguish, while Cerveau asks Zero to follow Elpizo, having a very bad feeling about the attack, along with Rouge and Jaune, the operators. You can chose to say no, but there's really no point. Say yes to be transferred to the Resdiential Area...
The strike fails
As soon as Zero arrives, it's a sight of pure carnage. Lifeless Reploid soldiers lie all over creation, and the aftermath of the destruction is everywhere. It looks like the operation was a complete failure, and it's time to rescue Elpizo before he meets his end...
Unlike the normal mission stages, this one is fairly short, but has a huge number of enemies to make up for it. You can still mess up very badly if you try to wildly dash through the area.
EX Skill walkthrough
Although the boss has no EX Skill, you still need to keep your score high to get the next ones.
Right as you head down the chaos-strewn hallways, you'll run into Gli-Eyes from the last game, enemies that swoop in to attack. Don't make much of them and wipe them out as you find them.
Along with the Gli-Eyes are Pantheon Guardians. Since the Residential Area is the place where they naturally appear, you can finally get a Cyber-Elf out of smashing them to bits.
Located down the lower corridors are numerous spike pits to trip you up, and Gli-Eyes are positioned in the worst places. The first pit you can jump over in a flash, but for the second, you'll need to reach the upper ledge and possibly wall-jump up to the awaiting Pantheon Guardians.
The third spike pit is quite large, but there's a block set in place to help you. Pull it down as far as possible to get a handy boost jumping over it. You don't need it, but it takes away the risk of mistiming the jump.
The fourth is just a tiny one where you need to jump over it and then wall-jump up to the other side. Two Yadokroids can easily become annoyances in the lower crevice here, but they're guarding some useful E-Crystals and Life Energy down below.
Shoot the Pantheon Guardian to pieces before crossing the fifth spike pit, then be wary of the Yadokroid hanging on the ceiling. Its durable body will let it traipse over spikes without being destroyed, so you don't have much time before it retreats to its "safe zone" down on the sixth pit of spikes. Another awaits just above, blocking the climb to the seventh spike pit. You'll need to delicately wall-jump up both pits to avoid damage.
The final sections of the Residential Area have a few groups of Pantheons and Gli-Eyes awaiting you, and two more spike pits. The first is easy to cross, but the second is just like the first bigger pit, and may require the help of another block waiting to help you to cross if you pull it over to the pit, but you can still make the jump.
After the last spike pit, and a few more Reploids taken before their time, you'll reach the shutter to the boss. However, you're in for a suprise...
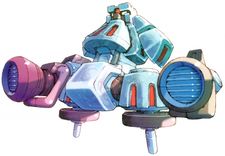
Boss: Golem Trio
The "boss" of this stage is more or less a gauntlet-like challenge, where you'll run into all three types of Golems you've encountered before. However, these actually have visible health bars, and are slightly tougher to pummel down than their weaker sub-boss counterparts. To Zero, they may be nothing, but to regular Reploids, they're absolute nightmares. Nobody stood a chance of getting past this sadistic kind of overkill, almost as if they were expected...
Golem Type E

You'll first encounter Golem Type E again. Like before, you need to anticipate its shots to avoid damage. Fortunately, you have a little advantage with the added help of walls in the room, allowing you to easily reach its head for more damage, and you also have the Ice Chip by now, its elemental weakness. Charge up Ice-element shots to knock its HP down very quickly, especially with the Z-Saber.
Golem Type F

Next up is Golem Type F. Again, jump through its rings of fire, wall jump when it shoots firebombs from its mouth, and tear its health away with the Thunder Chip, combined with the buster/saber.
Golem Type I

Last, but not least, is Golem Type I. Unlike the other Golems, this one retains its sloped battlefield, and its icicle and snowball attacks are still just as bad as ever. You can lower its health rapidly with the Fire Chip combined with the buster/saber, but not as fast due to the beefier health bar, which means you're at bigger risk of it dashing into to you, but it's still easy to beat.
With all three Golems destroyed, you'll receive a Mission Report, but no EX Skill, seeing as how these Golems are nothing special beyond more health.
Afterword
Neo Arcadia's counterstrike
In the room following the boss locations, Zero runs into the worst possible enemies; three of the Four Guardians, Sage Harpuia, Fairy Leviathan, and Fighting Fefnir. Hidden Phantom is notably absent because there was not enough time to rebuild him since his demise. However, the remaining three easily decimated Elpizo's troops. Elpizo himself got as far as Zero, but was clobbered by the three of them, and lies unconscious on the ground.
Leviathan playfully asks Zero why he was so late, since she got bored while she and her siblings had to "retire" so many Reploids, and then calls Elpizo an inferior ex-Neo Arcadian citizen. Fefnir immediately responds the same way, saying the Reploids were too weak for him, and he's been awaiting a rematch with Zero.
Harpuia, on the other hand, is more serious towards Zero's appearance, since it is his duty and direct responsibility to protect Neo Arcadia as its leader. He hushes his siblings to ask why Zero came to rescue a Reploid like Elpizo. Having dealt with Elpizo before in the past, Harpuia tells Zero up front that it's a waste of time to help him, since he won't thank him, and more Resistance soldiers will be killed as long as they resist Neo Arcadia. When Zero states he won't let that happen, Harpuia doubts his abilities on his own.
The confrontation is suddenly interrupted by an emergency call to Zero. Something airborne is quickly headed towards the Resistance Base. Leviathan reveals its a Neo Arcadian bombardment aircraft, heading over with a bomb big enough to wipe out the base in a flash. To Fefnir, it's not his style, but he references the famous quote, "All is fair in love and war."
Harpuia warns Zero his Resistance forces made an unforgivable mistake rebelling against the human populace of Neo Arcadia. X originally made Neo Arcadia as a refuge and place of peace for humans. Since the Resistance just threatened human lives, they can be viewed as Mavericks and must be exterminated.
Zero is forced to transfer with Elpizo back to base, but Harpuia quietly reveals his true standing on the matter. He doesn't think what he's doing is justice, however, until the risk they bring to humans is gone, it's his duty to go after them for the sake of the people.
Danger approaches swiftly
As Zero comes back with Elpizo, Jaune alerts the Emergency Squad to come rescue Elpizo. She also tracks the arrival of the huge enemy aircraft, which will arive in about ten minutes. Zero wants a shuttle readied to go after it himself, but Ciel wants to go with him, since she heard it was a special bomb, thinking it can't normally be defused. Even though Zero warns her of the danger, she counters his statement by warning him about being too reckless. Since they have no choice, Zero reluctantly agrees to let her come if she uses a portable Trans-Server, and he'll inform her when to come. Zero runs off to catch his shuttle in the meantime.
You'll be prompted to save your data after the cutscenes, because this is a forced mission, meaning no time to download new Cyber-Elves. Once you continue with the game, it will immediately start from here...
Cyber-elves walkthrough
You can re-enter this area only after the next mission is cleared.
- Destroy five Gli-Eyes for File:MMZ Animal Elf Icon.PNG Cyber-Elf Bircarry.
- Destroy eight Pantheon Guardians for File:MMZ Animal Elf Icon.PNG Cyber-Elf Beebite.
- Further along the hallway are two cleverly-positioned blocks, one covering up a Cyber-Elf Box. Pass by the one on the ground and drag it over to the right as far as possible with the Chain Rod to give yourself enough reach to pull the other one out on top of it from the ceiling, which you can do by yanking on it diagonally from the upper right. With the passage opened up, you can claim File:MMZ Nurse Elf Icon.PNG Cyber-Elf Estan. This is one of two Cyber-Elves that will transform into a File:MMZ2-4 Normal Subtank.PNG Sub Tank upon use. However, unlike the Hidden Sub Tanks, you'll suffer a penalty for using these, just like in the last game.
- Just before catching sight of any Pantheon Guardians, and above a few incoming Yadokroids, check directly to the upper left, about when the hallway opens up into a larger space. You'll discover a block covering up a Cyber-Elf Box. Pull it out diagonally with the Chain Rod from the place the first Pantheon was patrolling to be able to get File:MMZ Nurse Elf Icon.PNG Cyber-Elf Rireff, and to create a platform on the spikes.
