m (cleanup) |
(cleanup) |
||
| Line 4: | Line 4: | ||
==Seven Island Town== | ==Seven Island Town== | ||
[[File: | [[File:Pokemon FRLG Seven Island Town.png|thumb|500px|right|Seven Island Town.]] | ||
{{floatingtoc}} | {{floatingtoc}} | ||
{| {{prettytable|notwide=1}} | {| {{prettytable|notwide=1}} | ||
|- align="center" style="background:red; color:white" | |- align="center" style="background:red; color:white" | ||
|colspan="2"|Poke Mart | |colspan="2"|Poke Mart | ||
|- | |- | ||
| Line 30: | Line 30: | ||
{{-}} | {{-}} | ||
'''Seven Island''' is the last of the Sevii Islands. The town offers the usual amenities, such as the Poke Center and Poke Mart. A '''Move Tutor''' on the bridge south of the town will teach one of your Pokemon {{bpm|Swords Dance}}. | |||
'''Seven Island''' is the last of the Sevii Islands. The town offers the usual amenities, such as the Poke Center and Poke Mart. A '''Move Tutor''' on the bridge south of the town will teach one of your Pokemon {{bpm|Swords Dance}}. | |||
There are two paths you can take. Head north and you'll encounter '''Trainer Tower'''. Head south and you'll go towards '''Sevault Canyon''' and the '''Tanoby Ruins'''. You can tackle them in whatever way you choose. | There are two paths you can take. Head north and you'll encounter '''Trainer Tower'''. Head south and you'll go towards '''Sevault Canyon''' and the '''Tanoby Ruins'''. You can tackle them in whatever way you choose. | ||
==Trainer Tower== | ==Trainer Tower== | ||
[[File: | [[File:Pokemon FRLG Trainer Tower.png|thumb|400px|right|Trainer Tower.]] | ||
{| {{prettytable|notwide=1}} | {| {{prettytable|notwide=1}} | ||
|- align="center" style="background:red; color:white" | |- align="center" style="background:red; color:white" | ||
|colspan="2"|Poke Mart | |colspan="2"|Poke Mart | ||
|- | |- | ||
| Line 60: | Line 59: | ||
|} | |} | ||
Trainer Tower is the ultimate trainer challenge. Should you choose to climb it, you will have to go through eight levels of trainers to reach the top and claim a special prize. | Trainer Tower is the ultimate trainer challenge. Should you choose to climb it, you will have to go through eight levels of trainers to reach the top and claim a special prize. | ||
'''''Battling the trainers here will neither give you levels nor money.''''' The battles are timed, so try to do your best, and the level of the Pokémon here will match the level of your highest level Pokémon. | '''''Battling the trainers here will neither give you levels nor money.''''' The battles are timed, so try to do your best, and the level of the Pokémon here will match the level of your highest level Pokémon. | ||
There are 4 modes: '''Single Mode''', '''Double Mode''', '''Knockout Mode''', and '''Mixed Mode'''. | There are 4 modes: '''Single Mode''', '''Double Mode''', '''Knockout Mode''', and '''Mixed Mode'''. | ||
Beating '''Single Mode''' rewards an Up-Grade. | * Beating '''Single Mode''' rewards an Up-Grade. | ||
Beating '''Double Mode''' rewards a Dragon Scale. | * Beating '''Double Mode''' rewards a Dragon Scale. | ||
Beating '''Knockout Mode''' rewards a Metal Coat. | * Beating '''Knockout Mode''' rewards a Metal Coat. | ||
Beating '''Mixed Mode''' rewards a King's Rock. | * Beating '''Mixed Mode''' rewards a King's Rock. | ||
===Entrance=== | ===Entrance=== | ||
Heading north, you'll have to tackle two battles before you enter the Tower. Within, you'll find a Poke Center and a Poke Mart as well. The battles are unlike other challenges you may have found in different Pokemon games, as you are allowed to heal within and outside battles. Good Luck! | Heading north, you'll have to tackle two battles before you enter the Tower. Within, you'll find a Poke Center and a Poke Mart as well. The battles are unlike other challenges you may have found in different Pokemon games, as you are allowed to heal within and outside battles. Good Luck! | ||
| Line 79: | Line 77: | ||
====Trainers==== | ====Trainers==== | ||
{| {{prettytable|notwide=1|text center=1|float=left}} | {| {{prettytable|notwide=1|text center=1|float=left}} | ||
! style="background-color:#{{Pokemon color|Fire light}};color:#ffffff;" | Name | ! style="background-color:#{{Pokemon color|Fire light}};color:#ffffff;" | Name | ||
! style="background-color:#{{Pokemon color|Fire light}};color:#ffffff;" | 1st | ! style="background-color:#{{Pokemon color|Fire light}};color:#ffffff;" | 1st | ||
| Line 97: | Line 94: | ||
| | | | ||
|[[File:Pokebuck.png]]1040 | |[[File:Pokebuck.png]]1040 | ||
|} | |} | ||
{{-}} | {{-}} | ||
====Pokemon Found==== | ====Pokemon Found==== | ||
{| {{prettytable|notwide=1|text center=1}} | {| {{prettytable|notwide=1|text center=1}} | ||
! style="background:#{{Pokemon color|FireRed}};text-align:center;color:white" | FireRed | ! style="background:#{{Pokemon color|FireRed}};text-align:center;color:white" | FireRed | ||
! style="background:#{{Pokemon color|FireRed}};text-align:center;color:white" | Level | ! style="background:#{{Pokemon color|FireRed}};text-align:center;color:white" | Level | ||
| Line 193: | Line 188: | ||
===Single Mode=== | ===Single Mode=== | ||
Single Mode are simply single trainer battles. Beat the eight trainers and you'll be rewarded with an '''Upgrade''' (to evolve {{bp|Porygon}} into {{bp|Porygon2}} during a trade). | |||
Single Mode are simply single trainer battles. Beat the eight trainers and you'll be rewarded with an '''Upgrade''' (to evolve {{bp|Porygon}} into {{bp|Porygon2}} during a trade). | |||
{| {{prettytable|notwide=1}} | {| {{prettytable|notwide=1}} | ||
|- align="center" style="background:orange; color:white" | |- align="center" style="background:orange; color:white" | ||
|colspan="1"|Floor||colspan="1"|Trainers||colspan="2"|Pokemon | |colspan="1"|Floor||colspan="1"|Trainers||colspan="2"|Pokemon | ||
|- | |- | ||
|1||[[File: | |1||[[File:Pokemon FRLG Sailor.png]] Alberto||{{PokePic|Feraligatr}}{{bp|Feraligatr}}||{{PokePic|Kangaskhan}}{{bp|Kangaskhan}} | ||
|- | |- | ||
|2||[[File:Pokemon FRLG BugCatcher.png]] Brandon||{{PokePic|Beedrill}}{{bp|Beedrill}}||{{PokePic|Yanma}}{{bp|Yanma}} | |2||[[File:Pokemon FRLG BugCatcher.png]] Brandon||{{PokePic|Beedrill}}{{bp|Beedrill}}||{{PokePic|Yanma}}{{bp|Yanma}} | ||
| Line 212: | Line 206: | ||
|6||[[File:Pokemon FRLG Swimmer♂.png]] Braden|||{{PokePic|Dunsparce}}{{bp|Dunsparce}}||{{PokePic|Politoed}}{{bp|Politoed}} | |6||[[File:Pokemon FRLG Swimmer♂.png]] Braden|||{{PokePic|Dunsparce}}{{bp|Dunsparce}}||{{PokePic|Politoed}}{{bp|Politoed}} | ||
|- | |- | ||
|7||[[File:Pokémon | |7||[[File:Pokémon FRLG Burglar.png]] Jac||{{PokePic|Meowth}}{{bp|Meowth}}||{{PokePic|Chansey}}{{bp|Chansey}} | ||
|- | |- | ||
|8||[[File:Pokemon FRLG Pokémon Breeder.png]] Lily||{{PokePic|Togepi}}{{bp|Togepi}}||{{PokePic|Snorlax}}{{bp|Snorlax}} | |8||[[File:Pokemon FRLG Pokémon Breeder.png]] Lily||{{PokePic|Togepi}}{{bp|Togepi}}||{{PokePic|Snorlax}}{{bp|Snorlax}} | ||
|} | |} | ||
===Double Mode=== | ===Double Mode=== | ||
Doubles are battles with couple trainers. Beat eight couples and be rewarded with a '''Dragon Scale''' (to evolve {{bp|Seadra}} into {{bp|Kingdra}} during a trade). | Doubles are battles with couple trainers. Beat eight couples and be rewarded with a '''Dragon Scale''' (to evolve {{bp|Seadra}} into {{bp|Kingdra}} during a trade). | ||
{| {{prettytable|notwide=1}} | {| {{prettytable|notwide=1}} | ||
|- align="center" style="background:purple; color:white" | |- align="center" style="background:purple; color:white" | ||
|colspan="1"|Floor||colspan="1"|Trainers||colspan="2"|Pokemon | |colspan="1"|Floor||colspan="1"|Trainers||colspan="2"|Pokemon | ||
|- | |- | ||
| Line 239: | Line 233: | ||
|- | |- | ||
|8||[[File:Pokemon FRLG Cool Couple.png]] Geb & Megan||{{PokePic|Gyarados}}{{bp|Gyarados}}||{{PokePic|Rhydon}}{{bp|Rhydon}} | |8||[[File:Pokemon FRLG Cool Couple.png]] Geb & Megan||{{PokePic|Gyarados}}{{bp|Gyarados}}||{{PokePic|Rhydon}}{{bp|Rhydon}} | ||
|} | |} | ||
| Line 246: | Line 239: | ||
{| {{prettytable|notwide=1}} | {| {{prettytable|notwide=1}} | ||
|- align="center" style="background:red; color:white" | |- align="center" style="background:red; color:white" | ||
|colspan="1"|Floor||colspan="1"|Trainers||colspan="3"|Pokemon | |colspan="1"|Floor||colspan="1"|Trainers||colspan="3"|Pokemon | ||
|- | |- | ||
| Line 253: | Line 246: | ||
|2||[[File:Pokemon FRLG Hiker.png]] Mike & [[File:Pokemon FRLG Crush Girl.png]] Rebecca & [[File:Pokemon FRLG Black Belt.png]]Nicolas||{{PokePic|Charizard}}{{bp|Charizard}}||{{PokePic|Flareon}}{{bp|Flareon}}||{{PokePic|Poliwrath}}{{bp|Poliwrath}} | |2||[[File:Pokemon FRLG Hiker.png]] Mike & [[File:Pokemon FRLG Crush Girl.png]] Rebecca & [[File:Pokemon FRLG Black Belt.png]]Nicolas||{{PokePic|Charizard}}{{bp|Charizard}}||{{PokePic|Flareon}}{{bp|Flareon}}||{{PokePic|Poliwrath}}{{bp|Poliwrath}} | ||
|- | |- | ||
|3||[[File:Pokemon FRLG Picnicker.png]] Camryn & [[File: | |3||[[File:Pokemon FRLG Picnicker.png]] Camryn & [[File:Pokemon FRLG Aroma Lady.png]] Natalia & [[File:Pokemon FRLG Cooltrainer♀.png]]Kathleen||{{PokePic|Miltank}}{{bp|Miltank}}||{{PokePic|Vileplume}}{{bp|Vileplume}}||{{PokePic|Lapras}}{{bp|Lapras}} | ||
|- | |- | ||
|4||[[File:Pokemon FRLG Sailor.png]] Brennan & [[File: | |4||[[File:Pokemon FRLG Sailor.png]] Brennan & [[File:Pokemon FRLG Fisherman.png]] Kaden & [[File:Pokemon FRLG Gentleman.png]] Emanuel||{{PokePic|Chansey}}{{bp|Chansey}}||{{PokePic|Seaking}}{{bp|Seaking}}||{{PokePic|Vaporeon}}{{bp|Vaporeon}} | ||
|- | |- | ||
|5||[[File:Pokemon FRLG Beauty.png]] Maura & [[File: | |5||[[File:Pokemon FRLG Beauty.png]] Maura & [[File:Pokemon FRLG Lass.png]] Mikaela & [[File:Pokemon FRLG Engineer.png]] Flint||{{PokePic|Nidoran♀}}{{bp|Nidoran♀}}||{{PokePic|Nidorina}}{{bp|Nidorina}}||{{PokePic|Nidoqueen}}{{bp|Nidoqueen}} | ||
|- | |- | ||
|6||[[File:Pokemon FRLG Rocker.png]] Ben & [[File: | |6||[[File:Pokemon FRLG Rocker.png]] Ben & [[File:Pokemon FRLG Engineer.png]] Camden & [[File:Pokemon FRLG Scientist.png]]Zackery||{{PokePic|Ampharos}}{{bp|Ampharos}}||{{PokePic|Granbull}}{{bp|Granbull}}||{{PokePic|Misdreavus}}{{bp|Misdreavus}} | ||
|- | |- | ||
|7||[[File:Pokemon FRLG Tuber.png]] Priscilla & [[File: | |7||[[File:Pokemon FRLG Tuber.png]] Priscilla & [[File:Pokemon FRLG Lady.png]]Charlotte & [[File:Pokemon FRLG SwimmerF.png]]Shania||{{PokePic|Goldeen}}{{bp|Goldeen}}||{{PokePic|Qwilfish}}{{bp|Qwilfish}}||{{PokePic|Mantine}}{{bp|Mantine}} | ||
|- | |- | ||
|8||[[File:Pokemon FRLG Pokémon Ranger F.png]] Chelsea & [[File:Pokemon FRLG Pokémon Ranger M.png]] Trenton & [[File:Pokemon FRLG Cooltrainer♂.png]]Albert||{{PokePic|Starmie}}{{bp|Starmie}}||{{PokePic|Arcanine}}{{bp|Arcanine}}||{{PokePic|Venusaur}}{{bp|Venusaur}} | |8||[[File:Pokemon FRLG Pokémon Ranger F.png]] Chelsea & [[File:Pokemon FRLG Pokémon Ranger M.png]] Trenton & [[File:Pokemon FRLG Cooltrainer♂.png]]Albert||{{PokePic|Starmie}}{{bp|Starmie}}||{{PokePic|Arcanine}}{{bp|Arcanine}}||{{PokePic|Venusaur}}{{bp|Venusaur}} | ||
|} | |} | ||
===Mixed Mode=== | ===Mixed Mode=== | ||
Mixed brings a combination of all the previous modes. Beat eight floors and be rewarded with a '''King's Rock''' (to evolve {{bp|Poliwhirl}} and {{bp|Slowpoke}} into {{bp|Politoed}} and {{bp|Slowking}} during trade respectively. Also a Pokemon holding it will now have a chance to make the opponent flinch when attacking). | Mixed brings a combination of all the previous modes. Beat eight floors and be rewarded with a '''King's Rock''' (to evolve {{bp|Poliwhirl}} and {{bp|Slowpoke}} into {{bp|Politoed}} and {{bp|Slowking}} during trade respectively. Also a Pokemon holding it will now have a chance to make the opponent flinch when attacking). | ||
{| {{prettytable|notwide=1}} | {| {{prettytable|notwide=1}} | ||
|- align="center" style="background:blue; color:white" | |- align="center" style="background:blue; color:white" | ||
|colspan="1"|Floor||colspan="1"|Trainers||colspan="3"|Pokemon | |colspan="1"|Floor||colspan="1"|Trainers||colspan="3"|Pokemon | ||
|- | |- | ||
| Line 288: | Line 281: | ||
|- | |- | ||
|8||[[File:Pokemon FRLG Hiker.png]] Mike & [[File:Pokemon FRLG Crush Girl.png]] Rebecca & [[File:Pokemon FRLG Black Belt.png]]Nicolas||{{PokePic|Charizard}}{{bp|Charizard}}||{{PokePic|Nidoqueen}}{{bp|Nidoqueen}}||{{PokePic|Poliwrath}}{{bp|Poliwrath}} | |8||[[File:Pokemon FRLG Hiker.png]] Mike & [[File:Pokemon FRLG Crush Girl.png]] Rebecca & [[File:Pokemon FRLG Black Belt.png]]Nicolas||{{PokePic|Charizard}}{{bp|Charizard}}||{{PokePic|Nidoqueen}}{{bp|Nidoqueen}}||{{PokePic|Poliwrath}}{{bp|Poliwrath}} | ||
|} | |} | ||
==Canyon Entrance== | ==Canyon Entrance== | ||
[[File:Pokemon FRLG Canyon Entrance.png|thumb|300px|right|Canyon Entrance.]] | |||
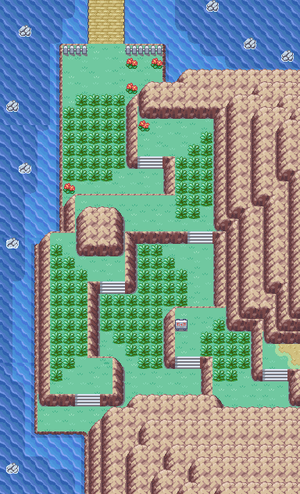
[[File: | Following the road south you'll find the entry zone towards '''Sevault Canyon'''. Canyon Entrance is a small zone mostly covered in tall grass, but you can also find challenging trainers here, so you may want to spend some time leveling your Pokemon here. | ||
Following the road south you'll find the entry zone towards '''Sevault Canyon'''. Canyon Entrance is a small zone mostly covered in tall grass, but you can also find challenging trainers here, so you may want to spend some time leveling your Pokemon here. | |||
From the middle of the zone, head south and east to continue on, the other path is a dead end. | From the middle of the zone, head south and east to continue on, the other path is a dead end. | ||
===Pokemon Found=== | ===Pokemon Found=== | ||
{| {{prettytable|notwide=1|text center=1|}} | {| {{prettytable|notwide=1|text center=1|}} | ||
! style="background:#{{Pokemon color|FireRed}};text-align:center;color:white" | FireRed | ! style="background:#{{Pokemon color|FireRed}};text-align:center;color:white" | FireRed | ||
! style="background:#{{Pokemon color|FireRed}};text-align:center;color:white" | Level | ! style="background:#{{Pokemon color|FireRed}};text-align:center;color:white" | Level | ||
| Line 357: | Line 346: | ||
|41 | |41 | ||
|5% | |5% | ||
|} | |} | ||
===Trainers=== | ===Trainers=== | ||
{| {{prettytable|notwide=1|text center=1}} | {| {{prettytable|notwide=1|text center=1}} | ||
!style="background-color:#{{Pokemon color|Normal light}};color:#ffffff;" | | |||
!style="background-color:#{{Pokemon color|Normal light}};color:#ffffff;" | | |||
!style="background-color:#{{Pokemon color|Normal light}};color:#ffffff;" | Name | !style="background-color:#{{Pokemon color|Normal light}};color:#ffffff;" | Name | ||
!style="background-color:#{{Pokemon color|Normal light}};color:#ffffff;" | 1st | !style="background-color:#{{Pokemon color|Normal light}};color:#ffffff;" | 1st | ||
| Line 410: | Line 397: | ||
| | | | ||
|[[File:Pokebuck.png]]2800 | |[[File:Pokebuck.png]]2800 | ||
|} | |} | ||
===Items=== | ===Items=== | ||
*Rawst Berry (hidden): dead end road at the west side | * Rawst Berry (hidden): dead end road at the west side | ||
==Sevault Canyon== | ==Sevault Canyon== | ||
[[File:Pokemon FRLG Sevault Canyon.png|thumb|300px|right|Sevault Canyon.]] | |||
[[File: | |||
Here you will find the strongest common trainers in the game, so this is the best place to train your Pokemon. On the south part of the zone you'll find a house, which contains a man ready to dance with you. If you agree, your Pokemon will all be healed, so you can hang around this area for as long as you want. | Here you will find the strongest common trainers in the game, so this is the best place to train your Pokemon. On the south part of the zone you'll find a house, which contains a man ready to dance with you. If you agree, your Pokemon will all be healed, so you can hang around this area for as long as you want. | ||
| Line 429: | Line 414: | ||
===Pokemon Found=== | ===Pokemon Found=== | ||
{| {{prettytable|notwide=1|text center=1|}} | {| {{prettytable|notwide=1|text center=1|}} | ||
! style="background:#{{Pokemon color|FireRed}};text-align:center;color:white" | FireRed | ! style="background:#{{Pokemon color|FireRed}};text-align:center;color:white" | FireRed | ||
! style="background:#{{Pokemon color|FireRed}};text-align:center;color:white" | Level | ! style="background:#{{Pokemon color|FireRed}};text-align:center;color:white" | Level | ||
| Line 528: | Line 511: | ||
===Trainers=== | ===Trainers=== | ||
{| {{prettytable|notwide=1|text center=1}} | {| {{prettytable|notwide=1|text center=1}} | ||
!style="background-color:#{{Pokemon color|Water light}};color:#ffffff;" | | |||
!style="background-color:#{{Pokemon color|Water light}};color:#ffffff;" | | |||
!style="background-color:#{{Pokemon color|Water light}};color:#ffffff;" | Name | !style="background-color:#{{Pokemon color|Water light}};color:#ffffff;" | Name | ||
!style="background-color:#{{Pokemon color|Water light}};color:#ffffff;" | 1st | !style="background-color:#{{Pokemon color|Water light}};color:#ffffff;" | 1st | ||
| Line 600: | Line 582: | ||
|style="background-color:#{{Pokemon color|Psychic}};" |[[File:Pokemon 203Girafarig.png|40px]]{{bp|Girafarig}} 50 | |style="background-color:#{{Pokemon color|Psychic}};" |[[File:Pokemon 203Girafarig.png|40px]]{{bp|Girafarig}} 50 | ||
|[[File:Pokebuck.png]]1800 | |[[File:Pokebuck.png]]1800 | ||
|} | |} | ||
===Items=== | ===Items=== | ||
*Nugget: South of the Cool Couple | * Nugget: South of the Cool Couple | ||
*Max Elixir: South of Tamer | * Max Elixir: South of Tamer | ||
*King's Rock: Puzzle that requires Strength and Rock Smash | * King's Rock: Puzzle that requires Strength and Rock Smash | ||
*Lucky Punch: Inside the house | * Lucky Punch: Inside the house | ||
*Cherry Berry (hidden): South of the house | * Cherry Berry (hidden): South of the house | ||
==Tanoby Ruins== | ==Tanoby Ruins== | ||
[[File: | [[File:Pokemon FRLG Tanoby Ruins.png|thumb|900px|center|Tanoby Ruins & Caves.]] | ||
Solving the earlier puzzle in Sevault Canyon will allow you to capture {{bp|Unown}} within these chambers! I know, a crappy reward for all the struggles you went through, but at least, you have finished exploring the Sevii Islands! | Solving the earlier puzzle in Sevault Canyon will allow you to capture {{bp|Unown}} within these chambers! I know, a crappy reward for all the struggles you went through, but at least, you have finished exploring the Sevii Islands! | ||
Time to go back to Celio in One Island and deliver the '''Sapphire''' if you have not done so already. Now you will be able to trade and battle Pokemon from ''Pokemon Ruby'', ''Pokemon Sapphire'' and ''Pokemon Emerald''!!! | Time to go back to Celio in One Island and deliver the '''Sapphire''' if you have not done so already. Now you will be able to trade and battle Pokemon from ''Pokemon Ruby'', ''Pokemon Sapphire'' and ''Pokemon Emerald''!!! | ||
| Line 620: | Line 601: | ||
===Pokemon Found=== | ===Pokemon Found=== | ||
{| {{prettytable|notwide=1|text center=1}} | {| {{prettytable|notwide=1|text center=1}} | ||
! style="background:#{{Pokemon color|FireRed}};text-align:center;color:white" | FireRed | ! style="background:#{{Pokemon color|FireRed}};text-align:center;color:white" | FireRed | ||
! style="background:#{{Pokemon color|FireRed}};text-align:center;color:white" | Level | ! style="background:#{{Pokemon color|FireRed}};text-align:center;color:white" | Level | ||
| Line 723: | Line 702: | ||
|25 | |25 | ||
|100% | |100% | ||
|} | |} | ||
===Trainers=== | ===Trainers=== | ||
{| {{prettytable|notwide=1|text center=1|float=left}} | {| {{prettytable|notwide=1|text center=1|float=left}} | ||
! style="background-color:#{{Pokemon color|Grass light}};color:#ffffff;" | Name | ! style="background-color:#{{Pokemon color|Grass light}};color:#ffffff;" | Name | ||
! style="background-color:#{{Pokemon color|Grass light}};color:#ffffff;" | 1st | ! style="background-color:#{{Pokemon color|Grass light}};color:#ffffff;" | 1st | ||
| Line 737: | Line 714: | ||
|[[File:Pokemon FRLG Ruin Maniac.png]]<br>Brandon | |[[File:Pokemon FRLG Ruin Maniac.png]]<br>Brandon | ||
| style="background-color:#{{Pokemon color|Rock}};" | {{PokePic|Onix}}{{bp|Onix}} 50 | | style="background-color:#{{Pokemon color|Rock}};" | {{PokePic|Onix}}{{bp|Onix}} 50 | ||
| | | | ||
| | | | ||
|[[File:Pokebuck.png]]2400 | |[[File:Pokebuck.png]]2400 | ||
|- align="center" | |- align="center" | ||
| Line 758: | Line 735: | ||
| style="background-color:#{{Pokemon color|Rock}};" | {{PokePic|Graveler}}{{bp|Graveler}} 48 | | style="background-color:#{{Pokemon color|Rock}};" | {{PokePic|Graveler}}{{bp|Graveler}} 48 | ||
|[[File:Pokebuck.png]]2304 | |[[File:Pokebuck.png]]2304 | ||
|} | |} | ||
{{-}} | {{-}} | ||
===Items=== | ===Items=== | ||
*Dragon Scale (x4 hidden): Outside the caves in the sand | * Dragon Scale (x4 hidden): Outside the caves in the sand | ||
==New Pokémon== | ==New Pokémon== | ||
{ | {{ContentBoxContainer}} | ||
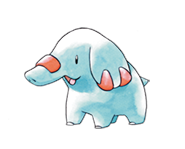
{{Pokemon/New|title=#231 Phanpy|contents=[[File:Pokemon 231Phanpy.png|left]] {{bp|Phanpy}}, is a new Ground heavyweight Pokemon now available to you. | |||
And heavyweight is right. Once evolved to {{bp|Donphan}} at level 25, this Pokemon gains a heavy boost to its attack and defense stats, along with a not too shabby HP. With these stats, Donphan can truly become a heavy hitter within your team. | And heavyweight is right. Once evolved to {{bp|Donphan}} at level 25, this Pokemon gains a heavy boost to its attack and defense stats, along with a not too shabby HP. With these stats, Donphan can truly become a heavy hitter within your team. | ||
Be warned though, that its Sp Def and Speed stats are very poor, so any fast Grass or Water Pokemon can easily one-shot Donphan. Moreover, its learnset will not contain any Ground moves until {{bpm|Earthquake}} at level 49, so TM's will be necessary. | Be warned though, that its Sp Def and Speed stats are very poor, so any fast Grass or Water Pokemon can easily one-shot Donphan. Moreover, its learnset will not contain any Ground moves until {{bpm|Earthquake}} at level 49, so TM's will be necessary.}} | ||
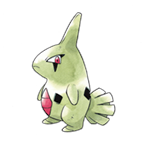
| [[File:Pokemon 246Larvitar.png|Larvitar|right]] {{bp|Larvitar}} is another small Pokemon just bursting with potential. | {{Pokemon/New|title=#246 Larvitar|contents=[[File:Pokemon 246Larvitar.png|Larvitar|right]] {{bp|Larvitar}} is another small Pokemon just bursting with potential. | ||
A Rock/Ground Pokemon, Larvitar follows the same progression that another powerhouse, the Dratini family. Like its Dragon counterparts, Larvitar, and its evolution at level 30, {{bp|Pupitar}},hold mediocre stats and movesets. | A Rock/Ground Pokemon, Larvitar follows the same progression that another powerhouse, the Dratini family. Like its Dragon counterparts, Larvitar, and its evolution at level 30, {{bp|Pupitar}},hold mediocre stats and movesets. | ||
Once it evolves into {{bp|Tyranitar}} at level 55, however, its types change to Rock/Dark, and its stats shoot up into the stratosphere. Tyranitar can devastate most teams by itself, and will even learn {{bpm|Earthquake}} at level 61. | Once it evolves into {{bp|Tyranitar}} at level 55, however, its types change to Rock/Dark, and its stats shoot up into the stratosphere. Tyranitar can devastate most teams by itself, and will even learn {{bpm|Earthquake}} at level 61. | ||
Like Dragonite, Tyranitar will make an excellent addition to any team, so long as you are patient enough to reap the rewards. | Like Dragonite, Tyranitar will make an excellent addition to any team, so long as you are patient enough to reap the rewards.}} | ||
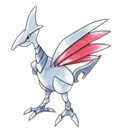
| | {{Pokemon/New|title=#227 Skarmory|contents=[[File:Pokemon 227Skarmory.png|Skarmory|right]] A Pokemon exclusive to Fire Red, {{bp|Skarmory}}'s defenses are off the scale, and also brings not too shabby attack stats as well. | ||
Skarmory's moveset is varied, focusing on physical attacks such as {{bpm|Air Cutter}} and {{bpm|Steel Wing}}, but can also learn {{bpm|Fly}} through the HM. | |||
Skarmory's moveset is varied, focusing on physical attacks such as {{bpm|Air Cutter}} and {{bpm|Steel Wing}}, but can also learn {{bpm|Fly}} through the HM. | |||
As a Flying/Steel Pokemon, Skarmory makes for a great physical wall, but do not expect it to be anywhere near as speedy as {{bp|Aerodactyl}} or {{bp|Dodrio}}. | As a Flying/Steel Pokemon, Skarmory makes for a great physical wall, but do not expect it to be anywhere near as speedy as {{bp|Aerodactyl}} or {{bp|Dodrio}}.}} | ||
| [[File:Pokemon 226Mantine.png|Mantine|left]] A Pokemon exclusive to Leaf Green, {{bp|Mantine}}, has decent stats across the board, except for a large Spc. Def, and a great moveset. | {{Pokemon/New|title=#226 Mantine|contents=[[File:Pokemon 226Mantine.png|Mantine|left]] A Pokemon exclusive to Leaf Green, {{bp|Mantine}}, has decent stats across the board, except for a large Spc. Def, and a great moveset. | ||
Mantine's moves are very varied, including {{bpm|Wing Attack}}, {{bpm|Water Pulse}} and {{bpm|Bubblebeam}}. In addition, as a Flying/Water Pokemon, it can take full advantage of strong TM's and HM's such as {{bpm|Aerial Ace}} and {{bpm|Surf}}. | Mantine's moves are very varied, including {{bpm|Wing Attack}}, {{bpm|Water Pulse}} and {{bpm|Bubblebeam}}. In addition, as a Flying/Water Pokemon, it can take full advantage of strong TM's and HM's such as {{bpm|Aerial Ace}} and {{bpm|Surf}}. | ||
Mantine makes a decent Spc. Def. wall and fighter, but it is easily outclassed by other Water Pokemon, including the similarly typed {{bp|Gyarados}}. | Mantine makes a decent Spc. Def. wall and fighter, but it is easily outclassed by other Water Pokemon, including the similarly typed {{bp|Gyarados}}.}} | ||
{{Pokemon/New|title=#201 Unown|contents=[[File:Pokemon 201Unown.png|left]] {{bp|Unown}}, the Symbol Pokemon, is not known to evolve into any Pokemon, but in fact has 28 different shapes, one for each of the 26 letters in the alphabet, as well as the "?" and "!" symbols. | |||
| | |||
| [[File: | |||
Unown has mediocre stats all across the board, and although it is a member of the powerful Psychic type, there is no guarantee that it can exploit its type, as its one and only move is {{bpm|Hidden Power}}, a move whose type changes according to the Pokemon's EV values. It learns no other moves, by leveling or TM. | Unown has mediocre stats all across the board, and although it is a member of the powerful Psychic type, there is no guarantee that it can exploit its type, as its one and only move is {{bpm|Hidden Power}}, a move whose type changes according to the Pokemon's EV values. It learns no other moves, by leveling or TM. | ||
Essentially, while Unown is a strange Pokemon, it'll provide little use to any team. Catch one for your Pokedex and leave it in your PC. | Essentially, while Unown is a strange Pokemon, it'll provide little use to any team. Catch one for your Pokedex and leave it in your PC.}} | ||
</div> | |||
{{Footer Nav|game=Pokémon FireRed and LeafGreen|prevpage=Five Island|nextpage=Cerulean Cave}} | {{Footer Nav|game=Pokémon FireRed and LeafGreen|prevpage=Five Island|nextpage=Cerulean Cave}} | ||
Revision as of 04:54, 12 August 2023
Seven Island is the last of the Sevii Islands, and holder of the strongest trainers of the game, aside from the Elite Four. Gear up and tackle the challenges within Trainer Tower, and make your way to solve the final puzzle within the Tanoby Ruins!
Seven Island Town

| Poke Mart | |
| Great Ball | |
| Ultra Ball | |
| Revive | |
| Full Restore | |
| Hyper Potion | |
| Max Potion | |
| Full Heal | |
| Escape Rope | |
| Max Repel | |
Seven Island is the last of the Sevii Islands. The town offers the usual amenities, such as the Poke Center and Poke Mart. A Move Tutor on the bridge south of the town will teach one of your Pokemon Swords Dance.
There are two paths you can take. Head north and you'll encounter Trainer Tower. Head south and you'll go towards Sevault Canyon and the Tanoby Ruins. You can tackle them in whatever way you choose.
Trainer Tower

| Poke Mart | |
| Great Ball | |
| Ultra Ball | |
| Revive | |
| Full Restore | |
| Hyper Potion | |
| Max Potion | |
| Full Heal | |
| Escape Rope | |
| Max Repel | |
Trainer Tower is the ultimate trainer challenge. Should you choose to climb it, you will have to go through eight levels of trainers to reach the top and claim a special prize.
Battling the trainers here will neither give you levels nor money. The battles are timed, so try to do your best, and the level of the Pokémon here will match the level of your highest level Pokémon.
There are 4 modes: Single Mode, Double Mode, Knockout Mode, and Mixed Mode.
- Beating Single Mode rewards an Up-Grade.
- Beating Double Mode rewards a Dragon Scale.
- Beating Knockout Mode rewards a Metal Coat.
- Beating Mixed Mode rewards a King's Rock.
Entrance
Heading north, you'll have to tackle two battles before you enter the Tower. Within, you'll find a Poke Center and a Poke Mart as well. The battles are unlike other challenges you may have found in different Pokemon games, as you are allowed to heal within and outside battles. Good Luck!
Trainers
| Name | 1st | 2nd | 3rd | Money |
|---|---|---|---|---|
| File:Pokemon FRLG PsychicF.png Rodette |
||||
| File:Pokemon FRLG PsychicM.png Dario |
Pokemon Found
| FireRed | Level | Encounter Rate | LeafGreen | Level | Encounter Rate |
|---|---|---|---|---|---|
| Surfing | |||||
| 5-40 | 95% | 5-40 | 95% | ||
| 35-40 | 5% | 35-40 | 5% | ||
| Old Rod | |||||
| 5 | 100% | 5 | 100% | ||
| Good Rod | |||||
| 5-15 | 80% | 5-15 | 80% | ||
| 5-15 | 20% | 5-15 | 20% | ||
| Super Rod | |||||
| 15-25 | 40% | 15-25 | 40% | ||
| 25-35 | 4% | 25-35 | 4% | ||
| 15-25 | 40% | 15-25 | 40% | ||
| 15-25 | 15% | 15-25 | 15% | ||
| 15-35 | 1% | 15-35 | 1% | ||
Single Mode
Single Mode are simply single trainer battles. Beat the eight trainers and you'll be rewarded with an Upgrade (to evolve Porygon into Porygon2 during a trade).
| Floor | Trainers | Pokemon | |
| 1 | |||
| 2 | File:Pokemon FRLG BugCatcher.png Brandon | ||
| 3 |  Jarrett Jarrett |
||
| 4 | |||
| 5 | |||
| 6 | |||
| 7 | File:Pokémon FRLG Burglar.png Jac | ||
| 8 |  Lily Lily |
||
Double Mode
Doubles are battles with couple trainers. Beat eight couples and be rewarded with a Dragon Scale (to evolve Seadra into Kingdra during a trade).
| Floor | Trainers | Pokemon | |
| 1 |  Jen & Kira Jen & Kira |
||
| 2 | File:Pokemon FRLG Crushkin.png Jo & Haley | ||
| 3 | File:Pokemon FRLG Crushkin.png Ric & Rene | ||
| 4 |  Isac & Mag Isac & Mag |
||
| 5 |  Jos & Anne Jos & Anne |
||
| 6 |  Emy & Alek Emy & Alek |
||
| 7 | File:Pokemon FRLG SisandBro.png Axe & Ren | ||
| 8 |  Geb & Megan Geb & Megan |
||
Knockout Mode
Knockout Mode are battles where you will tackle three trainers, one after the other with no healing time between battles. Beat eight floors and be rewarded with a Metal Coat (to evolve Onix and Scyther into Steelix and Scizor during trade respectively. It also powers Steel type moves when held).
| Floor | Trainers | Pokemon | ||
| 1 |  Jordy & Jordy &  Ernest & Ernest & Gabriel Gabriel |
|||
| 2 |  Mike & Mike &  Rebecca & Rebecca &  Nicolas Nicolas |
|||
| 3 |  Natalia & Natalia &  Kathleen Kathleen |
|||
| 4 |  Kaden & Kaden & |
|||
| 5 |  Maura & Maura & |
|||
| 6 |  Ben & Ben &  Zackery Zackery |
|||
| 7 |  Priscilla & Priscilla &  Charlotte & File:Pokemon FRLG SwimmerF.pngShania Charlotte & File:Pokemon FRLG SwimmerF.pngShania |
|||
| 8 | File:Pokemon FRLG Pokémon Ranger F.png Chelsea & File:Pokemon FRLG Pokémon Ranger M.png Trenton &  Albert Albert |
|||
Mixed Mode
Mixed brings a combination of all the previous modes. Beat eight floors and be rewarded with a King's Rock (to evolve Poliwhirl and Slowpoke into Politoed and Slowking during trade respectively. Also a Pokemon holding it will now have a chance to make the opponent flinch when attacking).
| Floor | Trainers | Pokemon | ||
| 1 |  Allyson Allyson |
|||
| 2 | File:Pokemon FRLG PsychicM.png Lorenzo | |||
| 3 | File:Pokemon FRLG SuperNerd.png Owen | |||
| 4 |  Geb & Megan Geb & Megan |
|||
| 5 | File:Pokemon FRLG SisandBro.png Kat & Kitt | |||
| 6 | File:Pokemon FRLG Pokémon Ranger F.png Chelsea & File:Pokemon FRLG Pokémon Ranger M.png Trenton &  Albert Albert |
|||
| 7 | File:Pokemon FRLG Crushkin.png Ric & Rene | |||
| 8 |  Mike & Mike &  Rebecca & Rebecca &  Nicolas Nicolas |
|||
Canyon Entrance
Following the road south you'll find the entry zone towards Sevault Canyon. Canyon Entrance is a small zone mostly covered in tall grass, but you can also find challenging trainers here, so you may want to spend some time leveling your Pokemon here.
From the middle of the zone, head south and east to continue on, the other path is a dead end.
Pokemon Found
| FireRed | Level | Encounter Rate | LeafGreen | Level | Encounter Rate |
|---|---|---|---|---|---|
| 44 | 20% | 44 | 20% | ||
| 48-50 | 15% | 48-50 | 15% | ||
| 10-15 | 30% | 10-15 | 30% | ||
| 41 | 10% | 41 | 10% | ||
| 47-50 | 5% | 47-50 | 5% | ||
| 10-15 | 15% | 10-15 | 15% | ||
| 41 | 5% | 41 | 5% |
Trainers
| Name | 1st | 2nd | 3rd | 4th | Money | |
|---|---|---|---|---|---|---|
| 1 |  Miah Miah
|
|||||
| 2 |  Mason Mason
|
|||||
| 3 | File:Pokemon FRLG Pokémon Ranger M.pngNicolas | |||||
| 4 | File:Pokemon FRLG Pokémon Ranger F.pngMadeline | |||||
| 5 |  Eve & Jon Eve & Jon
|
Items
- Rawst Berry (hidden): dead end road at the west side
Sevault Canyon

Here you will find the strongest common trainers in the game, so this is the best place to train your Pokemon. On the south part of the zone you'll find a house, which contains a man ready to dance with you. If you agree, your Pokemon will all be healed, so you can hang around this area for as long as you want.
North of the area you'll find the cave known as Tanoby Key. Inside the cave is a puzzle that involves Strength. Once solved, you'll unlock access to Unown within the Tanoby Ruins.
There are a couple of useful items that you can find throughout the road as well, such as the King's Rock, a held item that can make an opposing Pokemon flinch. Mind you, you'll need to bring Pokemon that know Strength and Rock Smash to get it.
When you are done with this place, head further south and enter the Tanoby Ruins.
Pokemon Found
| FireRed | Level | Encounter Rate | LeafGreen | Level | Encounter Rate |
|---|---|---|---|---|---|
| 15 | 20% | 15 | 20% | ||
| 50 | 10% | 50 | 15% | ||
| 43 | 10% | 43 | 10% | ||
| 46 | 10% | 46 | 10% | ||
| 52 | 10% | 52 | 10% | ||
| 46 | 20% | 46 | 20% | ||
| 49-52 | 5% | 49-52 | 5% | ||
| 54 | 5% | 54 | 5% | ||
| 15-20 | 5% | 15-20 | 5% | ||
| 30 | 5% | ||||
| Rock Smash | |||||
| 25-40 | 95% | 25-40 | 95% | ||
| 30-50 | 5% | 30-50 | 5% | ||
Trainers
| Name | 1st | 2nd | 3rd | 4th | 5th | Money | |
|---|---|---|---|---|---|---|---|
| 1 |  Lex & Nya Lex & Nya
|
||||||
| 2 |  Evan Evan
|
||||||
| 3 | File:Pokemon FRLG Pokémon Ranger M.pngJackson | ||||||
| 4 | File:Pokemon FRLG Pokémon Ranger F.pngMadeline | ||||||
| 5 |  Cyndy Cyndy
|
||||||
| 6 |  Leroy Leroy
|
||||||
| 7 |  Michelle Michelle
|
Items
- Nugget: South of the Cool Couple
- Max Elixir: South of Tamer
- King's Rock: Puzzle that requires Strength and Rock Smash
- Lucky Punch: Inside the house
- Cherry Berry (hidden): South of the house
Tanoby Ruins

Solving the earlier puzzle in Sevault Canyon will allow you to capture Unown within these chambers! I know, a crappy reward for all the struggles you went through, but at least, you have finished exploring the Sevii Islands!
Time to go back to Celio in One Island and deliver the Sapphire if you have not done so already. Now you will be able to trade and battle Pokemon from Pokemon Ruby, Pokemon Sapphire and Pokemon Emerald!!!
Your delivery of the gems has now triggered new events. Head back to Kanto, the Legendary Pokemon await you!!!
Pokemon Found
| FireRed | Level | Encounter Rate | LeafGreen | Level | Encounter Rate |
|---|---|---|---|---|---|
| Surfing | |||||
| 5-40 | 95% | 5-40 | 90% | ||
| 35-40 | 5% | 35-40 | 5% | ||
| 35-40 | 5% | ||||
| Old Rod | |||||
| 5 | 100% | 5 | 100% | ||
| Good Rod | |||||
| 5-15 | 80% | 5-15 | 80% | ||
| 5-15 | 20% | 5-15 | 20% | ||
| Super Rod | |||||
| 15-25 | 40% | 15-25 | 40% | ||
| 25-35 | 4% | 25-35 | 4% | ||
| 15-25 | 40% | 15-25 | 40% | ||
| 15-25 | 15% | 15-25 | 15% | ||
| 15-35 | 1% | 15-35 | 1% | ||
| Chambers | |||||
| 25 | 100% | 25 | 100% | ||
Trainers
| Name | 1st | 2nd | 3rd | Money |
|---|---|---|---|---|
 Brandon |
||||
Clifford |
||||
 Edna |
||||
 Benjamin |
Items
- Dragon Scale (x4 hidden): Outside the caves in the sand
New Pokémon
And heavyweight is right. Once evolved to Donphan at level 25, this Pokemon gains a heavy boost to its attack and defense stats, along with a not too shabby HP. With these stats, Donphan can truly become a heavy hitter within your team.
Be warned though, that its Sp Def and Speed stats are very poor, so any fast Grass or Water Pokemon can easily one-shot Donphan. Moreover, its learnset will not contain any Ground moves until Earthquake at level 49, so TM's will be necessary.
A Rock/Ground Pokemon, Larvitar follows the same progression that another powerhouse, the Dratini family. Like its Dragon counterparts, Larvitar, and its evolution at level 30, Pupitar,hold mediocre stats and movesets.
Once it evolves into Tyranitar at level 55, however, its types change to Rock/Dark, and its stats shoot up into the stratosphere. Tyranitar can devastate most teams by itself, and will even learn Earthquake at level 61.
Like Dragonite, Tyranitar will make an excellent addition to any team, so long as you are patient enough to reap the rewards.
Skarmory's moveset is varied, focusing on physical attacks such as Air Cutter and Steel Wing, but can also learn Fly through the HM.
As a Flying/Steel Pokemon, Skarmory makes for a great physical wall, but do not expect it to be anywhere near as speedy as Aerodactyl or Dodrio.
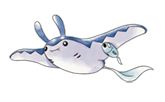
Mantine's moves are very varied, including Wing Attack, Water Pulse and Bubblebeam. In addition, as a Flying/Water Pokemon, it can take full advantage of strong TM's and HM's such as Aerial Ace and Surf.
Mantine makes a decent Spc. Def. wall and fighter, but it is easily outclassed by other Water Pokemon, including the similarly typed Gyarados.

Unown has mediocre stats all across the board, and although it is a member of the powerful Psychic type, there is no guarantee that it can exploit its type, as its one and only move is Hidden Power, a move whose type changes according to the Pokemon's EV values. It learns no other moves, by leveling or TM.
Essentially, while Unown is a strange Pokemon, it'll provide little use to any team. Catch one for your Pokedex and leave it in your PC.