Jump to navigation
Jump to search
E-123Wario54 (talk | contribs) (creation) |
E-123Wario54 (talk | contribs) m (simplifying formatting to make easier to read on mobile) |
||
| (One intermediate revision by one other user not shown) | |||
| Line 1: | Line 1: | ||
{{Header Nav|game=Danganronpa: Trigger Happy Havoc}} | {{Header Nav|game=Danganronpa: Trigger Happy Havoc}} | ||
==Part 1== | |||
*Use '''Yasuhiro's Message''' to shoot <font color=orange>'''blueprints'''</font>. | |||
*Choose "Hiro." | |||
*Select the '''Blue Tarp'''. | |||
*Select the '''Repository Dolly'''. | |||
*Final Strike: Equipment Room Bloodstain | |||
*Use '''Robo Justice Costume''' to shoot <font color=orange>'''bend over'''</font>. | |||
*Choose "you can't take it off by yourself." | |||
*Absorb <font color=#006400>'''what order'''</font> and shoot <font color=orange>'''the numbering'''</font>. | |||
*In the Hangman's Gambit, spell "WRISTWATCH." | |||
*Absorb <font color=#006400>'''someone else's discovery'''</font> and shoot <font color=orange>'''dead body had been found'''</font>. | |||
*Choose "when both bodies were rediscovered." | |||
==Part 2== | |||
*Use '''Hifumi's Glasses''' to shoot <font color=orange>'''there was no notable difference'''</font>. | |||
*Select '''Glasses Cleaning Cloth'''. | |||
*Choose "Hifumi." | |||
*Select '''The Note Hifumi Had'''. | |||
*Choose "Taka." | |||
*Use '''Broken Wristwatch''' to shoot <font color=orange>'''nothing to do with Tick-Tock'''</font>. | |||
*Select '''Kiyotaka's Scrap of Paper'''. | |||
*Use '''Spotless Hammer''' to shoot <font color=orange>'''one of the Justice Hammers'''</font>. | |||
*Absorb <font color=#006400>'''two murders'''</font> and shoot <font color=orange>'''impossible'''</font>. | |||
*Select Celeste. | |||
*Choose "encountering the suspicious individual." | |||
*Absorb <font color=#006400>'''so strange'''</font> and shoot <font color=orange>'''those guys'''</font>. | |||
*Choose "Hifumi is dragging the suspect away." | |||
*Use '''Robo Justice Costume''' to shoot <font color=orange>'''stand up straight'''</font>. | |||
*Choose "he said people's last names." | |||
*Use '''e-Handbook''' to shoot <font color=orange>'''no way to contradict me'''</font>. | |||
==Conclusion== | |||
{{spoiler|title=Closing Argument| | {{spoiler|title=Closing Argument| | ||
<gallery mode=packed heights=150px> | <gallery mode=packed heights=150px> | ||
Latest revision as of 00:24, 20 October 2023
Part 1[edit]
- Use Yasuhiro's Message to shoot blueprints.
- Choose "Hiro."
- Select the Blue Tarp.
- Select the Repository Dolly.
- Final Strike: Equipment Room Bloodstain
- Use Robo Justice Costume to shoot bend over.
- Choose "you can't take it off by yourself."
- Absorb what order and shoot the numbering.
- In the Hangman's Gambit, spell "WRISTWATCH."
- Absorb someone else's discovery and shoot dead body had been found.
- Choose "when both bodies were rediscovered."
Part 2[edit]
- Use Hifumi's Glasses to shoot there was no notable difference.
- Select Glasses Cleaning Cloth.
- Choose "Hifumi."
- Select The Note Hifumi Had.
- Choose "Taka."
- Use Broken Wristwatch to shoot nothing to do with Tick-Tock.
- Select Kiyotaka's Scrap of Paper.
- Use Spotless Hammer to shoot one of the Justice Hammers.
- Absorb two murders and shoot impossible.
- Select Celeste.
- Choose "encountering the suspicious individual."
- Absorb so strange and shoot those guys.
- Choose "Hifumi is dragging the suspect away."
- Use Robo Justice Costume to shoot stand up straight.
- Choose "he said people's last names."
- Use e-Handbook to shoot no way to contradict me.
Conclusion[edit]
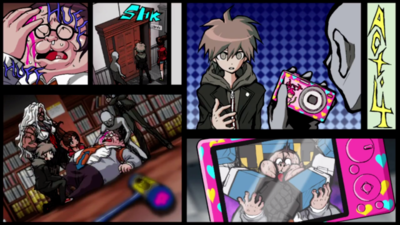
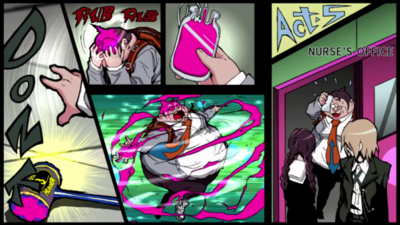
Closing Argument
-
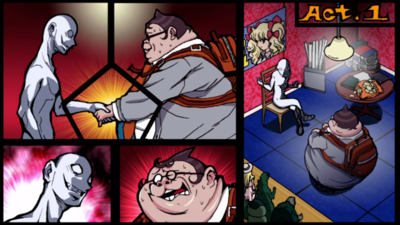
(1) The side of Hifumi's sweating face is seen.
-
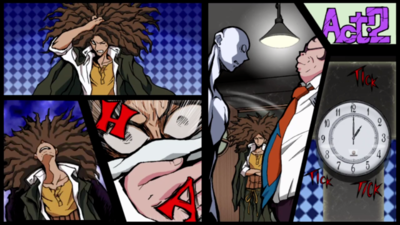
(2) A ticking clock and (3) a frustrated Yasuhiro are seen.
-
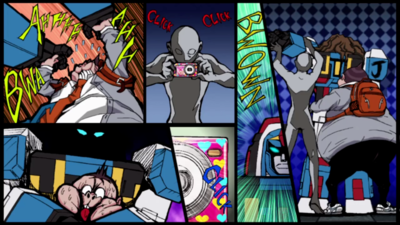
(4) The killer takes pictures with Hifumi's digital camera.
-

(5) Kiyotaka's wristwatch is seen.
-
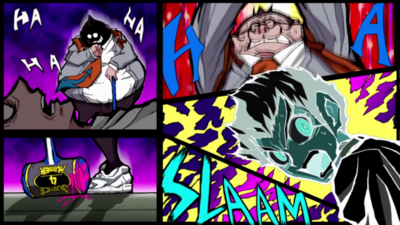
(6) Justice Hammer 4 is covered in blood.
-
(7) Justice Hammer 2 lays on the floor.
-
(8) Justice Hammer 3 is covered in blood.
-
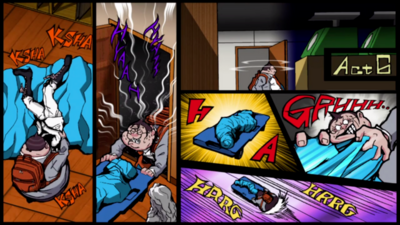
(9) Hifumi pushes the dolly.
-
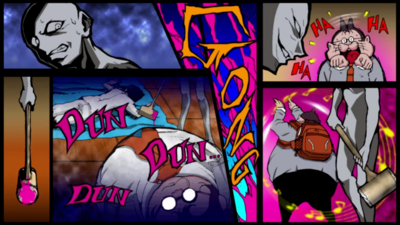
(10) The wooden hammer is covered in blood.


