Onderduiker (talk | contribs) (Added to list of vehicles in Car Crushers section, consolidated external links in separate section) |
Onderduiker (talk | contribs) m (Updated Icon parameter) |
||
| (4 intermediate revisions by the same user not shown) | |||
| Line 2: | Line 2: | ||
{{floatingtoc}} | {{floatingtoc}} | ||
{{-}} | {{-}} | ||
; Gangs | |||
Gang vehicles are driven by armed gang members, who will attack the vehicle if you hijack it. They cannot change plates or be resprayed at [[../Vehicles#Garages|Max Paynt]]. | |||
<gallery> | |||
File:GTA2 Vehicle Miara.png|Miara (Area 1) | |||
File:GTA2 Vehicle Z-Type.png|Z-Type (Areas 1-3) | |||
File:GTA2 Vehicle Dementia.png|Dementia (Area 1) | |||
File:GTA2 Vehicle Pickup (Redneck).png|Pickup (Area 2) | |||
File:GTA2 Vehicle Meteor.png|Meteor (Area 2) | |||
File:GTA2 Vehicle Karma Bus.png|Karma Bus (Area 3) | |||
File:GTA2 Vehicle Bulwark.png|Bulwark (Area 3) | |||
</gallery> | |||
; Government | |||
Government vehicles include the emergency services, law enforcement and the military. They cannot change plates or be resprayed at Max Paynt. | |||
<gallery> | |||
File:GTA2 Vehicle Medicar.png|Medicar | |||
File:GTA2 Vehicle Fire Truck.png|Fire Truck | |||
File:GTA2 Vehicle Cop Car.png|Cop Car | |||
File:GTA2 Vehicle SWAT Van.png|SWAT Van | |||
File:GTA2 Vehicle Special Agent Car.png|Special Agent Car (Areas 2-3) | |||
File:GTA2 Vehicle Land Roamer.png|Land Roamer (Areas 2-3) | |||
File:GTA2 Vehicle Armed Land Roamer.png|Armed Land Roamer (Areas 2-3) | |||
File:GTA2 Vehicle Pacifier.png|Pacifier (Areas 2-3) | |||
File:GTA2 Vehicle Tank.png|Tank | |||
</gallery> | |||
; Public transport | |||
You can wait for a train at a station and, once it stops, enter it to be transported around the area, and exit when it stops at any station. If you wait at a bus stop, entering the bus hijacks it: you won't be transported around the area, but you can drive it yourself and even pick up passengers at any bus stops. A bus can change plates or be resprayed at Max Paynt. | |||
<gallery> | |||
File:GTA2 Vehicle Box Car.png|Box Car | |||
File:GTA2 Vehicle Train FB.png|Train FB (Flatbed) | |||
File:GTA2 Vehicle Train.png|Train | |||
File:GTA2 Vehicle Train Cab.png|Train Cab | |||
File:GTA2 Vehicle Bus.png|Bus | |||
</gallery> | |||
; Limousines | |||
<gallery> | |||
File:GTA2 Vehicle Dementia Limousine.png|Dementia (Area 1) | |||
File:GTA2 Vehicle Stretch Limousine.png|Stretch (Area 2) | |||
File:GTA2 Vehicle Sports Limousine.png|Sports (Area 3) | |||
</gallery> | |||
; Trucks | |||
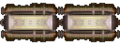
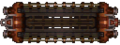
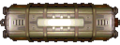
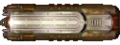
A Truck Cab (SX) can pick up a Container or a Transporter by reversing into the correct end until it connects. A Transporter can then be taken to a [[../Vehicles#Cranes|crane]], which can be used to load or unload a car. | |||
<gallery> | |||
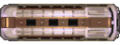
File:GTA2 Vehicle Container.png|Container (Area 1) | |||
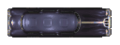
File:GTA2 Vehicle Truck Cab.png|Truck Cab | |||
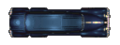
File:GTA2 Vehicle Transporter.png|Transporter | |||
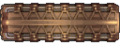
File:GTA2 Vehicle Truck Cab SX.png|Truck Cab SX (Area 2) | |||
</gallery> | |||
<gallery> | |||
File:GTA2 Vehicle Pickup.png|Pickup (Area 2) | |||
File:GTA2 Vehicle Box Truck.png|Box Truck (Area 3) | |||
File:GTA2 Vehicle Garbage Truck.png|Garbage Truck (Area 3) | |||
File:GTA2 Vehicle Tow Truck.png|Tow Truck (Multiplayer) | |||
</gallery> | |||
; Vans | |||
<gallery> | |||
File:GTA2 Vehicle Van.png|Van | |||
File:GTA2 Vehicle Ice-Cream Van.png|Ice-Cream Van (Area 1) | |||
File:GTA2 Vehicle Hot Dog Van.png|Hot Dog Van (Areas 2-3) | |||
File:GTA2 Vehicle G4 Bank Van.png|G4 Bank Van | |||
</gallery> | |||
==Car Crushers== | ==Car Crushers== | ||
If a crane has a car crusher, then after exiting a car it can be picked up and dropped in the crusher, destroying it. This earns a bonus, and for a limited time you can collect a power-up or weapons and ammo from a nearby conveyor belt once the crushed car has been processed. If two cars are crushed and the first gives weapons, only two weapons of the first car appear. | If a crane has a car crusher, then after exiting a car it can be picked up and dropped in the crusher, destroying it. This earns a bonus, and for a limited time you can collect a power-up or weapons and ammo from a nearby conveyor belt once the crushed car has been processed. If two cars are crushed and the first gives weapons, only two weapons of the first car appear. | ||
| Line 13: | Line 73: | ||
! Area 3: Industrial District | ! Area 3: Industrial District | ||
|- | |- | ||
! {{s|Power-ups|Health}} | ! {{s|Power-ups|Health}}<br>[[File:GTA2 Sprite Health.png]] | ||
| Schmidt | | | '''Schmidt'''<br>[[File:GTA2 Vehicle Schmidt.png]] | ||
| '''Pickup'''<br>[[File:GTA2 Vehicle Pickup.png]] [[File:GTA2 Vehicle Pickup (Redneck).png]] | |||
| '''Maurice'''<br>[[File:GTA2 Vehicle Maurice.png]] | |||
|- | |- | ||
! {{s|Power-ups|Armor}} | ! {{s|Power-ups|Armor}}<br>[[File:GTA2 Sprite Armor.png]] | ||
| Romero || Big Bug | | '''Romero'''<br>[[File:GTA2 Vehicle Romero.png]] | ||
| '''Big Bug'''<br>[[File:GTA2 Vehicle Big Bug.png]] | |||
| '''Big Bug'''<br>[[File:GTA2 Vehicle Big Bug.png]] | |||
|- | |- | ||
! {{s|Power-ups|Get Outta Jail Free Card}} | ! {{s|Power-ups|Get Outta Jail Free Card}}<br>[[File:GTA2 Sprite Get Outta Jail Free Card.png]] | ||
| Aniston BD4 | | | '''Aniston BD4'''<br>[[File:GTA2 Vehicle Aniston BD4.png]] | ||
| '''Morton'''<br>[[File:GTA2 Vehicle Morton.png]] | |||
| '''Jefferson'''<br>[[File:GTA2 Vehicle Jefferson.png]] | |||
|- | |- | ||
! {{s|Power-ups|Cop Bribe}} | ! {{s|Power-ups|Cop Bribe}}<br>[[File:GTA2 Sprite Cop Bribe.png]] | ||
| Cop Car || Cop Car | | '''Cop Car'''<br>[[File:GTA2 Vehicle Cop Car.png]] | ||
| '''Cop Car'''<br>[[File:GTA2 Vehicle Cop Car.png]] | |||
| '''Cop Car'''<br>[[File:GTA2 Vehicle Cop Car.png]] | |||
|- | |- | ||
! {{s|Power-ups|Respect!}} | ! {{s|Power-ups|Respect!}}<br>[[File:GTA2 Sprite Respect.png]] | ||
| Wellard || Special Agent Car | | '''Wellard'''<br>[[File:GTA2 Vehicle Wellard.png]] | ||
| '''Special Agent Car'''<br>[[File:GTA2 Vehicle Special Agent Car.png]] | |||
| '''Special Agent Car'''<br>[[File:GTA2 Vehicle Special Agent Car.png]] | |||
|- | |- | ||
! {{s|Power-ups|Double Damage}} | ! {{s|Power-ups|Double Damage}}<br>[[File:GTA2 Sprite Double Damage.png]] | ||
| Taxi || Taxi Xpress | | '''Taxi'''<br>[[File:GTA2 Vehicle Taxi.png]] | ||
| '''Taxi Xpress'''<br>[[File:GTA2 Vehicle Taxi Xpress.png]] | |||
| '''Taxi Xpress'''<br>[[File:GTA2 Vehicle Taxi Xpress.png]] | |||
|- | |- | ||
! {{s|Power-ups|ElectroFingers}} | ! {{s|Power-ups|ElectroFingers}}<br>[[File:GTA2 Sprite ElectroFingers.png]] | ||
| Minx | | | '''Minx'''<br>[[File:GTA2 Vehicle Minx.png]] | ||
| '''Benson'''<br>[[File:GTA2 Vehicle Benson.png]] | |||
| '''Stinger'''<br>[[File:GTA2 Vehicle Stinger.png]] | |||
|- | |- | ||
! {{s|Power-ups|Fast Reload}} | ! {{s|Power-ups|Fast Reload}}<br>[[File:GTA2 Sprite Fast Reload.png]] | ||
| A-Type | | | '''A-Type'''<br>[[File:GTA2 Vehicle A-Type.png]] | ||
| '''Furore GT'''<br>[[File:GTA2 Vehicle Furore GT.png]] | |||
| '''Rumbler'''<br>[[File:GTA2 Vehicle Rumbler.png]] | |||
|- | |- | ||
! {{s|Power-ups|Invisibility}} | ! {{s|Power-ups|Invisibility}}<br>[[File:GTA2 Sprite Invisibility.png]] | ||
| Dementia || B-Type | | '''Dementia'''<br>[[File:GTA2 Vehicle Dementia.png]] | ||
| '''B-Type'''<br>[[File:GTA2 Vehicle B-Type.png]] | |||
| '''B-Type'''<br>[[File:GTA2 Vehicle B-Type.png]] | |||
|- | |- | ||
! {{s|Power-ups|Invulnerability*}} | ! {{s|Power-ups|Invulnerability*}}<br>[[File:GTA2 Sprite Invulnerability.png]] | ||
| B-Type | | | '''B-Type'''<br>[[File:GTA2 Vehicle B-Type.png]] | ||
| '''Meteor'''<br>[[File:GTA2 Vehicle Meteor.png]] | |||
| '''Land Roamer'''<br>[[File:GTA2 Vehicle Land Roamer.png]] | |||
|} | |} | ||
| Line 50: | Line 130: | ||
! Area 3: Industrial District | ! Area 3: Industrial District | ||
|- | |- | ||
!rowspan=5| {{s|Weapons|S-Uzi Machine Gun}} (10 x 3) | !rowspan=5| {{s|Weapons|S-Uzi Machine Gun}} (10 x 3)<br>[[File:GTA2 Sprite S-Uzi Machine Gun.png]] | ||
| Big Bug | | | '''Big Bug'''<br>[[File:GTA2 Vehicle Big Bug.png]] | ||
| '''Bug'''<br>[[File:GTA2 Vehicle Bug.png]] | |||
| '''Arachnid'''<br>[[File:GTA2 Vehicle Arachnid.png]] | |||
|- | |- | ||
| Bug | | | '''Bug'''<br>[[File:GTA2 Vehicle Bug.png]] | ||
| '''Eddy'''<br>[[File:GTA2 Vehicle Eddy.png]] | |||
| '''Armed Land Roamer'''<br>[[File:GTA2 Vehicle Armed Land Roamer.png]] | |||
|- | |- | ||
| Michelli Roadster | | | '''Michelli Roadster'''<br>[[File:GTA2 Vehicle Michelli Roadster.png]] | ||
| '''Maurice'''<br>[[File:GTA2 Vehicle Maurice.png]] | |||
| '''Eddy'''<br>[[File:GTA2 Vehicle Eddy.png]] | |||
|- | |- | ||
| U-Jerk Truck | | | '''U-Jerk Truck'''<br>[[File:GTA2 Vehicle U-Jerk Truck.png]] | ||
| '''Schmidt'''<br>[[File:GTA2 Vehicle Schmidt.png]] | |||
| '''U-Jerk Truck'''<br>[[File:GTA2 Vehicle U-Jerk Truck.png]] | |||
|- | |- | ||
| {{N/a|}} | | | {{N/a|}} | ||
| '''[[../Redneck jobs#Tanks-Giving!|(Armed) Land Roamer]]'''<br>[[File:GTA2 Vehicle Armed Land Roamer.png]] [[File:GTA2 Vehicle Land Roamer.png]] | |||
| {{N/a|}} | |||
|- | |- | ||
! [[../Weapons#Silenced S-Uzi Machine Gun|Silenced Machine Gun]] (10 x 3) | ! [[../Weapons#Silenced S-Uzi Machine Gun|Silenced Machine Gun]] (10 x 3)<br>[[File:GTA2 Sprite Silenced S-Uzi Machine Gun.png]] | ||
| Z-Type || Z-Type | | '''Z-Type'''<br>[[File:GTA2 Vehicle Z-Type.png]] | ||
| '''Z-Type'''<br>[[File:GTA2 Vehicle Z-Type.png]] | |||
| '''Z-Type'''<br>[[File:GTA2 Vehicle Z-Type.png]] | |||
|- | |- | ||
! {{s|Weapons|Flamethrower}} (20 x 3) | ! {{s|Weapons|Flamethrower}} (20 x 3)<br>[[File:GTA2 Sprite Flamethrower.png]] | ||
| Beamer | | | '''Beamer'''<br>[[File:GTA2 Vehicle Beamer.png]] | ||
| '''Trance-Am'''<br>[[File:GTA2 Vehicle Trance-Am.png]] | |||
| '''Minx'''<br>[[File:GTA2 Vehicle Minx.png]] | |||
|- | |- | ||
! {{s|Weapons|Molotov Cocktails}} (5 x 3) | ! {{s|Weapons|Molotov Cocktails}} (5 x 3)<br>[[File:GTA2 Sprite Molotov Cocktails.png]] | ||
| Shark | | | '''Shark'''<br>[[File:GTA2 Vehicle Shark.png]] | ||
| '''Spritzer'''<br>[[File:GTA2 Vehicle Spritzer.png]] | |||
| '''Romero'''<br>[[File:GTA2 Vehicle Romero.png]] | |||
|- | |- | ||
! {{s|Weapons|Rocket Launcher}} (5 x 3) | ! {{s|Weapons|Rocket Launcher}} (5 x 3)<br>[[File:GTA2 Sprite Rocket Launcher.png]] | ||
| Miara | | | '''Miara'''<br>[[File:GTA2 Vehicle Miara.png]] | ||
| '''Hachura'''<br>[[File:GTA2 Vehicle Hachura.png]] | |||
| '''Shark'''<br>[[File:GTA2 Vehicle Shark.png]] | |||
|- | |- | ||
! {{s|Weapons|Shotgun}} (10 x 3) | ! {{s|Weapons|Shotgun}} (10 x 3)<br>[[File:GTA2 Sprite Shotgun.png]] | ||
| {{N/a|}} | | | {{N/a|}} | ||
| '''Arachnid'''<br>[[File:GTA2 Vehicle Arachnid.png]] | |||
| '''Bulwark'''<br>[[File:GTA2 Vehicle Bulwark.png]] | |||
|- | |- | ||
! {{s|Weapons|ElectroGun}} (20 x 3) | ! {{s|Weapons|ElectroGun}} (20 x 3)<br>[[File:GTA2 Sprite ElectroGun.png]] | ||
| {{N/a|}} | | | {{N/a|}} | ||
| '''T-Rex'''<br>[[File:GTA2 Vehicle T-Rex.png]] | |||
| '''Jagular XK'''<br>[[File:GTA2 Vehicle Jagular XK.png]] | |||
|- | |- | ||
! {{s|Weapons|Grenades}} (5 x 3) | ! {{s|Weapons|Grenades}} (5 x 3)<br>[[File:GTA2 Sprite Grenades.png]] | ||
| {{N/a|}} || Panto | | {{N/a|}} | ||
| '''Panto'''<br>[[File:GTA2 Vehicle Panto.png]] | |||
| '''Panto'''<br>[[File:GTA2 Vehicle Panto.png]] | |||
|} | |} | ||
| Line 86: | Line 190: | ||
{{GTA2/Dialog | {{GTA2/Dialog | ||
|Icon= | |Icon=Guide | ||
|Name=Neutral | |Name=Neutral | ||
|Dialog=I ain't touchin' that! Get outta here!}} | |Dialog=I ain't touchin' that! Get outta here!}} | ||
==Cranes== | ==Cranes== | ||
| Line 147: | Line 199: | ||
==Garages== | ==Garages== | ||
{| {{prettytable|style=text-align:center}} | {| {{prettytable|style=text-align:center}} | ||
! | !width=10%| Garage | ||
! | !width=18%| Max Paynt<br>[[File:GTA2 Sign Max Paynt.png]] | ||
! | !width=18%| Red Army Surplus<br>[[File:GTA2 Sign Red Army Surplus.png]] | ||
! | !width=18%| Hell Oil<br>[[File:GTA2 Sign Hell Oil.png]] | ||
! | !width=18%| Smith & Heston's<br>[[File:GTA2 Sign Smith & Heston's.png]] | ||
!width=18%| Gold Mines<br>[[File:GTA2 Sign Gold Mines.png]] | |||
|- | |- | ||
! | ! Areas | ||
| 1-3 || 1-3 || 1-3 || 1-3 || 2-3 | |||
|- | |- | ||
! | ! Purchase | ||
| {{ | |rowspan=2| Change plates or respray | ||
| | | {{s|Weapons|Vehicle Bomb}} | ||
| {{s|Weapons|Vehicle Oil Slick}} | |||
| {{s|Weapons|Vehicle Machine Guns}} | |||
| {{s|Weapons|Vehicle Mines}} | |||
|- | |- | ||
! | ! Ammo | ||
| | | 1 || 10 || 10 || 10 | ||
|- | |- | ||
! | ! Cost | ||
| | | $5000 || $5000 || $10000 || $25000 || $50000 | ||
|} | |} | ||
Your vehicle is modified by driving through the garage. If you drive through in | Your vehicle is modified by driving through the garage. If you drive through Max Paynt in a gang or government vehicle: | ||
{{GTA2/Dialog | {{GTA2/Dialog | ||
|Icon= | |Icon=Guide | ||
|Name=Neutral | |Name=Neutral | ||
|Dialog=I ain't touchin' that! Get outta here!}} | |Dialog=I ain't touchin' that! Get outta here!}} | ||
Otherwise, after changing plates or respraying, any Wanted level is cleared and any damage is repaired. If you drive through in a Truck Cab (SX) with a Container or Transporter then both can be resprayed and repaired, but any vehicle loaded on a Transporter will not. | |||
==External links == | ==External links == | ||
Latest revision as of 23:02, 29 November 2023
- Gangs
Gang vehicles are driven by armed gang members, who will attack the vehicle if you hijack it. They cannot change plates or be resprayed at Max Paynt.
-

Miara (Area 1)
-

Z-Type (Areas 1-3)
-

Dementia (Area 1)
-

Pickup (Area 2)
-

Meteor (Area 2)
-

Karma Bus (Area 3)
-

Bulwark (Area 3)


.png)


- Government
Government vehicles include the emergency services, law enforcement and the military. They cannot change plates or be resprayed at Max Paynt.
-

Medicar
-

Fire Truck
-

Cop Car
-

SWAT Van
-

Special Agent Car (Areas 2-3)
-

Land Roamer (Areas 2-3)
-

Armed Land Roamer (Areas 2-3)
-

Pacifier (Areas 2-3)
-

Tank


- Public transport
You can wait for a train at a station and, once it stops, enter it to be transported around the area, and exit when it stops at any station. If you wait at a bus stop, entering the bus hijacks it: you won't be transported around the area, but you can drive it yourself and even pick up passengers at any bus stops. A bus can change plates or be resprayed at Max Paynt.
-
Box Car
-
Train FB (Flatbed)
-
Train
-
Train Cab
-
Bus
- Limousines
-

Dementia (Area 1)
-
Stretch (Area 2)
-
Sports (Area 3)

- Trucks
A Truck Cab (SX) can pick up a Container or a Transporter by reversing into the correct end until it connects. A Transporter can then be taken to a crane, which can be used to load or unload a car.
-
Container (Area 1)
-

Truck Cab
-

Transporter
-

Truck Cab SX (Area 2)


-

Pickup (Area 2)
-
Box Truck (Area 3)
-

Garbage Truck (Area 3)
-

Tow Truck (Multiplayer)


- Vans
-

Van
-

Ice-Cream Van (Area 1)
-

Hot Dog Van (Areas 2-3)
-

G4 Bank Van


Car Crushers[edit]
If a crane has a car crusher, then after exiting a car it can be picked up and dropped in the crusher, destroying it. This earns a bonus, and for a limited time you can collect a power-up or weapons and ammo from a nearby conveyor belt once the crushed car has been processed. If two cars are crushed and the first gives weapons, only two weapons of the first car appear.
In Area 1: Downtown District, the cranes with car crushers are in north Zarelli (Zaibatsu), and the southeast corner of the district.
| Power-up | Area 1: Downtown District | Area 2: Residential District | Area 3: Industrial District |
|---|---|---|---|
| Health |
Schmidt |
Pickup |
Maurice |
| Armor |
Romero |
Big Bug |
Big Bug |
| Get Outta Jail Free Card |
Aniston BD4 |
Morton |
Jefferson |
| Cop Bribe |
Cop Car |
Cop Car |
Cop Car |
| Respect! |
Wellard |
Special Agent Car |
Special Agent Car |
| Double Damage |
Taxi |
Taxi Xpress |
Taxi Xpress |
| ElectroFingers |
Minx |
Benson |
Stinger |
| Fast Reload |
A-Type |
Furore GT |
Rumbler |
| Invisibility |
Dementia |
B-Type |
B-Type |
| Invulnerability* |
B-Type |
Meteor |
Land Roamer |
| Weapon | Area 1: Downtown District | Area 2: Residential District | Area 3: Industrial District |
|---|---|---|---|
| S-Uzi Machine Gun (10 x 3) |
Big Bug |
Bug |
Arachnid |
| Bug |
Eddy |
Armed Land Roamer | |
| Michelli Roadster |
Maurice |
Eddy | |
| U-Jerk Truck |
Schmidt |
U-Jerk Truck | |
| (Armed) Land Roamer |
|||
| Silenced Machine Gun (10 x 3) |
Z-Type |
Z-Type |
Z-Type |
| Flamethrower (20 x 3) |
Beamer |
Trance-Am |
Minx |
| Molotov Cocktails (5 x 3) |
Shark |
Spritzer |
Romero |
| Rocket Launcher (5 x 3) |
Miara |
Hachura |
Shark |
| Shotgun (10 x 3) |
Arachnid |
Bulwark | |
| ElectroGun (20 x 3) |
T-Rex |
Jagular XK | |
| Grenades (5 x 3) |
Panto |
Panto |
If you exit any other vehicle by a crane, it cannot be crushed:

|
Neutral
I ain't touchin' that! Get outta here! |
Cranes[edit]
There are no cranes without car crushers in Area 1: Downtown District. Otherwise, a crane can be used to pick up and drop a car, or (un)load a Transporter, after exiting the car.
Garages[edit]
| Garage | Max Paynt
|
Red Army Surplus
|
Hell Oil
|
Smith & Heston's
|
Gold Mines
|
|---|---|---|---|---|---|
| Areas | 1-3 | 1-3 | 1-3 | 1-3 | 2-3 |
| Purchase | Change plates or respray | Vehicle Bomb | Vehicle Oil Slick | Vehicle Machine Guns | Vehicle Mines |
| Ammo | 1 | 10 | 10 | 10 | |
| Cost | $5000 | $5000 | $10000 | $25000 | $50000 |
Your vehicle is modified by driving through the garage. If you drive through Max Paynt in a gang or government vehicle:
|
|
Neutral
I ain't touchin' that! Get outta here! |
Otherwise, after changing plates or respraying, any Wanted level is cleared and any damage is repaired. If you drive through in a Truck Cab (SX) with a Container or Transporter then both can be resprayed and repaired, but any vehicle loaded on a Transporter will not.
External links[edit]
- Vehicle locations (WikiGTA)
- Car crusher locations (WikiGTA)
- Crane locations (WikiGTA)
- Garage locations (WikiGTA)