Metroidking (talk | contribs) m (spelling corrections) |
Metroidking (talk | contribs) m (→Overview: didn't notice these) |
||
| Line 14: | Line 14: | ||
*'''Your Faction:''' Empire | *'''Your Faction:''' Empire | ||
*'''Easy'' reinforcements: 150 | *'''Easy''' reinforcements: 150 | ||
*''' | *'''Opposing army:''' Rebels | ||
*'''Easy'' reinforcements: 150 | *'''Easy''' reinforcements: 150 | ||
*'''Vehicles on map:''' None | *'''Vehicles on map:''' None | ||
*'''Jedi Heroes:''' Empire - Emperor Rebels - Luke Skywalker | *'''Jedi Heroes:''' Empire - Emperor Rebels - Luke Skywalker | ||
Revision as of 21:27, 27 May 2011

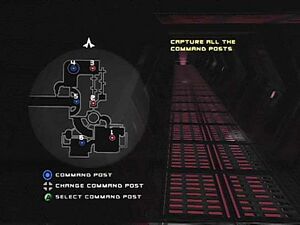
Command Posts
- The enemy usually doesn't reach this CP. There's a pathway off to the side leading to CP 6.
- Don't let the enemy get this one-it leads right to CP 3 and onward.
- Between this CP and CP 4, there's a lot of fighting at the beginning of the battle.
- An enemy CP, capture this one first.
- Most of the enemy troops here take cover behind the walls. You'll be under heavy fire when you try to take this one.
- At the end of a series of hallways, most of the fighting happens here towards the end of the fight.
Overview
- Your Faction: Empire
- Easy reinforcements: 150
- Opposing army: Rebels
- Easy reinforcements: 150
- Vehicles on map: None
- Jedi Heroes: Empire - Emperor Rebels - Luke Skywalker
Walkthrough
This map is pretty big, and easy to get lost in if you're not familiar with it. Some dangers to note are the bottomless pits, destructible bridges, and the Death Star laser.
Strategy 1
Spawn as a normal Stormtrooper at CP 3. Make your way over to CP 4, killing any Rebels nearby. Capture the CP and move on down the bridge to the hallway leading to CP 5. Don't rush in alone, because the enemy will hide in behind the walls and gun you down. After you clear out Rebel forces, take the CP. Now, get ready for the final assault. Go around the circular path around CP 5 and down the hallway. You should reach a bridge with two doorways and one sliding door in front of you. If the Rebels managed to capture CP 2, go to through the door across from you and retake it before Rebel troops make their way to CP 3. At this point in the battle, the enemy should be cornered inside CP 6. Head to CP 1 and use that small hallway to get a shortcut to CP 6. Hurry and take this CP before Rebel soldiers overwhelm you. Once this CP has been taken, await victory.
Strategy 2
Spawn at CP 3, this time as a Shock Trooper. Defeat the Rebel forces at CP 4 and capture it. Move on down the bridge to CP 5, but this time lay a mine at the entrance to CP 5, by the green computer. When a Rebel walks over it, the bridge will collapse. Now, backtrack to CP 4 and go to CP 5 through the alternative route. At the exit of this path, lay more mines. Rebels will run into them, trying to get through the hallway. Push onward and take over CP 5. Run over to the entrance to CP 6 and lay some mines. Continue this process over and over again, and it should be doing a great deal of damage. Move on and lay your mines closer to the CP, until you get there. Then, you may take it.
Strategy 3
Spawn at CP 1 as a regular Stormtrooper. Wait a while, then run through the entrance to CP 6. Capture it, then kill the Rebels in the hallway wondering what the heck happened. With the enemy's main Command Post down, you should have no trouble conquering the rest of the Rebellion's CPs.$N1P@R1F@ 17:31, 26 December 2010 (CST)
