This case has double the murders of the previous cases, so Monokuma File #3 has double the information...or at least it should. Ibuki's cause of death is a crushed windpipe due to choking, and Hiyoko's is blood loss due to having her throat slit by a sharp tool. Oddly enough, this is all the information that the Monokuma File includes. Chiaki also thinks it's strange that there would be two victims, as there is no clear benefit to killing two rather than one. Killing two students would actually increase the risk that the killer is caught, so there must be some reason for it. Regardless, all you can do now is begin to investigate the clues in front of you.
Music Venue[edit]


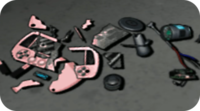
Speak to Fuyuhiko. He points out that there's a broken drumstick by the door, which could have been used to block the entrance before Hajime and co. burst through. Chiaki interjects to point out the presence of a Semitransparent Glob on the doors. She hypothesizes that this glob was formerly a liquid made up of workshop chemicals that has now hardened. Speak to Mikan for Mikan's Account; she recounts that she was with Hajime until just a bit before Monokuma's morning announcement. Examine the broken machine on the floor and Sonia will identify it as the Surveillance Camera Unit meant for communicating. Gundham questions why it would be destroyed in such a way. Sonia guesses that the killer would have destroyed it so they wouldn't get caught in the act, but that doesn't explain why Hajime saw the disturbing transmission of what was apparently Ibuki walking to her death. Examine the stage to get a closer look.

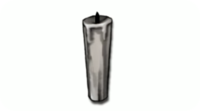

On the stage, speak to Chiaki. She brings Hajime's attention to a Smudge on the Floor that looks very much like a bloodstain. Its position isn't strange given the bloodshed that occurred here, but why does it look like someone attempted to clean it? What would they be covering up? Examine the massive Candle near the front of the stage. A candle this big would be suitable to light the area, but why not just use the stage lighting? Examine the Stepladder which Ibuki must have used to walk up to the noose. There's blood on the side of the stepladder, and since Ibuki didn't have any external injuries as reported by the Monokuma File, this blood must belong to Hiyoko.
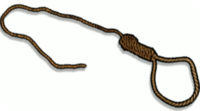
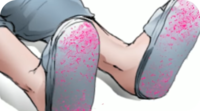

Pan the camera left and examine the Rope Used for Hanging. Nagito mentions that a rope like this wouldn't have been found in the Music Venue, so the killer must have picked it up from the supermarket. He then calls Mikan over to confirm that the rope was the cause of Ibuki's death. It seems he has another theory, but he isn't willing to share for now, so keep investigating. Examine Ibuki's body and Hajime will notice Blood on the Soles of her sandals. Hajime mentions that he didn't notice this detail in the video. Something about this murder scene isn't adding up. Fuyuhiko then approaches to ask about the time of death since that detail was omitted from the Monokuma File. Hajime saw Ibuki hang herself before he saw Hiyoko's body, but is it really so simple? Examine the Music Venue Curtain, which Chiaki points out wasn't even from the Music Venue to begin with. Why did the killer feel the need to bring it here?
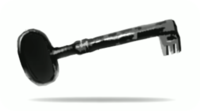
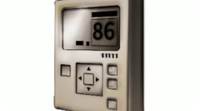

Examine Hiyoko's body to the right. It looks like the wound on her throat was covered up by the duct tape used to hold her up, and her kimono hasn't been put on properly. Nagito also notices a lump in her kimono that turns out to be a Motel Room Key. This must be something that Hiyoko had before she was killed as its presence would have been clearer if the killer planted it, but what could be its significance? Examine the A/C control panel to the right of Hiyoko. Hajime discovers that the A/C Temperature is the cause of the humidity in the room, but why would the killer need the room to be so hot? Examine the control panel below the A/C remote. Gundham will point out something stuck on the lighting rig above, which turns out to be a Scrap of Thick Paper. It seems inconsequential, but Hajime believes that its presence is a little too coincidental. Finally, examine the hemp bag in front of Ibuki's body. This doesn't give a Truth Bullet, but it does give Hajime a clue as to where he should look next.
Back away from the stage after everything there has been examined and examine the red doors to the right of the stage, marked "staff only." This will take you to the Storage Room, where you can speak to Nagito for his thoughts. He'll leave after the conversation, so Hajime will have to examine everything here on his own. Examine the shelves to the right and Hajime will notice that a piece of the wallpaper has been torn off. Examine the instruments on the back wall, the stack of stickers on the chair, and the full-length mirror. While there aren't any Truth Bullets here, this information can prove to be pretty important later on.
After exiting the Storage Room, speak to Mikan again. She claims that the heat in the room makes it difficult to determine a time of death for both victims, and brings up the possibility that this could be an imitation murder. Go to the Movie Theater to see what she's talking about.
Movie Theater[edit]



A discussion with Nagito and Monokuma follows Hajime's entrance into the area. Monokuma will eventually give Hajime the Movie's Invitation Ticket, which Nagito suggests he hold onto for some reason. Examine the food corner and goods corner while waiting for Monokuma. The tote bag is suspiciously missing from the goods corner, and Monokuma (unintentionally) hints that it was purchased by the killer. He also mentions that whoever bought it would have gotten a second tote bag free. This information is important to qualify as a Truth Bullet, called Monokuma's Account. Now enter the theater by examining the doors to the right and enjoy the show.
After the "film", you'll receive The Wizard of Monomi Truth Bullet. It seems clear now that the murders of Ibuki and Hiyoko were meant to mimic the deaths of the scarecrow and the lion in the movie, but the death of the tin man who was beaten to death could not be mimicked due to Monokuma's rule of a two victim maximum. But for what purpose did the killer feel the need to imitate that strange movie? Exit the Movie Theater and proceed to the Motel for clues on Hiyoko.
Motel[edit]


Speak to Gundham to find out where Hiyoko's room was, but before proceeding, speak to Fuyuhiko for Fuyuhiko's Account. He claims that he went straight to the Hospital after waking up, where he saw Mikan panicking because Ibuki was missing. They split up to search for her, but Fuyuhiko didn't see anyone around the island in that time, so his alibi isn't exactly airtight. Examine the building in the back to enter Hiyoko's room, using the key found inside her kimono. Sonia will speak to Hajime inside, but before doing anything, turn the camera a bit so you get a better view of the left side of the bathroom. Sitting on the toilet is Hidden Monokuma #5, the final one of the chapter. This one is missable, so be sure to get it before speaking to Sonia, or you will have to replay the chapter all over again.

Examine the mirror at the back of the bathroom, which looks rusty and unusable. Speak to Sonia and she'll share the story of Hiyoko's final moments. Hiyoko feared the Despair Disease so much that she locked herself in her room, but that wasn't the only reason. Apparently, she had trouble tying up the sash on her kimono, a task that Mahiru would have assisted her with before. Because Hiyoko was so set on getting dressed on her own, Sonia then suggested that she go to the Music Venue's Storage Room, where there was a full-length mirror. Because of this, Sonia believes that she is responsible for leading Hiyoko to her murder. This concludes Sonia's Account, but something about it doesn't add up to Hajime; if no one was listening in to their conversation as Sonia says, then how could the killer have known that Hiyoko would be at the Music Venue? Exit the Motel and proceed to the final location, the Hospital.
Hospital[edit]
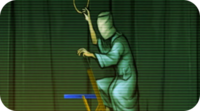
Examine the surveillance monitor on the counter and Hajime will recount the events of the Surveillance Monitor Video that he saw before discovering Ibuki's body. Chiaki doesn't seem so sure that Hajime saw what he thinks he did, and rushes off to the Conference Room. Speak to Kazuichi before following her into the Hallway, and speak to Akane before going up the stairs to the Conference Room. After the short scene, go to Monokuma Rock and examine the monument to begin the trial.
