m (→Glyphs: absorbing info) |
m (Auto Prod Bot moved page Castlevania: Order of Ecclesia/Getting Started to Castlevania: Order of Ecclesia/Gameplay without leaving a redirect: Getting Started -> Gameplay) |
||
| (7 intermediate revisions by 2 users not shown) | |||
| Line 3: | Line 3: | ||
== Glyphs == | == Glyphs == | ||
{{details|Castlevania: Order of Ecclesia/Glyphs|glyphs}} | {{details|Castlevania: Order of Ecclesia/Glyphs|glyphs}} | ||
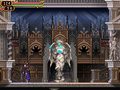
Unlike previous Castlevania games, Shanoa's main attacks are glyphs. She has three glyphs: main glyph, sub glyph, and back glyph. Main and sub glyphs are attacks, while back glyphs are usually supportive. Each glyph uses a certain amount of MP, but MP recharges quickly when not attacking. Each glyph is also associated with a specific attribute. | [[File:Castlevania Order of Ecclesia absorbing glyph.png|thumb|Shanoa absorbing a glyph.]] | ||
Unlike previous {{c|Castlevania}} games, Shanoa's main attacks are glyphs. She has three glyphs: main glyph, sub glyph, and back glyph. Main and sub glyphs are attacks, while back glyphs are usually supportive. Each glyph uses a certain amount of MP, but MP recharges quickly when not attacking. Each glyph is also associated with a specific attribute. | |||
Glyphs can be obtained in several ways. Some randomly appear after an enemy is defeated. Some can only be absorbed when an enemy is using a glyph. Others can be found in statues. Glyphs are absorbed by holding {{ds|Up|Dpad}}. Each glyph absorbed adds 1 point to all attributes and replenishes 10 hearts. | Glyphs can be obtained in several ways. Some randomly appear after an enemy is defeated. Some can only be absorbed when an enemy is using a glyph. Others can be found in statues. Glyphs are absorbed by holding {{ds|Up|Dpad}}. Each glyph absorbed adds 1 point to all attributes and replenishes 10 hearts. | ||
By pressing {{ds|Up|Dpad}} and either {{ds|X}} or {{ds|Y}}, a glyph union will be performed, which is a stronger attack. Glyph unions cost hearts instead of MP. | By pressing {{ds|Up|Dpad}} and either {{ds|X}} or {{ds|Y}}, a [[Castlevania: Order of Ecclesia/Glyphs#Glyph Unions|glyph union]] will be performed, which is a stronger attack. Glyph unions cost hearts instead of MP. | ||
== Attribute Points == | == Attribute Points == | ||
Attribute points are gained when enemies are defeated with glyphs. There are | Attribute points are gained when enemies are defeated with glyphs. The more points gained, the stronger the glyphs become. Using a color drop will increase the associated attribute by 1000 points. There are seven attributes. | ||
{|{{prettytable|notwide=1}} | |||
| [[File:Castlevania Order of Ecclesia attribute slash red.png|24px]] | |||
| Slash | |||
|- | |||
| [[File:Castlevania Order of Ecclesia attribute strike red.png|24px]] | |||
| Strike | |||
|- | |||
| [[File:Castlevania Order of Ecclesia attribute fire red.png|24px]] | |||
| Flame | |||
|- | |||
| [[File:Castlevania Order of Ecclesia attribute ice red.png|24px]] | |||
| Ice | |||
|- | |||
| [[File:Castlevania Order of Ecclesia attribute lightning red.png|24px]] | |||
| Lightning | |||
|- | |||
| [[File:Castlevania Order of Ecclesia attribute dark red.png|24px]] | |||
| Darkness | |||
|- | |||
| [[File:Castlevania Order of Ecclesia attribute light red.png|24px]] | |||
| Light | |||
|} | |||
== Stats == | |||
Stats increase when Shanoa levels up except for ATK and DEF. | |||
; ATK : Affects damage dealt with physical glyphs. | |||
; DEF : Affects damage received from physical attacks. | |||
; STR : Every 2 points increases ATK by 1. | |||
; CON : Every 2 points increase DEF by 1. | |||
; INT : Affects damage dealt with elemental glyphs. | |||
; MND : Affects damage received from magical attacks. | |||
; LCK : Affects drop rates for items and glyphs. | |||
== Status == | == Status == | ||
There are | There are four status effects that Shanoa can experience. | ||
; Poison : Drains HP and lowers stats. | ; Poison : Drains HP and lowers stats. | ||
; Curse : Drains MP. | ; Curse : Drains MP. | ||
; Stone : Shanoa becomes immobile. Keep tapping | ; Stone : Shanoa becomes immobile. Keep tapping {{ds|neutral|Dpad}} to break free. | ||
; Freeze : Same with Stone. But cannot break free with just tapping until you get hit again. | |||
== Items == | == Items == | ||
{{details|Castlevania: Order of Ecclesia/Items|items}} | {{details|Castlevania: Order of Ecclesia/Equipment|equipment}} | ||
A variety of items can be found throughout the game. Shanoa can equip a head gear, body gear, leg gear, and two accessories. There are also several use items that replenish either HP, MP, or hearts. Many use items don't have a functionality other than a requirement for quests. | {{details|Castlevania: Order of Ecclesia/Use Items|use items}} | ||
A variety of items can be found throughout the game. Shanoa can equip a [[Castlevania: Order of Ecclesia/Equipment#Head Gear|head gear]], [[Castlevania: Order of Ecclesia/Equipment#Body Gear|body gear]], [[Castlevania: Order of Ecclesia/Equipment#Leg Gear|leg gear]], and two [[Castlevania: Order of Ecclesia/Equipment#Accessories|accessories]]. There are also several use items that replenish either HP, MP, or hearts. Many use items don't have a functionality other than a requirement for quests. The maximum number of items that can be carried for each item is 9. | |||
== Chests == | == Chests == | ||
| Line 26: | Line 62: | ||
{| {{prettytable}} | {| {{prettytable}} | ||
| width="25px" | [[ | | width="25px" | [[File:Castlevania Order of Ecclesia wooden chest.png]] || Wooden chests contain a random common item. | ||
|- | |- | ||
| [[ | | [[File:Castlevania Order of Ecclesia green chest.png]] || Green chests contain a random rare item. | ||
|- | |- | ||
| [[ | | [[File:Castlevania Order of Ecclesia red chest.png]] || Red chests usually contain a max up item. | ||
|- | |- | ||
| [[ | | [[File:Castlevania Order of Ecclesia gold chest.png]] || Gold chests contain a [[Castlevania: Order of Ecclesia/Relics|relic]]. | ||
|- | |- | ||
| [[ | | [[File:Castlevania Order of Ecclesia blue chest.png]] || Blue chests are hidden and can be revealed by pressing {{ds|Down|Dpad}} or completing a secret condition. | ||
|} | |} | ||
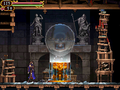
== Rooms == | |||
Each map has several save rooms where you can save your progress and restore HP and MP. Warp rooms transport you to other warp rooms that you can select on the map. Press {{ds|Up|Dpad}} to interact with them. | |||
<gallery> | |||
File:Castlevania Order of Ecclesia save room.png|Save room | |||
File:Castlevania Order of Ecclesia warp room.png|Warp room | |||
</gallery> | |||
{{Footer Nav|game=Castlevania: Order of Ecclesia|prevpage=|nextpage=Controls}} | {{Footer Nav|game=Castlevania: Order of Ecclesia|prevpage=|nextpage=Controls}} | ||
Latest revision as of 02:59, 2 June 2021
Glyphs[edit]
- For more details on glyphs, see Castlevania: Order of Ecclesia/Glyphs.

Unlike previous Castlevania games, Shanoa's main attacks are glyphs. She has three glyphs: main glyph, sub glyph, and back glyph. Main and sub glyphs are attacks, while back glyphs are usually supportive. Each glyph uses a certain amount of MP, but MP recharges quickly when not attacking. Each glyph is also associated with a specific attribute.
Glyphs can be obtained in several ways. Some randomly appear after an enemy is defeated. Some can only be absorbed when an enemy is using a glyph. Others can be found in statues. Glyphs are absorbed by holding ![]() . Each glyph absorbed adds 1 point to all attributes and replenishes 10 hearts.
. Each glyph absorbed adds 1 point to all attributes and replenishes 10 hearts.
By pressing ![]() and either
and either ![]() or
or ![]() , a glyph union will be performed, which is a stronger attack. Glyph unions cost hearts instead of MP.
, a glyph union will be performed, which is a stronger attack. Glyph unions cost hearts instead of MP.
Attribute Points[edit]
Attribute points are gained when enemies are defeated with glyphs. The more points gained, the stronger the glyphs become. Using a color drop will increase the associated attribute by 1000 points. There are seven attributes.
| Slash | |
| Strike | |
| Flame | |
| Ice | |
| Lightning | |
| Darkness | |
| Light |
Stats[edit]
Stats increase when Shanoa levels up except for ATK and DEF.
- ATK
- Affects damage dealt with physical glyphs.
- DEF
- Affects damage received from physical attacks.
- STR
- Every 2 points increases ATK by 1.
- CON
- Every 2 points increase DEF by 1.
- INT
- Affects damage dealt with elemental glyphs.
- MND
- Affects damage received from magical attacks.
- LCK
- Affects drop rates for items and glyphs.
Status[edit]
There are four status effects that Shanoa can experience.
- Poison
- Drains HP and lowers stats.
- Curse
- Drains MP.
- Stone
- Shanoa becomes immobile. Keep tapping
 to break free.
 - Freeze
- Same with Stone. But cannot break free with just tapping until you get hit again.
Items[edit]
- For more details on equipment, see Castlevania: Order of Ecclesia/Equipment.
- For more details on use items, see Castlevania: Order of Ecclesia/Use Items.
A variety of items can be found throughout the game. Shanoa can equip a head gear, body gear, leg gear, and two accessories. There are also several use items that replenish either HP, MP, or hearts. Many use items don't have a functionality other than a requirement for quests. The maximum number of items that can be carried for each item is 9.
Chests[edit]
Throughout the game are five kinds of chests that contain various items. Each chest can only be opened once, except for wooden and green chests. They can be opened each time after revisiting a map. Each map has a set pool of items which the wooden and green chests randomly select from.
| Wooden chests contain a random common item. | |
| Green chests contain a random rare item. | |
| Red chests usually contain a max up item. | |
| Gold chests contain a relic. | |
| Blue chests are hidden and can be revealed by pressing |
Rooms[edit]
Each map has several save rooms where you can save your progress and restore HP and MP. Warp rooms transport you to other warp rooms that you can select on the map. Press ![]() to interact with them.
to interact with them.
-
Save room
-
Warp room

