Jump to navigation
Jump to search
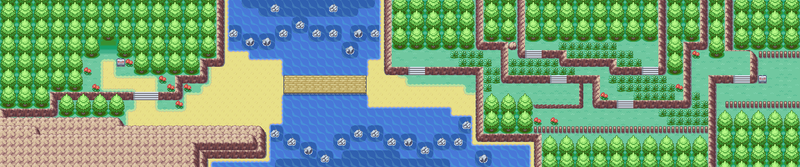
Bond Bridge.
m (add header, Image-> File) |
(made the page prettier) |
||
| Line 1: | Line 1: | ||
{{Header Nav|game=Pokémon FireRed and LeafGreen}} | {{Header Nav|game=Pokémon FireRed and LeafGreen}} | ||
==Bond Bridge== | ==Bond Bridge== | ||
'''Connecting the residents of Three Island with Berry Forest, Bond Bridge is a bit of a walk, but shouldn't be too much trouble if you've made it this far.''' | '''''Connecting the residents of Three Island with Berry Forest, Bond Bridge is a bit of a walk, but shouldn't be too much trouble if you've made it this far.''''' | ||
==Shaken, not stirred== | [[File:Pokemon_FRLG_Bond_Bridge.png|thumb|1000px|center|Bond Bridge.]] | ||
==Shaken, not stirred== | |||
Bond Bridge offers a few more trainer battles. More importantly, Bond Bridge also allows you an opportunity to catch some Pokemon you might have missed up to this point, or caught but failed to evolve. After you are satisfied with your new Pokemon, continue west with your search for Lostelle. | |||
===Pokémon found=== | |||
{| {{prettytable|notwide=1|text center=1}} | |||
|- | |||
! style="background:#{{Pokemon color|FireRed}};text-align:center;color:white" | FireRed | |||
! style="background:#{{Pokemon color|FireRed}};text-align:center;color:white" | Level | |||
! style="background:#{{Pokemon color|FireRed}};text-align:center;color:white" | Encounter Rate | |||
! style="background:#{{Pokemon color|LeafGreen}};text-align:center;color:white" | LeafGreen | |||
! style="background:#{{Pokemon color|LeafGreen}};text-align:center;color:white" | Level | |||
! style="background:#{{Pokemon color|LeafGreen}};text-align:center;color:white" | Encounter Rate | |||
|- align="center" | |||
|{{PokePic|Pidgey}}{{bp|Pidgey}} | |||
|29-32 | |||
|30% | |||
|{{PokePic|Pidgey}}{{bp|Pidgey}} | |||
|29-32 | |||
|30% | |||
|- | |||
|{{PokePic|Pidgeotto}}{{bp|Pidgeotto}} | |||
|34-40 | |||
|15% | |||
|{{PokePic|Pidgeotto}}{{bp|Pidgeotto}} | |||
|34-40 | |||
|15% | |||
|- | |||
|{{PokePic|Oddish}}{{bp|Oddish}} | |||
|31 | |||
|20% | |||
|{{PokePic|Bellsprout}}{{bp|Bellsprout}} | |||
|31 | |||
|20% | |||
|- | |||
|{{PokePic|Gloom}}{{bp|Gloom}} | |||
|36 | |||
|10% | |||
|{{PokePic|Weepinbell}}{{bp|Weepinbell}} | |||
|36 | |||
|10% | |||
|- | |||
|{{PokePic|Psyduck}}{{bp|Psyduck}} | |||
|31 | |||
|5% | |||
|{{PokePic|Slowpoke}}{{bp|Slowpoke}} | |||
|31 | |||
|5% | |||
|- | |||
|{{PokePic|Meowth}}{{bp|Meowth}} | |||
|31 | |||
|10% | |||
|{{PokePic|Meowth}}{{bp|Meowth}} | |||
|31 | |||
|10% | |||
|- | |||
|{{PokePic|Persian}}{{bp|Persian}} | |||
|37-40 | |||
|5% | |||
|{{PokePic|Persian}}{{bp|Persian}} | |||
|37-40 | |||
|5% | |||
|- | |||
|{{PokePic|Venonat}}{{bp|Venonat}} | |||
|34 | |||
|5% | |||
|{{PokePic|Venonat}}{{bp|Venonat}} | |||
|34 | |||
|5% | |||
|- | |||
! colspan="6" style="background:#{{Pokemon color|Water light}};color:black" | Surfing | |||
|- | |||
|{{PokePic|Tentacool}}{{bp|Tentacool}} | |||
|5-40 | |||
|95% | |||
|{{PokePic|Tentacool}}{{bp|Tentacool}} | |||
|5-40 | |||
|95% | |||
|- | |||
|{{PokePic|Tentacruel}}{{bp|Tentacruel}} | |||
|35-40 | |||
|5% | |||
|{{PokePic|Tentacruel}}{{bp|Tentacruel}} | |||
|35-40 | |||
|5% | |||
|- | |||
! colspan="6" style="background:#{{Pokemon color|Water}};color:black" | Old Rod | |||
|- | |||
|{{PokePic|Magikarp}}{{bp|Magikarp}} | |||
|5 | |||
|100% | |||
|{{PokePic|Magikarp}}{{bp|Magikarp}} | |||
|5 | |||
|100% | |||
|- | |||
! colspan="6" style="background:#{{Pokemon color|Water}};color:black" | Good Rod | |||
|- | |||
|{{PokePic|Horsea}}{{bp|Horsea}} | |||
|5-15 | |||
|80% | |||
|{{PokePic|Krabby}}{{bp|Krabby}} | |||
|5-15 | |||
|80% | |||
|- | |||
|{{PokePic|Magikarp}}{{bp|Magikarp}} | |||
|5-15 | |||
|20% | |||
|{{PokePic|Magikarp}}{{bp|Magikarp}} | |||
|5-15 | |||
|20% | |||
|- | |||
! colspan="6" style="background:#{{Pokemon color|Water dark}};color:black" | Super Rod | |||
|- | |||
|{{PokePic|Horsea}}{{bp|Horsea}} | |||
|15-25 | |||
|80% | |||
|{{PokePic|Krabby}}{{bp|Krabby}} | |||
|15-25 | |||
|80% | |||
|- | |||
|{{PokePic|Gyarados}}{{bp|Gyarados}} | |||
|15-25 | |||
|15% | |||
|{{PokePic|Gyarados}}{{bp|Gyarados}} | |||
|15-25 | |||
|15% | |||
|- | |||
|{{PokePic|Seadra}}{{bp|Seadra}} | |||
|25-35 | |||
|4% | |||
|{{PokePic|Kingler}}{{bp|Kingler}} | |||
|25-35 | |||
|4% | |||
|- | |||
|{{PokePic|Psyduck}}{{bp|Psyduck}} | |||
|25-35 | |||
|1% | |||
|{{PokePic|Slowpoke}}{{bp|Slowpoke}} | |||
|25-35 | |||
|1% | |||
|- | |||
|} | |||
==Trainers== | |||
{| {{prettytable|notwide=1|text center=1}} | {| {{prettytable|notwide=1|text center=1}} | ||
|- | |- | ||
| Line 49: | Line 191: | ||
|} | |} | ||
==Items== | |||
*Pearl (hidden): In the southwest corner of Bond Bridge | |||
*Max Repel (hidden): In a rock near a female trainer | |||
*Stardust (hidden): At the beach, western side, close to the Bridge. | |||
{{Footer Nav|game=Pokémon FireRed and LeafGreen|prevpage=Three Island|nextpage=Berry Forest}} | {{Footer Nav|game=Pokémon FireRed and LeafGreen|prevpage=Three Island|nextpage=Berry Forest}} | ||
Revision as of 01:29, 31 August 2016
Bond Bridge
Connecting the residents of Three Island with Berry Forest, Bond Bridge is a bit of a walk, but shouldn't be too much trouble if you've made it this far.

Shaken, not stirred
Bond Bridge offers a few more trainer battles. More importantly, Bond Bridge also allows you an opportunity to catch some Pokemon you might have missed up to this point, or caught but failed to evolve. After you are satisfied with your new Pokemon, continue west with your search for Lostelle.
Pokémon found
| FireRed | Level | Encounter Rate | LeafGreen | Level | Encounter Rate |
|---|---|---|---|---|---|
| 29-32 | 30% | 29-32 | 30% | ||
| 34-40 | 15% | 34-40 | 15% | ||
| 31 | 20% | 31 | 20% | ||
| 36 | 10% | 36 | 10% | ||
| 31 | 5% | 31 | 5% | ||
| 31 | 10% | 31 | 10% | ||
| 37-40 | 5% | 37-40 | 5% | ||
| 34 | 5% | 34 | 5% | ||
| Surfing | |||||
| 5-40 | 95% | 5-40 | 95% | ||
| 35-40 | 5% | 35-40 | 5% | ||
| Old Rod | |||||
| 5 | 100% | 5 | 100% | ||
| Good Rod | |||||
| 5-15 | 80% | 5-15 | 80% | ||
| 5-15 | 20% | 5-15 | 20% | ||
| Super Rod | |||||
| 15-25 | 80% | 15-25 | 80% | ||
| 15-25 | 15% | 15-25 | 15% | ||
| 25-35 | 4% | 25-35 | 4% | ||
| 25-35 | 1% | 25-35 | 1% | ||
Trainers
| Name | 1st | 2nd | 3rd | 4th | |
|---|---|---|---|---|---|
| 1 |  Joy & Meg Joy & Meg
|
||||
| 2 |  Violet Violet
|
||||
| 3 | |||||
| 4 | Nikki
|
||||
| 5 | |||||
| 6 | Tisha
|
Items
- Pearl (hidden): In the southwest corner of Bond Bridge
- Max Repel (hidden): In a rock near a female trainer
- Stardust (hidden): At the beach, western side, close to the Bridge.