(Added rematch link, reformatted images, combined surfing and grass tables) Tags: Mobile edit Mobile web edit |
|||
| (14 intermediate revisions by 9 users not shown) | |||
| Line 1: | Line 1: | ||
{{Header Nav|game=Pokémon FireRed and LeafGreen}} | {{Header Nav|game=Pokémon FireRed and LeafGreen}} | ||
Five Island is the final home of Team Rocket. You should prepare yourself for a final confrontation with these nefarious group!!! But after you are done, don't leave just yet, as riches soon await you! | |||
==Five Island Town== | ==Five Island Town== | ||
[[File: | [[File:Pokemon FRLG Five Island.png|thumb|350px|right|Five Island Town]] | ||
Five Island appears to show nothing worthy of attention at first sight. There isn't even a Poke Mart in sight! Despite this humble appearance, Five Island is in fact, one of the most exciting Sevii Islands around. | Five Island appears to show nothing worthy of attention at first sight. There isn't even a Poke Mart in sight! Despite this humble appearance, Five Island is in fact, one of the most exciting Sevii Islands around. | ||
If you head north, you'll encounter areas rich with trainers that will fill your coffers with lots of money and exp. However, it's best to head east first for a final battle with Team Rocket! | If you head north, you'll encounter areas rich with trainers that will fill your coffers with lots of money and exp. However, it's best to head east first for a final battle with Team Rocket! | ||
=== Pokémon | === Pokémon found=== | ||
{{ContentBoxContainer}} | |||
{{Pokemon/Wild|FRLG}} | |||
{{Pokemon/Wild header|Surfing}} | |||
{{Pokemon/Wild row|FRLG||072|5-40|65|bp=1}} | |||
{{Pokemon/Wild row|FRLG||073|35-45|5|bp=1}} | |||
{{Pokemon/Wild row|RS||187|5-15|30|bp=1}} | |||
|} | |||
</div> | |||
| | {{ContentBoxContainer}} | ||
{{Pokemon/Fishing|FR|1|1|1}} | |||
|- | {{Pokemon/Fishing row|FRLG|129|5|100|0|0|bp=1}} | ||
| | {{Pokemon/Fishing row|FRLG|116|5-15|0|80|0|bp=1}} | ||
| | {{Pokemon/Fishing row|FRLG|129|5-15|0|20|0|bp=1}} | ||
{{Pokemon/Fishing row|FRLG|054|25-35|0|0|1|bp=1}} | |||
{{Pokemon/Fishing row|FRLG|090|15-25|0|0|40|bp=1}} | |||
| | {{Pokemon/Fishing row|FRLG|116|15-25|0|0|40|bp=1}} | ||
| | {{Pokemon/Fishing row|FRLG|117|25-35|0|0|4|bp=1}} | ||
| | {{Pokemon/Fishing row|FRLG|130|15-25|0|0|15|bp=1}} | ||
|} | |||
| | {{Pokemon/Fishing|LG|1|1|1}} | ||
|5 | {{Pokemon/Fishing row|FRLG|129|5|100|0|0}} | ||
| | {{Pokemon/Fishing row|FRLG|098|5-15|0|80|0|bp=1}} | ||
| | {{Pokemon/Fishing row|FRLG|129|5-15|0|20|0}} | ||
| | {{Pokemon/Fishing row|FRLG|079|25-35|0|0|1|bp=1}} | ||
| | {{Pokemon/Fishing row|FRLG|098|15-25|0|0|40|bp=1}} | ||
| | {{Pokemon/Fishing row|FRLG|099|25-35|0|0|4|bp=1}} | ||
|5-15 | {{Pokemon/Fishing row|FRLG|120|15-25|0|0|40|bp=1}} | ||
| | {{Pokemon/Fishing row|FRLG|130|15-25|0|0|15}} | ||
| | |||
|- | |||
| | |||
| | |||
| | |||
| | |||
|- | |||
| | |||
| | |||
| | |||
| | |||
| | |||
| | |||
| | |||
| | |||
| | |||
| | |||
| | |||
| | |||
| | |||
| | |||
|15 | |||
| | |||
| | |||
| | |||
| | |||
| | |||
| | |||
|25-35 | |||
| | |||
| | |||
| | |||
|15-25 | |||
|40 | |||
| | |||
| | |||
| | |||
| | |||
| | |||
|15-25 | |||
| | |||
| | |||
| | |||
|25 | |||
| | |||
| | |||
|} | |} | ||
</div> | |||
==Five Island Meadow== | ==Five Island Meadow== | ||
[[File: | [[File:Pokemon FRLG Five Island Meadow.png|thumb|350px|right|Five Island Meadow]] | ||
Advance through the small grass maze and clear out the Rockets around. You can now enter the Warehouse, as you now should have both passwords ('''''"Goldeen need log"''''' and '''''"Yes, nah Chansey"'''''). | Advance through the small grass maze and clear out the Rockets around. You can now enter the Warehouse, as you now should have both passwords ('''''"Goldeen need log"''''' and '''''"Yes, nah Chansey"'''''). | ||
| Line 116: | Line 49: | ||
Before you go in, be sure to collect the two items from the area! | Before you go in, be sure to collect the two items from the area! | ||
=== Pokémon | === Pokémon found=== | ||
{ | {{ContentBoxContainer}} | ||
{{Pokemon/Wild|FR}} | |||
{{Pokemon/Wild row|FRLG||016|44|20|bp=1}} | |||
{{Pokemon/Wild row|FRLG||017|48,50|15|bp=1}} | |||
{{Pokemon/Wild row|FRLG||052|41|10|bp=1}} | |||
{{Pokemon/Wild row|FRLG||053|47,50|5|bp=1}} | |||
{{Pokemon/Wild row|FRLG||054|41|5|bp=1}} | |||
{{Pokemon/Wild row|RS||161|10,15|30|bp=1}} | |||
| | {{Pokemon/Wild row|RS||187|10,15|15|bp=1}} | ||
| | |} | ||
| | {{Pokemon/Wild|LG}} | ||
| | {{Pokemon/Wild row|FRLG||016|44|20}} | ||
| | {{Pokemon/Wild row|FRLG||017|48,50|15}} | ||
| | {{Pokemon/Wild row|FRLG||052|41|10}} | ||
| | {{Pokemon/Wild row|FRLG||053|47,50|5}} | ||
| | {{Pokemon/Wild row|FRLG||079|41|5|bp=1}} | ||
| | {{Pokemon/Wild row|RS||161|10,15|30}} | ||
| | {{Pokemon/Wild row|RS||187|10,15|15}} | ||
| | |} | ||
| | </div> | ||
| | {{ContentBoxContainer}} | ||
| | {{Pokemon/Wild|FRLG}} | ||
| | {{Pokemon/Wild header|Surfing}} | ||
| | {{Pokemon/Wild row|FRLG||072|5-40|65|bp=1}} | ||
| | {{Pokemon/Wild row|FRLG||073|35-45|5|bp=1}} | ||
|15 | {{Pokemon/Wild row|RS||187|5-15|30|bp=1}} | ||
| | |} | ||
| | </div> | ||
{{ContentBoxContainer}} | |||
{{Pokemon/Fishing|FR|1|1|1}} | |||
{{Pokemon/Fishing row|FRLG|129|5|100|0|0|bp=1}} | |||
| | {{Pokemon/Fishing row|FRLG|116|15|0|80|0|bp=1}} | ||
| | {{Pokemon/Fishing row|FRLG|129|5-15|0|20|0|bp=1}} | ||
| | {{Pokemon/Fishing row|FRLG|054|25-35|0|0|1|bp=1}} | ||
| | {{Pokemon/Fishing row|FRLG|116|15-25|0|0|40|bp=1}} | ||
| | {{Pokemon/Fishing row|FRLG|117|25-35|0|0|4|bp=1}} | ||
| | {{Pokemon/Fishing row|FRLG|130|15-25|0|0|15|bp=1}} | ||
| | {{Pokemon/Fishing row|RS|211|15-25|0|0|40|bp=1}} | ||
| | |} | ||
| | {{Pokemon/Fishing|LG|1|1|1}} | ||
| | {{Pokemon/Fishing row|FRLG|129|5|100|0|0|0}} | ||
|47 | {{Pokemon/Fishing row|FRLG|098|5-15|0|80|0|bp=1}} | ||
|5 | {{Pokemon/Fishing row|FRLG|129|5-15|0|20|0}} | ||
{{Pokemon/Fishing row|FRLG|079|25-35|0|0|1|bp=1}} | |||
{{Pokemon/Fishing row|FRLG|098|15-25|0|0|40|bp=1}} | |||
| | {{Pokemon/Fishing row|FRLG|099|25-35|0|0|4|bp=1}} | ||
| | {{Pokemon/Fishing row|FRLG|130|15-25|0|0|15}} | ||
| | {{Pokemon/Fishing row|RS|223|15-25|0|0|40|bp=1}} | ||
| | |||
| | |||
| | |||
| | |||
| | |||
| | |||
| | |||
|5-40 | |||
|65 | |||
|35- | |||
|5 | |||
| | |||
|5-15 | |||
|30 | |||
| | |||
| | |||
| | |||
| | |||
|5 | |||
|100 | |||
| | |||
| | |||
|80 | |||
| | |||
|5-15 | |||
| | |||
| | |||
| | |||
| | |||
| | |||
| | |||
| | |||
| | |||
| | |||
|- | |||
| | |||
|15-25 | |||
| | |||
| | |||
|15-25 | |||
|40 | |||
| | |||
| | |||
| | |||
| | |||
| | |||
| | |||
| | |||
| | |||
|15 | |||
| | |||
| | |||
| | |||
| | |||
| | |||
| | |||
|15-25 | |||
| | |||
| | |||
| | |||
| | |||
| | |||
| | |||
|25 | |||
| | |||
| | |||
|25 | |||
|1 | |||
|} | |} | ||
</div> | |||
===Trainers=== | ===Trainers=== | ||
{{ContentBoxContainer}} | |||
{ | {{Pokemon/Trainer|FRLG}} | ||
{{Pokemon/Trainer row|FRLG|Team Rocket Grunt||1536|gender=M}} | |||
{{Pokemon/Trainer mon|FRLG|019|48}} | |||
{{Pokemon/Trainer mon|FRLG|088|48}} | |||
{{Pokemon/Trainer mon|FRLG|089|48}} | |||
{{Pokemon/Trainer row|FRLG|Team Rocket Grunt||1536|gender=F}} | |||
{{Pokemon/Trainer mon|FRLG|023|48}} | |||
{{Pokemon/Trainer mon|FRLG|044|48}} | |||
{{Pokemon/Trainer mon|FRLG|044|48}} | |||
{{Pokemon/Trainer row|FRLG|Team Rocket Grunt||1568|gender=M}} | |||
{{Pokemon/Trainer mon|FRLG|109|49}} | |||
{{Pokemon/Trainer mon|FRLG|110|49}} | |||
| | |||
| | |||
| | |||
| | |||
|} | |} | ||
</div> | |||
===Items=== | ===Items=== | ||
*Max Potion: North of the | *Max Potion: North of the warehouse, after using Cut | ||
*PP Up: Surf south of the warehouse, head west and land on the small portion of grass | *PP Up: Surf south of the warehouse, head west and land on the small portion of grass | ||
==Rocket Warehouse== | ==Rocket Warehouse== | ||
[[File: | [[File:Pokemon FRLG Rocket Warehouse Map.png|thumb|350px|right|Rocket Warehouse]] | ||
This warehouse holds the final remnants of Team Rocket. The maze holds a lot of goodies inside, so take your time in exploring it and find them all, including TM36 {{bpm|Sludge Bomb}}!!! | This warehouse holds the final remnants of Team Rocket. The maze holds a lot of goodies inside, so take your time in exploring it and find them all, including TM36 {{bpm|Sludge Bomb}}!!! | ||
| Line 308: | Line 132: | ||
Refrain from heading back just yet. There is more to discover in the Sevii Islands region, including some truly powerful Pokemon! | Refrain from heading back just yet. There is more to discover in the Sevii Islands region, including some truly powerful Pokemon! | ||
===Trainers=== | ===Trainers=== | ||
{{ContentBoxContainer}} | |||
{ | {{Pokemon/Trainer|FRLG}} | ||
{{Pokemon/Trainer row|FRLG|Team Rocket Grunt||1568|gender=F}} | |||
{{Pokemon/Trainer mon|RS|228|49}} | |||
{{Pokemon/Trainer mon|RS|228|49}} | |||
{{Pokemon/Trainer row|FRLG|Team Rocket Grunt||1536|gender=M}} | |||
{{Pokemon/Trainer mon|FRLG|066|48}} | |||
{{Pokemon/Trainer mon|FRLG|066|48}} | |||
{{Pokemon/Trainer mon|FRLG|067|48}} | |||
{{Pokemon/Trainer row|FRLG|Team Rocket Grunt||1568|gender=M}} | |||
{{Pokemon/Trainer mon|FRLG|097|49}} | |||
{{Pokemon/Trainer mon|FRLG|097|49}} | |||
{{Pokemon/Trainer row|FRLG|Team Rocket Admin||1728|image=Pokemon FRLG Team Rocket Grunt♀.png}} | |||
{{Pokemon/Trainer mon|FRLG|089|52}} | |||
{{Pokemon/Trainer mon|FRLG|024|53}} | |||
| | {{Pokemon/Trainer mon|FRLG|045|54}} | ||
| | {{Pokemon/Trainer row|FRLG|Team Rocket Admin||1760|image=Pokemon FRLG Team Rocket Grunt♂.png}} | ||
| | {{Pokemon/Trainer mon|FRLG|042|53}} | ||
| | {{Pokemon/Trainer mon|FRLG|110|54}} | ||
| | {{Pokemon/Trainer mon|RS|229|55}} | ||
{{Pokemon/Trainer row|FRLG|Scientist|Gideon|2208}} | |||
{{Pokemon/Trainer mon|FRLG|100|46}} | |||
{{Pokemon/Trainer mon|FRLG|101|46}} | |||
{{Pokemon/Trainer mon|FRLG|081|46}} | |||
{{Pokemon/Trainer mon|FRLG|082|46}} | |||
| | {{Pokemon/Trainer mon|FRLG|137|46}} | ||
| | |||
| | |||
| | |||
| | |||
| | |||
| | |||
| | |||
| | |||
| | |||
| | |||
| | |||
| | |||
| | |||
| | |||
| | |||
| | |||
| | |||
| | |||
|} | |} | ||
</div> | |||
===Items=== | ===Items=== | ||
| Line 388: | Line 173: | ||
==Memorial Pillar== | ==Memorial Pillar== | ||
[[File: | [[File:Pokemon FRLG Memorial Pillar.png|thumb|350px|right|Memorial Pillar]] | ||
You'll find Memorial Pillar by surfing east from Five Island Meadow. You'll first reach a long island filled with trainers and some hidden items. | You'll find Memorial Pillar by surfing east from Five Island Meadow. You'll first reach a long island filled with trainers and some hidden items. | ||
| Line 395: | Line 180: | ||
===Trainers=== | ===Trainers=== | ||
{{ContentBoxContainer}} | |||
{{Pokemon/Trainer|FRLG}} | |||
{{Pokemon/Trainer row|FRLG|Bird Keeper|Milo|1176|notes=[[../Rematches#Bird Keeper Milo|Rematch]]}} | |||
{{Pokemon/Trainer mon|FRLG|016|47}} | |||
{{Pokemon/Trainer mon|FRLG|017|49}} | |||
{{Pokemon/Trainer row|FRLG|Bird Keeper|Chaz|1176|notes=[[../Rematches#Bird Keeper Chaz|Rematch]]}} | |||
{{Pokemon/Trainer mon|FRLG|021|47}} | |||
{{Pokemon/Trainer mon|FRLG|022|49}} | |||
{{Pokemon/Trainer row|FRLG|Bird Keeper|Harold|1176|notes=[[../Rematches#Bird Keeper Harold|Rematch]]}} | |||
{{Pokemon/Trainer mon|RS|163|47}} | |||
{{Pokemon/Trainer mon|RS|164|49}} | |||
|} | |||
</div> | |||
{| {{ | === Pokémon found=== | ||
{{ContentBoxContainer}} | |||
{{Pokemon/Wild|FRLG}} | |||
{{Pokemon/Wild row|RS||187|6,8,10,12,14,16|100|bp=1}} | |||
{{Pokemon/Wild header|Surfing}} | |||
{{Pokemon/Wild row|FRLG||072|5-40|65|bp=1}} | |||
| | {{Pokemon/Wild row|FRLG||073|35-45|5|bp=1}} | ||
|1 | {{Pokemon/Wild row|RS||187|5-15|30|bp=1}} | ||
| | |} | ||
| | </div> | ||
{{ContentBoxContainer}} | |||
| | {{Pokemon/Fishing|FR|1|1|1}} | ||
|- | {{Pokemon/Fishing row|FRLG|129|5|100|0|0|bp=1}} | ||
| | {{Pokemon/Fishing row|FRLG|116|15|0|80|0|bp=1}} | ||
| | {{Pokemon/Fishing row|FRLG|129|5-15|0|20|0|bp=1}} | ||
| | {{Pokemon/Fishing row|FRLG|054|25-35|0|0|1|bp=1}} | ||
{{Pokemon/Fishing row|FRLG|116|15-25|0|0|40|bp=1}} | |||
| | {{Pokemon/Fishing row|FRLG|117|25-35|0|0|4|bp=1}} | ||
|- | {{Pokemon/Fishing row|FRLG|130|15-25|0|0|15|bp=1}} | ||
| | {{Pokemon/Fishing row|RS|211|15-25|0|0|40|bp=1}} | ||
| | |||
| | |||
|} | |} | ||
{{Pokemon/Fishing|LG|1|1|1}} | |||
{{Pokemon/Fishing row|FRLG|129|5|100|0|0|0}} | |||
{| | {{Pokemon/Fishing row|FRLG|098|5-15|0|80|0|bp=1}} | ||
| | {{Pokemon/Fishing row|FRLG|129|5-15|0|20|0}} | ||
{{Pokemon/Fishing row|FRLG|079|25-35|0|0|1|bp=1}} | |||
{{Pokemon/Fishing row|FRLG|098|15-25|0|0|40|bp=1}} | |||
{{Pokemon/Fishing row|FRLG|099|25-35|0|0|4|bp=1}} | |||
{{Pokemon/Fishing row|FRLG|130|15-25|0|0|15}} | |||
{{Pokemon/Fishing row|RS|223|15-25|0|0|40|bp=1}} | |||
|100 | |||
| | |||
|5- | |||
| | |||
| | |||
| | |||
| | |||
| | |||
|5-15 | |||
| | |||
| | |||
|- | |||
| | |||
| | |||
|15-25 | |||
| | |||
|40 | |||
|25-35 | |||
| | |||
| | |||
| | |||
|15-25 | |||
| | |||
| | |||
|15-25 | |||
| | |||
| | |||
| | |||
|} | |} | ||
</div> | |||
===Items=== | ===Items=== | ||
| Line 535: | Line 236: | ||
==Water Labyrinth== | ==Water Labyrinth== | ||
[[File:Pokemon FRLG Water Labyrinth.png|thumb|350px|center|Water Labyrinth]] | |||
[[File: | |||
If you Surf north from Five Island Town, you will enter the Water Labyrinth. This is a water maze that you could easily bypass by heading north, towards Resort Gorgeous. Refrain from this for the moment and instead head west towards the small beach. | If you Surf north from Five Island Town, you will enter the Water Labyrinth. This is a water maze that you could easily bypass by heading north, towards Resort Gorgeous. Refrain from this for the moment and instead head west towards the small beach. | ||
| Line 544: | Line 244: | ||
Be aware that the Egg is not an item, it is technically a Pokemon, and in order to receive it you ''must'' have an empty spot in your party. Now you can head north. | Be aware that the Egg is not an item, it is technically a Pokemon, and in order to receive it you ''must'' have an empty spot in your party. Now you can head north. | ||
=== Pokémon | === Pokémon found=== | ||
{ | {{ContentBoxContainer}} | ||
{{Pokemon/Wild|FRLG}} | |||
{{Pokemon/Wild header|Surfing}} | |||
{{Pokemon/Wild row|FRLG||072|5-40|65|bp=1}} | |||
{{Pokemon/Wild row|FRLG||073|35-45|5|bp=1}} | |||
{{Pokemon/Wild row|RS||187|5-15|30|bp=1}} | |||
|} | |||
</div> | |||
| | {{ContentBoxContainer}} | ||
{{Pokemon/Fishing|FR|1|1|1}} | |||
|- | {{Pokemon/Fishing row|FRLG|129|5|100|0|0|bp=1}} | ||
| | {{Pokemon/Fishing row|FRLG|116|15|0|80|0|bp=1}} | ||
| | {{Pokemon/Fishing row|FRLG|129|5-15|0|20|0|bp=1}} | ||
{{Pokemon/Fishing row|FRLG|054|25-35|0|0|1|bp=1}} | |||
{{Pokemon/Fishing row|FRLG|116|15-25|0|0|40|bp=1}} | |||
| | {{Pokemon/Fishing row|FRLG|117|25-35|0|0|4|bp=1}} | ||
| | {{Pokemon/Fishing row|FRLG|130|15-25|0|0|15|bp=1}} | ||
| | {{Pokemon/Fishing row|RS|211|15-25|0|0|40|bp=1}} | ||
|} | |||
| | {{Pokemon/Fishing|LG|1|1|1}} | ||
|5 | {{Pokemon/Fishing row|FRLG|129|5|100|0|0|0}} | ||
| | {{Pokemon/Fishing row|FRLG|098|5-15|0|80|0|bp=1}} | ||
| | {{Pokemon/Fishing row|FRLG|129|5-15|0|20|0}} | ||
| | {{Pokemon/Fishing row|FRLG|079|25-35|0|0|1|bp=1}} | ||
| | {{Pokemon/Fishing row|FRLG|098|15-25|0|0|40|bp=1}} | ||
| | {{Pokemon/Fishing row|FRLG|099|25-35|0|0|4|bp=1}} | ||
|5-15 | {{Pokemon/Fishing row|FRLG|130|15-25|0|0|15}} | ||
| | {{Pokemon/Fishing row|RS|223|15-25|0|0|40|bp=1}} | ||
| | |||
|- | |||
| | |||
|- | |||
| | |||
| | |||
| | |||
| | |||
| | |||
| | |||
| | |||
| | |||
| | |||
|15-25 | |||
|40 | |||
| | |||
| | |||
| | |||
| | |||
| | |||
| | |||
| | |||
| | |||
| | |||
| | |||
| | |||
| | |||
|15 | |||
| | |||
| | |||
| | |||
| | |||
| | |||
| | |||
|15-25 | |||
| | |||
| | |||
| | |||
|25-35 | |||
| | |||
| | |||
|- | |||
| | |||
| | |||
| | |||
| | |||
|} | |} | ||
</div> | |||
===Trainers=== | ===Trainers=== | ||
{{ContentBoxContainer}} | |||
{ | {{Pokemon/Trainer|FRLG}} | ||
{{Pokemon/Trainer row|FRLG|Pokémon Breeder|Alize|1344|notes=[[../Rematches#Pokémon Breeder Alize|Rematch]]}} | |||
{{Pokemon/Trainer mon|FRLG|025|48}} | |||
{{Pokemon/Trainer mon|FRLG|035|48}} | |||
{{Pokemon/Trainer mon|RS|183|48}} | |||
|} | |} | ||
</div> | |||
==Resort Gorgeous== | ==Resort Gorgeous== | ||
[[File:Pokemon FRLG Resort Gorgeous.png|thumb|350px|center|Resort Gorgeous & Lost Cave]] | |||
[[File: | |||
Northeast of the Water Labyrinth lies the Resort Gorgeous zone. True to its name, this zone is home to some of the richest trainers in Kanto. This area is notable for its Lady trainers, who can become excellent sources of income. | Northeast of the Water Labyrinth lies the Resort Gorgeous zone. True to its name, this zone is home to some of the richest trainers in Kanto. This area is notable for its Lady trainers, who can become excellent sources of income. | ||
| Line 679: | Line 295: | ||
Additionally, both Lady trainers standing on the beach have Pokemon that are holding '''Nuggets''' or '''Stardust''', and will also hand over close to [[File:Pokebuck.png]]10,000 per fight. | Additionally, both Lady trainers standing on the beach have Pokemon that are holding '''Nuggets''' or '''Stardust''', and will also hand over close to [[File:Pokebuck.png]]10,000 per fight. | ||
=== | {{sidebar|float=right|width=150px|title=Treasure!!!|contents='''''Keep this area in mind if you find yourself short on money.''''' | ||
Simply use '''VS Seeker''' with the Lady trainers and in combination with the '''Amulet Coin''', and a couple of Pokemon that know {{bpm|Thief}} or {{bpm|Covet}}, you could make close to [[File:Pokebuck.png]]50,000 with only two easy challenges}} | |||
=== Pokémon found=== | |||
{ | {{ContentBoxContainer}} | ||
{{Pokemon/Wild|FRLG}} | |||
{{Pokemon/Wild header|Surfing}} | |||
{{Pokemon/Wild row|FRLG||072|5-40|65|bp=1}} | |||
{{Pokemon/Wild row|FRLG||073|35-45|5|bp=1}} | |||
{{Pokemon/Wild row|RS||187|5-15|30|bp=1}} | |||
|} | |||
</div> | |||
| | {{ContentBoxContainer}} | ||
{{Pokemon/Fishing|FR|1|1|1}} | |||
|- | {{Pokemon/Fishing row|FRLG|129|5|100|0|0|bp=1}} | ||
| | {{Pokemon/Fishing row|FRLG|116|15|0|80|0|bp=1}} | ||
| | {{Pokemon/Fishing row|FRLG|129|5-15|0|20|0|bp=1}} | ||
{{Pokemon/Fishing row|FRLG|054|25-35|0|0|1|bp=1}} | |||
{{Pokemon/Fishing row|FRLG|116|15-25|0|0|40|bp=1}} | |||
| | {{Pokemon/Fishing row|FRLG|117|25-35|0|0|4|bp=1}} | ||
| | {{Pokemon/Fishing row|FRLG|130|15-25|0|0|15|bp=1}} | ||
| | {{Pokemon/Fishing row|RS|211|15-25|0|0|40|bp=1}} | ||
|} | |||
| | {{Pokemon/Fishing|LG|1|1|1}} | ||
|5 | {{Pokemon/Fishing row|FRLG|129|5|100|0|0|0}} | ||
| | {{Pokemon/Fishing row|FRLG|098|5-15|0|80|0|bp=1}} | ||
| | {{Pokemon/Fishing row|FRLG|129|5-15|0|20|0}} | ||
| | {{Pokemon/Fishing row|FRLG|079|25-35|0|0|1|bp=1}} | ||
| | {{Pokemon/Fishing row|FRLG|098|15-25|0|0|40|bp=1}} | ||
| | {{Pokemon/Fishing row|FRLG|099|25-35|0|0|4|bp=1}} | ||
|5-15 | {{Pokemon/Fishing row|FRLG|130|15-25|0|0|15}} | ||
| | {{Pokemon/Fishing row|RS|223|15-25|0|0|40|bp=1}} | ||
| | |||
|- | |||
| | |||
| | |||
| | |||
| | |||
|- | |||
| | |||
| | |||
| | |||
| | |||
| | |||
| | |||
| | |||
| | |||
| | |||
| | |||
| | |||
| | |||
| | |||
| | |||
|15 | |||
| | |||
| | |||
| | |||
| | |||
| | |||
| | |||
|25-35 | |||
| | |||
| | |||
| | |||
|15-25 | |||
|40 | |||
| | |||
| | |||
| | |||
| | |||
| | |||
|15-25 | |||
| | |||
| | |||
|15-25 | |||
| | |||
| | |||
| | |||
|} | |} | ||
</div> | |||
===Trainers=== | ===Trainers=== | ||
{ | {{ContentBoxContainer}} | ||
{{Pokemon/Trainer|FRLG}} | |||
{{Pokemon/Trainer row|FRLG|Painter|Rayna|800|notes=[[../Rematches#Painter Rayna|Rematch]]}} | |||
{{Pokemon/Trainer mon|RS|235|50}} | |||
{{Pokemon/Trainer row|FRLG|Painter|Daisy|800}} | |||
{{Pokemon/Trainer mon|RS|235|50}} | |||
{{Pokemon/Trainer row|FRLG|Painter|Celina|800}} | |||
{{Pokemon/Trainer mon|RS|235|50}} | |||
{{Pokemon/Trainer row|FRLG|Youngster|Destin|768|notes=[[../Rematches#Youngster Destin|Rematch]]}} | |||
{{Pokemon/Trainer mon|FRLG|020|48}} | |||
{{Pokemon/Trainer mon|FRLG|017|48}} | |||
| | {{Pokemon/Trainer row|FRLG|Lady|Jacki|10000}} | ||
| | {{Pokemon/Trainer mon|RS|187|48}} | ||
| | {{Pokemon/Trainer mon|RS|188|50}} | ||
| | {{Pokemon/Trainer row|FRLG|Lady|Gillian|9800}} | ||
| | {{Pokemon/Trainer mon|RS|179|47}} | ||
| | {{Pokemon/Trainer mon|RS|179|48}} | ||
{{Pokemon/Trainer mon|RS|180|49}} | |||
| | {{Pokemon/Trainer row|FRLG|Swimmer♂|Toby|192}} | ||
| | {{Pokemon/Trainer mon|FRLG|061|48}} | ||
| | {{Pokemon/Trainer mon|FRLG|072|48}} | ||
| | {{Pokemon/Trainer mon|FRLG|073|48}} | ||
|[[ | |||
| | |||
| | |||
| | |||
| | |||
| | |||
| | |||
| | |||
|} | |} | ||
</div> | |||
===Items=== | ===Items=== | ||
| Line 854: | Line 371: | ||
==Lost Cave== | ==Lost Cave== | ||
This is a confusing cave filled with fog, and exits that never seem to go where you want to go. Lady Selphy is lost here and you need to "rescue" her. And by that I mean battle her so she goes home. | |||
There's a pattern to the cave. The path to reach Lady Selphy is actually pointed out by the number of rocks in the room. The number of rocks actually refers to the position in a clock, so three rocks is 3 o'clock, so you would need to head east, and so forth. If you head in the ''opposite'' direction to the clue, you will eventually reach an item. But if you don't want to think it through, just follow this table to reach your objective. | |||
Also a little side not, when you are in a room with item the chances to get murkrow and misdreavus are a lot higher so stick in that room til you catch one. | |||
{| {{prettytable|notwide=1|float=center}} | {| {{prettytable|notwide=1|float=center}} | ||
| Line 863: | Line 381: | ||
|colspan="2"|Paths | |colspan="2"|Paths | ||
|- | |- | ||
|[[File:Pokemon FRLG Lady.png]] | |[[File:Pokemon FRLG Lady.png]]Selphy||{{Kbd|right}} {{Kbd|up}} {{Kbd|down}} {{Kbd|down}} {{Kbd|right}} {{Kbd|left}}{{Kbd|down}} {{Kbd|right}} {{Kbd|up}} | ||
|- | |- | ||
|Lax Incense||{{Kbd|right}} {{Kbd|down}} | |Lax Incense||{{Kbd|right}} {{Kbd|down}} | ||
| Line 875: | Line 393: | ||
|Silk Scarf*||{{Kbd|right}} {{Kbd|up}} {{Kbd|down}} {{Kbd|down}} {{Kbd|right}} {{Kbd|left}} {{Kbd|down}} {{Kbd|right}} {{Kbd|up}} | |Silk Scarf*||{{Kbd|right}} {{Kbd|up}} {{Kbd|down}} {{Kbd|down}} {{Kbd|right}} {{Kbd|left}} {{Kbd|down}} {{Kbd|right}} {{Kbd|up}} | ||
|} | |} | ||
*''Silk Scarf is only available after defeating Lady | *''Silk Scarf is only available after defeating Lady Selphy'' | ||
Beat Lady | Beat Lady Selphy's two Persians to get her to go home. Mind you, this is the only time you will get to battle her, so come prepared with the '''Amulet Coin''' and a couple of Pokemon that know {{bpm|Thief}}, so you can reap more rewards from battling her! | ||
After you are done collecting the items, head to Seven Island for your next challenge! | After you are done collecting the items, head to Seven Island for your next challenge! | ||
=== Pokémon | === Pokémon found=== | ||
{ | {{ContentBoxContainer}} | ||
{{Pokemon/Wild|FR}} | |||
{{Pokemon/Wild header|Selphy path}} | |||
{{Pokemon/Wild row|FRLG||041|37|20|bp=1}} | |||
{{Pokemon/Wild row|FRLG||042|41,43|20|bp=1}} | |||
{{Pokemon/Wild row|FRLG||092|38, 40|25|bp=1}} | |||
{{Pokemon/Wild row|FRLG||093|44,46,48,50,52|30|bp=1}} | |||
{{Pokemon/Wild row|RS||198|22|5|bp=1}} | |||
|} | |||
| | {{Pokemon/Wild|LG}} | ||
{{Pokemon/Wild header|Selphy path}} | |||
| | {{Pokemon/Wild row|FRLG||041|37|20}} | ||
| | {{Pokemon/Wild row|FRLG||042|41,43|20}} | ||
| | {{Pokemon/Wild row|FRLG||092|38,40|25}} | ||
|38 | {{Pokemon/Wild row|FRLG||093|44,46,48,50,52|30}} | ||
|25 | {{Pokemon/Wild row|RS||200|22|5|bp=1}} | ||
|} | |||
</div> | |||
|44 | {{ContentBoxContainer}} | ||
|30 | {{Pokemon/Wild|FR}} | ||
{{Pokemon/Wild header|Item room}} | |||
| | {{Pokemon/Wild row|FRLG||041|37|20|bp=1}} | ||
{{Pokemon/Wild row|FRLG||042|41|10|bp=1}} | |||
{{Pokemon/Wild row|FRLG||092|40|20|bp=1}} | |||
{{Pokemon/Wild row|FRLG||093|44,46,48,50,52|30|bp=1}} | |||
{{Pokemon/Wild row|RS||198|15,20,22|20|bp=1}} | |||
|37 | |||
|20 | |||
| | |||
|41 | |||
| | |||
| | |||
| | |||
| | |||
| | |||
| | |||
| | |||
| | |||
| | |||
|22 | |||
| | |||
| | |||
|} | |} | ||
{{Pokemon/Wild|LG}} | |||
{{Pokemon/Wild header|Item room}} | |||
{{Pokemon/Wild row|FRLG||041|37|20}} | |||
{{Pokemon/Wild row|FRLG||042|41|10}} | |||
{{Pokemon/Wild row|FRLG||092|40|20}} | |||
{{Pokemon/Wild row|FRLG||093|44,46,48,50,52|30}} | |||
{{Pokemon/Wild row|RS||200|15,20,22|20|bp=1}} | |||
| | |||
| | |||
| | |||
|40 | |||
|20 | |||
| | |||
| | |||
|44 | |||
|30 | |||
| | |||
|20 | |||
|20 | |||
|} | |} | ||
</div> | |||
===Trainers=== | ===Trainers=== | ||
{ | {{ContentBoxContainer}} | ||
{{Pokemon/Trainer|FRLG}} | |||
{{Pokemon/Trainer row|FRLG|Ruin Maniac|Lawson|2352}} | |||
{{Pokemon/Trainer mon|FRLG|095|47}} | |||
{{Pokemon/Trainer mon|FRLG|075|48}} | |||
{{Pokemon/Trainer mon|FRLG|105|49}} | |||
{{Pokemon/Trainer row|FRLG|Psychic|Laura|980|gender=F}} | |||
{{Pokemon/Trainer mon|RS|177|48}} | |||
{{Pokemon/Trainer mon|RS|177|48}} | |||
{{Pokemon/Trainer mon|RS|178|49}} | |||
{{Pokemon/Trainer row|FRLG|Lady|Selphy|9800}} | |||
{{Pokemon/Trainer mon|FRLG|053|49}} | |||
{{Pokemon/Trainer mon|FRLG|053|49}} | |||
| | |||
| | |||
| | |||
| | |||
| | |||
| | |||
| | |||
| | |||
| | |||
|} | |} | ||
</div> | |||
==New Pokémon== | ==New Pokémon== | ||
{{ContentBoxContainer}} | |||
{{Pokemon/New|title=#187 Hoppip|contents={{PokePic|Hoppip|left}} | |||
{{bp|Hoppip}} is yet another Johto Pokemon with an unusual type combination. A Flying/Grass type, Hoppip is actually available all over the Five Island zones, even while Surfing!! | |||
| | |||
Hoppip has great speed stats, and its type combination can lead to new and unusual move combinations. Unfortunately, Hoppip's other stats are quite low, its learnset is mediocre at best, and it cannot even learn Fly. Best leave Hoppip in your PC. | Hoppip has great speed stats, and its type combination can lead to new and unusual move combinations. Unfortunately, Hoppip's other stats are quite low, its learnset is mediocre at best, and it cannot even learn Fly. Best leave Hoppip in your PC. | ||
Hoppip evolves to {{bp|Jumpluff}} at level 27. | Hoppip evolves to {{bp|Jumpluff}} at level 27.}} | ||
| | {{Pokemon/New|title=#175 Togepi|contents={{PokePic|Togepi|right}} | ||
Fans of the anime can easily recognize {{bp|Togepi}}. In this generation, Togepi is a Normal type Pokemon that must be hatched to be obtained. | |||
Togepi can only shine once it evolves to {{bp|Togetic}} by increasing its friendship levels. Once it evolves, Togetic is granted powerful Defense, Spc Atk and Spc Def stats. Its moveset is filled with mostly support moves, such as {{bpm|Wish}}, and {{bpm|Follow Me}}. | Togepi can only shine once it evolves to {{bp|Togetic}} by increasing its friendship levels. Once it evolves, Togetic is granted powerful Defense, Spc Atk and Spc Def stats. Its moveset is filled with mostly support moves, such as {{bpm|Wish}}, and {{bpm|Follow Me}}. | ||
Togetic makes a good wall Pokemon, but you'll probably have to use some TM's on it to increase its versatility. | Togetic makes a good wall Pokemon, but you'll probably have to use some TM's on it to increase its versatility.}} | ||
| | {{Pokemon/New|title=#198 Murkrow|contents={{PokePic|Murkrow|left}} | ||
{{bp|Murkrow}}, exclusive to Fire Red, adds yet another strange bird to the game. As a Dark/Flying Pokemon, it carries decent Atack, Spc Atk and Speed stats. | |||
| | |||
Murkrow is a decent choice if you wish to change your current Flying Pokemon, as it is one of the few Dark choices in FireRed, and it is capable of learning {{bpm|Faint Attack}} by level up, as well as some decent moves from TM's. | Murkrow is a decent choice if you wish to change your current Flying Pokemon, as it is one of the few Dark choices in FireRed, and it is capable of learning {{bpm|Faint Attack}} by level up, as well as some decent moves from TM's.}} | ||
| | {{Pokemon/New|title=#200 Misdreavus|contents={{PokePic|Misdreavus|right}} | ||
{{bp|Misdreavus}}, exclusive to LeafGreen, is another addition to the very small Ghost type group in this Generation. | |||
Misdreavus provides a benefit absent on the other Ghost Pokemon you've encountered before. Misdreavus is a pure Ghost type, unlike the Gastly group, and so it is more resistant to Psychic moves that have previously been so difficult to counter up to this point. | Misdreavus provides a benefit absent on the other Ghost Pokemon you've encountered before. Misdreavus is a pure Ghost type, unlike the Gastly group, and so it is more resistant to Psychic moves that have previously been so difficult to counter up to this point. | ||
If you want to use Misdreavus in your team, you'll have to teach it some TM's, including {{bpm|Psychic}} and {{bpm|Shadow Ball}}. | If you want to use Misdreavus in your team, you'll have to teach it some TM's, including {{bpm|Psychic}} and {{bpm|Shadow Ball}}.}} | ||
</div> | |||
{{Footer Nav|game=Pokémon FireRed and LeafGreen|prevpage=Six Island|nextpage=Seven Island}} | {{Footer Nav|game=Pokémon FireRed and LeafGreen|prevpage=Six Island|nextpage=Seven Island}} | ||
Latest revision as of 18:47, 9 April 2024
Five Island is the final home of Team Rocket. You should prepare yourself for a final confrontation with these nefarious group!!! But after you are done, don't leave just yet, as riches soon await you!
Five Island Town[edit]
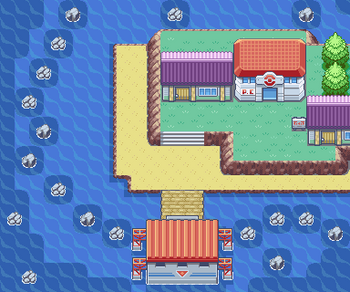
Five Island appears to show nothing worthy of attention at first sight. There isn't even a Poke Mart in sight! Despite this humble appearance, Five Island is in fact, one of the most exciting Sevii Islands around.
If you head north, you'll encounter areas rich with trainers that will fill your coffers with lots of money and exp. However, it's best to head east first for a final battle with Team Rocket!
Pokémon found[edit]
| FireRed and LeafGreen | |||||||||||||||||||||||||||||||||||||||||||||||||||||||||||||||||||||||||||||||||||||||||||||||||||
|---|---|---|---|---|---|---|---|---|---|---|---|---|---|---|---|---|---|---|---|---|---|---|---|---|---|---|---|---|---|---|---|---|---|---|---|---|---|---|---|---|---|---|---|---|---|---|---|---|---|---|---|---|---|---|---|---|---|---|---|---|---|---|---|---|---|---|---|---|---|---|---|---|---|---|---|---|---|---|---|---|---|---|---|---|---|---|---|---|---|---|---|---|---|---|---|---|---|---|---|
| Pokémon | Level | Rate | |||||||||||||||||||||||||||||||||||||||||||||||||||||||||||||||||||||||||||||||||||||||||||||||||
| Surfing | |||||||||||||||||||||||||||||||||||||||||||||||||||||||||||||||||||||||||||||||||||||||||||||||||||
| Tentacool | 5-40 | 65% | |||||||||||||||||||||||||||||||||||||||||||||||||||||||||||||||||||||||||||||||||||||||||||||||||
| Tentacruel | 35-45 | 5% | |||||||||||||||||||||||||||||||||||||||||||||||||||||||||||||||||||||||||||||||||||||||||||||||||
| Hoppip | 5-15 | 30% | |||||||||||||||||||||||||||||||||||||||||||||||||||||||||||||||||||||||||||||||||||||||||||||||||
| FireRed | |||||
|---|---|---|---|---|---|
| Pokémon | Level | Old Rod | Good Rod | Super Rod | |
| Magikarp | 5 | 100% | - | - | |
| Horsea | 5-15 | - | 80% | - | |
| Magikarp | 5-15 | - | 20% | - | |
| Psyduck | 25-35 | - | - | 1% | |
| Shellder | 15-25 | - | - | 40% | |
| Horsea | 15-25 | - | - | 40% | |
| Seadra | 25-35 | - | - | 4% | |
| Gyarados | 15-25 | - | - | 15% | |
| LeafGreen | |||||
|---|---|---|---|---|---|
| Pokémon | Level | Old Rod | Good Rod | Super Rod | |
| Magikarp | 5 | 100% | - | - | |
| Krabby | 5-15 | - | 80% | - | |
| Magikarp | 5-15 | - | 20% | - | |
| Slowpoke | 25-35 | - | - | 1% | |
| Krabby | 15-25 | - | - | 40% | |
| Kingler | 25-35 | - | - | 4% | |
| Staryu | 15-25 | - | - | 40% | |
| Gyarados | 15-25 | - | - | 15% | |
Five Island Meadow[edit]
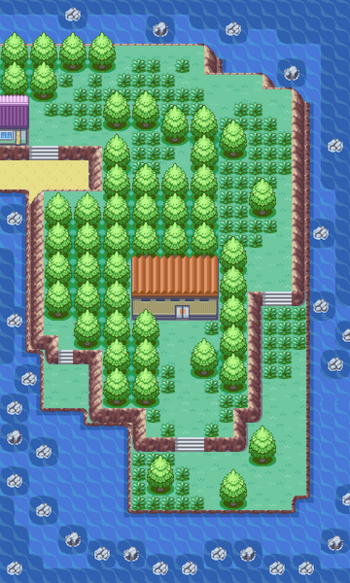
Advance through the small grass maze and clear out the Rockets around. You can now enter the Warehouse, as you now should have both passwords ("Goldeen need log" and "Yes, nah Chansey").
Before you go in, be sure to collect the two items from the area!
Pokémon found[edit]
| FireRed | |||
|---|---|---|---|
| Pokémon | Level | Rate | |
| Pidgey | 44 | 20% | |
| Pidgeotto | 48,50 | 15% | |
| Meowth | 41 | 10% | |
| Persian | 47,50 | 5% | |
| Psyduck | 41 | 5% | |
| Sentret | 10,15 | 30% | |
| Hoppip | 10,15 | 15% | |
| LeafGreen | |||
|---|---|---|---|
| Pokémon | Level | Rate | |
| Pidgey | 44 | 20% | |
| Pidgeotto | 48,50 | 15% | |
| Meowth | 41 | 10% | |
| Persian | 47,50 | 5% | |
| Slowpoke | 41 | 5% | |
| Sentret | 10,15 | 30% | |
| Hoppip | 10,15 | 15% | |
| FireRed and LeafGreen | |||||||||||||||||||||||||||||||||||||||||||||||||||||||||||||||||||||||||||||||||||||||||||||||||||
|---|---|---|---|---|---|---|---|---|---|---|---|---|---|---|---|---|---|---|---|---|---|---|---|---|---|---|---|---|---|---|---|---|---|---|---|---|---|---|---|---|---|---|---|---|---|---|---|---|---|---|---|---|---|---|---|---|---|---|---|---|---|---|---|---|---|---|---|---|---|---|---|---|---|---|---|---|---|---|---|---|---|---|---|---|---|---|---|---|---|---|---|---|---|---|---|---|---|---|---|
| Pokémon | Level | Rate | |||||||||||||||||||||||||||||||||||||||||||||||||||||||||||||||||||||||||||||||||||||||||||||||||
| Surfing | |||||||||||||||||||||||||||||||||||||||||||||||||||||||||||||||||||||||||||||||||||||||||||||||||||
| Tentacool | 5-40 | 65% | |||||||||||||||||||||||||||||||||||||||||||||||||||||||||||||||||||||||||||||||||||||||||||||||||
| Tentacruel | 35-45 | 5% | |||||||||||||||||||||||||||||||||||||||||||||||||||||||||||||||||||||||||||||||||||||||||||||||||
| Hoppip | 5-15 | 30% | |||||||||||||||||||||||||||||||||||||||||||||||||||||||||||||||||||||||||||||||||||||||||||||||||
| FireRed | |||||
|---|---|---|---|---|---|
| Pokémon | Level | Old Rod | Good Rod | Super Rod | |
| Magikarp | 5 | 100% | - | - | |
| Horsea | 15 | - | 80% | - | |
| Magikarp | 5-15 | - | 20% | - | |
| Psyduck | 25-35 | - | - | 1% | |
| Horsea | 15-25 | - | - | 40% | |
| Seadra | 25-35 | - | - | 4% | |
| Gyarados | 15-25 | - | - | 15% | |
| Qwilfish | 15-25 | - | - | 40% | |
| LeafGreen | |||||
|---|---|---|---|---|---|
| Pokémon | Level | Old Rod | Good Rod | Super Rod | |
| Magikarp | 5 | 100% | - | - | |
| Krabby | 5-15 | - | 80% | - | |
| Magikarp | 5-15 | - | 20% | - | |
| Slowpoke | 25-35 | - | - | 1% | |
| Krabby | 15-25 | - | - | 40% | |
| Kingler | 25-35 | - | - | 4% | |
| Gyarados | 15-25 | - | - | 15% | |
| Remoraid | 15-25 | - | - | 40% | |
Trainers[edit]
| FireRed and LeafGreen | |
|---|---|
| Trainer | Pokemon |
 Team Rocket Grunt Reward: |
|
 Team Rocket Grunt Reward: |
|
 Team Rocket Grunt Reward: |
|
Items[edit]
- Max Potion: North of the warehouse, after using Cut
- PP Up: Surf south of the warehouse, head west and land on the small portion of grass
Rocket Warehouse[edit]
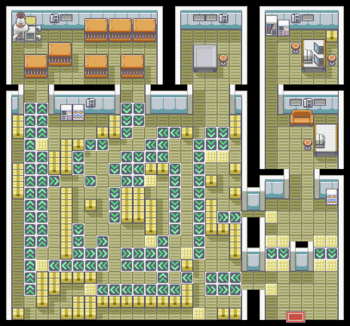
This warehouse holds the final remnants of Team Rocket. The maze holds a lot of goodies inside, so take your time in exploring it and find them all, including TM36 Sludge Bomb!!!
Tackle the Team Rocket members, and once you beat the Admin trainers, they will take a look at your Earth Badge and realize that the only way you could have acquired is by beating Giovanni.
Team Rocket is now fully disbanded and you can now fight that miserable scientist who stole the Sapphire back in Dotted Cave. Take him out so you can reacquire the precious gem and you will finally be able to end your quest for Celio!!!
Refrain from heading back just yet. There is more to discover in the Sevii Islands region, including some truly powerful Pokemon!
Trainers[edit]
Items[edit]
- Up-Grade: In the north room above the maze
- Pearl: Middle of the maze
- Big Pearl: South of the maze
- TM36 Sludge Bomb: In the north room above the maze
- Net Ball: Hidden on a box in the middle of the maze
- Nest Ball: Hidden on a box near Gideon
- Sapphire (Key Item): After defeating Gideon
Memorial Pillar[edit]
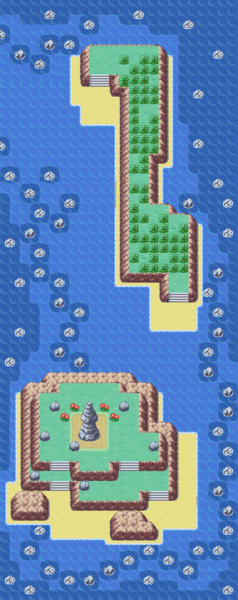
You'll find Memorial Pillar by surfing east from Five Island Meadow. You'll first reach a long island filled with trainers and some hidden items.
If you surf south, you'll reach a small landing with a big statue. This huge rock is in fact a memorial to a trainer's Onix, Tectonix. If you leave a Lemonade at the memorial, its trainer will give you TM42 Facade. There's also a Metal Coat on the left. After you're done, return to Five Island Town.
Trainers[edit]
| FireRed and LeafGreen | |
|---|---|
| Trainer | Pokemon |
 Bird Keeper Milo Reward: Rematch |
|
 Bird Keeper Chaz Reward: Rematch |
|
 Bird Keeper Harold Reward: Rematch |
|
Pokémon found[edit]
| FireRed and LeafGreen | |||||||||||||||||||||||||||||||||||||||||||||||||||||||||||||||||||||||||||||||||||||||||||||||||||
|---|---|---|---|---|---|---|---|---|---|---|---|---|---|---|---|---|---|---|---|---|---|---|---|---|---|---|---|---|---|---|---|---|---|---|---|---|---|---|---|---|---|---|---|---|---|---|---|---|---|---|---|---|---|---|---|---|---|---|---|---|---|---|---|---|---|---|---|---|---|---|---|---|---|---|---|---|---|---|---|---|---|---|---|---|---|---|---|---|---|---|---|---|---|---|---|---|---|---|---|
| Pokémon | Level | Rate | |||||||||||||||||||||||||||||||||||||||||||||||||||||||||||||||||||||||||||||||||||||||||||||||||
| Hoppip | 6,8,10,12,14,16 | 100% | |||||||||||||||||||||||||||||||||||||||||||||||||||||||||||||||||||||||||||||||||||||||||||||||||
| Surfing | |||||||||||||||||||||||||||||||||||||||||||||||||||||||||||||||||||||||||||||||||||||||||||||||||||
| Tentacool | 5-40 | 65% | |||||||||||||||||||||||||||||||||||||||||||||||||||||||||||||||||||||||||||||||||||||||||||||||||
| Tentacruel | 35-45 | 5% | |||||||||||||||||||||||||||||||||||||||||||||||||||||||||||||||||||||||||||||||||||||||||||||||||
| Hoppip | 5-15 | 30% | |||||||||||||||||||||||||||||||||||||||||||||||||||||||||||||||||||||||||||||||||||||||||||||||||
| FireRed | |||||
|---|---|---|---|---|---|
| Pokémon | Level | Old Rod | Good Rod | Super Rod | |
| Magikarp | 5 | 100% | - | - | |
| Horsea | 15 | - | 80% | - | |
| Magikarp | 5-15 | - | 20% | - | |
| Psyduck | 25-35 | - | - | 1% | |
| Horsea | 15-25 | - | - | 40% | |
| Seadra | 25-35 | - | - | 4% | |
| Gyarados | 15-25 | - | - | 15% | |
| Qwilfish | 15-25 | - | - | 40% | |
| LeafGreen | |||||
|---|---|---|---|---|---|
| Pokémon | Level | Old Rod | Good Rod | Super Rod | |
| Magikarp | 5 | 100% | - | - | |
| Krabby | 5-15 | - | 80% | - | |
| Magikarp | 5-15 | - | 20% | - | |
| Slowpoke | 25-35 | - | - | 1% | |
| Krabby | 15-25 | - | - | 40% | |
| Kingler | 25-35 | - | - | 4% | |
| Gyarados | 15-25 | - | - | 15% | |
| Remoraid | 15-25 | - | - | 40% | |
Items[edit]
- Razz Berry: Long island (hidden)
- Sitrus Berry: Long island (hidden)
- Bluk Berry: Long island (hidden)
- TM42 Facade: Leave a Lemonade at the memorial
- Metal Coat: Near the memorial on the south-west
- Big Pearl: On the beach on the south west (hidden)
Water Labyrinth[edit]

If you Surf north from Five Island Town, you will enter the Water Labyrinth. This is a water maze that you could easily bypass by heading north, towards Resort Gorgeous. Refrain from this for the moment and instead head west towards the small beach.
You'll find an old man on the land. Talk to him, and after examining the friendship level of your first Pokemon he'll give you an Egg, that once hatched will yield Togepi!!!
Be aware that the Egg is not an item, it is technically a Pokemon, and in order to receive it you must have an empty spot in your party. Now you can head north.
Pokémon found[edit]
| FireRed and LeafGreen | |||||||||||||||||||||||||||||||||||||||||||||||||||||||||||||||||||||||||||||||||||||||||||||||||||
|---|---|---|---|---|---|---|---|---|---|---|---|---|---|---|---|---|---|---|---|---|---|---|---|---|---|---|---|---|---|---|---|---|---|---|---|---|---|---|---|---|---|---|---|---|---|---|---|---|---|---|---|---|---|---|---|---|---|---|---|---|---|---|---|---|---|---|---|---|---|---|---|---|---|---|---|---|---|---|---|---|---|---|---|---|---|---|---|---|---|---|---|---|---|---|---|---|---|---|---|
| Pokémon | Level | Rate | |||||||||||||||||||||||||||||||||||||||||||||||||||||||||||||||||||||||||||||||||||||||||||||||||
| Surfing | |||||||||||||||||||||||||||||||||||||||||||||||||||||||||||||||||||||||||||||||||||||||||||||||||||
| Tentacool | 5-40 | 65% | |||||||||||||||||||||||||||||||||||||||||||||||||||||||||||||||||||||||||||||||||||||||||||||||||
| Tentacruel | 35-45 | 5% | |||||||||||||||||||||||||||||||||||||||||||||||||||||||||||||||||||||||||||||||||||||||||||||||||
| Hoppip | 5-15 | 30% | |||||||||||||||||||||||||||||||||||||||||||||||||||||||||||||||||||||||||||||||||||||||||||||||||
| FireRed | |||||
|---|---|---|---|---|---|
| Pokémon | Level | Old Rod | Good Rod | Super Rod | |
| Magikarp | 5 | 100% | - | - | |
| Horsea | 15 | - | 80% | - | |
| Magikarp | 5-15 | - | 20% | - | |
| Psyduck | 25-35 | - | - | 1% | |
| Horsea | 15-25 | - | - | 40% | |
| Seadra | 25-35 | - | - | 4% | |
| Gyarados | 15-25 | - | - | 15% | |
| Qwilfish | 15-25 | - | - | 40% | |
| LeafGreen | |||||
|---|---|---|---|---|---|
| Pokémon | Level | Old Rod | Good Rod | Super Rod | |
| Magikarp | 5 | 100% | - | - | |
| Krabby | 5-15 | - | 80% | - | |
| Magikarp | 5-15 | - | 20% | - | |
| Slowpoke | 25-35 | - | - | 1% | |
| Krabby | 15-25 | - | - | 40% | |
| Kingler | 25-35 | - | - | 4% | |
| Gyarados | 15-25 | - | - | 15% | |
| Remoraid | 15-25 | - | - | 40% | |
Trainers[edit]
| FireRed and LeafGreen | |
|---|---|
| Trainer | Pokemon |
 Pokémon Breeder Alize Reward: Rematch |
|
Resort Gorgeous[edit]

Northeast of the Water Labyrinth lies the Resort Gorgeous zone. True to its name, this zone is home to some of the richest trainers in Kanto. This area is notable for its Lady trainers, who can become excellent sources of income.
Upon arriving to the resort, you'll find that the house in the middle of the island will be empty. This is only temporary though, as its owner is currently lost within the properly named Lost Cave. Once you rescue her, Lady Selphie will take residence within the house and request (more like demand) that you show her a particular Pokemon. If you do so before walking 250 steps, Selphie's butler will reward you with an exciting item, which may even be the rare Luxury Ball.
Additionally, both Lady trainers standing on the beach have Pokemon that are holding Nuggets or Stardust, and will also hand over close to ![]() 10,000 per fight.
10,000 per fight.
Pokémon found[edit]
| FireRed and LeafGreen | |||||||||||||||||||||||||||||||||||||||||||||||||||||||||||||||||||||||||||||||||||||||||||||||||||
|---|---|---|---|---|---|---|---|---|---|---|---|---|---|---|---|---|---|---|---|---|---|---|---|---|---|---|---|---|---|---|---|---|---|---|---|---|---|---|---|---|---|---|---|---|---|---|---|---|---|---|---|---|---|---|---|---|---|---|---|---|---|---|---|---|---|---|---|---|---|---|---|---|---|---|---|---|---|---|---|---|---|---|---|---|---|---|---|---|---|---|---|---|---|---|---|---|---|---|---|
| Pokémon | Level | Rate | |||||||||||||||||||||||||||||||||||||||||||||||||||||||||||||||||||||||||||||||||||||||||||||||||
| Surfing | |||||||||||||||||||||||||||||||||||||||||||||||||||||||||||||||||||||||||||||||||||||||||||||||||||
| Tentacool | 5-40 | 65% | |||||||||||||||||||||||||||||||||||||||||||||||||||||||||||||||||||||||||||||||||||||||||||||||||
| Tentacruel | 35-45 | 5% | |||||||||||||||||||||||||||||||||||||||||||||||||||||||||||||||||||||||||||||||||||||||||||||||||
| Hoppip | 5-15 | 30% | |||||||||||||||||||||||||||||||||||||||||||||||||||||||||||||||||||||||||||||||||||||||||||||||||
| FireRed | |||||
|---|---|---|---|---|---|
| Pokémon | Level | Old Rod | Good Rod | Super Rod | |
| Magikarp | 5 | 100% | - | - | |
| Horsea | 15 | - | 80% | - | |
| Magikarp | 5-15 | - | 20% | - | |
| Psyduck | 25-35 | - | - | 1% | |
| Horsea | 15-25 | - | - | 40% | |
| Seadra | 25-35 | - | - | 4% | |
| Gyarados | 15-25 | - | - | 15% | |
| Qwilfish | 15-25 | - | - | 40% | |
| LeafGreen | |||||
|---|---|---|---|---|---|
| Pokémon | Level | Old Rod | Good Rod | Super Rod | |
| Magikarp | 5 | 100% | - | - | |
| Krabby | 5-15 | - | 80% | - | |
| Magikarp | 5-15 | - | 20% | - | |
| Slowpoke | 25-35 | - | - | 1% | |
| Krabby | 15-25 | - | - | 40% | |
| Kingler | 25-35 | - | - | 4% | |
| Gyarados | 15-25 | - | - | 15% | |
| Remoraid | 15-25 | - | - | 40% | |
Trainers[edit]
| FireRed and LeafGreen | |
|---|---|
| Trainer | Pokemon |
 Painter Rayna Reward: Rematch |
|
 Painter Daisy Reward: |
|
 Painter Celina Reward: |
|
Youngster Destin Reward: Rematch |
|
 Lady Jacki Reward: |
|
 Lady Gillian Reward: |
|
Swimmer♂ Toby Reward: |
|
Items[edit]
- Nest Ball (hidden): In a small island west of the zone
- Stardust (hidden): Main island, on the northwest
- Stardust (hidden): Main island, on the southwest
- Star Piece (hidden): Main island, on the south
- Luxury Ball: Reward from Selphie's butler
- Nugget: Reward from Selphie's butler
- Rare Candy: Reward from Selphie's butler
- Star Piece: Reward from Selphie's butler
- Stardust: Reward from Selphie's butler
- Big Pearl: Reward from Selphie's butler
- Pearl: Reward from Selphie's butler
Lost Cave[edit]
This is a confusing cave filled with fog, and exits that never seem to go where you want to go. Lady Selphy is lost here and you need to "rescue" her. And by that I mean battle her so she goes home.
There's a pattern to the cave. The path to reach Lady Selphy is actually pointed out by the number of rocks in the room. The number of rocks actually refers to the position in a clock, so three rocks is 3 o'clock, so you would need to head east, and so forth. If you head in the opposite direction to the clue, you will eventually reach an item. But if you don't want to think it through, just follow this table to reach your objective.
Also a little side not, when you are in a room with item the chances to get murkrow and misdreavus are a lot higher so stick in that room til you catch one.
| Paths | |
 Selphy Selphy |
→ ↑ ↓ ↓ → ← ↓ → ↑ |
| Lax Incense | → ↓ |
| Max Revive | → ↑ ↓ ↓ → → |
| Rare Candy | → ↑ ↓ ↓ → ← ↓ ← |
| Sea Incense | → ↑ ↓ ↑ |
| Silk Scarf* | → ↑ ↓ ↓ → ← ↓ → ↑ |
- Silk Scarf is only available after defeating Lady Selphy
Beat Lady Selphy's two Persians to get her to go home. Mind you, this is the only time you will get to battle her, so come prepared with the Amulet Coin and a couple of Pokemon that know Thief, so you can reap more rewards from battling her!
After you are done collecting the items, head to Seven Island for your next challenge!
Pokémon found[edit]
| FireRed | |||||||||||||||||||||||||||||||||||||||||||||||||||||||||||||||||||||||||||||||||||||||||||||||||||
|---|---|---|---|---|---|---|---|---|---|---|---|---|---|---|---|---|---|---|---|---|---|---|---|---|---|---|---|---|---|---|---|---|---|---|---|---|---|---|---|---|---|---|---|---|---|---|---|---|---|---|---|---|---|---|---|---|---|---|---|---|---|---|---|---|---|---|---|---|---|---|---|---|---|---|---|---|---|---|---|---|---|---|---|---|---|---|---|---|---|---|---|---|---|---|---|---|---|---|---|
| Pokémon | Level | Rate | |||||||||||||||||||||||||||||||||||||||||||||||||||||||||||||||||||||||||||||||||||||||||||||||||
| Selphy path | |||||||||||||||||||||||||||||||||||||||||||||||||||||||||||||||||||||||||||||||||||||||||||||||||||
| Zubat | 37 | 20% | |||||||||||||||||||||||||||||||||||||||||||||||||||||||||||||||||||||||||||||||||||||||||||||||||
| Golbat | 41,43 | 20% | |||||||||||||||||||||||||||||||||||||||||||||||||||||||||||||||||||||||||||||||||||||||||||||||||
| Gastly | 38, 40 | 25% | |||||||||||||||||||||||||||||||||||||||||||||||||||||||||||||||||||||||||||||||||||||||||||||||||
| Haunter | 44,46,48,50,52 | 30% | |||||||||||||||||||||||||||||||||||||||||||||||||||||||||||||||||||||||||||||||||||||||||||||||||
| Murkrow | 22 | 5% | |||||||||||||||||||||||||||||||||||||||||||||||||||||||||||||||||||||||||||||||||||||||||||||||||
| LeafGreen | |||||||||||||||||||||||||||||||||||||||||||||||||||||||||||||||||||||||||||||||||||||||||||||||||||
|---|---|---|---|---|---|---|---|---|---|---|---|---|---|---|---|---|---|---|---|---|---|---|---|---|---|---|---|---|---|---|---|---|---|---|---|---|---|---|---|---|---|---|---|---|---|---|---|---|---|---|---|---|---|---|---|---|---|---|---|---|---|---|---|---|---|---|---|---|---|---|---|---|---|---|---|---|---|---|---|---|---|---|---|---|---|---|---|---|---|---|---|---|---|---|---|---|---|---|---|
| Pokémon | Level | Rate | |||||||||||||||||||||||||||||||||||||||||||||||||||||||||||||||||||||||||||||||||||||||||||||||||
| Selphy path | |||||||||||||||||||||||||||||||||||||||||||||||||||||||||||||||||||||||||||||||||||||||||||||||||||
| Zubat | 37 | 20% | |||||||||||||||||||||||||||||||||||||||||||||||||||||||||||||||||||||||||||||||||||||||||||||||||
| Golbat | 41,43 | 20% | |||||||||||||||||||||||||||||||||||||||||||||||||||||||||||||||||||||||||||||||||||||||||||||||||
| Gastly | 38,40 | 25% | |||||||||||||||||||||||||||||||||||||||||||||||||||||||||||||||||||||||||||||||||||||||||||||||||
| Haunter | 44,46,48,50,52 | 30% | |||||||||||||||||||||||||||||||||||||||||||||||||||||||||||||||||||||||||||||||||||||||||||||||||
| Misdreavus | 22 | 5% | |||||||||||||||||||||||||||||||||||||||||||||||||||||||||||||||||||||||||||||||||||||||||||||||||
| FireRed | |||||||||||||||||||||||||||||||||||||||||||||||||||||||||||||||||||||||||||||||||||||||||||||||||||
|---|---|---|---|---|---|---|---|---|---|---|---|---|---|---|---|---|---|---|---|---|---|---|---|---|---|---|---|---|---|---|---|---|---|---|---|---|---|---|---|---|---|---|---|---|---|---|---|---|---|---|---|---|---|---|---|---|---|---|---|---|---|---|---|---|---|---|---|---|---|---|---|---|---|---|---|---|---|---|---|---|---|---|---|---|---|---|---|---|---|---|---|---|---|---|---|---|---|---|---|
| Pokémon | Level | Rate | |||||||||||||||||||||||||||||||||||||||||||||||||||||||||||||||||||||||||||||||||||||||||||||||||
| Item room | |||||||||||||||||||||||||||||||||||||||||||||||||||||||||||||||||||||||||||||||||||||||||||||||||||
| Zubat | 37 | 20% | |||||||||||||||||||||||||||||||||||||||||||||||||||||||||||||||||||||||||||||||||||||||||||||||||
| Golbat | 41 | 10% | |||||||||||||||||||||||||||||||||||||||||||||||||||||||||||||||||||||||||||||||||||||||||||||||||
| Gastly | 40 | 20% | |||||||||||||||||||||||||||||||||||||||||||||||||||||||||||||||||||||||||||||||||||||||||||||||||
| Haunter | 44,46,48,50,52 | 30% | |||||||||||||||||||||||||||||||||||||||||||||||||||||||||||||||||||||||||||||||||||||||||||||||||
| Murkrow | 15,20,22 | 20% | |||||||||||||||||||||||||||||||||||||||||||||||||||||||||||||||||||||||||||||||||||||||||||||||||
| LeafGreen | |||||||||||||||||||||||||||||||||||||||||||||||||||||||||||||||||||||||||||||||||||||||||||||||||||
|---|---|---|---|---|---|---|---|---|---|---|---|---|---|---|---|---|---|---|---|---|---|---|---|---|---|---|---|---|---|---|---|---|---|---|---|---|---|---|---|---|---|---|---|---|---|---|---|---|---|---|---|---|---|---|---|---|---|---|---|---|---|---|---|---|---|---|---|---|---|---|---|---|---|---|---|---|---|---|---|---|---|---|---|---|---|---|---|---|---|---|---|---|---|---|---|---|---|---|---|
| Pokémon | Level | Rate | |||||||||||||||||||||||||||||||||||||||||||||||||||||||||||||||||||||||||||||||||||||||||||||||||
| Item room | |||||||||||||||||||||||||||||||||||||||||||||||||||||||||||||||||||||||||||||||||||||||||||||||||||
| Zubat | 37 | 20% | |||||||||||||||||||||||||||||||||||||||||||||||||||||||||||||||||||||||||||||||||||||||||||||||||
| Golbat | 41 | 10% | |||||||||||||||||||||||||||||||||||||||||||||||||||||||||||||||||||||||||||||||||||||||||||||||||
| Gastly | 40 | 20% | |||||||||||||||||||||||||||||||||||||||||||||||||||||||||||||||||||||||||||||||||||||||||||||||||
| Haunter | 44,46,48,50,52 | 30% | |||||||||||||||||||||||||||||||||||||||||||||||||||||||||||||||||||||||||||||||||||||||||||||||||
| Misdreavus | 15,20,22 | 20% | |||||||||||||||||||||||||||||||||||||||||||||||||||||||||||||||||||||||||||||||||||||||||||||||||
Trainers[edit]
| FireRed and LeafGreen | |
|---|---|
| Trainer | Pokemon |
 Ruin Maniac Lawson Reward: |
|
 Psychic Laura Reward: |
|
 Lady Selphy Reward: |
|
New Pokémon[edit]
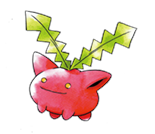
Hoppip is yet another Johto Pokemon with an unusual type combination. A Flying/Grass type, Hoppip is actually available all over the Five Island zones, even while Surfing!!
Hoppip has great speed stats, and its type combination can lead to new and unusual move combinations. Unfortunately, Hoppip's other stats are quite low, its learnset is mediocre at best, and it cannot even learn Fly. Best leave Hoppip in your PC.
Hoppip evolves to Jumpluff at level 27.
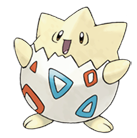
Fans of the anime can easily recognize Togepi. In this generation, Togepi is a Normal type Pokemon that must be hatched to be obtained.
Togepi can only shine once it evolves to Togetic by increasing its friendship levels. Once it evolves, Togetic is granted powerful Defense, Spc Atk and Spc Def stats. Its moveset is filled with mostly support moves, such as Wish, and Follow Me.
Togetic makes a good wall Pokemon, but you'll probably have to use some TM's on it to increase its versatility.
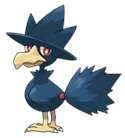
Murkrow, exclusive to Fire Red, adds yet another strange bird to the game. As a Dark/Flying Pokemon, it carries decent Atack, Spc Atk and Speed stats.
Murkrow is a decent choice if you wish to change your current Flying Pokemon, as it is one of the few Dark choices in FireRed, and it is capable of learning Faint Attack by level up, as well as some decent moves from TM's.
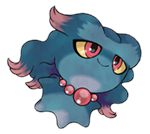
Misdreavus, exclusive to LeafGreen, is another addition to the very small Ghost type group in this Generation.
Misdreavus provides a benefit absent on the other Ghost Pokemon you've encountered before. Misdreavus is a pure Ghost type, unlike the Gastly group, and so it is more resistant to Psychic moves that have previously been so difficult to counter up to this point.
If you want to use Misdreavus in your team, you'll have to teach it some TM's, including Psychic and Shadow Ball.
