(Moved items to each floor section instead of listing at bottom of page) Tags: Mobile edit Mobile web edit |
m (Fixed red link) Tags: Mobile edit Mobile web edit |
||
| (22 intermediate revisions by 4 users not shown) | |||
| Line 3: | Line 3: | ||
The situation in Pokémon Tower is grave indeed, but with the Silph Scope, you should be able to dig up whatever is causing all the trouble. You don't have to do anything special with the scope, but just make sure you have it with you when you enter the tower. The Silph Scope automatically identifies ghosts and makes it possible to engage them in combat. | The situation in Pokémon Tower is grave indeed, but with the Silph Scope, you should be able to dig up whatever is causing all the trouble. You don't have to do anything special with the scope, but just make sure you have it with you when you enter the tower. The Silph Scope automatically identifies ghosts and makes it possible to engage them in combat. | ||
If you cleared out the tower earlier, skip to the bottom to finally identify the ghost that was blocking the way to the final floor and clear out the Rocket grunts. | If you cleared out the tower earlier, skip to the bottom to finally identify the ghost that was blocking the way to the final floor and clear out the Rocket grunts. | ||
__TOC__ | |||
On your way through Saffron City, you might just want to stop in at the Poké Mart and grab a '''Max Repel'''. | == Into the tower == | ||
[[File:Pokemon FRLG Pokemon Tower 1F.png|left|thumb|400px|Pokémon Tower 1F]] | |||
{{sidebar|width=200px|title=Scoping out danger|contents=Without the Silph Scope, you can't identify the ghosts lurking in Pokémon Tower, and therefore you can't fight them. With the scope in hand, you can fight and try to capture these astral aggressors. Many special attacks don't affect Ghost-type Pokémon at all, so use caution in battle. You'll have better luck catching a Gastly or a Haunter if you use Great Balls instead of regular Poké Balls.}} | |||
With the '''Silph Scope''' in your hot little hands, it's time to head back to Pokémon Tower and figure out what the heck is going on. The quickest path is to go back to [[../Route 7/]], hand the guard the tea from the lady in Celadon to end the baffling "Thirsty Guard" crisis, and then cut through [[../Saffron City/]] on your way East to [[../Lavender Town/]]. | |||
On your way through Saffron City, you might just want to stop in at the Poké Mart and grab a '''Max Repel'''. The Repel is for the Tower, where you'll be assaulted by Gastlies, Gastlies, an occasional Haunter, and more Gastlies, but if you plan to fight some Gastlies it might be best to use Pidgeotto. | |||
{{-}} | {{-}} | ||
== Another rival battle! == | |||
[[File:Pokemon FRLG Pokemon Tower 2F.png|center|thumb|400px|Pokémon Tower 2F]] | |||
When your rival gets in your way on the second floor, he'll pick a fight as usual. His team depends on your starter Pokémon so it may vary from player to player. | |||
{{ContentBoxContainer}} | {{ContentBoxContainer}} | ||
{{Pokemon/Trainer|FRLG}} | {{Pokemon/Trainer|FRLG}} | ||
|+'''If you chose Charmander''' | |||
{{Pokemon/Trainer row|FRLG|Rival|Blue|900}} | {{Pokemon/Trainer row|FRLG|Rival|Blue|900}} | ||
{{Pokemon/Trainer mon|FRLG|017 | {{Pokemon/Trainer mon|FRLG|017|25}}{{Pokemon/Trainer mon|FRLG|064|20}}{{Pokemon/Trainer mon|FRLG|102|22}}{{Pokemon/Trainer mon|FRLG|008|25}}{{Pokemon/Trainer mon|FRLG|058|22}} | ||
|} | |||
{{Pokemon/Trainer|FRLG}} | |||
|+'''If you chose Squirtle''' | |||
{{Pokemon/Trainer row|FRLG|Rival|Blue|900}} | {{Pokemon/Trainer row|FRLG|Rival|Blue|900}} | ||
{{Pokemon/Trainer mon|FRLG|017 | {{Pokemon/Trainer mon|FRLG|017|25}}{{Pokemon/Trainer mon|FRLG|064|20}}{{Pokemon/Trainer mon|FRLG|002|25}}{{Pokemon/Trainer mon|FRLG|130|23}}{{Pokemon/Trainer mon|FRLG|058|22}} | ||
|} | |||
{{Pokemon/Trainer|FRLG}} | |||
|+'''If you chose Bulbasaur''' | |||
{{Pokemon/Trainer row|FRLG|Rival|Blue|900}} | {{Pokemon/Trainer row|FRLG|Rival|Blue|900}} | ||
{{Pokemon/Trainer mon|FRLG|017 | {{Pokemon/Trainer mon|FRLG|017|25}}{{Pokemon/Trainer mon|FRLG|064|20}}{{Pokemon/Trainer mon|FRLG|102|23}}{{Pokemon/Trainer mon|FRLG|130|22}}{{Pokemon/Trainer mon|FRLG|005|25}} | ||
|} | |} | ||
</div> | </div> | ||
== | ==3F== | ||
[[File:Pokemon FRLG Pokemon Tower 3F.png|left|thumb|400px|Pokémon Tower 3F]] | |||
[[ | Pokémon with Psychic attacks like {{bp|Kadabra}} and {{bp|Drowzee}}, are really powerful here against these Ghosts, as they also have the Poison type. Farfetch'd is also a strong option because it is immune to all of Gastly's moves except {{bpm|Curse}}. But those are few and far between, so if you don't want to deal with lots of random encounters, just pop open the Max Repel... ''After'' you catch a {{bp|Gastly}} for yourself. | ||
Pokémon with Psychic attacks like {{bp|Kadabra}} and {{bp|Drowzee}}, are really powerful here against these Ghosts, as they also have the Poison type. Farfetch'd is also a strong option because it is immune to all of Gastly's moves except {{bpm|Curse}}. | |||
Addition: If you have Pokemon with Ghost or Dark type moves (such as Bite), they work pretty well against the Ghosts as well. After catching your own Ghost type here, you can train it up a little and use it to wipe out the ghosts. | Addition: If you have Pokemon with Ghost or Dark type moves (such as Bite), they work pretty well against the Ghosts as well. After catching your own Ghost type here, you can train it up a little and use it to wipe out the ghosts. | ||
===Trainers=== | |||
{{ContentBoxContainer}} | {{ContentBoxContainer}} | ||
{{Pokemon/Trainer|FRLG}} | {{Pokemon/Trainer|FRLG}} | ||
{{Pokemon/Trainer row|FRLG|Channeler|Hope|736}} | {{Pokemon/Trainer row|FRLG|Channeler|Hope|736}} | ||
{{Pokemon/Trainer mon|FRLG|092 | {{Pokemon/Trainer mon|FRLG|092|23}} | ||
{{Pokemon/Trainer row|FRLG|Channeler|Patricia|704}} | {{Pokemon/Trainer row|FRLG|Channeler|Patricia|704}} | ||
{{Pokemon/Trainer mon|FRLG|092 | {{Pokemon/Trainer mon|FRLG|092|22}} | ||
{{Pokemon/Trainer row|FRLG|Channeler|Carly|768}} | {{Pokemon/Trainer row|FRLG|Channeler|Carly|768}} | ||
{{Pokemon/Trainer mon|FRLG|092 | {{Pokemon/Trainer mon|FRLG|092|24}} | ||
|} | |} | ||
</div> | </div> | ||
===Pokémon found=== | |||
{{ContentBoxContainer}} | |||
{{Pokemon/Wild|FRLG}} | |||
{{Pokemon/Wild row|FRLG||092|13-19|90|bp=1}} | |||
{{Pokemon/Wild row|FRLG||093|20|1|bp=1}} | |||
{{Pokemon/Wild row|FRLG||104|15,17|9|bp=1}} | |||
|} | |||
</div> | |||
===Items=== | ===Items=== | ||
*Escape Rope (On the north side of the third floor) | *Escape Rope (On the north side of the third floor) | ||
== | |||
[[ | ==4F== | ||
[[File:Pokemon FRLG Pokemon Tower 4F.png|left|thumb|400px|Pokémon Tower 4F]] | |||
===Trainers=== | |||
{{ContentBoxContainer}} | {{ContentBoxContainer}} | ||
{{Pokemon/Trainer|FRLG}} | {{Pokemon/Trainer|FRLG}} | ||
{{Pokemon/Trainer row|FRLG|Channeler|Laurel|736}} | {{Pokemon/Trainer row|FRLG|Channeler|Laurel|736}} | ||
{{Pokemon/Trainer mon|FRLG|092 | {{Pokemon/Trainer mon|FRLG|092|23}} | ||
{{Pokemon/Trainer mon|FRLG|092 | {{Pokemon/Trainer mon|FRLG|092|23}} | ||
{{Pokemon/Trainer row|FRLG|Channeler|Jody|704}} | {{Pokemon/Trainer row|FRLG|Channeler|Jody|704}} | ||
{{Pokemon/Trainer mon|FRLG|092 | {{Pokemon/Trainer mon|FRLG|092|22}} | ||
{{Pokemon/Trainer row|FRLG|Channeler|Paula|768}} | {{Pokemon/Trainer row|FRLG|Channeler|Paula|768}} | ||
{{Pokemon/Trainer mon|FRLG|092 | {{Pokemon/Trainer mon|FRLG|092|23}} | ||
|} | |} | ||
</div> | </div> | ||
===Pokémon found=== | |||
{{ContentBoxContainer}} | |||
{{Pokemon/Wild|FRLG}} | |||
{{Pokemon/Wild row|FRLG||092|13-19|86|bp=1}} | |||
{{Pokemon/Wild row|FRLG||093|20|5|bp=1}} | |||
{{Pokemon/Wild row|FRLG||104|15,17|9|bp=1}} | |||
|} | |||
</div> | |||
===Items=== | ===Items=== | ||
*Elixir (Near the staircase leading from the fourth floor to the fifth floor) | *Elixir (Near the staircase leading from the fourth floor to the fifth floor) | ||
*Awakening (In the center of the fourth floor) | *Awakening (In the center of the fourth floor) | ||
*Great Ball (On the south side of the fourth floor) | *Great Ball (On the south side of the fourth floor) | ||
== | ==5F== | ||
[[ | [[File:Pokemon FRLG Pokemon Tower 5F.png|left|thumb|400px|Pokémon Tower 5F]] | ||
The leader of the Channelers has broken free of the dark power that held her, and created a reusable healing zone on the 5th floor. | The leader of the Channelers has broken free of the dark power that held her, and created a reusable healing zone on the 5th floor. Make sure you heal and save while you have the opportunity, since there are a number of surprises ahead. | ||
===Trainers=== | |||
{{ContentBoxContainer}} | {{ContentBoxContainer}} | ||
{{Pokemon/Trainer|FRLG}} | {{Pokemon/Trainer|FRLG}} | ||
{{Pokemon/Trainer row|FRLG|Channeler|Ruth|704}} | {{Pokemon/Trainer row|FRLG|Channeler|Ruth|704}} | ||
{{Pokemon/Trainer mon|FRLG|092| | {{Pokemon/Trainer mon|FRLG|092|22}} | ||
{{Pokemon/Trainer row|FRLG|Channeler|Tammy|736}} | {{Pokemon/Trainer row|FRLG|Channeler|Tammy|736}} | ||
{{Pokemon/Trainer mon|FRLG|093 | {{Pokemon/Trainer mon|FRLG|093|23}} | ||
{{Pokemon/Trainer row|FRLG|Channeler|Karina|768}} | {{Pokemon/Trainer row|FRLG|Channeler|Karina|768}} | ||
{{Pokemon/Trainer mon|FRLG|092 | {{Pokemon/Trainer mon|FRLG|092|24}} | ||
{{Pokemon/Trainer row|FRLG|Channeler|Janae|704}} | {{Pokemon/Trainer row|FRLG|Channeler|Janae|704}} | ||
{{Pokemon/Trainer mon|FRLG|092 | {{Pokemon/Trainer mon|FRLG|092|22}} | ||
|} | |} | ||
</div> | </div> | ||
===Pokémon found=== | |||
{{ContentBoxContainer}} | |||
{{Pokemon/Wild|FRLG}} | |||
{{Pokemon/Wild row|FRLG||092|13-19|86|bp=1}} | |||
{{Pokemon/Wild row|FRLG||093|20|5|bp=1}} | |||
{{Pokemon/Wild row|FRLG||104|15,17|9|bp=1}} | |||
|} | |||
</div> | |||
===Items=== | ===Items=== | ||
*Cleanse Tag (In the center of the healing spot) | *Cleanse Tag (In the center of the healing spot) | ||
| Line 134: | Line 130: | ||
*Nugget (On the south side of the fifth floor near the healing spot) | *Nugget (On the south side of the fifth floor near the healing spot) | ||
*X Accuracy (Near the staircase leading from the fifth floor to the sixth floor) | *X Accuracy (Near the staircase leading from the fifth floor to the sixth floor) | ||
== | ==6F== | ||
[[ | [[File:Pokemon FRLG Pokemon Tower 6F.png|left|thumb|400px|Pokémon Tower 6F]] | ||
The first surprise is at the stairway to the top floor, where the Ghost that you needed the '''Silph Scope''' for finally reveals itself as a level 30 {{bp|Marowak}}. | The first surprise is at the stairway to the top floor, where the Ghost that you needed the '''Silph Scope''' for finally reveals itself as a level 30 {{bp|Marowak}}. Make sure you have some strong, non-Psychic Pokémon for this fight as you have to beat it! Unfortunately, you can't catch it, even with a Masterball, as it dodges the ball every time. | ||
===Trainers=== | |||
{{ContentBoxContainer}} | {{ContentBoxContainer}} | ||
{{Pokemon/Trainer|FRLG}} | {{Pokemon/Trainer|FRLG}} | ||
{{Pokemon/Trainer row|FRLG|Channeler|Angelica|704}} | {{Pokemon/Trainer row|FRLG|Channeler|Angelica|704}} | ||
{{Pokemon/Trainer mon|FRLG|092 | {{Pokemon/Trainer mon|FRLG|092|22}} | ||
{{Pokemon/Trainer mon|FRLG|092 | {{Pokemon/Trainer mon|FRLG|092|22}} | ||
{{Pokemon/Trainer mon|FRLG|092 | {{Pokemon/Trainer mon|FRLG|092|22}} | ||
{{Pokemon/Trainer row|FRLG|Channeler|Jennifer|768}} | {{Pokemon/Trainer row|FRLG|Channeler|Jennifer|768}} | ||
{{Pokemon/Trainer mon|FRLG|092 | {{Pokemon/Trainer mon|FRLG|092|24}} | ||
{{Pokemon/Trainer row|FRLG|Channeler|Emilia|768}} | {{Pokemon/Trainer row|FRLG|Channeler|Emilia|768}} | ||
{{Pokemon/Trainer mon|FRLG|092 | {{Pokemon/Trainer mon|FRLG|092|24}} | ||
|} | |} | ||
</div> | </div> | ||
===Pokémon found=== | |||
{{ContentBoxContainer}} | |||
{{Pokemon/Wild|FRLG}} | |||
{{Pokemon/Wild row|FRLG||092|14-19|85|bp=1}} | |||
{{Pokemon/Wild row|FRLG||093|21,23|6|bp=1}} | |||
{{Pokemon/Wild row|FRLG||104|17,19|9|bp=1}} | |||
|} | |||
</div> | |||
===Items=== | ===Items=== | ||
*Rare Candy (On the southwest side of the sixth floor) | *Rare Candy (On the southwest side of the sixth floor) | ||
== | ==7F== | ||
[[ | [[File:Pokemon FRLG Pokemon Tower 7F.png|left|thumb|400px|Pokémon Tower 7F]] | ||
More non-Gastly foes await on the top floor. There are three rocket grunts up here. | More non-Gastly foes await on the top floor. There are three rocket grunts up here. | ||
===Trainers=== | |||
{{ContentBoxContainer}} | {{ContentBoxContainer}} | ||
{{Pokemon/Trainer|FRLG}} | {{Pokemon/Trainer|FRLG}} | ||
{{Pokemon/Trainer row|FRLG | {{Pokemon/Trainer row|FRLG|Team Rocket Grunt||704|gender=M}} | ||
{{Pokemon/Trainer mon|FRLG|041 | {{Pokemon/Trainer mon|FRLG|041|25}} | ||
{{Pokemon/Trainer mon|FRLG|041 | {{Pokemon/Trainer mon|FRLG|041|25}} | ||
{{Pokemon/Trainer mon|FRLG|042 | {{Pokemon/Trainer mon|FRLG|042|25}} | ||
{{Pokemon/Trainer row|FRLG | {{Pokemon/Trainer row|FRLG|Team Rocket Grunt||768|gender=M}} | ||
{{Pokemon/Trainer mon|FRLG|109 | {{Pokemon/Trainer mon|FRLG|109|26}} | ||
{{Pokemon/Trainer mon|FRLG|096 | {{Pokemon/Trainer mon|FRLG|096|26}} | ||
{{Pokemon/Trainer row|FRLG | {{Pokemon/Trainer row|FRLG|Team Rocket Grunt||768|gender=M}} | ||
{{Pokemon/Trainer mon|FRLG|041 | {{Pokemon/Trainer mon|FRLG|041|23}} | ||
{{Pokemon/Trainer mon|FRLG|019 | {{Pokemon/Trainer mon|FRLG|019|23}} | ||
{{Pokemon/Trainer mon|FRLG|020 | {{Pokemon/Trainer mon|FRLG|020|23}} | ||
{{Pokemon/Trainer mon|FRLG|041| | {{Pokemon/Trainer mon|FRLG|041|23}} | ||
|} | |||
</div> | |||
===Pokémon found=== | |||
{{ContentBoxContainer}} | |||
{{Pokemon/Wild|FRLG}} | |||
{{Pokemon/Wild row|FRLG||092|15-19|75|bp=1}} | |||
{{Pokemon/Wild row|FRLG||093|23,25|15|bp=1}} | |||
{{Pokemon/Wild row|FRLG||104|17,19|10|bp=1}} | |||
|} | |} | ||
</div> | </div> | ||
== Mr. Fuji == | == Mr. Fuji == | ||
After you've bested those foes, you'll find the missing Mr. Fuji. He'll thank you for your efforts with a gift of a '''Poké Flute''', which you can use to awaken any sleeping Pokémon, and which finally makes that {{bpm|Rest}} skill useful. | |||
You can also use it to wake up that sleeping {{bp|Snorlax}} that was blocking the passage between [[../Route 11/]] outside of [[../Vermilion City/]] and [[Pokémon FireRed and LeafGreen/Route 12-13|Route 12]] south of [[../Lavender Town/]]. But first, let's pay a visit to [[../Saffron City/]]. | |||
As a side note, make sure to come back and use the Itemfinder in the place where Mr. Fuji stood to unearth a Soothe Bell. | |||
===Items=== | ===Items=== | ||
*Soothe Bell (hidden and "buried" on the spot where Mr. Fuji stood, unearthed with the ItemFinder) | *Soothe Bell (hidden and "buried" on the spot where Mr. Fuji stood, unearthed with the ItemFinder) | ||
The Soothe Bell is one of a few items that are hidden in a special way. Items like this can only be obtained by using the ItemFinder in the spot where they are "buried." | The Soothe Bell is one of a few items that are hidden in a special way. Items like this can only be obtained by using the ItemFinder in the spot where they are "buried." | ||
==New Pokémon== | |||
{{ContentBoxContainer}} | |||
{{Pokemon/New|title=#92 Gastly|contents={{PokePic|Gastly|left}} | |||
{{bp|Gastly}}, and its evolutions, {{bp|Haunter}} and {{bp|Gengar}}, are the only Ghost Pokémon you'll meet, at least until you beat the Elite Four. Ghost Pokémon are immune to all Normal and Fighting attacks and are not affected by Ground attacks due to their {{bpa|Levitate}} ability. | |||
While Gastly and Haunter hold somewhat weak stats, its final evolution, Gengar, is quite powerful, with strong Speed and Special Atk stats, but may need some TM's to supplement its weak moveset. Be aware that evolving Gengar will require trading. | |||
As a final side note, if you plan to catch a Gastly, make sure it is level 15 or lower, otherwise it will be deprived of a powerful move, {{bpm|Hypnosis}}, and its ability to combo with {{bpm|Dream Eater}}.}} | |||
{{Pokemon/New|title=#104 Cubone|contents={{PokePic|Cubone|right}} | |||
{{bp|Cubone}} is a small Ground Pokémon with a lot of kick. It is somewhat rare to find here in the Tower, but catching it will be quite rewarding. Its moves, {{bpm|Bone Club}}, and {{bpm|Bonemerang}}, are strong Ground moves and are exclusive to this Pokémon and its evolution, {{bp|Marowak}}. | |||
Cubone can learn quite a few TM's, and will make an excellent addition to your team, especially if you chose not to raise a Nidoking/Nidoqueen. Be aware, however, that its health is somewhat low, but it compensates for this with strong defenses, and not too shabby attack stats.}} | |||
</div> | |||
{{Footer Nav|game=Pokémon FireRed and LeafGreen|prevpage=Rocket Hideout|nextpage=Saffron City}} | {{Footer Nav|game=Pokémon FireRed and LeafGreen|prevpage=Rocket Hideout|nextpage=Saffron City}} | ||
Latest revision as of 15:32, 6 April 2024
The situation in Pokémon Tower is grave indeed, but with the Silph Scope, you should be able to dig up whatever is causing all the trouble. You don't have to do anything special with the scope, but just make sure you have it with you when you enter the tower. The Silph Scope automatically identifies ghosts and makes it possible to engage them in combat.
If you cleared out the tower earlier, skip to the bottom to finally identify the ghost that was blocking the way to the final floor and clear out the Rocket grunts.
Into the tower[edit]
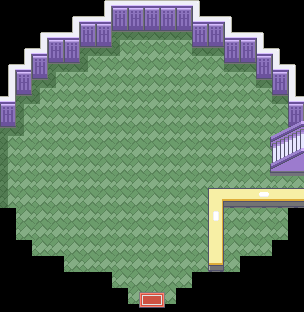
With the Silph Scope in your hot little hands, it's time to head back to Pokémon Tower and figure out what the heck is going on. The quickest path is to go back to Route 7, hand the guard the tea from the lady in Celadon to end the baffling "Thirsty Guard" crisis, and then cut through Saffron City on your way East to Lavender Town.
On your way through Saffron City, you might just want to stop in at the Poké Mart and grab a Max Repel. The Repel is for the Tower, where you'll be assaulted by Gastlies, Gastlies, an occasional Haunter, and more Gastlies, but if you plan to fight some Gastlies it might be best to use Pidgeotto.
Another rival battle![edit]
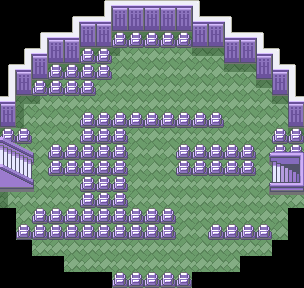
When your rival gets in your way on the second floor, he'll pick a fight as usual. His team depends on your starter Pokémon so it may vary from player to player.
| FireRed and LeafGreen | |
|---|---|
| Trainer | Pokemon |
Rival Blue Reward: |
|
| FireRed and LeafGreen | |
|---|---|
| Trainer | Pokemon |
Rival Blue Reward: |
|
| FireRed and LeafGreen | |
|---|---|
| Trainer | Pokemon |
Rival Blue Reward: |
|
3F[edit]
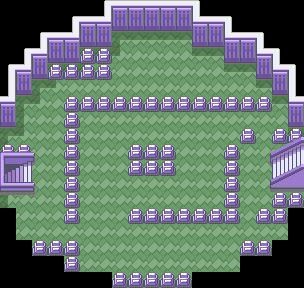
Pokémon with Psychic attacks like Kadabra and Drowzee, are really powerful here against these Ghosts, as they also have the Poison type. Farfetch'd is also a strong option because it is immune to all of Gastly's moves except Curse. But those are few and far between, so if you don't want to deal with lots of random encounters, just pop open the Max Repel... After you catch a Gastly for yourself.
Addition: If you have Pokemon with Ghost or Dark type moves (such as Bite), they work pretty well against the Ghosts as well. After catching your own Ghost type here, you can train it up a little and use it to wipe out the ghosts.
Trainers[edit]
| FireRed and LeafGreen | |
|---|---|
| Trainer | Pokemon |
 Channeler Hope Reward: |
|
 Channeler Patricia Reward: |
|
 Channeler Carly Reward: |
|
Pokémon found[edit]
Items[edit]
- Escape Rope (On the north side of the third floor)
4F[edit]
Trainers[edit]
| FireRed and LeafGreen | |
|---|---|
| Trainer | Pokemon |
 Channeler Laurel Reward: |
|
 Channeler Jody Reward: |
|
 Channeler Paula Reward: |
|
Pokémon found[edit]
Items[edit]
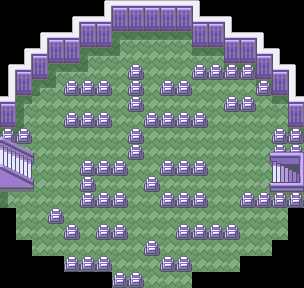
- Elixir (Near the staircase leading from the fourth floor to the fifth floor)
- Awakening (In the center of the fourth floor)
- Great Ball (On the south side of the fourth floor)
5F[edit]
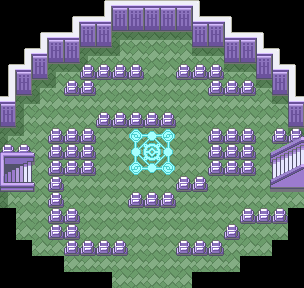
The leader of the Channelers has broken free of the dark power that held her, and created a reusable healing zone on the 5th floor. Make sure you heal and save while you have the opportunity, since there are a number of surprises ahead.
Trainers[edit]
| FireRed and LeafGreen | |
|---|---|
| Trainer | Pokemon |
 Channeler Ruth Reward: |
|
 Channeler Tammy Reward: |
|
 Channeler Karina Reward: |
|
 Channeler Janae Reward: |
|
Pokémon found[edit]
Items[edit]
- Cleanse Tag (In the center of the healing spot)
- Big Mushroom (Hidden above and to the left of the northernmost Channeler on the fifth floor)
- Nugget (On the south side of the fifth floor near the healing spot)
- X Accuracy (Near the staircase leading from the fifth floor to the sixth floor)
6F[edit]
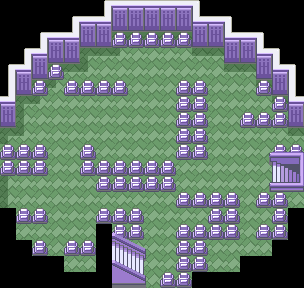
The first surprise is at the stairway to the top floor, where the Ghost that you needed the Silph Scope for finally reveals itself as a level 30 Marowak. Make sure you have some strong, non-Psychic Pokémon for this fight as you have to beat it! Unfortunately, you can't catch it, even with a Masterball, as it dodges the ball every time.
Trainers[edit]
| FireRed and LeafGreen | |
|---|---|
| Trainer | Pokemon |
 Channeler Angelica Reward: |
|
 Channeler Jennifer Reward: |
|
 Channeler Emilia Reward: |
|
Pokémon found[edit]
Items[edit]
- Rare Candy (On the southwest side of the sixth floor)
7F[edit]
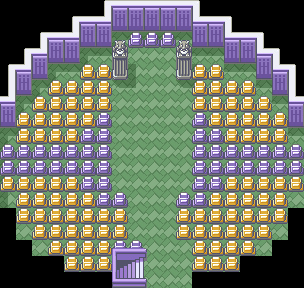
More non-Gastly foes await on the top floor. There are three rocket grunts up here.
Trainers[edit]
| FireRed and LeafGreen | |
|---|---|
| Trainer | Pokemon |
 Team Rocket Grunt Reward: |
|
 Team Rocket Grunt Reward: |
|
 Team Rocket Grunt Reward: |
|
Pokémon found[edit]
Mr. Fuji[edit]
After you've bested those foes, you'll find the missing Mr. Fuji. He'll thank you for your efforts with a gift of a Poké Flute, which you can use to awaken any sleeping Pokémon, and which finally makes that Rest skill useful.
You can also use it to wake up that sleeping Snorlax that was blocking the passage between Route 11 outside of Vermilion City and Route 12 south of Lavender Town. But first, let's pay a visit to Saffron City.
As a side note, make sure to come back and use the Itemfinder in the place where Mr. Fuji stood to unearth a Soothe Bell.
Items[edit]
- Soothe Bell (hidden and "buried" on the spot where Mr. Fuji stood, unearthed with the ItemFinder)
The Soothe Bell is one of a few items that are hidden in a special way. Items like this can only be obtained by using the ItemFinder in the spot where they are "buried."
New Pokémon[edit]
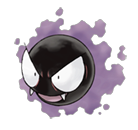
Gastly, and its evolutions, Haunter and Gengar, are the only Ghost Pokémon you'll meet, at least until you beat the Elite Four. Ghost Pokémon are immune to all Normal and Fighting attacks and are not affected by Ground attacks due to their Levitate ability.
While Gastly and Haunter hold somewhat weak stats, its final evolution, Gengar, is quite powerful, with strong Speed and Special Atk stats, but may need some TM's to supplement its weak moveset. Be aware that evolving Gengar will require trading.
As a final side note, if you plan to catch a Gastly, make sure it is level 15 or lower, otherwise it will be deprived of a powerful move, Hypnosis, and its ability to combo with Dream Eater.
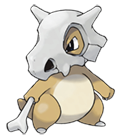
Cubone is a small Ground Pokémon with a lot of kick. It is somewhat rare to find here in the Tower, but catching it will be quite rewarding. Its moves, Bone Club, and Bonemerang, are strong Ground moves and are exclusive to this Pokémon and its evolution, Marowak.
Cubone can learn quite a few TM's, and will make an excellent addition to your team, especially if you chose not to raise a Nidoking/Nidoqueen. Be aware, however, that its health is somewhat low, but it compensates for this with strong defenses, and not too shabby attack stats.