No edit summary |
(Renamed images, added rematch links, and reformatted new Pokémon section) Tags: Mobile edit Mobile web edit |
||
| (30 intermediate revisions by 11 users not shown) | |||
| Line 2: | Line 2: | ||
{{floatingtoc}} | {{floatingtoc}} | ||
You've liberated Saffron City from Team Rocket's mad scheme, and you could probably use a bit of a holiday. We hear the fishing is good down south of Lavender Town, so grab your best rod and get set to go! | |||
You ought to pack the Poké Flute, too. You won't be able to avoid Pokémon duels completely on this trip, but things will be far less hectic. Route 13 is more like a maze than a highway, but it is a pleasant place to walk and enjoy the great outdoors. | |||
{{-}} | {{-}} | ||
== | ==Route 12== | ||
[[File:Pokemon FRLG Route 12.png|thumb|350px|left|Route 12]] | |||
=== | ===Sleeping Beauty=== | ||
{ | The '''Poké Flute''' is needed to wake the {{bp|Snorlax}} blocking the path here. But first, visit the gate's second floor to get TM27. It contains {{bpm|Return}} (which, the stronger the friendship level of your Pokémon, the more powerful it is). | ||
[[File:Pokemon FRLG Snorlax.png|right|Snorlax]] | |||
Snorlax won't be very happy to be woken, but try to capture it. This is the only other Snorlax in the game, so if you didn't catch the one in Route 16, here's your last opportunity. With the way clear, continue south to Route 13. After the Snorlax, get the '''Super Rod''' from a man in a house. | |||
===Pokémon found=== | |||
{{ContentBoxContainer}} | |||
{{Pokemon/Wild|FR}} | |||
{{Pokemon/Wild row|FRLG||016|23-27|30|bp=1}} | |||
{{Pokemon/Wild row|FRLG||043|22-26|35|bp=1}} | |||
{{Pokemon/Wild row|FRLG||044|28-30|5|bp=1}} | |||
{{Pokemon/Wild row|FRLG||048|24-26|30|bp=1}} | |||
| | |||
|23-27 | |||
|30 | |||
| | |||
| | |||
| | |||
| | |||
| | |||
| | |||
|5 | |||
| | |||
|- | |||
|30 | |||
|} | |} | ||
{{-}} | {{Pokemon/Wild|LG}} | ||
{{Pokemon/Wild row|FRLG||016|23-27|30}} | |||
{{Pokemon/Wild row|FRLG||048|24-26|30}} | |||
{{Pokemon/Wild row|FRLG||069|22-26|35|bp=1}} | |||
{{Pokemon/Wild row|FRLG||070|28-30|5|bp=1}} | |||
|} | |||
</div> | |||
{{ContentBoxContainer}} | |||
{{Pokemon/Wild|FRLG}} | |||
{{Pokemon/Wild header|Surfing}} | |||
{{Pokemon/Wild row|FRLG||072|5-40|100|bp=1}} | |||
|} | |||
</div> | |||
{{ContentBoxContainer}} | |||
{{Pokemon/Fishing|FR|1|1|1}} | |||
{{Pokemon/Fishing row|FRLG|129|5|100|0|0|bp=1}} | |||
{{Pokemon/Fishing row|FRLG|098|5-15|0|20|0|bp=1}} | |||
{{Pokemon/Fishing row|FRLG|116|5-15|0|60|0|bp=1}} | |||
{{Pokemon/Fishing row|FRLG|129|5-15|0|20|0|bp=1}} | |||
{{Pokemon/Fishing row|FRLG|054|25-35|0|0|1|bp=1}} | |||
{{Pokemon/Fishing row|FRLG|116|15-35|0|0|84|bp=1}} | |||
{{Pokemon/Fishing row|FRLG|130|15-25|0|0|15|bp=1}} | |||
|} | |||
{{Pokemon/Fishing|LG|1|1|1}} | |||
{{Pokemon/Fishing row|FRLG|129|5|100|0|0}} | |||
{{Pokemon/Fishing row|FRLG|098|5-15|0|60|0}} | |||
{{Pokemon/Fishing row|FRLG|116|5-15|0|20|0}} | |||
{{Pokemon/Fishing row|FRLG|129|5-15|0|20|0}} | |||
{{Pokemon/Fishing row|FRLG|079|25-35|0|0|1|bp=1}} | |||
{{Pokemon/Fishing row|FRLG|098|15-35|0|0|84|bp=1}} | |||
{{Pokemon/Fishing row|FRLG|130|15-25|0|0|15}} | |||
|} | |||
</div> | |||
===Trainers=== | |||
{{ContentBoxContainer}} | |||
{{Pokemon/Trainer|FRLG}} | |||
{{Pokemon/Trainer row|FRLG|Fisherman|Ned|792}} | |||
{{Pokemon/Trainer mon|FRLG|118|22}} | |||
{{Pokemon/Trainer mon|FRLG|060|22}} | |||
{{Pokemon/Trainer mon|FRLG|118|22}} | |||
{{Pokemon/Trainer row|FRLG|Fisherman|Chip|864}} | |||
{{Pokemon/Trainer mon|FRLG|072|24}} | |||
{{Pokemon/Trainer mon|FRLG|118|24}} | |||
{{Pokemon/Trainer row|FRLG|Fisherman|Hank|972}} | |||
{{Pokemon/Trainer mon|FRLG|118|27}} | |||
{{Pokemon/Trainer row|FRLG|Fisherman|Elliot|756|notes=[[../Rematches#Fisherman Elliot|Rematch]]}} | |||
{{Pokemon/Trainer mon|FRLG|060|21}} | |||
{{Pokemon/Trainer mon|FRLG|090|21}} | |||
{{Pokemon/Trainer mon|FRLG|118|21}} | |||
{{Pokemon/Trainer mon|FRLG|116|21}} | |||
{{Pokemon/Trainer row|FRLG|Young Couple|Gia & Jes|1344|notes=[[../Rematches#Young Couple Gia & Jes|Rematch]]}} | |||
{{Pokemon/Trainer mon|FRLG|032|24}} | |||
{{Pokemon/Trainer mon|FRLG|029|24}} | |||
{{Pokemon/Trainer row|FRLG|Rocker|Luca|696|notes=[[../Rematches#Rocker Luca|Rematch]]}} | |||
{{Pokemon/Trainer mon|FRLG|100|29}} | |||
{{Pokemon/Trainer mon|FRLG|101|29}} | |||
{{Pokemon/Trainer row|FRLG|Camper|Justin|580}} | |||
{{Pokemon/Trainer mon|FRLG|032|29}} | |||
{{Pokemon/Trainer mon|FRLG|033|29}} | |||
{{Pokemon/Trainer row|FRLG|Fisherman|Andrew|864}} | |||
{{Pokemon/Trainer mon|FRLG|129|24}} | |||
{{Pokemon/Trainer mon|FRLG|129|24}} | |||
|} | |||
</div> | |||
===Items=== | |||
* TM27 {{bpm|Return}} (Given to you by the girl on the second floor of Lavender Town's gate) | |||
* Hyper Potion (Hidden near a fisherman) | |||
* TM48 {{bpm|Skill Swap}} (On a small island at the North of Route 12, through surfing) | |||
* Leftovers (Hidden and "buried" on the spot where Snorlax stands, unearthed with the ItemFinder) | |||
* '''Super Rod''' (Given to you by the Fishing Guru at a house south of Snorlax's spot) | |||
* Net Ball (one or more, up to a certain limit) (Given to you by the Fishing Guru for showing them a Magikarp and then, if possible, anytime for showing them a bigger Magikarp than the ones previously shown, theoretically limited to certain minimum and maximum sizes) | |||
* Iron (In the grass area accessible only by cutting a tree, south of the Fishing Guru's house) | |||
* Rare Candy (Hidden in the patch of grass on Route 12 (three grass patches up from the bottom and two to the right from the left) | |||
Leftovers is an important and popular item to be held by a Pokémon. It recovers a Pokémon's health one bit at a time, making it universally useful to any Pokémon. | |||
==Route 13== | |||
[[File:Pokemon FRLG Route 13.png|thumb|350px|Route 13]] | |||
{{-}} | {{-}} | ||
===Pokémon found=== | |||
=== Pokémon === | {{ContentBoxContainer}} | ||
{ | {{Pokemon/Wild|FR}} | ||
{{Pokemon/Wild row|FRLG||016|25,27|20|bp=1}} | |||
{{Pokemon/Wild row|FRLG||017|25,27|5|bp=1}} | |||
{{Pokemon/Wild row|FRLG||043|22,24,26|35|bp=1}} | |||
{{Pokemon/Wild row|FRLG||044|28,30|5|bp=1}} | |||
{{Pokemon/Wild row|FRLG||048|24,26|30|bp=1}} | |||
{{Pokemon/Wild row|FRLG||132|25|5|bp=1}} | |||
|} | |||
| | {{Pokemon/Wild|LG}} | ||
| | {{Pokemon/Wild row|FRLG||016|25,27|20}} | ||
|22 | {{Pokemon/Wild row|FRLG||017|25,27|5}} | ||
|35 | {{Pokemon/Wild row|FRLG||048|24,26|30}} | ||
| | {{Pokemon/Wild row|FRLG||069|22,24,26|35|bp=1}} | ||
| | {{Pokemon/Wild row|FRLG||070|28,30|5|bp=1}} | ||
| | {{Pokemon/Wild row|FRLG||132|25|5}} | ||
| | |} | ||
| | </div> | ||
|24 | {{ContentBoxContainer}} | ||
| | {{Pokemon/Wild|FRLG}} | ||
| | {{Pokemon/Wild header|Surfing}} | ||
| | {{Pokemon/Wild row|FRLG||072|5-40|100|bp=1}} | ||
| | |} | ||
| | </div> | ||
| | {{ContentBoxContainer}} | ||
| | {{Pokemon/Fishing|FR|1|1|1}} | ||
{{Pokemon/Fishing row|FRLG|129|5|100|0|0|bp=1}} | |||
{{Pokemon/Fishing row|FRLG|098|5-15|0|20|0|bp=1}} | |||
| | {{Pokemon/Fishing row|FRLG|116|5-15|0|60|0|bp=1}} | ||
| | {{Pokemon/Fishing row|FRLG|129|5-15|0|20|0|bp=1}} | ||
| | {{Pokemon/Fishing row|FRLG|054|25-35|0|0|1|bp=1}} | ||
| | {{Pokemon/Fishing row|FRLG|116|15-35|0|0|84|bp=1}} | ||
| | {{Pokemon/Fishing row|FRLG|130|15-25|0|0|15|bp=1}} | ||
| | |} | ||
| | {{Pokemon/Fishing|LG|1|1|1}} | ||
| | {{Pokemon/Fishing row|FRLG|129|5|100|0|0}} | ||
| | {{Pokemon/Fishing row|FRLG|098|5-15|0|60|0}} | ||
| | {{Pokemon/Fishing row|FRLG|116|5-15|0|20|0}} | ||
| | {{Pokemon/Fishing row|FRLG|129|5-15|0|20|0}} | ||
|28 | {{Pokemon/Fishing row|FRLG|079|25-35|0|0|1|bp=1}} | ||
|5 | {{Pokemon/Fishing row|FRLG|098|15-35|0|0|84|bp=1}} | ||
| | {{Pokemon/Fishing row|FRLG|130|15-25|0|0|15}} | ||
| | |||
| | |||
| | |||
| | |||
|5-40 | |||
|100 | |||
| | |||
| | |||
| | |||
| | |||
|5 | |||
|100 | |||
| | |||
|5 | |||
| | |||
| | |||
|- | |||
| | |||
|5-15 | |||
| | |||
| | |||
| | |||
| | |||
| | |||
| | |||
| | |||
| | |||
| | |||
| | |||
| | |||
| | |||
|5 | |||
| | |||
| | |||
|5-15 | |||
| | |||
| | |||
|- | |||
| | |||
|15 | |||
| | |||
| | |||
| | |||
| | |||
| | |||
| | |||
|15- | |||
| | |||
| | |||
| | |||
|25 | |||
| | |||
| | |||
|} | |} | ||
</div> | |||
=== Trainers === | ===Trainers=== | ||
{{ContentBoxContainer}} | |||
{{Pokemon/Trainer|FRLG}} | |||
{{Pokemon/Trainer row|FRLG|Picnicker|Alma|560}} | |||
{{Pokemon/Trainer mon|FRLG|118|28}} | |||
{{Pokemon/Trainer mon|FRLG|060|28}} | |||
{{Pokemon/Trainer mon|FRLG|116|28}} | |||
{{Pokemon/Trainer row|FRLG|Bird Keeper|Clark|696}} | |||
{{Pokemon/Trainer mon|FRLG|016|29}} | |||
{{Pokemon/Trainer mon|FRLG|016|29}} | |||
{{Pokemon/Trainer row|FRLG|Picnicker|Susie|480|notes=[[../Rematches#Picnicker Susie|Rematch]]}} | |||
{{Pokemon/Trainer mon|FRLG|016|24}} | |||
{{Pokemon/Trainer mon|FRLG|052|24}} | |||
{{Pokemon/Trainer mon|FRLG|019|24}} | |||
{{Pokemon/Trainer mon|FRLG|025|24}} | |||
| | {{Pokemon/Trainer mon|FRLG|052|24}} | ||
| | {{Pokemon/Trainer row|FRLG|Beauty|Lola|1944}} | ||
| | {{Pokemon/Trainer mon|FRLG|019|27}} | ||
| | {{Pokemon/Trainer mon|FRLG|025|27}} | ||
{{Pokemon/Trainer mon|FRLG|019|27}} | |||
{{Pokemon/Trainer row|FRLG|Beauty|Sheila|2088|notes=[[../Rematches#Beauty Sheila|Rematch]]}} | |||
{{Pokemon/Trainer mon|FRLG|035|29}} | |||
{{Pokemon/Trainer mon|FRLG|052|29}} | |||
{{Pokemon/Trainer row|FRLG|Picnicker|Valerie|600}} | |||
{{Pokemon/Trainer mon|FRLG|060|30}} | |||
{{Pokemon/Trainer mon|FRLG|060|30}} | |||
{{Pokemon/Trainer row|FRLG|Picnicker|Gwen|540}} | |||
{{Pokemon/Trainer mon|FRLG|016|27}} | |||
{{Pokemon/Trainer mon|FRLG|052|27}} | |||
{{Pokemon/Trainer mon|FRLG|016|27}} | |||
{{Pokemon/Trainer mon|FRLG|017|27}} | |||
{{Pokemon/Trainer row|FRLG|Bird Keeper|Robert|624|notes=[[../Rematches#Bird Keeper Robert|Rematch]]}} | |||
{{Pokemon/Trainer mon|FRLG|016|26}} | |||
{{Pokemon/Trainer mon|FRLG|017|26}} | |||
{{Pokemon/Trainer mon|FRLG|021|26}} | |||
{{Pokemon/Trainer mon|FRLG|022|26}} | |||
{{Pokemon/Trainer row|FRLG|Bird Keeper|Perry|600}} | |||
{{Pokemon/Trainer mon|FRLG|021|25}} | |||
{{Pokemon/Trainer mon|FRLG|016|25}} | |||
| | {{Pokemon/Trainer mon|FRLG|016|25}} | ||
{{Pokemon/Trainer mon|FRLG|021|25}} | |||
{{Pokemon/Trainer mon|FRLG|021|25}} | |||
| | {{Pokemon/Trainer row|FRLG|Biker|Jared|560}} | ||
{{Pokemon/Trainer mon|FRLG|109|28}} | |||
{{Pokemon/Trainer mon|FRLG|109|28}}{{Pokemon/Trainer mon|FRLG|109|28}} | |||
| | |||
| | |||
| | |||
|} | |} | ||
</div> | |||
===Items=== | |||
* PP UP (Hidden in the gap in the southernmost fencing, next to a strange Trainer Tips sign that tells readers to look, referring to this item) | |||
==New Pokémon== | ==New Pokémon== | ||
{{ContentBoxContainer}} | |||
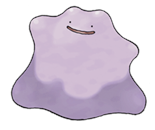
{{Pokemon/New|title=#132 Ditto|contents={{PokePic|Ditto|left}} | |||
Ditto may have the ability to {{bpm|Transform}} into any Pokémon it faces, but with such weak stats, it's almost not worth the catch. However, Ditto does have one factor that makes it worth it. Because of its Ditto egg group, it can breed with any egg group except for its own and the No Egg egg group. Find one with some good IVs, and you'll have an excellent breeding Pokémon on your hands.}} | |||
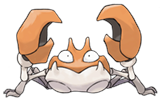
| | {{Pokemon/New|title=#98 Krabby|contents={{PokePic|Krabby|right}} | ||
Krabby is a fairly good Water Pokémon, and you can have fun beating things instantly (30% of the time) with his {{bpm|Guillotine}} technique. But Krabby's real selling point is that he can learn the {{bpm|Cut}}, {{bpm|Surf}}, and {{bpm|Strength}} HM's, allowing you to have them all without using more than one slot on your bench.}} | |||
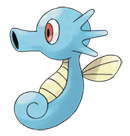
| | {{Pokemon/New|title=#116 Horsea|contents={{PokePic|Horsea|left}} | ||
| | Horsea's evolved form {{bp|Seadra}} is a solid fighter, and learns a good variety of Water-type attacks. But you probably won't want more than one or two Water-types on your bench, and there's a variety of better options. {{bp|Cloyster}}, {{bp|Vaporeon}}, {{bp|Starmie}} and {{bp|Lapras}} top the list.}} | ||
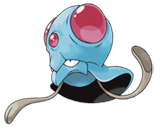
{{Pokemon/New|title=#72 Tentacool|contents={{PokePic|Tentacool|right}} | |||
Tentacool mixes Water with Poison types, and learns a variety of good attacks in both (and has a high enough special to make good use of them). The Built-in Poison attack {{bpm|Acid}} does damage while lowering defense, which is nice, but Poison types still aren't stellar.}} | |||
| | </div> | ||
| | |||
{{Footer Nav|game=Pokémon FireRed and LeafGreen|prevpage=Safari Zone|nextpage=Route 14-15}} | {{Footer Nav|game=Pokémon FireRed and LeafGreen|prevpage=Safari Zone|nextpage=Route 14-15}} | ||
Latest revision as of 23:09, 6 April 2024
You've liberated Saffron City from Team Rocket's mad scheme, and you could probably use a bit of a holiday. We hear the fishing is good down south of Lavender Town, so grab your best rod and get set to go!
You ought to pack the Poké Flute, too. You won't be able to avoid Pokémon duels completely on this trip, but things will be far less hectic. Route 13 is more like a maze than a highway, but it is a pleasant place to walk and enjoy the great outdoors.
Route 12[edit]

Sleeping Beauty[edit]
The Poké Flute is needed to wake the Snorlax blocking the path here. But first, visit the gate's second floor to get TM27. It contains Return (which, the stronger the friendship level of your Pokémon, the more powerful it is).

Snorlax won't be very happy to be woken, but try to capture it. This is the only other Snorlax in the game, so if you didn't catch the one in Route 16, here's your last opportunity. With the way clear, continue south to Route 13. After the Snorlax, get the Super Rod from a man in a house.
Pokémon found[edit]
| FireRed | |||
|---|---|---|---|
| Pokémon | Level | Rate | |
| Pidgey | 23-27 | 30% | |
| Oddish | 22-26 | 35% | |
| Gloom | 28-30 | 5% | |
| Venonat | 24-26 | 30% | |
| LeafGreen | |||
|---|---|---|---|
| Pokémon | Level | Rate | |
| Pidgey | 23-27 | 30% | |
| Venonat | 24-26 | 30% | |
| Bellsprout | 22-26 | 35% | |
| Weepinbell | 28-30 | 5% | |
| FireRed and LeafGreen | |||||||||||||||||||||||||||||||||||||||||||||||||||||||||||||||||||||||||||||||||||||||||||||||||||
|---|---|---|---|---|---|---|---|---|---|---|---|---|---|---|---|---|---|---|---|---|---|---|---|---|---|---|---|---|---|---|---|---|---|---|---|---|---|---|---|---|---|---|---|---|---|---|---|---|---|---|---|---|---|---|---|---|---|---|---|---|---|---|---|---|---|---|---|---|---|---|---|---|---|---|---|---|---|---|---|---|---|---|---|---|---|---|---|---|---|---|---|---|---|---|---|---|---|---|---|
| Pokémon | Level | Rate | |||||||||||||||||||||||||||||||||||||||||||||||||||||||||||||||||||||||||||||||||||||||||||||||||
| Surfing | |||||||||||||||||||||||||||||||||||||||||||||||||||||||||||||||||||||||||||||||||||||||||||||||||||
| Tentacool | 5-40 | 100% | |||||||||||||||||||||||||||||||||||||||||||||||||||||||||||||||||||||||||||||||||||||||||||||||||
| FireRed | |||||
|---|---|---|---|---|---|
| Pokémon | Level | Old Rod | Good Rod | Super Rod | |
| Magikarp | 5 | 100% | - | - | |
| Krabby | 5-15 | - | 20% | - | |
| Horsea | 5-15 | - | 60% | - | |
| Magikarp | 5-15 | - | 20% | - | |
| Psyduck | 25-35 | - | - | 1% | |
| Horsea | 15-35 | - | - | 84% | |
| Gyarados | 15-25 | - | - | 15% | |
| LeafGreen | |||||
|---|---|---|---|---|---|
| Pokémon | Level | Old Rod | Good Rod | Super Rod | |
| Magikarp | 5 | 100% | - | - | |
| Krabby | 5-15 | - | 60% | - | |
| Horsea | 5-15 | - | 20% | - | |
| Magikarp | 5-15 | - | 20% | - | |
| Slowpoke | 25-35 | - | - | 1% | |
| Krabby | 15-35 | - | - | 84% | |
| Gyarados | 15-25 | - | - | 15% | |
Trainers[edit]
| FireRed and LeafGreen | |
|---|---|
| Trainer | Pokemon |
 Fisherman Ned Reward: |
|
 Fisherman Chip Reward: |
|
 Fisherman Hank Reward: |
|
 Fisherman Elliot Reward: Rematch |
|
 Young Couple Gia & Jes Reward: Rematch |
|
 Rocker Luca Reward: Rematch |
|
Camper Justin Reward: |
|
 Fisherman Andrew Reward: |
|
Items[edit]
- TM27 Return (Given to you by the girl on the second floor of Lavender Town's gate)
- Hyper Potion (Hidden near a fisherman)
- TM48 Skill Swap (On a small island at the North of Route 12, through surfing)
- Leftovers (Hidden and "buried" on the spot where Snorlax stands, unearthed with the ItemFinder)
- Super Rod (Given to you by the Fishing Guru at a house south of Snorlax's spot)
- Net Ball (one or more, up to a certain limit) (Given to you by the Fishing Guru for showing them a Magikarp and then, if possible, anytime for showing them a bigger Magikarp than the ones previously shown, theoretically limited to certain minimum and maximum sizes)
- Iron (In the grass area accessible only by cutting a tree, south of the Fishing Guru's house)
- Rare Candy (Hidden in the patch of grass on Route 12 (three grass patches up from the bottom and two to the right from the left)
Leftovers is an important and popular item to be held by a Pokémon. It recovers a Pokémon's health one bit at a time, making it universally useful to any Pokémon.
Route 13[edit]

Pokémon found[edit]
| FireRed | |||
|---|---|---|---|
| Pokémon | Level | Rate | |
| Pidgey | 25,27 | 20% | |
| Pidgeotto | 25,27 | 5% | |
| Oddish | 22,24,26 | 35% | |
| Gloom | 28,30 | 5% | |
| Venonat | 24,26 | 30% | |
| Ditto | 25 | 5% | |
| LeafGreen | |||
|---|---|---|---|
| Pokémon | Level | Rate | |
| Pidgey | 25,27 | 20% | |
| Pidgeotto | 25,27 | 5% | |
| Venonat | 24,26 | 30% | |
| Bellsprout | 22,24,26 | 35% | |
| Weepinbell | 28,30 | 5% | |
| Ditto | 25 | 5% | |
| FireRed and LeafGreen | |||||||||||||||||||||||||||||||||||||||||||||||||||||||||||||||||||||||||||||||||||||||||||||||||||
|---|---|---|---|---|---|---|---|---|---|---|---|---|---|---|---|---|---|---|---|---|---|---|---|---|---|---|---|---|---|---|---|---|---|---|---|---|---|---|---|---|---|---|---|---|---|---|---|---|---|---|---|---|---|---|---|---|---|---|---|---|---|---|---|---|---|---|---|---|---|---|---|---|---|---|---|---|---|---|---|---|---|---|---|---|---|---|---|---|---|---|---|---|---|---|---|---|---|---|---|
| Pokémon | Level | Rate | |||||||||||||||||||||||||||||||||||||||||||||||||||||||||||||||||||||||||||||||||||||||||||||||||
| Surfing | |||||||||||||||||||||||||||||||||||||||||||||||||||||||||||||||||||||||||||||||||||||||||||||||||||
| Tentacool | 5-40 | 100% | |||||||||||||||||||||||||||||||||||||||||||||||||||||||||||||||||||||||||||||||||||||||||||||||||
| FireRed | |||||
|---|---|---|---|---|---|
| Pokémon | Level | Old Rod | Good Rod | Super Rod | |
| Magikarp | 5 | 100% | - | - | |
| Krabby | 5-15 | - | 20% | - | |
| Horsea | 5-15 | - | 60% | - | |
| Magikarp | 5-15 | - | 20% | - | |
| Psyduck | 25-35 | - | - | 1% | |
| Horsea | 15-35 | - | - | 84% | |
| Gyarados | 15-25 | - | - | 15% | |
| LeafGreen | |||||
|---|---|---|---|---|---|
| Pokémon | Level | Old Rod | Good Rod | Super Rod | |
| Magikarp | 5 | 100% | - | - | |
| Krabby | 5-15 | - | 60% | - | |
| Horsea | 5-15 | - | 20% | - | |
| Magikarp | 5-15 | - | 20% | - | |
| Slowpoke | 25-35 | - | - | 1% | |
| Krabby | 15-35 | - | - | 84% | |
| Gyarados | 15-25 | - | - | 15% | |
Trainers[edit]
| FireRed and LeafGreen | |
|---|---|
| Trainer | Pokemon |
Picnicker Alma Reward: |
|
 Bird Keeper Clark Reward: |
|
Picnicker Susie Reward: Rematch |
|
 Beauty Lola Reward: |
|
 Beauty Sheila Reward: Rematch |
|
Picnicker Valerie Reward: |
|
Picnicker Gwen Reward: |
|
 Bird Keeper Robert Reward: Rematch |
|
 Bird Keeper Perry Reward: |
|
 Biker Jared Reward: |
|
Items[edit]
- PP UP (Hidden in the gap in the southernmost fencing, next to a strange Trainer Tips sign that tells readers to look, referring to this item)
New Pokémon[edit]

Ditto may have the ability to Transform into any Pokémon it faces, but with such weak stats, it's almost not worth the catch. However, Ditto does have one factor that makes it worth it. Because of its Ditto egg group, it can breed with any egg group except for its own and the No Egg egg group. Find one with some good IVs, and you'll have an excellent breeding Pokémon on your hands.

Krabby is a fairly good Water Pokémon, and you can have fun beating things instantly (30% of the time) with his Guillotine technique. But Krabby's real selling point is that he can learn the Cut, Surf, and Strength HM's, allowing you to have them all without using more than one slot on your bench.

Tentacool mixes Water with Poison types, and learns a variety of good attacks in both (and has a high enough special to make good use of them). The Built-in Poison attack Acid does damage while lowering defense, which is nice, but Poison types still aren't stellar.
