Below are the bosses you will encounter at the end of the Corridors, during the in-flight sequences. Some of them only appear once, while others you may encounter multiple times. As for these, they can appear in multiple variations, with a different color. The green color represents the least dangerous variant, the blue color the medium one and the red color the more powerful one. Weapon damage of bosses are capped at 5 per hit.
Labyrinth Bosses
Blob
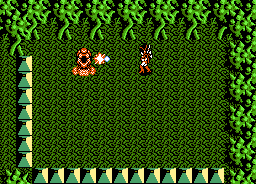
This is the easiest boss to defeat. It appears in a random position on the screen, raises its head, then disappears and reappears elsewhere. When it disappears, it leaves behind some minor enemy similar to it, which you will have to defeat, but it does not attack you in any other way.
You will meet it many times during the game and it appears in four variants: red, orange, blue and green (from the least dangerous to the most powerful). None of them, however, should create too many problems and generally you will be able to defeat this boss also without optional weapons
Domed Robot
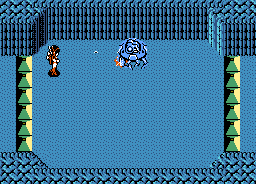
Another boss you will encounter often. This domed robot will always come towards you, firing small bullets that move in a straight line. It cannot move diagonally and this benefits you. You can then walk around the room in circles, stopping to attack the boss when you have a good distance between him and you. For these fights it is best to use optional weapons that attack in a straight line.
It appears in three versions: green, blue and red.
Note: In the later stages of the game, the blue domed robots will also start appearing as ordinary enemies, and just before the end, the red version as well.
Bouncing Leech
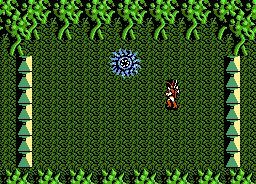
This boss is downright insidious. It bounces very fast around the room, usually coming in your direction. Hitting it without taking damage is really difficult. The most effective optional weapons are the Back Fire and the Blaster Area, which will allow you to hit the boss as you keep moving to escape it. There is also another very risky strategy to defeat it. You can always stand still in the same position, continuing to shoot the boss with your regular attacks and some powerful special weapons, like Fireball. The boss will damage you continuously, but if you are quick and with a bit of luck, you will be able to defeat it before your life energy drops to zero.
It appears in three versions: green, blue and red.
Crab

This crab appears in a random position on the screen, flashing. While it is flashing, you will not be able to hit it. The boss will move up or down until it is at your side. Only then will it become solid and start attacking you and you can hit it too. The crab attacks you by throwing bullets and bubbles that move in a descending parabola. After a while, it disappears and reappears in another position. Given its behavior, you will never be able to hit it from below, but only from the side. However, there is a strategy to defeat this boss very easily: when it appears, go against the upper wall of the room. This way, many of his attacks will hit the wall and can't harm you, while you are free to attack it. You can use the optional weapons to speed up the fight, but it is not strictly necessary.
It appears in three versions: green, blue and red.
Floating Crystal
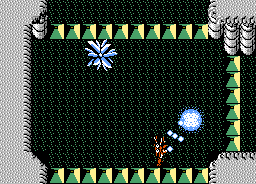
This boss appears only once during the game, in Area 5 and behaves similarly to the domed robot. However, it will attack you by shooting small diamonds that will chase you very quickly. This attack can be dangerous, so try to take out the small diamonds quickly with your weapons. For the rest, you can follow the same strategy you use for domed robots. Every so often, among other things, this boss stops for a few moments, giving you the opportunity to get away and attack it safely.
Dinosaur Skull
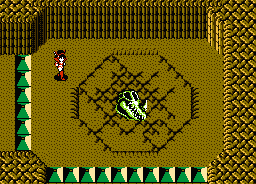
You will meet this boss only once, at the beginning of Area 10. It’s among the last bosses you will encounter, as well as the toughest. It floats around the room, firing bullets that chase you quickly and do some decent damage. Hitting the boss with weapons that move in a straight line like Fireball is not easy, because it moves very fast, so you should fall back on the less powerful Area Blaster or Cutter Laser. You must also avoid any contact with the boss, which causes considerable damage. If your life energy starts to run low, you should use some Enemy Eraser, to destroy the bullets, hoping to make items appear that allow you to recover life energy. This boss has a lot of HP, so the fight will be longer than usual.
Corridor Bosses
Defense System
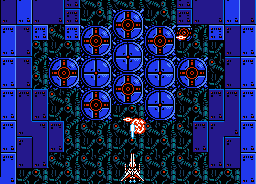
The first boss encountered in the game, it is found at the end of the initial flying scene. Consisting of both large and small turrets across the screen, it is the only instance of this boss in the game (no colour variants). There isn't much to say about the strategy for defeating him, as you don't currently have any optional weapons. Try to avoid the bullets it fires, or rather, to destroy them with your attacks. In this way you will make items appear that will allow you to restore life energy.
HP = 4 (small turrets), 8 (large turrets)
Fleepa
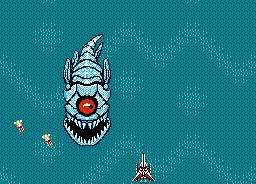
A large fish-like boss, it mainly travels vertically up and down the screen while attempting to maintain the same horizontal position as the Guardian. It will occasionally produce smaller fish from its mouth which seek out the Guardian. Your regular attacks should be enough to defeat it, but if there are too many fish on the screen, you can use an optional weapon like the Wave to take them out more easily.
It appears in two variants, blue and red.
HP = 80 (blue), 128 (red)
Optomon

A large fuzzy eyeball, the Optomon shoots standard bullets at the Guardian’s position as it travels horizontally across the screen. More importantly, Optomon regularly spawns/drops long seaweed-like strands that slowly descend on screen which cause devastating damage should the Guardian touch them. Therefore, when faced with a choice between touching a bullet or seaweed, always take the bullet. During these encounters, the only way to restore energy is to use an Enemy Eraser to destroy the bullets, hoping for an item to appear. This makes the Optomon among the most formidable enemies. Things will get a little easier when you have Fireballs at least at level 2, which, in addition to causing massive damage to the boss, can eliminate seaweeds.
It appears in green, blue, and red variants.
HP = 160 (green), 256 (blue), 320 (red)
Crawdaddy
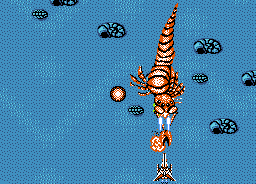
A large crayfish which, similar to Fleepa, travels vertically and releases smaller projectiles. If the Guardian changes horizontal positioning, Crawdaddy will attempt to match position but will gain speed and bounce off the sides of the screen like a pinball, becoming more difficult to target. Recommended strategy is to stay directly underneath Crawdaddy without moving and continuously shoot Fireball.
It appears only once in the game, at the end of Corridor 2.
HP = 144
Bombarder
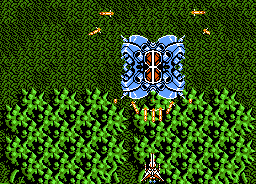
Bombarders will appear randomly on the screen, launch a barrage of heat-seeking missiles in a full circle, and then disappear from the screen before reappearing in a different location. When it appears in front of you, you can use your regular attack, supported by special weapons such as Fireball or Saber Laser, to attack the boss while destroying the missiles. When it appears near the bottom edge of the screen, you can use the Laser Cutter or the Back Fire instead.
It appears in blue and red variants.
HP = 192 (blue), 240 (red)
Clawbot
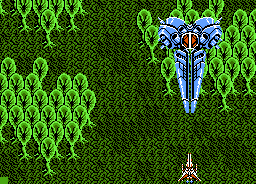
The battle with Clawbot is always divided into two phases. During phase one it will fire homing missiles from the side and occasionally open his claws to fire a large laser. During phase two, it will lose his claws, which slowly descend towards the bottom of the screen, and Clawbot will fire the laser continuously. An easy strategy is to switch to Cutter Laser, move up to the top of the screen, and hit Clawbot from the side. As long as the Cutter Laser is hitting the boss you won’t take damage, and the fight will quickly end. You can also hit it from below without too much trouble; just be careful to keep slightly to the side to avoid the large laser, as it does a lot of damage.
It appears in green, blue and red variants.
HP = 516 (blue), 452 (green), 580 (red)
Teramute
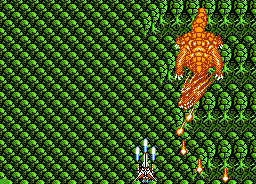
Teramute is a dragon that appears randomly on the screen, spew fireballs in an arc formation, and will disappear. If it appears at the top of the screen, you can use your regular attacks, supported perhaps by powerful optional weapons such as Fireballs. If it appears at the bottom of the screen and you can't position yourself under it, you may want to use a side-hitting weapon, such as the Saber Laser directly into his head.
It appears only once in the game, at the end of Corridor 4.
HP = 256
Zibzub
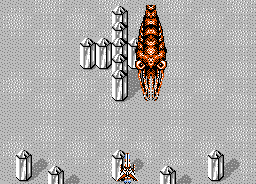
Similar in appearance to the Crawdaddy, the Zibzub moves vertically while firing small squids from its mouth. Recommended strategy is similar to Crawdaddy, staying low on the screen and continuously firing the Fireball.
It is the boss of Corridor 5, but you will also meet it again in the final Corridor, during the boss rush.
HP = 224
Glider
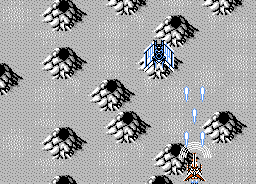
Appearing as a small winged mechanical creature, the Glider loops around the screen impervious to any attack until it holds still in one place, flaps its wings, and shoots missiles at you. This is the only time you may damage it with your weapons. Since it holds still to attack, you can conceivably use your Saber Laser against it, but the Fireball or Wave Attack are equally effective and don't put you at risk of colliding with the boss when it starts flying around the screen again. Collision with the boss can be quite damaging. Nevertheless, the missiles it sends won't really overwhelm you. The biggest concern is getting out of its way when it crosses the bottom of the screen.
It is the boss of Corridor 6, but you will also meet it later, in a room in Area 10.
HP = 96
Eyeball Growth

Similar to the Defense System, the Eyeball Growth is a stationary boss that fires projectiles (eyes) at you in large quantity. Recommended strategy is dodge projectiles while firing Fireball, Repeller, or Grenades. In this way you will easily make objects appear that will allow you to restore life energy.
This boss can be encountered twice, in Corridors 7 and 17. On both occasions it will look the same, although the second time there will be two extra small eyeballs on either side.
HP = 96 (small eyes), 384 (large eyes)
Grimgrin

Grimgrin moves about the screen in a particular pattern. It flies all around the middle of the screen in a manner that allows you to avoid him if you remain on the side. It fires eyeballs and bullets at you, none of which are a tremendous threat. Instead, you will have to pay attention to his movements and move accordingly, to avoid any contact with the boss, as it causes a lot of damage. To attack it, you can use a weapon with good range like the Wave Attack, Fireball, Repeller or Hyper Lasers. As you attack it, its eyes will be progressively destroyed: first the bottom pair below, then the top pair, and finally the eye in the middle. At this point, a myriad of bullets and eyeballs will come out of the destroyed eye. If on the one hand you will be hit easily, on the other hand you will now have a much better chance of making items appear that will allow you to regain your energy. Keep attacking it until it dies.
It appears in two variants, blue and red.
HP = 1152 (blue), 1664 (red)
Eyegore
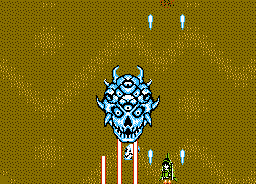
Eyegore always appears in the center of the screen, never moving sideways, only up or down. As it moves, it releases lasers underneath it, as well as launching skulls that move across the screen and can be destroyed by your attacks. Given its behavior, it is better to avoid attacking it from below, while you can easily attack it from the side with optional weapons such as the Back Fire or the Laser Cutter. You can also use weapons that have a wider range than the Guardian, such as Hyper Laser or Repeller, to attack him without exposing yourself to his lasers.
It appears in two variants, blue and red.
HP = 512 (blue), 768 (red)
It
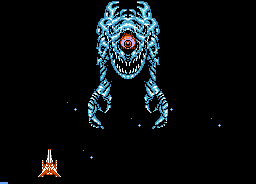
The final boss of the game takes up a good portion of the screen. It always stays on top, moving only left and right. Every few seconds, however, it will move its claws downward, attacking you, sometimes even both at the same time. It can hit you even if you stay against the bottom edge of the screen, so you will necessarily have to move. The boss also shoots bubbles and missles that chase you, which can be destroyed by your attacks. To damage the boss, you won't be able to aim at your normal attack, as its claws are impervious to your main weapon. To defeat the boss you'll need to use optional weapons that can get past its claws (Fireball is fine), or attack it from the side with weapons like Cutter Laser or Back Fire. In any case, you will have to move carefully so as not to get hit. If you stay in the upper right or upper left corner of the screen, the boss cannot touch you. If your life energy starts running low, use some Enemy Erasers on repeat to destroy the missiles and pop up items that allow you to regain your energy. When you've dealt massive damage to the boss, it boss will turn yellow and fire more bullets. However this, rather than complicating things, makes them easier, as you will have a better chance of making items appear to recover energy, especially if you use the Enemy Erasers. When the boss is finally close to death, it turns red and shoots wildly. Keep calm and keep using the above strategy until you kill it.
HP = 2176 (1664 phase one, 256 phase two, 256 phase three)
