Wonky Circus is the second level of Spooktastic World, with a zany circus aesthetic. This stage features many different types of animals, cannon balls, and tricky platforming on the way to get treasure and beat up the bad guys.
Like the previous level, there is a half-way point where once dropped down, Wario cannot traverse back earlier through the stage. There are a series of massive clown-faced cannonballs fired throughout the stage: They cannot be destroyed and will always plow through Wario, so they should be avoided at all costs.
Spriteling 1 and Treasure: Red[edit]
Almost immediately into the stage is the first Spriteling, on a ledge near the cannonballs. It mentions the upcoming Electric Clown Fence miniboss, and suggests a better way to defeat it. Just to the left of this Spriteling is the red treasure button and a Wooden Chest.
The red button is to the left of the first Spriteling. The treasure itself is just left of that, after a massive cannonball cannon.
Trapdoor 1 and Gold Statue Part 2[edit]
At this rate, getting all the collectibles will be a breeze! The wood trapdoor is directly next to the red Treasure, and features two ladders in the corners with several spike balls floating around them. Fit Wario in the gap and slowly inch upwards, either by climbing a rung or two at a time, or very very lightly pressing up on the control stick. It is a patience tester! The top ledge contains a Gold Statue Part and a Red Diamond.
Immediately after leaving Trapdoor 1 is the second part. There is another Wooden Chest past the final massive cannonball cannon as well.
Soon, Wario reaches the first Electric Clown Fence. Periodically, Clown Magons will fall from above to attempt to attack Wario. Stun them, and use a Mega Toss to defeat the little targets bouncing around. A Mega Toss is not required, but each target will need to be hit more times and grow smaller/faster without doing so.
Trapdoor 2[edit]
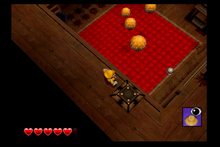
This Trapdoor features several Glue Globes to reach the top ledge. Simply jump off one to the next, over the spikes, and reach the Red Diamond prize. The Wooden Chest may have health if you need it. Grab one of the birds once departed—it will help soon.
Jump into the bottom area first to fight a blue Crystal Entity, and use it to enter the steel Trapdoor at the bottom of the arena.
Trapdoor 3[edit]
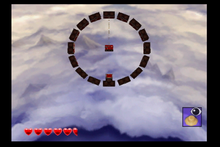
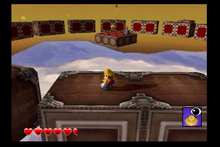
A very large ring of blocks has appeared around the center platform. Wait a second or two before dropping onto the first of these blocks, and work across to the opposite end of the ring. Utilizing the C-Stick to ensure Wario is on the correct platform is vital. It is somewhat difficult to see, but the ring of blocks is rotating around the center platform, with the block opposite to Wario's starting position moving to be directly above the center platform. The idea is for Wario to fall off the top onto the center platform. Once the ring has risen enough, Wario will need to move from the blocks' sides to the top—jumping to the top too soon may have Wario slide right off, so be patient. Once close to over the center, use the C-Stick to look directly down. Wario doesn't have much horizontal movement when falling, so wait until he is assuredly over the platform before jumping off. Soon, the Red Diamond and Gold Statue Part here will be yours.
After the completion of this Trapdoor, move upwards with the ladder. There's a strange flag banner over the ledge: Jumping, walking, or dashing into it will fling Wario the opposite direction, so use it to make the gap. After the second ladder is the yellow button.
Gold Statue Part 4[edit]
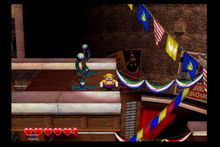
This Gold Statue Part is impossible to miss—Wario will get it while being flung from the second flag banner.
Spriteling 2[edit]
Take the glue globe to the right, avoiding a massive cannonball cannon, to reach the Spriteling. It makes a comment about using the C-Stick to see what is ahead. From here, head left.
There is a small, optional minigame here. Bombs will drop infinitely and can be used to be Mega Tossed directly at five bowling pin shaped birds. If Wario's aim is good, they will sweat and twitch to indicate they are in the direct line of fire. Should all five be defeated this way, a Wooden Chest will appear with money. There is no benefit to trying to dash through the birds on their respective platform—they jump up and away to hide.
Treasure: Yellow[edit]
The yellow button is located to the left of the ladder after the first banner. The chest is located after the optional minigame, by taking the glue globe to the top of its rotation. Watch out for the massive cannonballs!
Trapdoor 4[edit]
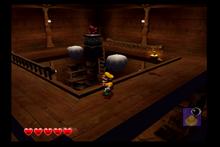
Run, don't walk, downwards from the yellow Treasure. A series of Elephants will start charging at Wario, and no attacks will stop their rampage. There are two spike balls that will block the path up the ladders, but will move out of the way for a brief time. Simply wait for the spiked ball to move out of the way, then climb to the top. Quickly hop off the Marshmallow Blocks to get to the Red Diamond and Gold Statue Part.
Treasure: Chartreuse[edit]
Carefully drop down to the lower section after the fourth Trapdoor after a series of massive cannonballs, and run downwards. The button is on a small metal platform, safe from the cannonballs' reach. Run back left, climb the ladder, and use the glue globe to find the Treasure itself nearby.
Treasure: Green[edit]
The green button is in the reverse corner of the chartreuse Treasure with the glue globe. Proceed to the next large arena-like room, and run near the bottom. Do not break the rock block in the floor yet. Instead, climb the ladder to an upper ledge with two Cobras. Defeat both, and the green Treasure is Wario's. Jump off to the side down back into the arena, as to avoid the quickly-respawning Cobras.
Trapdoor 5[edit]
There are several Caged Beast enemies present that will swipe at Wario if he gets too close. Instead of risking losing health, use a Gatorbaby—the club wielding enemy at the top of the room—to enter the trapdoor located on the left side. This trapdoor features two rings of swiftly moving Glue Globes rotating in-between blocks. To help make lining up a jump easier, use the C-Stick to rotate the camera to the side to see where the Glue Globes are. The second ring is easier to get onto than the first, but oftentimes Wario moves so quickly off of it that he overshoots the ending platform. A ground pound cancels all horizontal velocity, so aim above the platform and ground pound to prevent this. There is only a Wooden Chest and a Red Diamond here in this brief Trapdoor.
Falling down the giant hole[edit]
Similar to the previous stage, there is a large hole in this stage only protected by a single Rock Block. The only way to return to the areas before is to use a ByeBye Balloon at the end of the level or replay it entirely, so ensure all collectibles are acquired before moving further. Upon landing at the bottom of the hole, a fight against a red Crystal Entity will begin.
Trapdoor 6[edit]
After a few fire plumes is the sixth Trapdoor, with a lot of enemies to make it difficult to enter. Bird-like enemies are smaller, and tend to get into the Trapdoor easier, but are also harder to knock out of the sky, so pick whatever is more comfortable. The Trapdoor itself is a momentum challenge: There's a Glue Globe at the end of a stick that retracts before shooting forward quickly. Wario should jump off immediately after the stick reaches its full length, which is easiest to identify by jumping immediately after the sound effect. Hold upwards and hold A! Approach this massive leap with confidence. If it is done right, Wario will be flung to the opposite side to reach the green Spriteling and a Red Diamond. The Spriteling informs Wario about how to use a Dash Attack by pressing R...something that should be well known to use by now!
Treasure: Light Blue[edit]
The button for this treasure is directly above the sixth Trapdoor. Continue moving left, ignoring the large circular platforms. Wario will pass by a clock tower to find the Treasure in a small corner area.
Spriteling 4[edit]
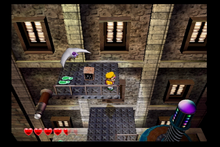
Returning from collecting the light blue Treasure, Wario can locate the blue Spriteling on a metal platform above the Glue Globes. It informs Wario about how Garlic Dispensers work. After saving this Spriteling, perform a Corkscrew Conk to the platforms on the right.
Battle Ring[edit]
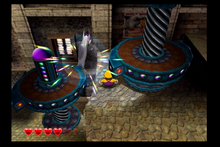
These platforms are called Swirly Slabs, and they are the only three in the game. By punching, dashing into, or throwing an enemy at the exposed portions of the slab, it will spiral upwards, allowing Wario to reach new heights. Hit the lower one first, then the upper, and it will lead Wario to the Battle Ring. Swirly Slabs don't stay raised forever, so move quickly.
Treasure: Dark Blue and Gold Statue Part 6[edit]
The button is located above the first Glue Globe in the sequence after the Battle Ring—ride it to the top to reach the platform. The treasure is located at the end of the sequence of three Glue Globes out in the open, and shouldn't be too difficult to locate.
Above the second Glue Globe in the sequence after the Battle Ring is a Gold Statue Part. There is a cannon firing massive cannonballs here, so approach with caution.
Treasure: Purple[edit]
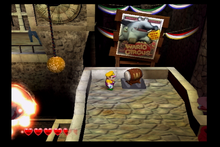
There are two methods to obtain the purple Treasure. The first method is intended, which is to drop down the platform to hit the button, defeat an additional Electric Clown Fence, and climb up ropes to redo the Glue Globe sequence—the purple treasure is almost directly next to the dark blue panel and is difficult to miss. Alternatively, a nearby Cobra or similar enemy could be thrown an an almost perfectly vertical angle in the bottom left corner to bounce off the wall and hit the button. This is extremely tricky to do, but does save having to defeat the Electric Clown Fence.
Gold Statue Part 7 and Trapdoor 7[edit]
After the Cobra filled section is another Electric Clown Fence, with a Magon riding a Caged Beast. Defeat these, and use the Glue Globes to traverse to the left. The Gold Statue Part is suspended in air here.
After collecting Gold Statue Part 6, run to the right over the bridge to find the Trapdoor near a Garlic Dispenser. If Wario is low on health, he should recover now. There's a lot happening around the Trapdoor, but the easiest way to navigate is to use the unobstructed ladder on the fourth wall to get to the balcony, free the purple Spriteling (which explains how to damage the boss), and then using a Corkscrew Conk to clear the gap over to get the Red Diamond.
Trapdoor 8[edit]
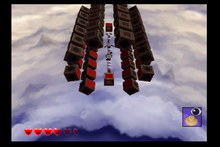
Use an enemy to enter this miniature gauntlet. There's a handful of Marshmallow Bocks and spiked balls, but its mostly just running and jumping forward. The final Gold Statue Part and Red Diamond are here.
Treasure: Pink[edit]
The button for this Treasure is next to the final Electric Clown Fence, which needs an enemy thrown at it. The Treasure itself is located next to the eighth Trapdoor. It's a Nintendo 64!
Boss: Clown-a-Round[edit]
This creepy clown is no match for you! It rides over to Wario riding a giant ball, throwing it to the other side. This reveals the big ball is actually a massive bomb! Try to not get distracted by the fireworks—the clown is the main objective. Clown-a-Round will begin by removing his head to reveal...another head. He will then throw these heads at Wario, and they become sentient entities that will occasionally charge up and attack Wario. This reveals Clown-a-Round's real face, which is an ugly grimace instead. The natural course of action is to pummel it, which will eventually stun the boss. Use a Mad Move to deliver damage like normal. The Wild Swing-Ding or Piledrive is suggested, as it can damage or defeat the sentient heads nearby. Soon, Clown-a-Round summons another ball and attempts to cross a tightrope to an opposing platform. Use a Glue Globe found on the ball to safely cross with Clown-a-Round to continue the fight. There are no new attacks from here on out, and it just summons more heads each time. Each point of damage, there will be one fewer Glue Globe to use to cross the gap. That said, there is always a Glue Globe located on the right side of the ball.
Should Wario not cross the gap, flee to the sides of the area! There are little gaps that will keep Wario away from the explosion caused by Clown-a-Round's ball. Any of the sentient heads will also try to use these spaces, so punch them back into the blast radius to defeat them. On very rare occasions, Clown-a-Round will move halfway down the tightrope, then turn around and go back the way it came.
Once this boss is defeated, Dual Dragon's Showdown unlocks. If all Gold Statue Parts have been collected, Wario should have a total of six hearts of health.


