One significant feature of StrategyWiki guides is that you can add images, and place them anywhere you like. This page deals with the specifics of placing and uploading images on pages.
A picture is worth a thousand words. If you're trying to describe a route or puzzle solution that takes a lot of words to explain, it might be easier to draw it and refer to the map. Please use restraint when uploading images or other media to a game guide. While you are encouraged to use as many images as you feel necessary for describing elements of the game, each should be relevant, important, and include informative captions (where appropriate). An image should add to the informative value of a guide. Do not upload images for the sole purpose of making a guide "look cool".
Uploading[edit]
- For more details on image naming and categorization, see the image policy.
You can upload images from the upload page.
- File sizes and file extensions
StrategyWiki has a filesize limitation of ~2MB. We prefer to have the smallest file sizes possible to minimize hard drive disk space and bandwidth usage (this does not mean you need to go through our file library to optimize every png file; in fact, uploading new versions does not save us disk space because we retain old versions of the images). Please keep file sizes, and resolutions to a reasonable size. If the image will be used as a thumbnail, then it should be close to 250x250 pixels to match the default thumbnail resolution. E.g. see Mega Man X/Chill Penguin for an example of small file size, but high quality thumbnails.
We prefer png files because they can be compressed the lowest and render thumbnails well. Jpg are great for offering low file sizes for high resolution photos, and have no problems here. Gif files should only be used for animations, as StrategyWiki currently cannot render gif thumbnails.
To get the lowest file size before uploading:
- Use a photo editing tool like The GNU Image Manipulation Program (GIMP) to open your file or capture it with the print screen function.
- Please save (or 'export') your file as a png, then run it through a compression tool. There are many free websites available to do this (please Google something like "online png compression tool").
- Once you use a tool to compress the file, download your file and rename, or overwrite the original file. Or, upload the image to StrategyWiki from the directory/folder you downloaded it to.
- How to upload
- Go to the upload page.
- Choose the file that you are about to upload.
- Option 1: select "Source: filename" (the first circle button, it may already be selected). Use this to upload from your computer.
- To do this, click 'Choose File'. In the pop-up window find your file, then click 'Open'. The upload page will now show the path/filename and maybe a thumbnail on the right. The default name provided will match the name of the file on your local computer, so it will need to be renamed if it doesn't conform to the image naming policy.
- Option 2: "'Source URL" - copy from another website. If you are uploading from a source on the web, enter the full URL into the provided box. When copying an image from another website, you will have to enter the filename yourself. Remember to also place the URL into the summary section so that others know where it was copied from (this helps others verify that the image complies with StrategyWiki's licensing). Alternatively, you can click on a red image link to be taken to the upload page with the named filled in from the link. One helpful way to deal with this, if you are copying a filename from a gallery or thumbnail preview, is to put the filename in the summary field, then put the URL into place. Replacing the bad filename with a good one is just one step away - copy it from the summary field where you temporarily put it (please remove it from the summary before submitting).
- Option 1: select "Source: filename" (the first circle button, it may already be selected). Use this to upload from your computer.
- Naming: properly name your image with the name of the guide to which it belongs or its abbreviation, followed by a one or two word description of the image, such as a character's name or a level's name. The destination filename should be something clear like 'War3RoC Sylvanas-base Map.png' (this sufficiently references the game WarCraft III: Reign of Chaos, the level it applies to, and the type of image it is). The extension, ".jpg", ".png", ".gif", etc., is case-sensitive and all lowercase is preferred. For details, see the image naming policy.
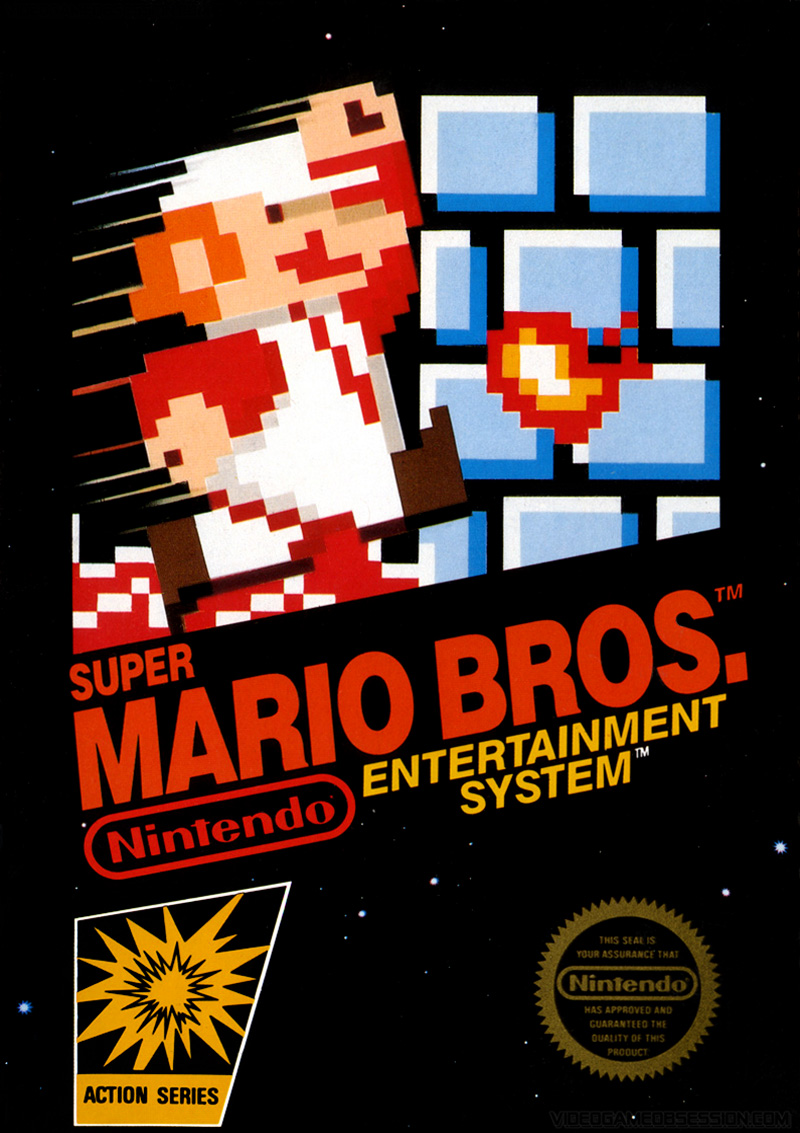
- Summary: here you put a description of the image with a link to the guide on which it will be used. For example, "Box art from [[Super Mario Bros.]]." If the image is from someone else, attribute them here, preferably with a URL.
- Categories: below the summary, put any applicable file categories and the guide-specific category. For example, "[[Category:Box artwork]][[Category:Super Mario Bros. images]]". Note that the word "images" in the guide-specific category is lowercase. To make these readable, and to follow Wikipedia's standards for where to put categories and how to display them, we prefer to put a line break (press enter) between the categories, so that only one category is on each line. This makes it easier to read them. Finally, please alphabetize the categories.
Image Formats[edit]
As a general rule, "When in doubt, use PNG". The most common formats are listed here.
- PNG has excellent lossless compression as well as multiple levels of transparency. Use PNG for images with transparency, smaller images and images with cleanly separated areas of color.
- GIF has good compression, but not as good as PNG in most cases. It only supports a small palette (216/256 colors), and dithers anything outside that palette. Use GIF for images containing a few, clearly separate solid colors, or animated images (QuickTime animations or movies are good alternatives).
- JPEG is good for pictures with thousands of colors, but its compression method corrupts simpler images with compression artifacts. Use JPEG for photos and complex images involving gradients, such as most current box artwork. Also, avoid saving your JPEG images with Microsoft Paint when possible, as it's been known to cause compatibility issues among certain clients.
- SVG is a vector graphic image. Currently most browsers don't fully support the SVG format, which gives your computer commands to draw the picture rather than a bit for bit stream of each pixel used. These images are fantastic for scalability, as shrunken down or blown up they retain their original quality. The MediaWiki software is able to upload SVG images, which are then converted to PNG and displayed as such. Vector images are more complex to create, and it's unlikely you'll find any when searching, but eventually this format may replace all other ones on the Internet.
- BMP is lossless but has no compression. Never use BMPs, use an alternate format instead.
Of course, there are many other image formats out there, but StrategyWiki generally only welcomes the first three mentioned above. When in doubt, consult a sysop or other knowledgeable individual.
Using uploaded files[edit]
To use an image or other file which has been uploaded to the wiki, use:
[[File:SMB NES Box.jpg]]
If you add a pipe (|) and some text after the filename, the text will be used as alternative text for text-only browsers and for the tooltip when you hover the mouse of it:
[[File:SMB NES Box.jpg|alternative text]]
If you don't want to display the image, you can link to the file's description page, by adding a colon:
[[:File:SMB NES Box.jpg]]
To bypass the description page and link directly to a file , use the "Media" pseudo-namespace:
[[Media:SMB NES Box.jpg]]
You can also make piped links if you want some other text to be used:
[[:File:SMB NES Box.jpg|link text]][[Media:SMB NES Box.jpg|link text]]
Image placement[edit]
| Description | You type… | You get… |
|---|---|---|
| Embed image (with alt text) |
|
|
| Link to description page |
|
|
| Link directly to file |
|
|
| Frame (with caption) |
|
 |
| Thumbnail (default thumbnail width, with caption) |
|
 |
| Thumbnail (maximum width to 150px) |
|
|
| Thumbnail (maximum dimension set to 150px) |
|
|
Advanced options[edit]
The full syntax for displaying an image is:
[[File:{name}|{options}]]
Where options can be zero or more of the following, separated by pipes:
thumb,thumbnail, orframe: Controls how the image is formatted. Thumbnailed images are typically smaller, and what should normally be used for in-guide images. Framed images are similar to thumbnailed images, but are not scaled down, while if this option is left out entirely, the image is displayed at full size without any border or embellishment. Use frames on images that don't need to be scaled down or have a caption. Use thumbnails to scale large images down to the default size (250px wide). If you use a thumbnail, put a caption! Remember, users can increase thumbnail size in their preferences.left,right,none: Controls the alignment of the image or thumbnail on the page. Thumbnail images default to floating to the right.{width}px: Resizes the image to the given width in pixels. Note that use of this option is discouraged for thumbnailed images, as it means people can't specify the thumbnail size they want to view in their preferences.{caption text}: A short description of the image and what it shows. This will be displayed under the image for thumb and frame images.link=Destination: This is a named parameter, meaning you must put in "link=" before the destination. Using this option navigates the browser to wherever you specify when the user clicks the image (ex. [[File:Super Mario Bros. cover.jpg|link=Super Mario Bros.]]). Note that link brackets ([[ and ]]) are not used with this option. Normally, clicking the image takes you to the image's information page, so when using this option, it's helpful to make it obvious to readers that the image serves as a link. Currently, using this option negates any alternate text you may try to use, and the "alt=" named parameter also currently doesn't work. This means you cannot modify the words in the tooltip that pops up when hovering over the image.class=custom class': Similar tolinkthis is also a named parameter. This allows you to specify custom styles for the images. For example,class=pixelartwill allow upscaling pixel art images without blurring.class=imgmaxwidthwill size the image to fill the maximum width, and resize on smaller screens.
The options can be given in any order. If a given option does not match any of the other possibilities, it is assumed to be the caption text. Caption text can contain wiki links or other formatting.
Gallery of images[edit]
It's easy to make a gallery of thumbnails with the <gallery> tag. The syntax is:
<gallery>
File:{filename}|{caption}
File:{filename}|{caption}
{...}
</gallery>
Captions are optional, and may contain wiki links or other formatting. You can also add a caption to the gallery itself, by using the caption="{caption}" parameter in the <gallery> tag. Note that you cannot use wiki links or other formatting in gallery captions.
For example:
<gallery caption="Super Mario Bros. boxes">
File:SMB NES Box.jpg|Item 1
File:SMB NES Box.jpg|a link to [[Help:Contents]]
File:SMB NES Box.jpg
File:SMB NES Box.jpg
File:SMB NES Box.jpg|''italic caption''
</gallery>
is formatted as:
- Super Mario Bros. boxes
-

Item 1
-
a link to Help:Contents
-
-
-
italic caption
Special parameters (attributes and values)[edit]
A great, recommended way to use the gallery tag is to add additional parameters. For example, you can make the gallery images large and centered by using the 'modes' parameter set to 'packed' and the 'heights' parameter to force them to be large thumbnails. More details on parameters can be viewed here. Example:
<gallery mode=packed heights=200px caption="Super Mario Bros. boxes">
File:SMB NES Box.jpg|Item 1
File:SMB NES Box.jpg|a link to [[Help:Contents]]
File:SMB NES Box.jpg
File:SMB NES Box.jpg
File:SMB NES Box.jpg|''italic caption''
</gallery>
is formatted as:
- Super Mario Bros. boxes
-

Item 1
-
a link to Help:Contents
-
-
-
italic caption
Image maps[edit]
Image maps are welcome on StrategyWiki. They are images of which certain portions are clickable as links. You can use visual editors such as Image Map Generator to assist with drawing the shapes, although this free image map editor is more than sufficient.
Syntax description[edit]
- The following comes from ImageMap at MediaWiki
The content of an <imagemap> tag consists of blank lines, comments (starting with #) and logical lines. The first logical line specifies the image to be displayed and the size if you're not using its native size. This must be in the same format as an ordinary MediaWiki image link, except without the enclosing [[ and ]].
Further lines are split into tokens, separated by whitespace. The function of each line is determined by the first token in the line. All coordinates are according to the full-size image, not the visible image.
- desc: Specifies the location of the image description link. May be either top-right, bottom-right, bottom-left, top-left, or none. This puts a blue "i" icon in the specified corner, linking to the image description page. The default is bottom-right. To hide the description link, set it to none.
- poly: A polygon. The coordinates of the vertices are given, followed by a link in square brackets. Polygons must be defined before any other form!
- rect: A rectangle. The parameters are the coordinates of the top-left and bottom-right corners, followed by a title to link to in square brackets.
- circle: A circle. The first two parameters are the coordinates of the center, the third is the radius. The coordinates are followed by a link in square brackets.
- default: This gives the default link, where no other regions are specified.
All coordinates are specified relative to the source image. The image can be scaled using a size in pixels piped after the image source in the first line, in which case the image map coordinates will be automatically scaled as well.
All links are given in either the form [[Page title]] or [[Page title|description]]. In the latter case, the part after the pipe "|" becomes the title attribute of the link – in most browsers, it will pop up as a tooltip when the user hovers over it. If no explicit link description is given, the page title will be used.
Areas which overlap give precedence to the first link listed.
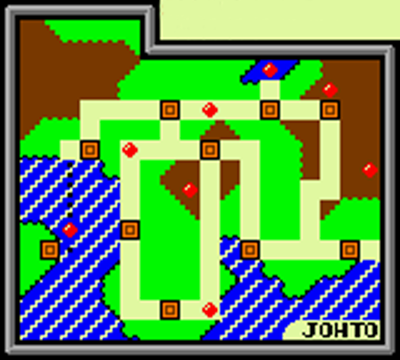
Example[edit]
<center>
<imagemap>
File:PKMNGS_JhotoMap.png|400px
rect 543 383 576 416 [[Pokémon Gold and Silver/New Bark Town|New Bark Town]]
rect 383 383 416 416 [[Pokémon Gold and Silver/Cherrygrove City|Cherrygrove City]]
rect 319 222 352 255 [[Pokémon Gold and Silver/Violet City|Violet City]]
rect 255 480 288 513 [[Pokémon Gold and Silver/Azalea Town|Azalea Town]]
rect 191 352 224 385 [[Pokémon Gold and Silver/Goldenrod City|Goldenrod City]]
rect 255 158 288 191 [[Pokémon Gold and Silver/Ecruteak City|Ecruteak City]]
rect 126 222 159 255 [[Pokémon Gold and Silver/Olivine City|Olivine City]]
rect 61 383 94 416 [[Pokémon Gold and Silver/Cianwood City|Cianwood City]]
rect 413 158 436 191 [[Pokémon Gold and Silver/Mahagony Town|Mahagony Town]]
rect 510 158 543 191 [[Pokémon Gold and Silver/Blackthorn City|Blackthorn City]]
default [[Pokémon Gold and Silver]]
desc bottom-left
</imagemap>
</center>
Will give the following image map. Hover mouse over the orange squares to see how the links work.
Attribution[edit]
Like the rest of the site, do not use attribution on your image; this information instead goes in the edit summary when uploading the image. Each image should have a specific purpose, such as demonstrating a particular task (such as finding the correct book to open a secret passage), illustrating a boss's various evolutions or movement patterns, or listing enemies so the player can learn to recognise and differentiate between them, etc.
Maps and other explanatory images are a priority. Featuring an overworld or screenshot map without any annotations is probably of little value. They should instead serve to either show all the major locations in the game world or else to highlight hidden goodies, enemies, etc. If the thing in question is not clearly visible, it may be useful to draw a circle or arrow indicating it. For the sake of simplicity do not write on the screenshot; the explanation should instead go in the picture caption or in the walkthrough body. For more involved steps, it may be necessary to label different parts "A" and "B" or similar.
Also, take care that images are high quality, clear, and easy to understand. Do not upload grainy pictures taken with video cameras. Either take a direct screenshot with a computer, or use a capture device of some sort.
Do not, under any circumstances, use images with watermarks on them. Additionally, images copyrighted by others cannot be used here. All images must be original or compatibly licensed with the CC-BY-SA license to avoid conflicts of intellectual property.
Other files[edit]
You can link to an external file using the same syntax used for linking to an external web page, however, it is highly recommended that you upload the images to StrategyWiki instead of hotlinking to other sites.
[https://url.for/some/image.png]
Or with different text:
[https://url.for/some/image.png link text here]
You can also embed images via their direct URLs. To do that, simply insert the URL:
https://url.for/some/image.png
You can also use an external image as a link:
[https://destination.page/here/ https://image.url/here.png]
Note that if you want an image to link to an internal page you will need to use the external form of the link (e.g. https://strategywiki.org/wiki/Main_Page) rather than the internal one (e.g. Main Page).