Main area
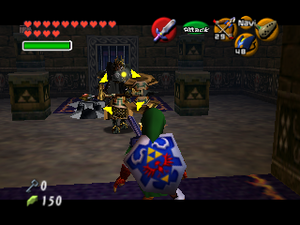
Just as you go forward, you'll see two Green Bubbles patrolling the staircase. Dispose of them with your bow and continue. You need to kill all the enemies to open the door leading into the main room. The two Armos Statues should be no problem since they can't actually engage you up there. The Iron Knuckle is the real problem here, because of the floor spike, the lack of health refills in this room as well as the awkward room layout. You may want to resort to bombs to kill him at a distance. Once all enemies are gone, go through the door.
You're now in the main area. There are six barriers here which prevent access to the central tower where Ganondorf dwells. You will need to complete six trials to dispel the barrier, each of the trials being based on a particular temple you have visited before. Even though it may not seem like it, these trials have to be beaten in a specific order. If you need to heal, there's a secret passage right below the entrance - drop down and look for a secret passage using your Lens of Truth, it leads to a room with lots of fairies and Business Scrubs. Once you're ready, start off by entering the Forest trial directly to your right.
Forest trial
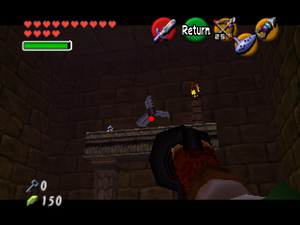
The first room starts off with a rather straightforward fight against two Stalfos. Once they're gone, look above the door - there's a small key and a fan there. Use the Longshot to pull yourself up to the torch, then run across when the wind isn't blowing (or just use the Iron Boots) to get the small key. Continue by going through the door.
The next room is a real challenge. There are lots of fans and Beamos statues scattered all across the room that are just there to make life hard for you. There are two eye switches here, but shooting them is of no use (you get bombs and arrows if you were to do this). Look to your right to notice a fan. Equip the Hover Boots, and once the fan starts blowing, run into the air stream to be blown to the platform on the right with a Beamos on it. Quickly kill it with bombs before it can hit you (or stun it by shooting its eye), and run across the platforms until you're at the locked door on the other side, destroying all the Beamos on your way.
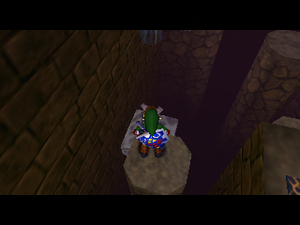
Once you're at the locked door, wait until the fan to the right of the locked door (with a Beamos right in front of it) is not blowing, then get on the platform and equip the Iron Boots so the wind won't blow you away. Play the Song of Time to move the nearby block down and reveal an Armos Statue. Play the Song of Time once more and the block will move back up, but the statue will drop down onto the switch which opens the door. Now, jump back across and go through the door. Shoot the Forest Barrier with a Light Arrow to dispel it.
Go to the right and enter the Water trial.
Water trial
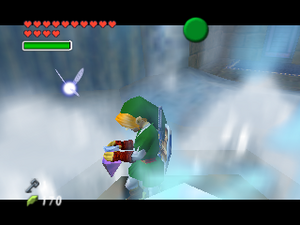
Once you enter the room, you'll find that it is full of Freezzards. You may want to use Din's Fire to get rid of all of them easily. In the center there's a Blue Fire flame, but it is covered by a water jet. There are two ways to get to the Blue Fire: for the first, go to the right and you'll notice a single of Dead Hand's hands just standing there. Kill it with your sword and strike the pillar behind it which will make the water jet go out for a short period of time. The second, and easier, way is to simply equip the Hover Boots, roll into the water jet and pull out your bottle, which will make Link catch the flame just as well.
The chest to the left inside the red ice just contains 20 Rupees. Instead, go forward to the door and release the Blue Fire to melt the red ice blocking it. Catch some more Blue Fire and go through the door using the leftover Small Key from the Forest trial to enter a block puzzle.
In here, you'll have to collect five Silver Rupees. First of all, pull out your bow and get rid of all the Keese flying around (beside those you see, there's also an invisible one here). Jump down and fall into the hole in the middle to get your first Silver Rupee. Go to the back and jump across the pit (the Hover Boots make this easier) for the second one. In an alcove beside the blocks you'll find the third one, and by jumping from one of the blocks to the other you can get the fourth one as well.
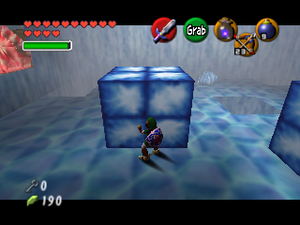
For the fifth one, grab the block furthest away from the wall and push it to the small rock ahead, then push it to the right so it falls into the pit where one of the Silver Rupees was. Afterwards, go to the other block, push it forward across the now closed pit, then left twice so it moves into the alcove. Climb the block and up you'll find the Silver Rupee inside a block of red ice. You do not actually need to melt the ice - simply jump attack the red ice block and you'll get the Silver Rupee, opening the door.
The door, however, is unreachable. Exit and re-enter the room to reset the blocks' positions. Push the block straight ahead to the now unlocked door and use your Blue Fire to melt the red ice barrier. Go through the door, and shoot a Light Arrow at the Water barrier to dispel it.
Once back, go to the right and into the Shadow trial.
Note: If your jars are empty, go out and refill it with fairies to help continue with your survival.
Shadow trial
Again you need to collect five silver rupees. First of all, kill the Green Bubble right in front of you. To your right is a bomb flower, shoot it with an arrow to make it explode, which will reveal a treasure chest on the left side. Use your Longshot to latch yourself to this treasure chest, then open it if you want (it contains arrows). Now, equip the Hover Boots and use your Lens of Truth to reveal an invisible platform moving diagonally across the stage. Jump onto it and grab the first silver rupee, and from there jump to the bomb flower platform to collect the second silver rupee.
Jump back to the invisible platform and jump forward. Kill the Beamos as it hides the third silver rupee. Use a Fire Arrow or Din's Fire to light the submerged torch, which will make a platform appear in front of you. Jump across and kill the two Beamos over there. Use your Lens of Truth and run across the path to your left, kill the Beamos as it hides another silver rupee. Walk back and look back to the platform you came from, there's an eye switch at the very bottom. Activate it and a treasure chest will drop down containing a small key. Continue forward and run across the invisible platform. Watch the guillotine and jump across as it's moving up. You'll collect the last silver rupee on your way which will open the door at the end. In the next room, shoot a light arrow to dispel the shadow barrier.
Run around until you come across the Spirit trial, enter it.
Spirit trial
First, kill the two Keese and the torch slug. Then, look back to notice a depressed eye switch. Shoot it to make an Iron Knuckle appear in the room. It's vital that you must make him destroy the pillars in the middle, since that will reveal a rusted switch. Once he's done that, you're free to kill him any way you want. Afterwards, use the Megaton Hammer on the rusted switch to open the door, then continue.
In this room, kill the Green Bubble just in front of you. The treasure chest behind him contains some Bombchus. Look up to notice a hole in the grating, which is where you want your Bombchu to pass through. Line yourself up with the grating, turn your back to the hole and drop a Bombchu, if you positioned yourself correctly it should hit the crystal switch at the other side which will open the door. Go across and immediately get rid of the Green Bubble.
Play the Sun's Song and kill the Gibdo and the two Redeads in the next room. Use a Fire Arrow directly above you to shed light into this room, then pull out your Mirror Shield. First, aim at the sun symbol directly to the right of the locked door to reveal a treasure chest containing the Golden Gauntlets, which allow you to lift humongous objects. Now, stand in the middle of the light, face the locked door and turn around. The sun symbol directly to the right of the one you're looking at is the one you want to aim at - it reveals a treasure chest containing a small key. To unlock the door, you'll need to light up the spirit symbol above the locked door. In the next room, shoot a light arrow to dispel the spirit barrier.
Now, go the left and lift that rock using your Golden Gauntlets. This will reveal the door to the Light trial.
Note: Go out to have the Giant Fairy enhance your heart meter to reduce the damage by half. Once you got it, continue on your quest.
Light trial
In the first room you'll have to fight against two torch slugs and a Dinofol. This may be a bit troubling so you may want to deal with the torch slugs first, and then bother with the Dinofol. Once they're gone, the door will unlock. In the next room, simply open the locked door right in front of you to proceed. Go forward and you'll be in a room with rolling boulders and a Beamos. Kill the Beamos using Bombs or Bombchus, then look above to see a Hookshot target. Latch yourself to it to be pulled on top of the platform. From here jump across, unlock the door and proceed.
In this room, hit the right torch to trigger a hidden crystal switch. Then, run through the fake wall and in the real room, shoot a light arrow to dispel the light barrier. Once back, go into the last remaining room, the Fire trial.
Fire trial
You'll definitely need the Goron tunic here, as well as Hover Boots. Your job is, again, to collect five silver rupees. Start off by waiting until the moving platform gets to you then jump across. Jump to the top right platform which will launch you up to your first silver rupee. You'll need to backflip to get it, but at the same time watch out to not fall off the platform and into the lava.
Now cross the platforms until you land on the platform with two torch slugs and a giant boulder. Kill the torch slugs and throw away the giant boulder which will serve as a stepping stone later. Once the boulder is gone, you'll notice a silver rupee - wait until the moving platform comes there then jump across. Get back to the platform where the boulder was and look across to the other side of the room to notice a Hookshot platform. Latch yourself onto it and climb onto it, then jump off to the left to collect another silver rupee. From here, jump forward to the platform right before the boulder you just threw, then right to the next platform. This one launches you up to allow you to jump onto the boulder, which is insanely hard since you need to jump very precisely.
Once you've collected this silver rupee latch yourself back to the hookshot platform. Use the platforms in the lava to get to the platform with a Beamos and another giant boulder. You'll want to stun the Beamos first since otherwise it will very likely throw you off the platform otherwise. Once done, throw away the giant boulder and you'll notice it hid the last silver rupee. Collect it and the door will unlock, and a Hookshot platform will appear so you can easily get across. Over there, shoot a light arrow to dispel the fire barrier.
Inside Ganon's Castle
Now that you've disspelled all barriers, you will be able to walk into the tower. The inside of the tower is exactly identical to the one in plain Ocarina of Time, so refer to the OoT guide for details.
You'll be pitted against:
- two Dinolfos
- two Stalfos
- two Iron Knuckles
in this order.
