Within the depths of Lake Hylia stands the Water Temple. Built by Zoras long ago, it honors spirits of water and the many creatures under their guidance.
With the power of your new song available, play the Serenade of Water ![]() to transport to Lake Hylia. Everything seems the same except for one thing: where's the lake water? Go down to the bottom of the dried-up lake and there will be a small pool of water. Put on the Zora Tunic
to transport to Lake Hylia. Everything seems the same except for one thing: where's the lake water? Go down to the bottom of the dried-up lake and there will be a small pool of water. Put on the Zora Tunic ![]() and sink into the water with the Iron Boots
and sink into the water with the Iron Boots ![]() .
.
- The Crystal Lock
Underneath the water is an entrance leading to somewhere, but there is a metal gate blocking it. To open it up, take out the Hookshot and hit the crystal-shaped keystone above the entrance. This will dislodge the buoyant keystone and send it floating up to the surface of Lake Hylia. Since it was keeping the gate from rising, the entrance will open, uncovering the path into the next temple.
The Water Temple[edit]
Underneath Lake Hylia is the Water Temple. It is perplexing, tricky, and an all-around difficult place to navigate through. Many complex puzzles and dangers await you, so be prepared to act quickly in response to dangerous traps. You will also need the Dungeon Map and Compass to identify which rooms you've yet to visit and the hidden treasures they contain. Otherwise, it can be easy to get lost in this dungeon. You will need the Zora Tunic ![]() equipped at all times to breathe underwater, and be using the Iron Boots frequently to submerge into the temple.
equipped at all times to breathe underwater, and be using the Iron Boots frequently to submerge into the temple.
To make things easier on yourself, you should have these with you: Bombs ![]() , plenty of Arrows
, plenty of Arrows ![]() , Din's Fire
, Din's Fire ![]() , and the Biggoron's Sword
, and the Biggoron's Sword ![]() . It is advisable to also have the Biggest Bomb Bag
. It is advisable to also have the Biggest Bomb Bag ![]() and at least the Bigger Quiver
and at least the Bigger Quiver ![]() upgrade (obtained by getting a perfect score at the Kakariko Village Shooting Gallery).
upgrade (obtained by getting a perfect score at the Kakariko Village Shooting Gallery).
As an additional note, make sure to collect the Gold Skulltula Tokens as soon as possible (the ideal times to do so are outlined in this walkthrough); backtracking through this dungeon is difficult and relentlessly tiresome.
Reunited with Ruto[edit]
Once you are in the temple, you'll have to take your Iron Boots ![]() off so you can surface and climb up to venture into the dungeon. You'll find yourself entering a large cavern filled with water and with a large shrine in the middle. This is the main room of the temple. Remember this, as the subsections of the temple all converge back to this room, which comprises three whole floors. The water level in the temple can either be high, medium, or low, and the level will open up access to certain floors while cutting off access to others. At the moment, it is at its highest level. There are also several Blue Tektites
off so you can surface and climb up to venture into the dungeon. You'll find yourself entering a large cavern filled with water and with a large shrine in the middle. This is the main room of the temple. Remember this, as the subsections of the temple all converge back to this room, which comprises three whole floors. The water level in the temple can either be high, medium, or low, and the level will open up access to certain floors while cutting off access to others. At the moment, it is at its highest level. There are also several Blue Tektites ![]() perched on the dry ledges in this room. Try to snipe them with your Fairy Bow
perched on the dry ledges in this room. Try to snipe them with your Fairy Bow ![]() before they have a chance to notice you and attempt to cross onto the water, because they will be able to float on the surface and attempt to chase you while you are swimming.
before they have a chance to notice you and attempt to cross onto the water, because they will be able to float on the surface and attempt to chase you while you are swimming.
Climb up, then walk forward and fall in the water. Then, put the Iron Boots back on. Sink all the way to the bottom. Be wary of the unique enemies which traverse this floor. They are Spikes ![]() , metallic balls with sharp points jutting from their bodies. If the Spikes spot Link, they will roll towards the hero with intent to pierce him. No weapon can harm them in this armored form, but if they collide with your shield or plunk them with an attack from the Hookshot
, metallic balls with sharp points jutting from their bodies. If the Spikes spot Link, they will roll towards the hero with intent to pierce him. No weapon can harm them in this armored form, but if they collide with your shield or plunk them with an attack from the Hookshot ![]() , they will retract their spikes and assume a vulnerable, rock-like form of a vulnerable rock for a few seconds before reverting to their armored form. Attacking them with Hookshot will allow you to keep a safe distance from the Spikes. You can also anticipate where they are by the metallic rattling sounds they make as they roll around, and when to hunt them by the snapping noises they make when they camouflage themselves as rocks. The Spikes will be in their rock forms by default unless disturbed and on the move. As long as you are far away enough away from them, they will not transform.
, they will retract their spikes and assume a vulnerable, rock-like form of a vulnerable rock for a few seconds before reverting to their armored form. Attacking them with Hookshot will allow you to keep a safe distance from the Spikes. You can also anticipate where they are by the metallic rattling sounds they make as they roll around, and when to hunt them by the snapping noises they make when they camouflage themselves as rocks. The Spikes will be in their rock forms by default unless disturbed and on the move. As long as you are far away enough away from them, they will not transform.
Walk northeast, until you see a passage into another area that has two torches on either of the entrance. Go in that area and follow the path. You'll find Princess Ruto at the end, who has matured into an adult. Talk to her, and you'll learn she was saved from being frozen, thanks to Sheik, and she's a bit upset about being ignored by you for seven years. However, she knows that there are three places in the temple that you can raise or lower the water. She tells you to follow her and she floats up. However, Ruto will be long gone by the time you reach the area she has entered.
Draining the Temple Dry[edit]
Simply take off your Iron Boots ![]() and you will float up. When you reach the top, you notice that she isn't there. Get out of the water and ignore the symbol on the wall for now. Enter the next room and kill all of the Spike
and you will float up. When you reach the top, you notice that she isn't there. Get out of the water and ignore the symbol on the wall for now. Enter the next room and kill all of the Spike ![]() enemies in the next room to get the Dungeon Map
enemies in the next room to get the Dungeon Map ![]() . Then go back through the door and play Zelda's Lullaby
. Then go back through the door and play Zelda's Lullaby ![]() in front of the symbol. It lowers the water level in the temple. Then drop all the way down the way you came up.
in front of the symbol. It lowers the water level in the temple. Then drop all the way down the way you came up.
Turn around and you will see that the middle torch is lit but the other two aren't. Either use Din's Fire ![]() or shoot an arrow through the lit torch to light up all three torches. Enter the now unlocked door. There are several enemies called Shell Blades
or shoot an arrow through the lit torch to light up all three torches. Enter the now unlocked door. There are several enemies called Shell Blades ![]() in this room, mollusks which are guarded by thick shells. If you approach them, they'll turn to face you, and when you get in attack range, their mouths will pop open, exposing their vulnerable interiors, which can be struck with your sword, arrows, or the Hookshot
in this room, mollusks which are guarded by thick shells. If you approach them, they'll turn to face you, and when you get in attack range, their mouths will pop open, exposing their vulnerable interiors, which can be struck with your sword, arrows, or the Hookshot ![]() , though their shells can still deflect your attacks should you try to strike them from any spot besides directly in front of them. If you are too slow to react, the Shell Blades will seal their mouths and leap at you with their spiny backsides, and you'll need to defend yourself with your shield and try to attack once they settle down and you are able to make them open their jaws. Kill the Shell Blades inside and you will receive a Small Key
, though their shells can still deflect your attacks should you try to strike them from any spot besides directly in front of them. If you are too slow to react, the Shell Blades will seal their mouths and leap at you with their spiny backsides, and you'll need to defend yourself with your shield and try to attack once they settle down and you are able to make them open their jaws. Kill the Shell Blades inside and you will receive a Small Key ![]() from the chest that appears. Exit the room and go back to the main room. Use the Dungeon Map to note where you are, if necessary. Return to the main room and try not to get too close to large tower in the middle of the room, since it can trigger Blue Tektites
from the chest that appears. Exit the room and go back to the main room. Use the Dungeon Map to note where you are, if necessary. Return to the main room and try not to get too close to large tower in the middle of the room, since it can trigger Blue Tektites ![]() to pounce down on you from above.
to pounce down on you from above.
In the main room, look for a brown platform on sticking out from the west side of this floor. Stand on it, and you'll see a brown block which cordons off further access into this area of the dungeon. Push the brown block as far as it goes. The block should fall down an underwater chamber. Put on the Iron Boots and follow it down. Go to the end of the hallway you'll find and take off the Iron Boots when you reach a place you can resurface. In this room, hit the crystal switch and a geyser of water will shoot up from the ground. Jump on top of it to get to the other side. In this next room, there is a whirlpool of water. If you look in the corner that is furthest from the entrance, there is a dragon's tail on the right, underwater (to the left is the dragon head). Jump into the water with your regular boots. When the whirlpool reaches over the tail, put on the Iron Boots. Now, you will be underwater and on top of the statue. Look around to re-orient yourself, but don't hop off the statue. You will see a diamond in the dragon's head. Hit it with your Hookshot and a nearby gate will open. Then turn your view and Hookshot onto the target. Then go into where the gate used to be and take off your Iron Boots. Float to the top and you will find a Small Key. Get the key and then go all the way back out to the main room. Use the Hookshot at the end to get out of hole to get back to main room.
Half-Full, Half-Empty[edit]
Back in the main room there is a large tower in the center of the room. At the bottom of the tower there is a locked door. Open it and enter the tower. Once you are in go straight to the wall, then turn around. Look up and there will be a target where you can Hookshot ![]() to. On this platform there is another Triforce symbol so play Zelda's Lullaby
to. On this platform there is another Triforce symbol so play Zelda's Lullaby ![]() to raise the water. Notice how the block also floats up. Put on the Iron Boots
to raise the water. Notice how the block also floats up. Put on the Iron Boots ![]() and sink down to the bottom and under where the block used to be.
and sink down to the bottom and under where the block used to be.
In this next room hit the diamond object and kill all the enemies inside. Once you kill them all another gate will open. Take off your boots and float up and get the Small Key ![]() in this room. Now return to the room where you raised the water.
in this room. Now return to the room where you raised the water.
Float all the way to the top and exit through the door. Now jump back down and put on your Iron Boots. Go to the room where you met Princess Ruto (the one with a torch on each side). Once again take off your Iron Boots and float up. Now that the water is only half risen so you can reach a new place. Place a bomb ![]() near the odd shaped wall and stand back. Get the Small Key and head back to the main room.
near the odd shaped wall and stand back. Get the Small Key and head back to the main room.
The Compass[edit]
Float up to the top of the main room and stand on the platform in the center. Look around for a Hookshot ![]() target that has two pots at the entrance of a passageway (it's not a door that needs to be unlocked). Go into the passage and through the tunnel. Hookshot to the target on the wall, and then to the target on the ceiling. You will find a chest that is covered with water. There is a switch in this room. Shoot your Hookshot or an arrow at it and open the chest. You will receive the Compass
target that has two pots at the entrance of a passageway (it's not a door that needs to be unlocked). Go into the passage and through the tunnel. Hookshot to the target on the wall, and then to the target on the ceiling. You will find a chest that is covered with water. There is a switch in this room. Shoot your Hookshot or an arrow at it and open the chest. You will receive the Compass ![]() . Now head back to the main room.
. Now head back to the main room.
All Wet Again[edit]
Swim around the tower until you find a locked door. Go into it. In this room, stand on the water jet, being wary of the Blue Tektite ![]() that jumps down. Shoot the crystal switch with an arrow to raise the water jet to the next floor. Go through the door and you are once again in the main room, but in a nook in the southwest corner. Here you find another Triforce tile in the wall; play Zelda's Lullaby
that jumps down. Shoot the crystal switch with an arrow to raise the water jet to the next floor. Go through the door and you are once again in the main room, but in a nook in the southwest corner. Here you find another Triforce tile in the wall; play Zelda's Lullaby ![]() and raise the water all the way to the top. You may find it helpful to place a Farore's Wind
and raise the water all the way to the top. You may find it helpful to place a Farore's Wind ![]() warp point here for later. Now jump down. Go East and head into the corridor, putting on your Iron Boots
warp point here for later. Now jump down. Go East and head into the corridor, putting on your Iron Boots ![]() at the end to go underwater. There is a block here. Pull it as far as it goes. Then go back into the main hub and enter the locked door on the West side.
at the end to go underwater. There is a block here. Pull it as far as it goes. Then go back into the main hub and enter the locked door on the West side.
First, kill the two Keese ![]() (there is one near where you enter and one near the exit) with the Hookshot
(there is one near where you enter and one near the exit) with the Hookshot ![]() or arrows; avoid standing near the edge or you might get knocked off. This room can be very challenging, especially if the Keese are not defeated before moving along the platforms in the middle. Go straight to the edge and look down. Jump onto the platform that is moving up and down. Take out your Hookshot and be ready to shoot. Shoot across to one of the platforms that is moving downwards. Then immediately aim your Hookshot and shoot upwards. Once you are on that platform once again aim your Hookshot up and shoot to the next platform. The tricky part about this is that the platforms are moving down so you have to move quickly to avoid falling. Once you reach the top go through the locked door.
or arrows; avoid standing near the edge or you might get knocked off. This room can be very challenging, especially if the Keese are not defeated before moving along the platforms in the middle. Go straight to the edge and look down. Jump onto the platform that is moving up and down. Take out your Hookshot and be ready to shoot. Shoot across to one of the platforms that is moving downwards. Then immediately aim your Hookshot and shoot upwards. Once you are on that platform once again aim your Hookshot up and shoot to the next platform. The tricky part about this is that the platforms are moving down so you have to move quickly to avoid falling. Once you reach the top go through the locked door.
In this room there is a diamond in the center and several dragon head statues. The diamond in the center raises the water and the statues. Some of the statues have targets on them. Use the targets to get across the platforms. At any time in this room shoot an arrow to hit the diamond to raise or lower the statues and water. Once you are at the last platform, lower the water and step on the statue. Then raise the water and go up with the statue. Kill the Like-Like ![]() and then Hookshot to the target on the ceiling to get to the other side of the spikes. Enter into the sub boss room.
and then Hookshot to the target on the ceiling to get to the other side of the spikes. Enter into the sub boss room.
Your Dark Side[edit]
Advance note: If you have the Megaton Hammer ![]() , use it. Using it renders the enemy useless, meaning it does not attack you back at all. For a quick victory, equip the Megaton Hammer before turning back and strike Dark Link with it until he is defeated. This is by far the easiest way to defeat him.
, use it. Using it renders the enemy useless, meaning it does not attack you back at all. For a quick victory, equip the Megaton Hammer before turning back and strike Dark Link with it until he is defeated. This is by far the easiest way to defeat him.
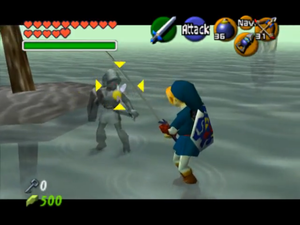
This room appears to be in a strange cloud of disorienting fog, almost as if you've wandered into a strange nether realm. Even stranger is the presence of a tall, gnarled tree in the middle of the room. It defies common sense for a tree to appear deep inside a temple otherwise devoid of plant life. As you pass by this tree, examine the door on the other side of the room. You'll see that it's locked, but there is no enemy in this room to fight... or so you may think. As you cross from one end of the room to the other, while your back is turned, an eerie, shadowy figure will emerge. His appearance will not be stopped even if you never take your eyes of the tree by walking backwards to the other end of the room. He shall stand ominously still, glaring at you with piercing red eyes. Turn around and face the tree. Dark Link ![]() , your evil doppelganger has appeared!
, your evil doppelganger has appeared!
To start the battle, you must provoke Dark Link by hitting with a projectile attack or approaching the base of the tree where he waits for you. He is one of the most formidable enemies in the game, able to put up a greater fight than most because of his swift movements and damaging attacks. Navi's advice is simply, "Conquer yourself!" This is a hint at Dark Link's true nature. He is an evil reflection of Link. His health actually reflects how many hearts Link currently has, and you can judge how close he is to defeat by the tint of his shadowed body. As he grows weaker, he changes from pale gray coloration to a very opaque black. The Master Sword ![]() will deal damage equal to a single heart, so you can use that to gauge how many hits he can take.[1] You can use your sword against him, but Dark Link can easily block and counter almost every slice you make with his own shield and sword. In addition, if you thrust your sword at Dark Link, he may leap onto the blade, causing you to freeze for about a second, while he attempts a counterattack.
will deal damage equal to a single heart, so you can use that to gauge how many hits he can take.[1] You can use your sword against him, but Dark Link can easily block and counter almost every slice you make with his own shield and sword. In addition, if you thrust your sword at Dark Link, he may leap onto the blade, causing you to freeze for about a second, while he attempts a counterattack.
There are several ways to defeat him, as detailed below, but the easiest ways to beat him are with weapons he cannot use, such as the Biggoron's Sword ![]() , Din's Fire
, Din's Fire ![]() , or the Megaton Hammer. Dark Link cannot defend against these items. Although the Hookshot
, or the Megaton Hammer. Dark Link cannot defend against these items. Although the Hookshot ![]() can stun him, it is difficult to use effectively (if you miss, it leaves you vulnerable to attack). Dark Link has a very defensive fighting style, sometimes mimicking your actions. Every time Dark Link is wounded, he disappears and then reappears behind you. After he takes a lot of damage (or if he is injured near the edge of the room), he reappears further away.
can stun him, it is difficult to use effectively (if you miss, it leaves you vulnerable to attack). Dark Link has a very defensive fighting style, sometimes mimicking your actions. Every time Dark Link is wounded, he disappears and then reappears behind you. After he takes a lot of damage (or if he is injured near the edge of the room), he reappears further away.
- Using the Biggoron's Sword
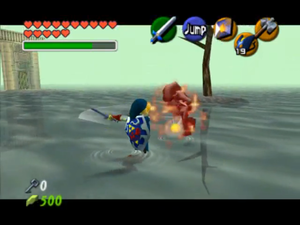
Simply run away towards the camera, then turn around and press ![]() +
+![]() to do a stabbing motion. Dark Link can't defend against this attack, so you'll hit him every time.
to do a stabbing motion. Dark Link can't defend against this attack, so you'll hit him every time.
If you are using the Giant's Knife ![]() , remember that blocked attacks risk breaking the sword. If this happens, revert to one of the other tactics.
, remember that blocked attacks risk breaking the sword. If this happens, revert to one of the other tactics.
- Using Din's Fire
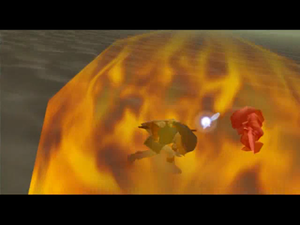
If you want to take the easy way out, simply spam Din's Fire over and over, because Dark Link can't block it. However, this can quickly deplete your magic meter, so have a Green Potion ![]() or a Blue Potion
or a Blue Potion ![]() ready to drink, preferably the latter, as it will also restore you health and Dark Link is liable to whittle it down quite quickly if you aren't careful.
ready to drink, preferably the latter, as it will also restore you health and Dark Link is liable to whittle it down quite quickly if you aren't careful.
- Using the Master Sword: Timed attacks

![]() -target Dark Link, and hold your shield out. When he begins to attack, hit
-target Dark Link, and hold your shield out. When he begins to attack, hit ![]() (Jump Attack) as soon as he swings, or as soon as he strikes your shield - your chances are good to land a solid hit without exposing yourself.
If he mimics the move, he'll end up behind you and facing away. Keep
(Jump Attack) as soon as he swings, or as soon as he strikes your shield - your chances are good to land a solid hit without exposing yourself.
If he mimics the move, he'll end up behind you and facing away. Keep ![]() -target on, but turn around quickly and do a regular swing on him.
-target on, but turn around quickly and do a regular swing on him.
- Using the Master Sword: Button mashing
As you can tell with Dark Link, he will mirror your every swing with one of his own. To exploit this, perform continuous vertical slashes towards him but off to the side. You should either be able to get behind him to make an attack that will hit or otherwise take damage and be able to squeeze in a hit of your own.
- Using the Megaton Hammer
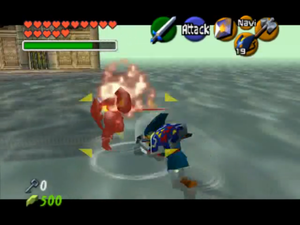
See beginning of this section for advice regarding this weapon. The copycat is not equipped with a Megaton hammer, just a Master sword, so you can also use the hammer on him, just swing it at him until you destroy him. While he takes damage from the hammer, he is still able to block its attacks.
- Attacking backwards
Face away from Dark Link, and use ![]() -Targeting to only look in one direction. Perform a backwards-right walk just as Dark link approaches behind you, and swing your sword to hit him just as you start your swing.[2]
-Targeting to only look in one direction. Perform a backwards-right walk just as Dark link approaches behind you, and swing your sword to hit him just as you start your swing.[2]
The Longshot[edit]
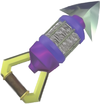
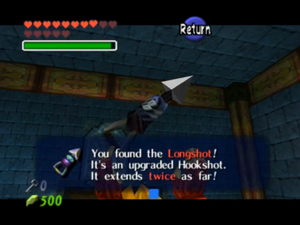
When Dark Link is finally defeated, the illusion in the room will vanish, and you can head on to the next room. This room has a treasure chest inside. Open and you'll be rewarded with the Longshot ![]() . This is a Hookshot with twice the that can extend twice as far because of it double-length chain, making many more Hookshot targets reachable. It also makes a few Gold Skulltula Tokens in range to collect within the temple, as well as previously unobtainable ones in the overworld.
. This is a Hookshot with twice the that can extend twice as far because of it double-length chain, making many more Hookshot targets reachable. It also makes a few Gold Skulltula Tokens in range to collect within the temple, as well as previously unobtainable ones in the overworld.
Treacherous Waters[edit]
Once you have the Longshot ![]() , go behind the chest and you will see a blue block on the ground. Play the Song of Time
, go behind the chest and you will see a blue block on the ground. Play the Song of Time ![]() to make it disappear. Jump into the water and swim through the small river. There are vortexes in water that suck you into the ground in a few areas. Use the Iron Boots
to make it disappear. Jump into the water and swim through the small river. There are vortexes in water that suck you into the ground in a few areas. Use the Iron Boots ![]() to avoid the vortexes; you can avoid them without the Iron Boots, but utilising them is the quickest and most effective way by far to pass the first three.
to avoid the vortexes; you can avoid them without the Iron Boots, but utilising them is the quickest and most effective way by far to pass the first three.
The first vortex is easy enough to get round; simply jump in with the Iron Boots equipped far in advance of the vortex and it won't suck you in. Continue along the path until you find the second vortex. To cross the second vortex you will need to go around the left side of it (facing downstream), following an underwater rock path. If you follow the path, this should be easy enough. After crossing the second vortex you will see the third vortex; just swim past it while keeping to the right (facing downstream) along the rockface. The fourth vortex is slightly more difficult to pass. At times it may seem there is no chance of escape, but keep pushing outwards with the control stick. The best strategy is to go round the right side of the vortex with the Iron Boots equipped, and push out until you get to the very edge. After you get to the edge you will be pulled back into the current, so timing is essential. As soon as you reach the edge, switch to the Kokiri Boots ![]() and swim towards the island to the northeastern side of your view (it should have two pots on it). Climb onto the island by pushing the control stick (and thus, Link), against it. If you find yourself trapped in the fifth vortex, push against the current and try to escape it by moving towards the aforementioned island (keep close to the rockface).
and swim towards the island to the northeastern side of your view (it should have two pots on it). Climb onto the island by pushing the control stick (and thus, Link), against it. If you find yourself trapped in the fifth vortex, push against the current and try to escape it by moving towards the aforementioned island (keep close to the rockface).
From the island, you should be able to see a separate small square island attached to the rockface, between the fourth and fifth vortices. There is little margin for error here. Don the Kokiri Boots and tap ![]() repeatedly to swim towards the tiny island between the fourth and fifth vortices. You should not get sucked into these if you approach the small square island correctly and carefully, but if you do get absorbed into them, follow previous instructions for escaping the respective vortices. You can also use the Longshot to pull yourself towards a target on the ceiling directly on top of the square island.
repeatedly to swim towards the tiny island between the fourth and fifth vortices. You should not get sucked into these if you approach the small square island correctly and carefully, but if you do get absorbed into them, follow previous instructions for escaping the respective vortices. You can also use the Longshot to pull yourself towards a target on the ceiling directly on top of the square island.
Look around for a golden eye (it will be set in a diamond shape, which should be on your right if you are facing the locked grate). Hit this with an arrow. IMPORTANT: Once you hit this, a timer will start. Immediately after hitting the golden eye with an arrow, turn to your left and jump to the newly unlocked platform, before the timer runs out. It is a short enough jump to make without the assistance of the longshot etc. Open the chest and retrieve its contents. If you do not reach the chest in time, simply repeat the steps outlined in this paragraph until you do.
Continue along the passageway beyond the key chest. At the end of the passageway, use your newly acquired Longshot to reach the platform to the left and then go through the door. Defeat the Blue Tektite ![]() with your sword and use the Longshot on the opposite target to cross the gap. Use the Iron Boots to pass through the waterlogged tunnels ahead of you into the main room. Use your Iron Boots to reach the eastern room on the bottom floor (two torches in front) where you met Princess Ruto. Equip your Kokiri Boots and float to the top.
with your sword and use the Longshot on the opposite target to cross the gap. Use the Iron Boots to pass through the waterlogged tunnels ahead of you into the main room. Use your Iron Boots to reach the eastern room on the bottom floor (two torches in front) where you met Princess Ruto. Equip your Kokiri Boots and float to the top.
Once you have reached the top of the tunnel, play Zelda's Lullaby ![]() in front of the Triforce symbol to your right to lower the water all the way to the bottom. Jump down and go back to the main room.
in front of the Triforce symbol to your right to lower the water all the way to the bottom. Jump down and go back to the main room.
Enter the exposed tower door in the middle on the bottom floor (beware, as you will be met with two spiked mine enemies and a Tektite, which it is advisable to defeat before progressing). Cross the two square platforms and turn around. You should see a target to your right. Use the Longshot to get to it and play Zelda's Lullaby once again to the triforce on the wall in front of you; this will raise the water to mid-level.
Climb onto the newly raised platform. Use the Longshot to defeat the Gold Skulltula ![]() to the top left of your vision and collect the token, before jumping across the gap to leave the tower. Upon leaving the tower, be aware again of any roaming enemies (they often respawn on all levels of the main room, so be careful). A passage blocked by a gate should be on the opposite side to which you left the central tower. Find this passage and shoot an arrow into the golden eye below it. IMPORTANT: This will open the gate above it on a timer. You will need to quickly equip the Longshot and use it to drag yourself to the target behind the now-opened gate. If you do not reach the target in time, you can shoot the eye to try again. Your Longshot is more than capable of grabbing the target. (In case you're playing the game on a computer, note that you can't aim properly with the Longshot through the normal way. There is a solution though. Shoot the eye, then aim the Longshot just below the target. Press the
to the top left of your vision and collect the token, before jumping across the gap to leave the tower. Upon leaving the tower, be aware again of any roaming enemies (they often respawn on all levels of the main room, so be careful). A passage blocked by a gate should be on the opposite side to which you left the central tower. Find this passage and shoot an arrow into the golden eye below it. IMPORTANT: This will open the gate above it on a timer. You will need to quickly equip the Longshot and use it to drag yourself to the target behind the now-opened gate. If you do not reach the target in time, you can shoot the eye to try again. Your Longshot is more than capable of grabbing the target. (In case you're playing the game on a computer, note that you can't aim properly with the Longshot through the normal way. There is a solution though. Shoot the eye, then aim the Longshot just below the target. Press the ![]() button to 'focus', then quickly press down to move your aim upwards. The cursor will slowly return to its former position, quickly shoot when it's over the target.)
button to 'focus', then quickly press down to move your aim upwards. The cursor will slowly return to its former position, quickly shoot when it's over the target.)
Follow the passage to find a large red block. Push it as far as possible (it will fall into place). Turn right and get the key from the chest. Walk through the passage opposite and use the Longshot on the above target to get out of the hole (it is best to stand in the centre of the end of the passage for this). Follow the passage to the very top floor of the main area.
Put on the Iron Boots and sink to the bottom and go through the passage at the northern part of the map. Walk down this hall and either Longshot to get up or remove the boots and float up. Swim up to and climb on the platform. Use your longshot to get to the door across the spikes. Enter the locked door.
Kill all six of the Blue Tektites in this room with your arrows to make it easier. Use your Iron Boots and jump into the water. Walk across to the other side. Then take them off and climb onto the platform. Enter the door.
Before you jump down, kill all the Stingers ![]() in the room with your Longshot. You will see that there is a switch in the water, it needs to have a block on top of it to stay "on" (this switch controls the water level). Jump to the platform that's on opposite side of the room as the switch and bomb the weird colored brick wall. Go in and you will find a huge block. Push it as far as it will go. Jump back to the switch side and bomb the cracked wall. Pull the block towards the switch. Go back to the other side and get behind the block. Push it until it falls on the switch. The water level will raise so swim over to the door that you can now access (the door with steps) and go through it.
in the room with your Longshot. You will see that there is a switch in the water, it needs to have a block on top of it to stay "on" (this switch controls the water level). Jump to the platform that's on opposite side of the room as the switch and bomb the weird colored brick wall. Go in and you will find a huge block. Push it as far as it will go. Jump back to the switch side and bomb the cracked wall. Pull the block towards the switch. Go back to the other side and get behind the block. Push it until it falls on the switch. The water level will raise so swim over to the door that you can now access (the door with steps) and go through it.
Boss Key[edit]
In this room kill the enemies with arrows first. Then hit the switch and jump from water platform to water platform to reach the other side and go through the door.
In this room there is a boulder that keeps rolling by. Grab the Gold Skulltula on the wall. When the boulder passes, go in the direction that it came from. If you accidentally go in the direction that the boulder rolls, just jump into a vortex and it’ll take you back to the platform.
When you are in deep water, put on the Iron Boots ![]() and sink to the bottom. Go through this little tunnel passageway, kill the Shell Blade
and sink to the bottom. Go through this little tunnel passageway, kill the Shell Blade ![]() , rise up, go through the door and find the ornate treasure chest. Open the chest to get the Boss Key
, rise up, go through the door and find the ornate treasure chest. Open the chest to get the Boss Key ![]() . If you need to capture some, there is a fairy
. If you need to capture some, there is a fairy ![]() in each of the pots in the back of the room. You can re-enter the room until you are finished filling your bottles. The fairies will respawn inside of the pots if you leave the room and re-enter. If you placed a Farore's Wind
in each of the pots in the back of the room. You can re-enter the room until you are finished filling your bottles. The fairies will respawn inside of the pots if you leave the room and re-enter. If you placed a Farore's Wind ![]() warp point at the plaque that raises the water level to the highest point earlier you can return to it now. If not, Go back to the place where the boulder was. This time go down the waterfall and find yourself back in the room with boulders, vortexes, and the six Blue Tektites
warp point at the plaque that raises the water level to the highest point earlier you can return to it now. If not, Go back to the place where the boulder was. This time go down the waterfall and find yourself back in the room with boulders, vortexes, and the six Blue Tektites ![]() . Head all the way back to the main room.
. Head all the way back to the main room.
The water should be half risen right now. Head to the west side of the room to where you'll find a door that has a reddish-orange platform in front of it (the type that floats). You've been in this room before. Kill the Blue Tektite that falls from the top, then hit the diamond and go up with the water platform (you may have to ride the platform up for the enemy to move; sometimes the enemy gets stuck up there and never falls). Enter the door and play Zelda's Lullaby ![]() for the last time in the dungeon to raise the water all the way to the top.
for the last time in the dungeon to raise the water all the way to the top.
Float back to the top of the main room. On the top floor there is a dragon statue with a target that you have never been to. Earlier you weren't able to reach it because of the Hookshot ![]() 's short reach, but now you can with the Longshot
's short reach, but now you can with the Longshot ![]() ! Longshot over to the statue and enter the door (the pots here also have fairies if you need them).
! Longshot over to the statue and enter the door (the pots here also have fairies if you need them).
This next room is tricky, and sometimes frustrating. The trick to this room is hugging the right wall with your regular boots and not stopping! Once the first blade bounces off the right wall, start walking while hugging the right wall. The easiest way to get through is by running up WITHOUT TURNING. Once you get through, you have reached the boss!
Boss: Morpha[edit]
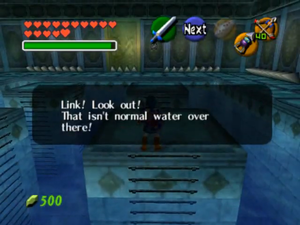
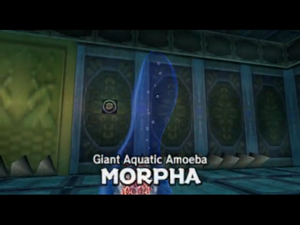
You'll notice the lair of the boss is filled with a strange, dark blue water. Navi senses danger and warns you that this isn't normal water. At the moment, you won't find the boss in the room. It will not attack unless you are close enough that it can inflict harm on you. To start the battle, jump onto one of the four platforms in the center of the pool. A creature will slither out of the water and rise up behind you...
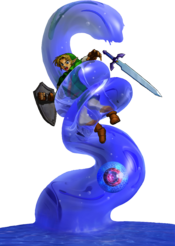
Morpha is the evil monster hoarding Lake Hylia's water, a frightening amoeba that can manipulate all water it touches. With this much water at its disposal, Morpha becomes a monstrosity in many more ways than one.
Attack Strategy
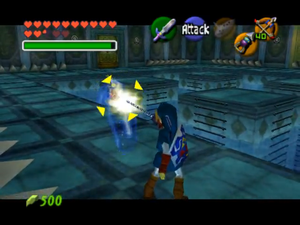
- Morpha will use the water to attack you in any way it can. The way to kill this boss is to get close to the nucleus itself (the small pinkish creature) and hit it with your sword. To do this,
 -Target it and use your Longshot
  .
.
- The best strategy for defeating Morpha as quickly as possible is to stay off the islands and corner yourself around the perimeter of the room. Morpha's reach is limited so use this to your advantage! After you pull the nucleus from Morpha's water and slash it, quickly grab it again with the Longshot and slash it. Use this method and you should defeat it. This may be hard because the nucleus moves around pretty fast.
- Use your longshot and
 -targeting to grab the "nucleus" and strike it with your sword (it will go down even faster if you use the Biggoron sword).
Dodging Morpha's Clutches

Morpha will continually attempt to grab you with its tentacles and wear you out by violently thrashing Link around. If Morpha manages to take hold of you and fling you across the room, it can do tons of damage coupled with the spike wall, so be sure not to get hit. Avoid his tentacles and keep hitting him with your Longshot and then your sword.
When you've done enough damage, Morpha will grow more persistent and conjure up a second tentacle, trying to catch you off guard while it attacks on its own.
Keep pulling Morpha from the water and strike him down until he finally meets his end (it takes about 6 hits with the Biggoron's Sword ![]() ).
).
The most effective, yet risky strategy involves repeatedly grabbing Morpha with the Longshot, with rapid-fire shots to reel it in like a fish, cornering it to the wall so it can't get away, and then unleashing your fury on it for a cheap, but fast defeat.
Easy Way Out
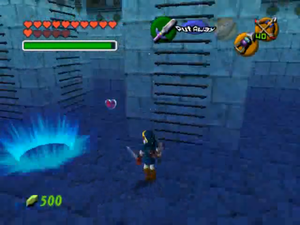
The easiest way for those low on hearts and/or supplies is to go to the center of the room. This will trigger Morpha's entrance. Once the scene ends, quickly run for one of the corners in the room. Morpha's tentacles cannot reach you here. While Morpha attempts to reach you, use the Longshot to grab the nucleus. Take your time; you're safe here. Once you have the nucleus, slash at it as much as possible.
Special Note: Don't try to handle the boss underwater! You don't have any sword attack (unlike The Legend of Zelda: Twilight Princess) and you only have a Longshot to pull it close to you. Stick to the surface by all means!
Well-Earned Victory
When Morpha has been done in by your sword, the monster will swell up and explode. With nothing left to keep it bottled up, the water will drain back to Lake Hylia. With Morpha's defeat, take the Heart Container ![]() (it's down between two of the platforms) and leave.
(it's down between two of the platforms) and leave.
The Fourth Medallion[edit]

Once again you will be transported to the Chamber of the Sages as you step into the blue light. The Sage of Water is Ruto. She breaks off the engagement, given that you and she can no longer live in the same world now. She can sense your concern about Princess Zelda. She reveals that she is fine. She gives you the Water Medallion, which contains her strength.
Upon re-entering Lake Hylia, the storm stops, and the Lake refills with water. Sheik is there, observing the events. After you give Ruto's thanks to him, he disappears into the water.
Magical Morning Light[edit]


Once Sheik is gone, go over and read the plaque by the tree. "When water fills the lake, shoot for the morning light." The lake has just refilled, and as luck would have it, it's morning right now. That sounds like a hint! Pull out your Fairy Bow ![]() and shoot the rising sun. As crazy as it sounds, this will pay off handsomely. You'll be treated with your first magical arrow, the Fire Arrows
and shoot the rising sun. As crazy as it sounds, this will pay off handsomely. You'll be treated with your first magical arrow, the Fire Arrows ![]() .
.
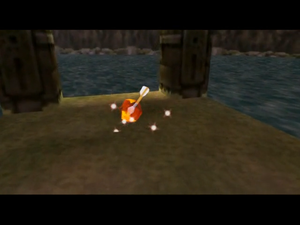
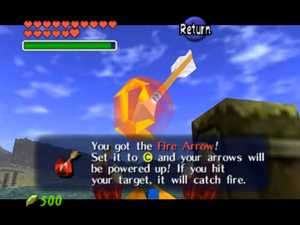
The Fire Arrow will drop from the sky and land on the island with the two pillars. This is a magical enchantment which you can equip to your Fairy Bow to imbue arrows with the power of fire and disperse flames when they hits their targets, at the cost of two magic points each time you ready a Fire Arrow.
However, if you don't get the arrow after firing one or two shots, it means you've missed your window of opportunity before the transition from morning to day and need to use the Sun's Song ![]() to go to night. Wait until daybreak and fire an arrow just as the rooster is crowing and the Sun is located horizontally between the pillars.
to go to night. Wait until daybreak and fire an arrow just as the rooster is crowing and the Sun is located horizontally between the pillars.
Sidequests[edit]
- Zora's Fountain: One lies on the farthest ice platform. You must jump onto several spinning ice platforms to reach it.
- Zora's Fountain: Once you've obtained the Iron Boots
 and the Zora Tunic
  , sink to the bottom of the lake to find a Heart Piece.
 - Ice Cavern: It is frozen in the room where you found the Compass
 . A blue fire altar is present as well.
 - Lake Hylia: As a child, plant a Magic Bean
 in the soil outside the laboratory. Return as an adult and ride the platform up to the roof, and climb the observatory to find this Heart Piece.
 - Lakeside Laboratory: Once you obtain the Golden Scale
 , go to the laboratory, jump in the water and dive eight meters. You should be able to touch the bottom. Confirm this with the alchemist and he will give you a heart piece.
- Zora's River: As you enter Zora's Domain, venture up to where the bean seller used to be and cross the river. Walk down the pathway about 60 feet, and then look high up on the south wall. Take the Skulltula down with your Longshot
 . (nighttime only)
 - Zora's River: As you approach the curve that leads to the entrance to Zora's Domain, use your Longshot to take down this Gold Skulltula, which hides high up on the outer wall. (nighttime only)
- Zora's Domain: Walk up to where King Zora's throne is, and then take a left and go down the hallway where the Zora Diving Game was. Approach the ledge, and look left. Use your Longshot to bring down this Gold Skulltula. (nighttime only)
- Lake Hylia: At night, use your Longshot to pull yourself to the top of the dead tree on the island with the warp pad. Up here lies a Gold Skulltula. Obtain the token by using your Longshot.
- Lakeside Laboratory: At night, inside the Lake Hylia lab is a pool the alchemist draws water from for experiments. At the bottom of the pool is a crate. Sink down into the pool with the Iron Boots
 and do a rolling attack to break the crate to expose the Gold Skulltula. Finish it off with your sword or Longshot and collect the token.
Quest for the Biggoron's Sword[edit]
If you want to, you can go ahead and finish the item-trading sequence and collect the Biggoron's Sword ![]() now. However, to finish this event, you will need to travel through Kakariko Village, which at this point in the game, you will need to go through a series of cut-scenes before continuing to Death Mountain Trail. If you wish to continue anyways, start where you left off, with the Poacher's Saw.
now. However, to finish this event, you will need to travel through Kakariko Village, which at this point in the game, you will need to go through a series of cut-scenes before continuing to Death Mountain Trail. If you wish to continue anyways, start where you left off, with the Poacher's Saw.
- Broken Goron's Sword: Head to Gerudo Valley. (The entrance to it, from the field, is just north of Lake Hylia.) To cross the broken bridge, aim your Longshot
 at the wooden board with the black dot in the middle. It is just above the other end of the bridge. Once across, show the carpenter (the bald, screaming man) the saw, and he will give you the Broken Goron's Sword
  in return.
- Prescription: Your next destination is the summit of Death Mountain. (Where the first Great Fairy Fountain was.) There are two methods of getting there. The first is simply going there on foot, that means, going through Kakariko and dealing with the cut-scenes. The second is using the Bolero of Fire
 to warp to the Death Mountain Crater, go left (instead of to Darunia's room) and jump across where there is a red boulder. A ladder takes you up and out of the crater where Biggoron sits. Alternatively and slightly slower, after teleporting to the crater you can enter Goron City through Darunia's room. Simply go up and out of the main entrance, then hike over the top of the mountain like normal. It is recommended that you travel through Kakariko now, because soon you will need to travel though the village, but it will be a timed event (getting rid of the cutscenes now will be beneficial). When at the top of the mountain, walk in the opposite direction of the fairy fountain entrance. The Biggoron will show himself. Show him the Broken Sword. You will find that his eyesight has been disrupted by a recent eruption. He will then give you a prescription to take to King Zora.
- Eyeball Frog: Travel to Zora's Domain and show the prescription to King Zora. It is revealed that the ingredients to make Biggoron's medicine are present, but you will need to deliver them to scientist at Lake Hylia before they spoil. Make sure you defrost him with Blue Fire
 or he won't deliver the eyeball frog at all in order to finish this trade quest! Warning: If you use the Serenade of Water
  to warp to Lake Hylia, the counter will reset at 00:01 seconds, so the only way to complete this is using Epona. The fastest way is to roll to Zora's River, and then jump into the river and swim to Hyrule Field. Then use Epona.
- World's Finest Eye Drops: You have three minutes to deliver the Eyeball Frog to the scientist at the Lakeside Laboratory in Lake Hylia. Use Epona if you have her. (Make sure you know how to jump gates with her. Accelerate straight towards the fence and she will automatically jump.) The scientist will make the eye-drops for you. (after mistaking them for his dinner!)
- Claim Check: You have four minutes to deliver the eye drops to Biggoron before they lose their effect. Once again, use Epona if you have her. While on the trail, do your best to avoid all the boulders and enemies. NOTE: It is possible to warp to the Death Mountain Crater without the Goron Tunic
 equipped. The game can only do 1 timer at a time, however you will have 1 second to give him the eye drops after exiting the crater. Once you give the eye drops to Biggoron, he will give you a claim check for the Biggoron's Sword.
Wait three days after receiving the check. Then, show it to him and the Biggoron's Sword will be yours. If you don't have the patience, if you have the Sun's Song ![]() , play it about 5 to 6 times. To really check, play the song and keep responding with your claim check. If Biggoron is not ready, he'll think your impatient! But if the ultimate swords ready, show your claim check and he'll give you the Biggoron's Sword.
, play it about 5 to 6 times. To really check, play the song and keep responding with your claim check. If Biggoron is not ready, he'll think your impatient! But if the ultimate swords ready, show your claim check and he'll give you the Biggoron's Sword.
The Golden Scale[edit]

Head to the Fishing Pond and capture a 15 pound or heavier fish to receive the Golden Scale ![]() . It will allow you to dive nine meters underwater. It costs 20 rupees to fish and you can do so for as long as you like. The bigger fish tend to stay by the log in the center and by the poles sticking out.
. It will allow you to dive nine meters underwater. It costs 20 rupees to fish and you can do so for as long as you like. The bigger fish tend to stay by the log in the center and by the poles sticking out.
Early start to the Spirit Temple[edit]
If you try to cross the quick sand, you can't. You need the Longshot ![]() or the Hover Boots
or the Hover Boots ![]() to get across it. If you use the Hover Boots, you'll stop just at the edge and run like crazy until you get across the sand river. This is the earliest point to go to Spirit Temple. If you acquire the Requiem of Spirit
to get across it. If you use the Hover Boots, you'll stop just at the edge and run like crazy until you get across the sand river. This is the earliest point to go to Spirit Temple. If you acquire the Requiem of Spirit ![]() , come back and do the first half of the temple to complete your childhood missions (unless you're playing the Master Quest version). It will save you a lot of heartache and not have to worry because you're free to choose how you go through the game.
, come back and do the first half of the temple to complete your childhood missions (unless you're playing the Master Quest version). It will save you a lot of heartache and not have to worry because you're free to choose how you go through the game.


