To enter Dodongo's Cavern, which Ganondorf has sealed off with a gigantic boulder, you must first speak to Darunia. He will give you the strength you need to continue on your quest.
Opening the Cavern[edit]
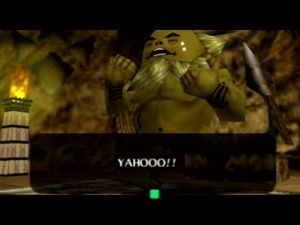
To quickly reach Goron City from The Lost Woods, as long as you have already opened the passage linking the two domains, head to the Target Practice area and turn left. There, go directly to Darunia, take out your ocarina and play Saria's Song ![]() . The song lifts his mood, and he begins to dance. After he finishes dancing, he tells you more of Ganondorf. Then he gives you the Goron's Bracelet
. The song lifts his mood, and he begins to dance. After he finishes dancing, he tells you more of Ganondorf. Then he gives you the Goron's Bracelet ![]() . You can now pick up Bomb Flowers that are growing on the ground. You then need to leave Goron City, returning to Death Mountain Trail.
. You can now pick up Bomb Flowers that are growing on the ground. You then need to leave Goron City, returning to Death Mountain Trail.
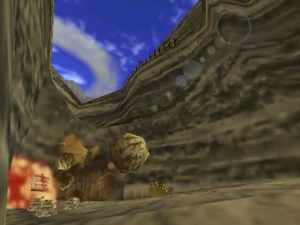
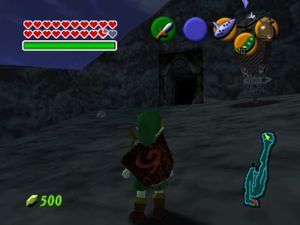
Outside Goron City, bear right at the circle of rocks. There you'll see a lone Goron sitting by a lone Bomb Flower. If you look closely, you'll notice that Dodongo's Cavern is directly below. You'll also notice that the fence behind the Bomb Flower is a bit lower than the rest of the fence. Pick up the Bomb Flower and throw it over this low fence. With a proper throw, the bomb will destroy the boulder in front of the cavern. Dodongo's Cavern awaits!
Back-flip over this low fence to receive the Piece of Heart ![]() below if you have not already. Also, be sure to drop a bottle of bugs
below if you have not already. Also, be sure to drop a bottle of bugs ![]() on the patch of dirt revealed after destroying the boulder for a Gold Skulltula
on the patch of dirt revealed after destroying the boulder for a Gold Skulltula ![]() .
.
The Dungeon[edit]
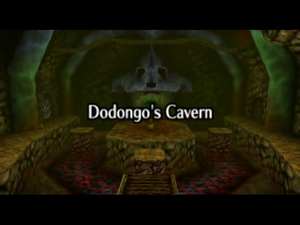

You'll enter the first room, a deceivingly small room with Bomb Flowers growing on either side. The wall directly in front of you seems to be made of a different kind of material. Take one of the Bomb Flowers, set it by this back wall and step away. Boom! The main cavern is revealed.
The Main Cavern[edit]
Move forward and you'll see a platform that moves up and down and beyond that a larger platform with a Beamos ![]() on it. Up above is a giant Dodongo head. Some bridges are suspended from the ceiling. Along the west wall, the one to the left, is a barred door, a bombable wall, and a small grotto. Along the east wall are two more bombable walls and a passage whose entrance is raised. There are also Beamos and Bomb Flowers against either wall. Down below, the floor is made of hot, cracked rock. Obviously, that would be painful to touch.
on it. Up above is a giant Dodongo head. Some bridges are suspended from the ceiling. Along the west wall, the one to the left, is a barred door, a bombable wall, and a small grotto. Along the east wall are two more bombable walls and a passage whose entrance is raised. There are also Beamos and Bomb Flowers against either wall. Down below, the floor is made of hot, cracked rock. Obviously, that would be painful to touch.
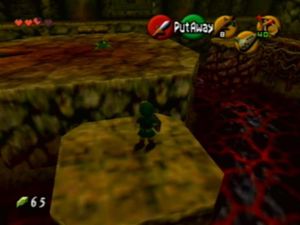
Quickly leap across the central platform and over to the west side, careful to avoid the blue beam of the Beamos, as it will attack upon sighting you. Bombing the wall on the left reveals a treasure chest. It's the Dungeon Map ![]() ! After taking care of the Beamos, look around, and you'll find a Business Scrub
! After taking care of the Beamos, look around, and you'll find a Business Scrub ![]() in the grotto. When he's defeated, he offers to sell you a Deku Shield. This may come in handy later...
in the grotto. When he's defeated, he offers to sell you a Deku Shield. This may come in handy later...
The East Side[edit]
Since the door on this side is still barred, head over to the east side. Behind the wall to the left is a Gossip Stone. Use it to replenish your health by playing Zelda's Lullaby ![]() while standing in front of it. Or if you have an empty bottle trap the fairy for later. The raised passage is inaccessible from here, so move on. After killing the Beamos on this side, use a bomb flower to bomb the other destructible wall.
while standing in front of it. Or if you have an empty bottle trap the fairy for later. The raised passage is inaccessible from here, so move on. After killing the Beamos on this side, use a bomb flower to bomb the other destructible wall.
Enter and you find yourself in a hallway. As you move along the hall, Baby Dodongos ![]() erupt from the floor. At the end of the hall, you see a blue switch. You can step on it and unlock the door there, but when you step off the switch, the door locks again. Blue switches need to be weighted down to work. Remember that. By testing one of the nearby statues, you'll find them movable. Push one of the statues onto the switch so the door stays open.
erupt from the floor. At the end of the hall, you see a blue switch. You can step on it and unlock the door there, but when you step off the switch, the door locks again. Blue switches need to be weighted down to work. Remember that. By testing one of the nearby statues, you'll find them movable. Push one of the statues onto the switch so the door stays open.
A Brief Delay[edit]
You'll enter a short hallway with some Keese ![]() perched in between. Simply peck them off with a couple of Deku Seeds and proceed onward.
perched in between. Simply peck them off with a couple of Deku Seeds and proceed onward.
A Nasty Pair[edit]
The next room has a pair of Lizalfos ![]() , the minibosses of the cavern. Using
, the minibosses of the cavern. Using ![]() -targeting, you can lock onto them, dodge their attacks (the Hylian Shield
-targeting, you can lock onto them, dodge their attacks (the Hylian Shield ![]() really works wonders here) and retaliate with your sword. They run away after they've been damaged a few times, but they return. After defeating them, the doors unlock, and you may continue on. These lizard-like creatures are stunned, briefly, by throwing Deku Nuts at them. For a faster kill, target them and use your slingshot
really works wonders here) and retaliate with your sword. They run away after they've been damaged a few times, but they return. After defeating them, the doors unlock, and you may continue on. These lizard-like creatures are stunned, briefly, by throwing Deku Nuts at them. For a faster kill, target them and use your slingshot ![]() .
.
These Aren't Babies[edit]
To the right, just before the next room, is a destructible wall. Behind it is a Business Scrub ![]() that offers to sell Deku Sticks
that offers to sell Deku Sticks ![]() for 15 Rupees each after being defeated.
for 15 Rupees each after being defeated.
In the next room you enter, you'll find three full-sized Dodongos ![]() . Their tails are vulnerable, but be careful as they can swipe you with those tails. When defeated, their explosions are much larger than the babies'. Neither shield will protect you from their fire breath, so dodge to the side when one is getting ready to attack. You can also kill them by placing a bomb near their mouth; they will eat the bomb and die, although there is a chance they will ignore the bomb.
. Their tails are vulnerable, but be careful as they can swipe you with those tails. When defeated, their explosions are much larger than the babies'. Neither shield will protect you from their fire breath, so dodge to the side when one is getting ready to attack. You can also kill them by placing a bomb near their mouth; they will eat the bomb and die, although there is a chance they will ignore the bomb.
Once they are defeated, you'll see the door exiting the chamber is still locked. You'll also notice a number of unlit torches. Returning to the entrance of this chamber, you'll find some lit torches. With a lit Deku Stick, run down the line of torches. You must be fast, since these torches will go out after a short time. Doing this will open up the door.
To the West Side[edit]
Now, you are back in the center room again, but you are in an area where you couldn't reach before, the slightly raised passage looking down from the west side. In front of you is a switch. Stepping on it causes the door across the room to unlock. Hop over the middle again and go through the door.
A Tenacious Statue[edit]
This next room is filled with a crop of Bomb Flowers. To the left is a destructible wall. Destroy it with the lone Bomb Flower next to it and enter the door into the next room. There are three statues surrounding a chest. The two off to the sides can be yanked away, but that does no good. One still blocks the chest, not to mention the door's barred shut. Strike the statue with your sword, and it comes alive! This is an Armos ![]() , and it will charge after you for disturbing it. Use Deku Nuts
, and it will charge after you for disturbing it. Use Deku Nuts ![]() or the provided Bomb Flowers to stun it and then attack it with your sword. It will then self-destruct, so stay clear of it. Now, you are free to leave, and able to open the chest here, getting the Compass
or the provided Bomb Flowers to stun it and then attack it with your sword. It will then self-destruct, so stay clear of it. Now, you are free to leave, and able to open the chest here, getting the Compass ![]() as a reward.
as a reward.
Onward and Upward[edit]
Now, go back to the room with all the Bomb Flowers. There is a gap between the them where a seemingly missing one can fit. Pick up the one that's separate from the others and place it where there is a gap. Boom! They all explode and a staircase descends. Climb up to the next level. You'll discover at the top of the winding passage a Skullwalltula ![]() and a Gold Skulltula
and a Gold Skulltula ![]() . Use your slingshot on both to get rid of them, and climb the vines to grab the token.
. Use your slingshot on both to get rid of them, and climb the vines to grab the token.
The Second Floor[edit]

In this room, there are some Fire Keese ![]() flying around. Be very careful that they don't burn your Deku Shield
flying around. Be very careful that they don't burn your Deku Shield ![]() . You might want to equip the Hylian Shield
. You might want to equip the Hylian Shield ![]() now. After killing the Keese, take a look at the central column. Around it stand four statues, but given your experience with those statues, you know they can be dangerous. You'll notice a ladder behind one. That statue does not spring to life when you hit it, so you may move it aside and climb up. Press the switch on top, and the door is unlocked.
now. After killing the Keese, take a look at the central column. Around it stand four statues, but given your experience with those statues, you know they can be dangerous. You'll notice a ladder behind one. That statue does not spring to life when you hit it, so you may move it aside and climb up. Press the switch on top, and the door is unlocked.
You'll enter the main room once again, but now on one of the bridges spanning the top of the room. Run across the bridge, taking care not to get hit by the Fire Keese. A door is at the far side, and you can enter it.
Danger Around Every Corner[edit]
The next room is gray with a floor sunken in below the level of the entrance. In the room are many square pillars with narrow passages between. Looking around carefully, you'll notice a set of square spikes that looks suspicious. Carefully climbing down the ladder, don't be too surprised- when those same spikes rush by you if you get too close! These are Spike Traps, which you can't defeat, and they guard these passages well. Navi suggests that you use ![]() -Targeting to peek around corners. Doing so, make your way over to a ladder with a gray block underneath it, dodging the pesky traps. Stand on the block and use it to climb the ladder, or pull it back to find a Recovery Heart
-Targeting to peek around corners. Doing so, make your way over to a ladder with a gray block underneath it, dodging the pesky traps. Stand on the block and use it to climb the ladder, or pull it back to find a Recovery Heart ![]() if you need one. After climbing the ladder, you'll arrive at a destructible door. Look away from the door and you'll see a platform. Jump here.
if you need one. After climbing the ladder, you'll arrive at a destructible door. Look away from the door and you'll see a platform. Jump here.
On the platform is a small chest and a Bomb Flower. Open the chest to find a Red Rupee ![]() . A ladder across from you leads to a destructible wall. This will take some timing to blow up. Pick up the Bomb Flower here. Hold it for about 3-4 seconds and throw, or aim for the narrow ledge. With a successful toss, the wall will be destroyed, and you can continue onward.
. A ladder across from you leads to a destructible wall. This will take some timing to blow up. Pick up the Bomb Flower here. Hold it for about 3-4 seconds and throw, or aim for the narrow ledge. With a successful toss, the wall will be destroyed, and you can continue onward.
A Fiery Barrier[edit]
In the next room there are three platforms, but one is on fire. Directly in front of you, you'll notice an eye. Using your slingshot ![]() , you can shoot the eye. The fires subside, and you can jump across into the next room, but act fast or the fire will return. Run through the passage beyond this room fast, since Baby Dodongos
, you can shoot the eye. The fires subside, and you can jump across into the next room, but act fast or the fire will return. Run through the passage beyond this room fast, since Baby Dodongos ![]() thrive along the path to door out of here.
thrive along the path to door out of here.
Another Nasty Pair[edit]
The next room is actually the same room you fought the Lizalfos in previously. However, this time you are at a higher level. Once more, 2 Lizalfos ![]() await you. Battle them in the same way as before. On a section overhanging the lower level are some hearts for your use when necessary. Of course, be very careful not to fall down if you need them!
await you. Battle them in the same way as before. On a section overhanging the lower level are some hearts for your use when necessary. Of course, be very careful not to fall down if you need them!
Two Fiery Barriers[edit]
In the next room there are four platforms. but the middle two are on fire. Once again you can shoot up at an eye switch, but only the first fire dissipates. After hopping over to the next platform, turn to the left and you'll see another eye. Quickly shoot the second eye to remove the second fire barrier. Now that the flame is down, quickly hop onto the platform where the second flame barrier was and then leave this room.
Into the Maw[edit]
You will find yourself back into the room that is filled with many spike traps, but you'll be on a higher level and you can reach the mysterious treasure chest you may have seen earlier in the room. If you hop over across the platforms, you can walk up to this chest. When you open it, you will finally get the ![]() Bomb Bag! Now, you can hold bombs with you. Not only that, it can hold 20
Bomb Bag! Now, you can hold bombs with you. Not only that, it can hold 20 ![]() Bombs, already filled to capacity. In the next room, you'll find a switch. Pressing the switch causes one of the platforms in the main room to now extend to the second floor when it rises up, moving twice as fast. A plaque sits there, looking out over the main cavern saying, "Giant dead Dodongo...when it sees red, a new way to go will be open". A hint, perhaps? On the bridge above the giant Dodongo's head, you'll see two gaps, one above each of the Dodongo's eyes. Dropping a bomb through each gap and into its eyeholes puts fire in its eyes when they explode. When both eyes are lit, its mouth opens, revealing a door.
Bombs, already filled to capacity. In the next room, you'll find a switch. Pressing the switch causes one of the platforms in the main room to now extend to the second floor when it rises up, moving twice as fast. A plaque sits there, looking out over the main cavern saying, "Giant dead Dodongo...when it sees red, a new way to go will be open". A hint, perhaps? On the bridge above the giant Dodongo's head, you'll see two gaps, one above each of the Dodongo's eyes. Dropping a bomb through each gap and into its eyeholes puts fire in its eyes when they explode. When both eyes are lit, its mouth opens, revealing a door.
However, by continuing across the bridge you are on, you will find a door you can bomb. Blow it up and inside is a Deku Shield ![]() ! However, if yours hasn't been turned to ash, you'll find a Blue Rupee
! However, if yours hasn't been turned to ash, you'll find a Blue Rupee ![]() instead. Another Deku Shield is available in this dungeon too; it is for sale by a Business Scrub on the first floor of the main room. This shield will cost you 50 rupees. They only cost 40 rupees in the Kokiri Forest, but let's face it: a Business Scrub has to pay his bills too, and a place like this CAN'T be good for business.
instead. Another Deku Shield is available in this dungeon too; it is for sale by a Business Scrub on the first floor of the main room. This shield will cost you 50 rupees. They only cost 40 rupees in the Kokiri Forest, but let's face it: a Business Scrub has to pay his bills too, and a place like this CAN'T be good for business.
The Last Leg[edit]

Several Fire Keese are flying around in the next room, and they will attack from high above, so look out. After taking care of them, you'll see a little square in the middle of the room. Inside this hole is a switch. Pressing the switch causes the door to unlock, but when you get off of the switch, the door locks again. Something needs to push this switch permanently down.
Go right into the next room. There are a few Fire Keese in this room also. Go through the room until you get to its exit, but before leaving, hit the pots in this room to find a Fairy ![]() . It can revive you if you run out of health. If you catch it in a bottle, it will still provide its help, because you might need it for the boss, or fully restore your health anyway if you nudge up against it. Push the block up against the destructible wall and blow it out with a bomb
. It can revive you if you run out of health. If you catch it in a bottle, it will still provide its help, because you might need it for the boss, or fully restore your health anyway if you nudge up against it. Push the block up against the destructible wall and blow it out with a bomb ![]() . Kill the Armos
. Kill the Armos ![]() in here and claim another Gold Skulltula
in here and claim another Gold Skulltula ![]() . Go out of that room and go through the tunnel and push the block until it falls to the lower platform. Then push and pull it until it falls on to the switch. Then enter into the next room.
. Go out of that room and go through the tunnel and push the block until it falls to the lower platform. Then push and pull it until it falls on to the switch. Then enter into the next room.
Boss: King Dodongo[edit]
Open the chest for bombs ![]() , then bomb the odd shaped floor and jump down. However, with a few stomps, a hungry monster approaches you...
, then bomb the odd shaped floor and jump down. However, with a few stomps, a hungry monster approaches you...
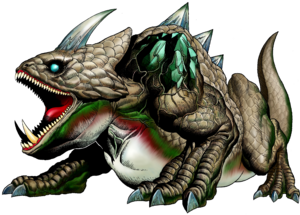
Like Gohma before him, King Dodongo is a bigger and meaner version of a previous enemy. After taking a few lumbering steps towards you, he will begin to inhale to unleash his flame breath. Obviously that would be unpleasant, so interrupt this by throwing a bomb ![]() into his open mouth. The unexpected snack will then blow up and stun him, giving you an opportunity to run up and hit him with your sword. To inflict the most damage possible, do jumping slashes. When he recovers, he will then curl up and begin to roll around the room.
into his open mouth. The unexpected snack will then blow up and stun him, giving you an opportunity to run up and hit him with your sword. To inflict the most damage possible, do jumping slashes. When he recovers, he will then curl up and begin to roll around the room.
The best way to avoid him when he rolls is to hide in one of the corners, but if you can't get to a corner in time, just stand on the crease bordering the lava pool. He shouldn't hit you. If you crouch under your Hylian Shield ![]() while he is rolling, you will be virtually invincible to his rolling attack. When he stops rolling, he will try breathing fire at you again. Throw another bomb in his mouth. Do this four times and you will defeat him.
while he is rolling, you will be virtually invincible to his rolling attack. When he stops rolling, he will try breathing fire at you again. Throw another bomb in his mouth. Do this four times and you will defeat him.
King Dodongo will end up rolling into the lava in the middle of the room and fry himself to a crisp. With the lava cooling, get the Heart Container ![]() that appears and leave.
that appears and leave.
Goron Jubilation[edit]
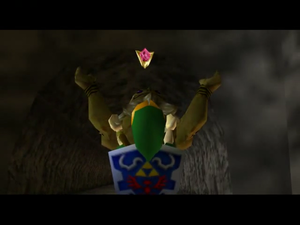
When you exit Dodongo's Cavern, Darunia meets you with great joy. He is happy you got rid of the monsters in the cavern, but knows it was foolish to anger Ganondorf. He decides your bravery is that of a Goron brother, and he happily gives you the Spiritual Stone of Fire, the ![]() Goron's Ruby, as thanks for your help.
Goron's Ruby, as thanks for your help.
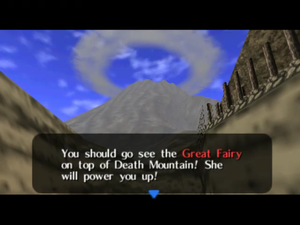
Darunia also reminds you that a Great Fairy lives at the summit of Death Mountain. He has been there before, and knows she holds great magical powers. With that advice, he gives his thanks with a "big Goron hug". The other Gorons then attempt to give you a hug, at which point you run for your life screaming. You and Darunia are now brothers! This will become important later in the game.
To the Summit[edit]
As you head up the mountain, you come to a fork. Bearing right would lead you to Goron City. If you bear left and move farther up the mountain, a few boulders block your way, but they are easily taken care of by a few bombs ![]() . Once you get past these boulders, you can hear a cow mooing! You can use another bomb to destroy the boulder atop the ridge. Drop down in the hole to find a cow and some Rupees. If you play Epona's Song
. Once you get past these boulders, you can hear a cow mooing! You can use another bomb to destroy the boulder atop the ridge. Drop down in the hole to find a cow and some Rupees. If you play Epona's Song ![]() for the cow, you get some free Milk
for the cow, you get some free Milk ![]() ! Continuing farther up the mountain, your Hylian Shield comes in handy as fiery rocks rain straight down on you from above. Finally you reach a shear rock wall. Climb it, but watch out for the Skullwalltulas
! Continuing farther up the mountain, your Hylian Shield comes in handy as fiery rocks rain straight down on you from above. Finally you reach a shear rock wall. Climb it, but watch out for the Skullwalltulas ![]() . At each platform, clear out the Skullwalltula from above you. Finally you'll reach the top where you find Kaepora Gaebora. After he speaks to you, bomb the wall to the left of him. Venturing inside reveals a fountain, but no fairy. However, when you play Zelda's Lullaby
. At each platform, clear out the Skullwalltula from above you. Finally you'll reach the top where you find Kaepora Gaebora. After he speaks to you, bomb the wall to the left of him. Venturing inside reveals a fountain, but no fairy. However, when you play Zelda's Lullaby ![]() on the Triforce crest in front of the fountain, the Great Fairy appears, gives you a Magic Meter, and enhances your Spin Attack ability. With this, you can now charge your spin attack for a stronger blow, and when it's charged at full power, it becomes a Super Spin Attack with farther reach. You can also do a quick spin attack by moving
on the Triforce crest in front of the fountain, the Great Fairy appears, gives you a Magic Meter, and enhances your Spin Attack ability. With this, you can now charge your spin attack for a stronger blow, and when it's charged at full power, it becomes a Super Spin Attack with farther reach. You can also do a quick spin attack by moving ![]() in a circle and pressing
in a circle and pressing ![]() . However, each charged spin attack takes a little magic to use, but you can refill your Magic Meter with Magic Jars you'll find, or when you swig down a Green Potion
. However, each charged spin attack takes a little magic to use, but you can refill your Magic Meter with Magic Jars you'll find, or when you swig down a Green Potion ![]() .
.
The Next Destination[edit]
Since it seems your work is done in this area, at least for the time being, you wonder where next you should go. When last you met with Saria, she taught you Saria's Song ![]() to communicate with her at any time. Playing this song now, she tells you what she knows: the Zoras, an aquatic people living in the east, possess the Spiritual Stone of Water.
to communicate with her at any time. Playing this song now, she tells you what she knows: the Zoras, an aquatic people living in the east, possess the Spiritual Stone of Water.
Before Moving On...[edit]
- There are many holes in Hyrule blocked by boulders. Blow them all up for many secrets.
- In the Lost Woods, the Bigger Deku Seed Bag
 is obtained from the area where there is a target hanging from a tree branch in the room to the right of where you enter the Lost Woods from Kokiri Forest. You must score three perfect bull's eyes in a row. A perfect bull's eye is worth 100 points, whereas other shots are worth 30 points.
 - The Bombchu Bowling Alley and Bombchu Shop are now open in the Castle Market.
- In Goron City, stop Hot Rodder Goron on the third floor using a bomb to receive a Bigger Bomb Bag
 upgrade. However, you must stop him near the tunnel or sign.
 - There are two other destructible walls on the sides of Death Mountain Trail. Bomb them find a Gold Skulltula
 and rupees.
The Bombchu Bowling Alley[edit]
If you return to Hyrule Market, go to the into building with a Bombchu sign by the door. This is the Bombchu Bowling Alley. Talk to the girl at the counter and she'll let you play for 30 Rupees. You'll get 10 Bombchus ![]() , bombs that crawl up walls. Stand directly in front of the hole in the wall and press
, bombs that crawl up walls. Stand directly in front of the hole in the wall and press ![]() to use a Bombchu, then
to use a Bombchu, then ![]() again to let it go. Watch the movement of the spike trap nearby so it won't skewer your Bombchu. If the Bombchu is released correctly, it'll go in the hole and blow up the first wall. The wall will then drop to reveal a second hole with a Cucco moving around in front of it. This next hole will appear in on of three spots: the left side of the wall, the right side, or the top. Position yourself accordingly and intently take time to check your positioning. If this Bombchu makes it to the hole, the second wall will blow up and drop to reveal the final hole. However, the most agitating obstacle lies in front of it: a giant Cucco that moves in front the hole! If you can center this Bombchu past all three obstacles and it makes to the hole, you're a winner!
again to let it go. Watch the movement of the spike trap nearby so it won't skewer your Bombchu. If the Bombchu is released correctly, it'll go in the hole and blow up the first wall. The wall will then drop to reveal a second hole with a Cucco moving around in front of it. This next hole will appear in on of three spots: the left side of the wall, the right side, or the top. Position yourself accordingly and intently take time to check your positioning. If this Bombchu makes it to the hole, the second wall will blow up and drop to reveal the final hole. However, the most agitating obstacle lies in front of it: a giant Cucco that moves in front the hole! If you can center this Bombchu past all three obstacles and it makes to the hole, you're a winner!
Now, you'll get a prize offered at the start of the game.
Prizes[edit]
There are a few prizes that you can win more than once:
- One Purple Rupee
 , worth 50 Rupees
 - A bundle of Bombs
 .
. - 10 Bombchus
 (you can hold up to 50 of them).
There are also two prizes that you can win one time:
- A Piece of Heart
 .
. - A Bigger Bomb Bag
 or the Biggest Bomb Bag
  . If you go to Hot Rodder Goron first, you'll get the Big Bomb Bag. Now, if you win the Biggest Bomb Bag, you'll get a bag that holds the most bombs at once: 40 Bombs!
Bombchus will help you later in your quest. Win them to stock up. The Bombchu Shop also has Bombchus, but it opens only at night and the Bombchus are limited. The prices will raise with the more purchases made until the owner is sold out.
The Shooting Gallery[edit]
At the Market, there is a building that has an arrow and target sign up by the door. Enter the building. This is the Shooting Gallery. You can play for 20 Rupees and win a prize. The object of the game is to shoot the Rupees that appear before they disappear. This is a list of how they appear in order:
- A Green Rupee; from the center platform
- Two Blue Rupees; one on the left and on the right, one before the other
- Another Green Rupee; from the center platform that flies up in the air
- Two More Blue Rupees; on the left and right at the same time
- Two Red Rupees; across one of the cables that move above you
- Two More Red Rupees; same as before, only faster and further spaced apart
Each time you hit a Rupee, you'll see it appear in your scoreboard (the spaces on the floor in front of you). If you hit 7 or less Rupees, the game's over. If you hit 8 or 9, you get a free try at it again. Hit all 10 to get the Biggest Deku Seed Bag ![]() and carry up to 50 Deku Seeds!
and carry up to 50 Deku Seeds!


