(Added Data) |
m (Text replacement - "BSM(.*).PNG" to "BSM$1.png") |
||
| (5 intermediate revisions by 5 users not shown) | |||
| Line 1: | Line 1: | ||
{{Header Nav|game=Battlestations: Midway}} | {{Header Nav|game=Battlestations: Midway}} | ||
[[ Image:BSM PhillipinesMap. | <p style="border:3px solid #000000;background-color:#ffff88;text-align:center">'''With the shutdown of GameSpy, these pages are no longer relevant. They have been preserved for historical purposes.'''</p> | ||
[[ Image:BSM PhillipinesMap.png|right|thumb|The destroyers, for some reason, do not appear on the briefing screen.]] | |||
'''American Objectives''' | '''American Objectives''' | ||
*Sink the ''Soryū'' | *Sink the ''Soryū'' | ||
| Line 28: | Line 29: | ||
==American Strategy== | ==American Strategy== | ||
[[ Image:BSM PhillipinesKateAttack. | [[ Image:BSM PhillipinesKateAttack.png|right|thumb|Kates are vulnerable given their low altitude. Don't let them in close.]] | ||
The Americans have the entire western side of the map uncontested, so they should take full advantage of this mobility and combine the two fleets to provide mutual protection from Japanese air raids. Always beware of the enemy submarine that spawns to the northeast of the northern fleet. Destroy it a few air-dropped depth charges or, if you're a sub-hunting ace, with a destroyer. | The Americans have the entire western side of the map uncontested, so they should take full advantage of this mobility and combine the two fleets to provide mutual protection from Japanese air raids. Always beware of the enemy submarine that spawns to the northeast of the northern fleet. Destroy it with a few air-dropped depth charges or, if you're a sub-hunting ace, with a destroyer. | ||
[[ Image:BSM PhillipinesTeamUp. | [[ Image:BSM PhillipinesTeamUp.png|left|thumb|Don't let the enemy destroyers team up on you.]] | ||
Once the two fleets are combined, you can have the destroyers move in on the enemy bases. Oftentimes the commander of the western US fleet will send a destroyer through the straits to attack the carrier from behind. While potentially devastating, it requires a lot of luck and distraction. If the enemy knows you're coming, they'll redirect everything you have and you'll be down a destroyer. | Once the two fleets are combined, you can have the destroyers move in on the enemy bases. Oftentimes the commander of the western US fleet will send a destroyer through the straits to attack the carrier from behind. While potentially devastating, it requires a lot of luck and distraction. If the enemy knows you're coming, they'll redirect everything you have and you'll be down a destroyer. | ||
| Line 36: | Line 37: | ||
==Japanese Strategy== | ==Japanese Strategy== | ||
[[ Image:BSM PhillipinesDDEvadeTorp. | [[ Image:BSM PhillipinesDDEvadeTorp.png|right|thumb|Use dive bombers instead of torpedoes against destroyers.]] | ||
The US is divided in two groups, so rally up a battle group with the airfield player and, if you're feeling lucky, launch a preemptive raid on one of the enemy fleets. They'll become almost impossible to take down once they merge up, so cause what damage you can. | The US is divided in two groups, so rally up a battle group with the airfield player and, if you're feeling lucky, launch a preemptive raid on one of the enemy fleets. They'll become almost impossible to take down once they merge up, so cause what damage you can. | ||
Be careful of being attacked from the back by an American destroyer. The US players will often do this to try and get rid of the ''Soryū'' early. Don't let this happen and | Be careful of being attacked from the back by an American destroyer. The US players will often do this to try and get rid of the ''Soryū'' early. Don't let this happen, move forward and around behind the large island, next to the airfield, doing so will force the enemy submarine to surface if it comes close due to the shallow water, making it an easier target. In addition, the carrier's anti-air defenses can protect the airfield. | ||
[[ Image:BSM PhillipinesDDAntiAir. | [[ Image:BSM PhillipinesDDAntiAir.png|left|thumb|Take down the enemy fighters to pave a way for your bombers.]] | ||
If you spot a lot of planes headed your way, it's best to assume they're bombers and put up a massive fighter screen to nullify them. Then you can have the destroyers move in to take down the enemy carriers - similar to combined arms in other strategy games (which entails combining infantry and tanks for mutual protection). | If you spot a lot of planes headed your way, it's best to assume they're bombers and put up a massive fighter screen to nullify them. Then you can have the destroyers move in to take down the enemy carriers - similar to combined arms in other strategy games (which entails combining infantry and tanks for mutual protection). | ||
[[ Image:BSM PhillipinesTorpEnterprise. | [[ Image:BSM PhillipinesTorpEnterprise.png|right|thumb|Nothing says "good game" like a school of torpedoes.]] | ||
If you can sink one of the enemy carriers and keep both your airbase and your carrier alive, then the battle severely tilts in your favour. | If you can sink one of the enemy carriers and keep both your airbase and your carrier alive, then the battle severely tilts in your favour. | ||
In the | In the event you move the Soryū to open waters though, whatever you do, sacrifice a destroyer to stay with it. You need its sonar to detect the submarine the enemy will ultimately send at you. Destroyers aren't manoeuvrable as planes, so you'll want to use the destroyer's sonar to spot the target, then have your Judy dive bombers strike the sub down. | ||
Only use dive bombers when attacking the destroyers. If you can destroy at least two while keeping your own intact, it is possible to win by rushing the Americans with your own. | |||
Keep your sub on the surface for a while. If you're lucky, you will draw a destroyer off to chase you. It's to your advantage if you can keep the American destroyers from forming up. | |||
{{Footer Nav|game=Battlestations: Midway|nextpage=Islands of Solomon|prevpage=Battle of the Vella Gulf}} | {{Footer Nav|game=Battlestations: Midway|nextpage=Islands of Solomon|prevpage=Battle of the Vella Gulf}} | ||
Latest revision as of 20:21, 10 August 2022
With the shutdown of GameSpy, these pages are no longer relevant. They have been preserved for historical purposes.
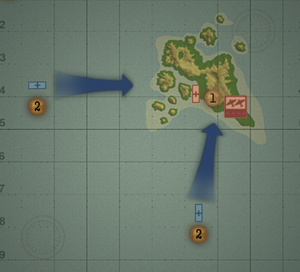
American Objectives
- Sink the Soryū
- Destroy the airfield
Japanese Objectives
- Sink the enemy carriers
You're quite evenly matched on this one, but the Japanese have a slight disadvantage in that they have an airfield which can't be moved. Additionally, movement for the Japanese is restricted in the many small islands until the Soryū moves out into open waters.
The Americans, however, have their firepower separated until they combine the fleets. The submarine for the Americans is also slightly less useful, as the Japanese airfield can't be torpedoed by it.
Player Slots[edit]
American Slots
- Yorktown (CV) - Enterprise
- Yorktown (CV) - Hornet
- Fletcher (DD) - Aylwin
Fletcher (DD) - Bagley - Fletcher (DD) - Balch
Fletcher (DD) - Conyngham
Narwhal (SS) - S-28
Japanese Slots
- Airfield (contains 40 fighters and bombers of both variety)
- Sōryū (CV) - Sōryū
- Fubuki (DD) - Hibiki
Fubuki (DD) - Hokaze - Fubuki (DD) - Ikazuchi
Fubuki (DD) - Nadakaze
Type B (SS) - I-25
American Strategy[edit]
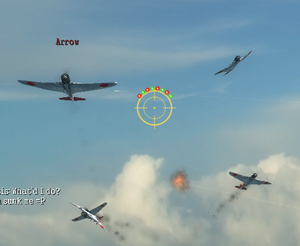
The Americans have the entire western side of the map uncontested, so they should take full advantage of this mobility and combine the two fleets to provide mutual protection from Japanese air raids. Always beware of the enemy submarine that spawns to the northeast of the northern fleet. Destroy it with a few air-dropped depth charges or, if you're a sub-hunting ace, with a destroyer.
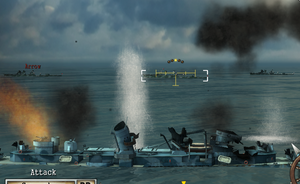
Once the two fleets are combined, you can have the destroyers move in on the enemy bases. Oftentimes the commander of the western US fleet will send a destroyer through the straits to attack the carrier from behind. While potentially devastating, it requires a lot of luck and distraction. If the enemy knows you're coming, they'll redirect everything you have and you'll be down a destroyer.
Target the carrier when you can with what bombers you can muster. Alternatively you can target the airfield, which isn't going anywhere, and reduce the enemy air power in half. Later, however, you'll have to hunt down the enemy carrier, which lengthens the match and thus gives the enemy a chance to catch up. Either way this is one heck of a naval/air battle, and all warships on this map have excellent anti-aircraft.
Japanese Strategy[edit]
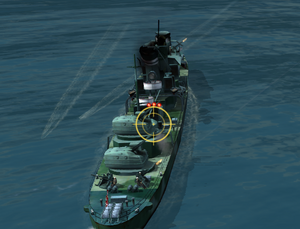
The US is divided in two groups, so rally up a battle group with the airfield player and, if you're feeling lucky, launch a preemptive raid on one of the enemy fleets. They'll become almost impossible to take down once they merge up, so cause what damage you can.
Be careful of being attacked from the back by an American destroyer. The US players will often do this to try and get rid of the Soryū early. Don't let this happen, move forward and around behind the large island, next to the airfield, doing so will force the enemy submarine to surface if it comes close due to the shallow water, making it an easier target. In addition, the carrier's anti-air defenses can protect the airfield.
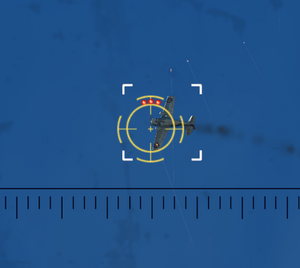
If you spot a lot of planes headed your way, it's best to assume they're bombers and put up a massive fighter screen to nullify them. Then you can have the destroyers move in to take down the enemy carriers - similar to combined arms in other strategy games (which entails combining infantry and tanks for mutual protection).
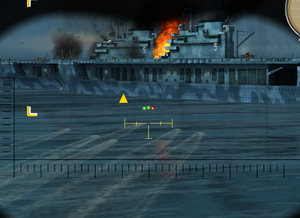
If you can sink one of the enemy carriers and keep both your airbase and your carrier alive, then the battle severely tilts in your favour.
In the event you move the Soryū to open waters though, whatever you do, sacrifice a destroyer to stay with it. You need its sonar to detect the submarine the enemy will ultimately send at you. Destroyers aren't manoeuvrable as planes, so you'll want to use the destroyer's sonar to spot the target, then have your Judy dive bombers strike the sub down.
Only use dive bombers when attacking the destroyers. If you can destroy at least two while keeping your own intact, it is possible to win by rushing the Americans with your own. Keep your sub on the surface for a while. If you're lucky, you will draw a destroyer off to chase you. It's to your advantage if you can keep the American destroyers from forming up.
