Aircraft are the most powerful units in the game given their high attacking power and high speed. Players have complete control of an aircraft, with all the abilities one would expect from a flight simulator, including pitch, yaw, and roll control. In this sense it controls similarly to the Ace Combat series of flight arcade shooters; it is only semi-realistic. Aircraft sport an infinite number of ammunition (bombs and torpedoes must be reloaded at an airbase or carrier), G-forces do not affect the pilot, and all planes carry infinite fuel. Unlike Ace Combat, however, planes cannot take much punishment before going down, and in a fight between two ships and an aircraft, chances are the warships will shoot the plane down (but perhaps not before the plane drops its torpedo).
Any plane can be used as a fighter if they are sent up unequipped with bombs. Some planes are better than others, but bombs negatively affect all plane's fight performance, so either drop them or send them up without bombs before trying to use them as dogfighters.
There are several kinds of aircraft, including:
- Fighters: Includes the A6M Zero and the F4F Wildcat. These planes are typically armed with machine guns and have extremely high manoeuvrability, allowing them to out-turn and out-fly all other aircraft. Typically they have machine guns, but they can carry tiny bombs too. The bombs cause extremely little damage, and it also negatively affects their performance, so drop them before dogfighting.
- Dive bombers: Includes the D3A Val and the SBD Dauntless. These bombers start high and dive low on their targets. Ineffective against targets with strong deck plating, like battleships, they are best wielded against lightly armoured targets, mainly destroyers and light cruisers. They can also bring the hurt on aircraft carriers given the huge size of their deck. Difficult to destroy, but in general causes little damage.
- Torpedo Bombers: Includes the B5N Kate and the TBD/F Avenger. These planes start low, then climb high after releasing torpedoes. Torpedoes must be dropped at an altitude less than 1,000ft while the plane is almost parallel to the ocean - otherwise the torpedo will detonate when hitting the water. Far easier to use than dive bombers as well as being far more devastating, they are easy prey for targets with a lot of anti-aircraft fire.
- Level Bombers: Includes the B-17 and the G4M. These planes fly at high altitudes and drop massive amounts of bombs on targets. They are rather easy to use and are oftentimes heavily defended by themselves, but their accuracy is typically abysmal. They are effective against all targets, but particularly excel in bombing shipyards, airfields, and aircraft carriers in particular.
- Recon Planes: Includes the PBY Catalina and the H8K Emily. These planes are slow, but they sport sonar, making them ideal for anti-submarine operations. They come equipped with either bombs, twin torpedoes, or most devastatingly depth charges. Without a doubt the submariner's most deadly enemy, since recon planes can see and attack them without fear of counter-attack from the sub. It should also be noted that recon planes can land on the water. If they land on the water near a shipyard, they can be rearmed with additional weapons. Unfortunately, this must be done manually.
All the above types, excepting recon planes, are produced at either an airfield or, most commonly, at an aircraft carrier. Recon planes are produced at shipyards.
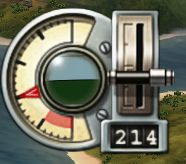
It should be noted that the throttle control on planes works differently than some other flyers. Setting the throttle to the maximum will cause the plane to accelerate to maximum speed, but pulling it down will result in the plane braking. The issue is that the plane will continue braking until it reaches a speed of 0, during which a novice player can easily stall and crash. It is therefore important, while flying, to slow down while making an attack run, but not slowing down to the point of an unrecoverable stall.
Taking Off[edit]
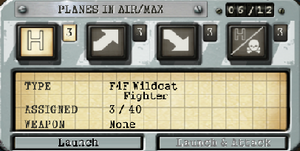
To put aircraft in the air, select the unit you want to launch planes - whether a carrier or an airfield, and open up the control panel. In the above example, four squadrons are available.
- The "H" indicates the squadron is at home base.
- The diagonal arrow pointing up shows that the squadron is currently in the process of taking off.
- A straight arrow indicates that the aircraft is currently in the air.
- A diagonal arrow pointing down indicates that the aircraft has received landing orders and intend to land.
- A skull and crossbones indicates the squadron was destroyed. If you have additional planes, you can launch them.
Beneath those icons you will see:
- Type: The aircraft the squadron is currently using. You can switch this whenever the squadron is landed.
- Assigned: The number of planes assigned to the squadron versus the total number of planes of that type you have.
- Weapon: Here you can choose what the planes are loaded with. Typically this involves bombs, depth charges, or torpedoes.
The number at the top right of the window indicates the number of planes airborne versus the number of planes you can actually put up. Regardless of how many planes you assign to a squadron, the number of airborne planes cannot exceed the plane cap.
In the above example, the carrier can have 12 planes in the air at once. You have four squadrons. You can assign squadron members evenly (each squadron has 3 members - 4 squadrons times 3 planes each = 12 planes total). You can also choose to have 5 planes in two squadrons, but that means one squad is left underpowered at only two members (5+5+2=12).
Landing[edit]
Landing aircraft is important, especially for bombers. Landing planes saves them for later use in the long run.

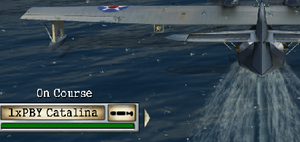
In the diagram above, note that the carrier has 10 SBD Dauntlesses - three of which are assigned to the squadron. If all three planes in the squadron are lost, then the max number on the right will decrease to 7. You can still launch planes, but if those planes get shot down the max further decreases to 4. Eventually you'll have 0 planes left in reserve, and you will be unable to launch planes of that type. Landing units, especially bombers, therefore, is vital.
To order a squadron to land, open the Command menu and select the Land option. You should hear "Landing orders acknowledged, sir" or something of the sort, and your squadron status will be set to "LAND".
The AI takes its time landing - you can attempt to land yourself, oftentimes quicker than the AI, by simply reducing your airspeed (your gear will come down automatically) and simply touch down at a low speed. You can do this for either carriers or airfields, but carrier landings are considerably more difficult than airfield landings.
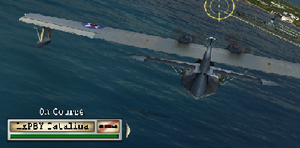
As mentioned above, recon planes like the Catalina can rearm themselves by landing in the vicinity of a shipyard (although you must do this manually). Simply do the same thing as before, except on water. Landing on water should be easy - just don't come down at a sharp angle and you should be fine. Keep your throttle low and get close to the shipyard to rearm (you should not need to enter the shipyard, and docking the plane is impossible). It should also be noted that while you can rearm your Catalinas in this manner, you cannot change their weapons. In the above example, it is impossible to change the Catalina's weapons from torpedoes to, for instance, depth charges.
Very few players online land their planes - they instead prefer to crash their squadrons into enemy ships or into terrain. This loses them permanently, but it saves time since as soon as they die another squadron can immediately be sent to replace them, versus waiting for them to land first. One major exception to crashing planes is Operation MI, as that map is extremely long and running out of fighters is a definite possibility.
Torpedo Bombing[edit]
When piloting a plane armed with torpedoes, you have to fly low (the game says "slow and low", but speed generally isn't an issue) with your plane flying parallel to the sea. Dropping the torpedo from a high altitude means the torpedo will explode upon hitting the water. The torpedo bay won't even open if you're upside down or have your wing-tips touching the ocean.
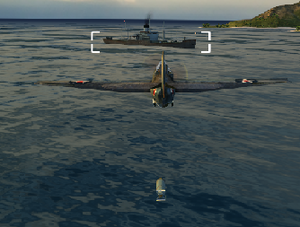
Once within a close enough range of the target (experience will tell you when) press and hold the bombing mode key and, while doing so, pull the trigger to release your torpedo. Hold the trigger to watch the torpedo streak through the water and hopefully land a hit. Even if you don't watch the torpedo, you'll hear "Ordnance was on target, sir!", confirming you have made a successful torpedo run on the enemy warship.
Once your ordnance is gone, it's best for you to turn around and head back home, but be careful when issuing landing orders - if the rest of your squadron is behind you, they might not have released their torpedoes yet. Issuing a landing order at this time will prompt the entire squadron - including those who still have their torpedoes - to turn around and head for home (not only wasting time and torpedoes but also aircraft, as the expose their vulnerable tails to the enemy). Therefore, it's best to let the AI handle the landing orders. The squadron will automatically return home once all its torpedoes have been expended.
Torpedo bombing is one of the most effective way of attacking ships, as it not only causes leaks but also it punches under the waterline, bypassing a battleship's heavy belt and deck armour.
Dive Bombing[edit]
The other method of attacking ground targets is dive bombing. Best used by dedicated dive bombers, dive bombing causes little damage and is difficult to perform, but it is from the ship's perspective the most difficult to stop, given the bomber's high altitudes.
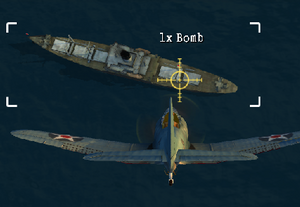
Dive bombing in theory is simple - fly as high as you can, and once you're somewhat past your target, roll over and plunge like a brick right at the enemy target, and drop your bomb when you're sure it's going to hit. In practice, however, it is considerably harder than it sounds. Most rookies dive too early or too late, or are simply too afraid they are going to crash into the ocean.
Your best bet is to simply follow your wingmen. The AI will almost always do a better job of dive bombing than you will, so simply let your wingmen lead the target and watch them. If they rudder right, you rudder right too. When they roll over and start a dive, you do too. Once you're in the dive, it's all up to you.
Plummet as fast as possible towards the enemy target and at this point toggle on your bombing mode to see where your bomb is going to hit. Position your crosshair over the enemy warship and, once you're low enough, drop the bomb, cut your throttle to the absolute minimum, and pull out of the dive. Again, hold the trigger if you want to see if it scored a hit. You'll still hear "We hit it!" regardless, however.
Carpet Bombing[edit]
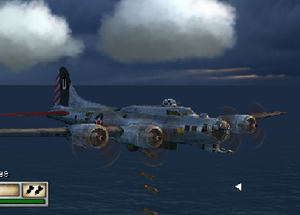
The easiest and possibly most destructive way of attacking enemy ground targets is with a level bomber. These massive planes carry equally massive amounts of bombs - the B-17 has a whopping payload of 24 bombs. You need to fly straight and level over your target in order to release, however - you aren't a dive bomber, and while a dive bomber can perform a level bombing attack, a level bomber cannot perform a dive attack.
Once you've positioned the crosshair over the target, simply open your bomb bay doors with the bombing mode button and pull the trigger to start dropping bombs. There are two main methods of carpet bombing ships - from side-to-side (port to starboard or starboard to port) or from front-to-back (or back-to-front - bow to stern or stern to bow). Bombing from side-to-side almost guarantees a hit, but given the ship's low profile in this manner, most of the bombs will miss.
Although it may seem obvious, dropping bombs takes time. B-17s, with their payload of 24 bombs, takes several seconds to start and finish dumping their payloads. There is no way to stop dropping bombs once you've started, so you'll want to lead your target with bombs if necessary. Don't pull the trigger when your cursor is on top of the ship - otherwise, half of your bombs will hit, and half of the bombs will hit the water behind the ship. Start dropping in front of the ship - that way, the latter half of your bombs will hit their target too.
Conversely, bombing from bow-to-stern or stern-to-bow will result in far more bombs striking their target, but at the same time if the enemy warship is moving fast enough and turns, most of the bombs could miss. Against the lighter targets, therefore, it might be wiser to employ dive bombers instead of carpet bombers.
Strafing[edit]
Strafing is pretty easy, but don't expect it to cause a lot of damage. The most you can do is annoy the enemy. It does, however, have its purposes.
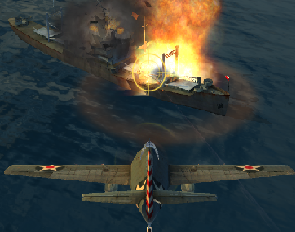
Strafing is simple - using the forward firing guns on a plane to attack a ground target. Given the weak nature of guns, however, it only affects extremely lightly armoured targets - personnel landing ships (that is, Daihatsus and Higgins Boats), patrol boats, the cargo of cargo ships (shooting their superstructure does little to no damage) and most types of land installations (Fortresses, shipyards, and airfields being notable exceptions).
The most useful part of strafing, however, is the ability to target exposed anti-aircraft emplacements on an enemy ship. It won't affect fully-enclosed turrets, but if you intend to disable the enemy's machine gun emplacements or flak guns, strafing may be a viable solution. Simply attack the enemy with your machine guns and shoot the gun until you see a small explosion.
Strafing is possible really with any type of ship that uses an anti-aircraft weapon (in theory, flak guns work too, but they are often too inaccurate to strike such small targets). A good place to try surface-to-surface strafing is in Defence of the Phillipines. Take your PT boat and drive it close to the enemy destroyer. Arm your machine guns and fire at the enemy's own machine guns. You should be able to blow them up.
Note that enemy gun emplacements will automatically respawn, so don't expect a target you disabled ten minutes ago to still be a sitting target for your air wing.
Dogfighting[edit]
As mentioned above, players have full reign of aircraft control - BSM isn't a rail shooter at all.
Before attempting dogfighting, drop any other ordnance you may have - particularly bombs or torpedoes, as they negatively affect your ability to fly.
As you approach the enemy, they will oftentimes turn and head straight for you. As soon as you're in range, pepper their engine with machine gun fire. Be careful though since they'll be doing the same to you. The idea is to hit them in the engine before they can hit yours.
As you close the distance, you'll want to pull up and away from the enemy planes, as it is highly possible to crash into them (it is equally possible to fly right through them - BSM has rather poor collision detection).
What happens now depends on how your opponent fights. The general rule remains the same - hit them from behind. Dogfighting is very simple in BSM terms, and pretty much anyone can do it. Get behind them, lean on the trigger, and watch for the explosions marking your bullets hitting. If you find you are hitting the enemy from very close up just behind them, and it isn't doing any damage, consider going a bit lower and pointing slightly upwards to hit them. These bullets should cause damage and it will often mean that if you fly just behind them the bullets will start causing damage again, and you will shoot down the enemy plane.
One mistake commonly made by rookies is not adjusting their airspeed. Airspeed is extremely valuable - the common military aviator saying is that "Speed is life". Speed in this case is more like money - easy to expend, tough to get, especially in a fight.
Despite this, low airspeed is good for turning, so apply the airbrakes when you're ready for a turn. Additionally, if you're in a dive and need to pull up quickly, apply the brakes first in order to slow your descent, then angle your plane up and open up the throttle quickly to gain altitude.
Another thing to consider is what kind of plane you're flying. Wildcats have a tighter turning radius (despite history proving otherwise), but their guns do not have much convergence and they stall slightly easier. Zeros are the opposite; they have a wide turning radius, but are slightly faster, carry more bombs (two versus one), and their guns have a strong convergence. Shot-for-shot, the Zero outguns the Wildcat.
Additionally, the American planes are generally decent at dogfighting. The Dauntless has a ridiculously low stall speed, allowing it to make extremely tight turns, and unlike the Wildcat, its guns are all nose-mounted, giving it extremely good convergence. The Avenger may have the worst convergence of guns in the game, but its manoeuvrability still outclasses the Zero. The Japanese planes are much less manoeuvrable and therefore are more specialized.
Standing Orders[edit]
Unlike warships, aircraft have only two standing orders. Standing orders dictate how the squadron reacts when you aren't controlling it. There are only two settings, both of which can be toggled on and off:
- Free Fire: Determines whether or not a squadron will automatically attack enemy units that enter its area.
- CAP: Stands for Combat Air Patrol. If you open the tactical map and right click on a friendly unit, this will automatically turn on. Aircraft on combat air patrols will automatically engage enemies that threaten the friendly target.
Note that aircraft do not have a Free Move option, like ships do. This is because aircraft have to keep moving regardless - they aren't helicopters, you know.
