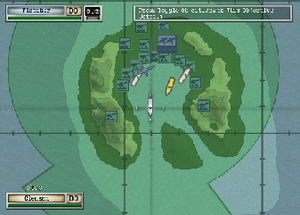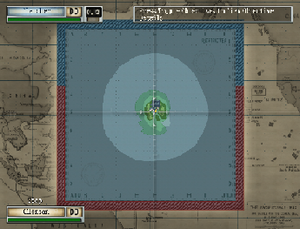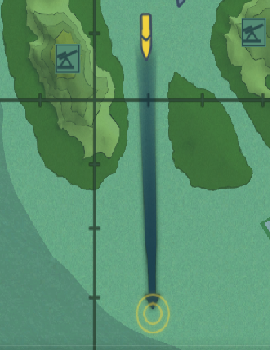
Pressing the map key opens a tactical map which shows you where your units are and any spotted enemy units. The bottom window shows you information about the unit you are currently in command of. The top window shows you either:
- What is beneath your cursor
- What the selected unit is targeting
The zoom controls allow you to zoom in on where your cursor is pointing. At different levels, various details are revealed.
At the outermost zoom, very little information is revealed - you can only see ship formation leaders and aircraft squadron leaders. Individual ships, individual planes, and gun emplacements are some of the things that are not shown on maximum magnification.
In the middle zoom, individual ships are revealed, but not individual planes. Gun emplacements are also not revealed at this level of zoom.
At maximum magnification, players can see practically everything - from gun installations to individual planes, even torpedoes appear on the map. The ships on the map, regardless of magnification, are never drawn to scale, so while it may seem a torpedo is headed for the aft section of a warship it may actually miss by mere centimetres. From the tactical map screen, it appears as though the ship moves over the torpedo.
Objectives[edit]

At the top right of the interface displays all the objectives. Pressing the "Show Objectives" button allows you to view your current objectives, and selecting them is possible too. Each objective is numbered - black numbers indicate the objective is incomplete. Green numbers indicate the objective is complete. Red numbers indicate the objective has failed. Selecting an objective will detail what is or was required to accomplish that objective.
There are three kinds of objectives:
- Primary objectives are required to accomplish the mission. Failing one means losing the mission.
- Secondary objectives are optional objectives. Clearing all secondary objectives gives you a silver star indicating you have passed all the primary and secondary objectives.
- Hidden objectives do not appear on the objectives panel, and means the player has gone above and beyond what was expected of them in the level. Typically, they aren't difficult objectives - what's hard is knowing what they are. Clearing all the primary, secondary, and hidden objectives gives you a gold star as a reward.
The stars do not unlock anything special, and are there merely for bragging rights and proof that you have defeated the level with only primary (bronze), primary and secondary (silver) or all (gold) objectives.
Detection Ranges[edit]

While viewing the battlefield at the outermost zoom, you can notice several coloured layers representing each vessel's detection ranges. There are three fields:
The darker area is the radar detection area. Enemy units spotted this way appear as "Unknown". You will be able to tell whether it is a ship or a plane, but that's it.
The light coloured area is the visual detection range. Any enemy units that enter this range will automatically be reported and identified ("We have incoming enemy aircraft!" or "Enemy ship spotted, sir!")
The green coloured area is the sonar detection range. Submerged submarines can only be detected through sonar. Note that destroyers have a huge sonar coverage in the front but lesser so in the back, so approaching a destroyer from behind when you're a submarine can give you the element of surprise.
Issuing Orders[edit]

Issuing orders via the map screen allows you to command separate units for split-second amounts of time, issuing quick, simple commands in a manner befitting a real-time strategy game.
To move a unit from the tactical screen, put your cursor over the unit you want to move and hit the select unit control to select it. It will turn gold to indicate that this is the unit you have selected. The move-to control (by default the right mouse button) will have the unit move to where your cursor is - just like an RTS. It may or may not engage enemies that appear based on its standing orders (some RTS games call it the unit's "Stance" or "AI"), which are discussed later.
Along similar lines, a unit can be ordered to engage an enemy warship in a similar fashion. Clicking on an enemy unit with a unit currently selected will have your unit engage the enemy's. A red line will show that the unit is engaging the enemy.
Aircraft ordered to land will have green arrows pointing to their carrier or airfield. Aircraft ordered to patrol and give air cover to a warship below them will also have a green arrow.
