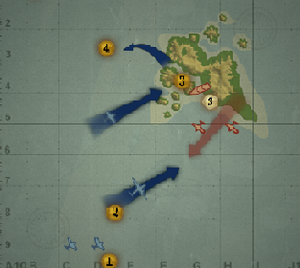
Primary Objectives
- Protect the B-17s
- Donald must survive
- Sink the Tone
- Sink the Fusō
- The USS Lexington must survive
Secondary Objectives
- Sink the Horai Maru
Hidden Objectives
- Sink all enemy destroyers
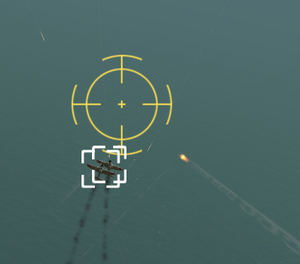
Your first priority is to mix things up with the enemy Zeroes that come in from dead ahead. Catch up to the bombers and fly in front and shoot away at the Zeroes as they come by. The B-17s help considerably with their huge numbers of rear gunners. While you can only control Donald, he's all you need...for now. You'll encounter three waves of Zeroes. The first two waves have five Zeroes each, the third wave consists of three. You can only afford to lose one bomber – losing two or more will result in failure of the mission.
One important thing to note is that the crash conditions regarding aircraft are a little flimsy. Sometimes you can fly through the wreckage of a downed Zero, other times you can't. Other times, you may crash into a B-17 if you bank right to try and keep up with the Zeroes as they pass you. Just try again - odds are, you'll miss them the second time around. Fortunately also this is early in the mission, so restarting from this point isn't a major issue.
The moment one presents its tail to you, fly behind it and fire away. Don't worry about the B-17s - they can easily handle themselves.
It won't be long until the B-17s are over the target area and they drop their bombs. They'll take out the airfield in one go. There'll be some short dialogue between you, the bombers, and "Lady Lex", which gives you an opportunity to attack the nearby cargo ship. It's not essential to the mission, but you can anyway. The moment you can, however, target the Horai Maru, which is shown below.
Four Wings as One[edit]
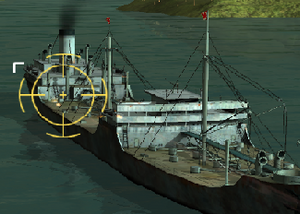
Your first target should be the tanker Horai Maru, shown right. It's an easy target for your plane's machine guns - just aim for the flat spots to send it down. Notice the two destroyers sandwiching the Horai Maru - they'll attempt to flak you down, but as Donald you're an elite unit - you can take the punishment.
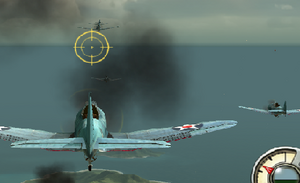
It isn't long until Tiger Squadron enters the mission area. Coming in with SBD Dauntlesses with bombs, their objective is to hit the Tone. Instead, open up the tactical map and change their target to one of the enemy destroyers. They'll do little hurt to the Tone, but they should sink an enemy destroyer. Follow your squadron leaders through the dive - they do a much better job than anyone can. Just make sure you fly over your target and let the wingmen fly in front. When they start to dive, you start your dive too - and you should be in a perfect opportunity to bomb the daylights out of one of the two destroyers. Once all ordnance is deployed, the squad turns around and heads for a nav point. They'll go automatically, so open the map screen and switch to Donald. Have him shoot some stuff - there isn't much to shoot aside from cargo ships, so do that while you wait for the next squadron to arrive.
The next squadron to arrive is Bobcat Squadron. These guys are flying TBF/D Avengers, and honestly have enough firepower to sink the Tone in a single attack. However, the trick is to sink all the destroyers here first to save you time later - so switch targets again to the final enemy destroyer. Come in on it at low altitude and drop the torpedo when you're almost right on top of it to guarantee a direct hit. If it can sink the Tone, it can sink a destroyer. The destroyer should really be sinking after only two torpedo hits, but since you have five planes in your group - you might as well be thorough.
The next squadron to arrive is Panther squadron, again flying Dauntlesses. With all the other targets destroyed, have them dive on the Tone. With these guys, you can see how little damage dive bombers can do. You have to hit a critical area in order for the bombs to cause considerable damage. As with Tiger squadron, simply have your wingmates follow you and aim for the area towards the stern to hit the Tone and her fuel tank to cause maximum damage.
The final squad is Cougar Squad, with TBF/D Avengers. If you fail to sink the Tone with these guys, you fail the mission. Fortunately, with you at the controls, that isn't going to happen. Approach low and yet as fast as possible towards the Tone, firing at its machine guns with your own to silence them for your approach. Drop your torpedoes and confirm your hits. Once all the torpedoes hit, your squadron retreats automatically.
The Fusō[edit]
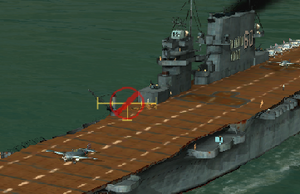
Those of you who studied the Japanese warships in the game, you'll know that the Tone is in fact a heavy cruiser and not a battleship. Unfortunately your pilots are slow on the uptake, and it's only after the Tone is sunk do you realize that you were attacking the wrong target. The Fusō, a fully-fledged battleship, is coming in "to pick a fight with the Lex".
You lose control of Donald at this point, but you gain control of the Lexington. Half-control, more like - you can't steer her or change her speed, but you can have her launch squads of planes. The Fusō is to the north and is attempting to bear down on you. You have a single destroyer as an escort, but you can't control that either - the enemy has the Fusō, two destroyers, and six Zeros in the air.
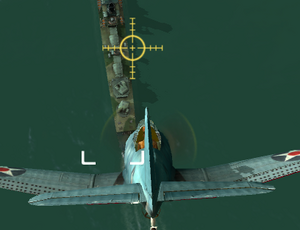
Regarding the Fusō, she'll try and chase down the Lexington, but you have the head start, and so the Fusō can't catch up. However, once Lexington hits the eastern border, she'll turn around and head west - straight for the Fusō. You have to sink the Fusō before that happens. Basically, there is a time limit, but it's hidden.
Start with the Zeroes - they're the biggest threat to your bombing wings. Have the first two squadrons consist of Wildcats and the second two consist of SBDs. Send the former at the Zeroes, and have the latter target the two destroyers - one squad of three SBDs for each destroyer. This should be more than enough to sink it.
The Wildcats arrive on scene first since you launched them first, so switch to the Wildcats and prepare for some real dogfighting (Donald had a super Wildcat as a one-of-a-kind heroic unit). Mix it up with the Zeroes just like before, only the seas are against you. The destroyers should fire some flak up in the air, but ultimately it shouldn't do much aside from annoy you. Make short work of the Zeroes, and once both squads of Zeroes are down, have all the Wildcats retreat to the carrier. In the event squads of Wildcats get downed, replace them as quickly as possible.
Once the Wildcats are done, your SBDs should be in bombing range shortly. They'll fly over the destroyer they're targeting, then initiate their dive. As with the previous SBDs, follow your squad through the dive and target each ship's weak spots - the ammo magazine or the fuel tank. As soon as your squad is done with their bombs, they'll automatically receive landing orders and head for home. If a destroyer survives, smack it with more SBDs until it goes down.
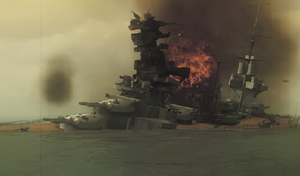
Your first wave alone should have neutralized the six Zeros and both escort destroyers, paving the way for torpedo bombers. Destroying the destroyers also fulfills the mission's sole secret objective. The moment all your planes are back, have all four wings of aircraft consist of TBF/D Avengers. Battleships have high deck armour, so dive bombing is much less effective, and the battleship is immune to machine gun fire. Despite this, when flying a torpedo bomber, pepper the machine guns of the battleship with machine gun fire to silence them as you make your approach. Drop the torpedo at point-blank range and hold the trigger to confirm your hit.
Continue launching torpedo bombers until the Fusō is no more. It should sink after about three or four wings of torpedo bombers (or possibly more depending on your difficulty level).
