Ultima IV: Quest of the Avatar (NES)/Dungeons Despise and Covetous: Difference between revisions

From StrategyWiki, the video game walkthrough and strategy guide wiki
(created)
 
(adjusted)
 
(13 intermediate revisions by the same user not shown)
Line 1: Line 1:
{{Header Nav|game=Ultima IV: Quest of the Avatar (NES)}}
__TOC__
:'' See also: [[Ultima IV: Quest of the Avatar/Dungeons Despise and Covetous]]''
== General strategy ==
* Enter from Despise, north of Britain.
{|{{prettytable|notwide=1|text center=1|sortable=1}}
* Get the Yellow and the Orange stones.
! Class !! Strength <br>(STR) !! Dexterity <br>(INT) !! Intelligence <br>(DEX)
* Get the Key Parts from the Altars of Love and Courage.
|-
* Leave from Covetous and use a Gate spell.
| Mage    || {{no|22}} || 29 || 43
|-
| Bard    || {{no|30}} || 35 || {{no|32}}
|-
| Fighter  || 42 || {{no|24}} || {{n/a|''17''}}
|-
| Druid    || {{no|24}} || {{no|26}} || 40
|-
| Tinker  || 33 || 42 || {{no|24}}
|-
| Paladin  || 36 || {{no|23}} || 35
|-
| Ranger  || 36 || {{no|25}} || {{no|34}}
|-
| Shepherd || {{no|24}} || 42 || {{no|23}}
|}


== Dungeons Destard and Shame ==
The magic balls in both these dungeons raise dexterity (INT); the balls in Shame also raise strength (STR).
:'' See also: [[Ultima IV: Quest of the Avatar/Six Dungeons#Dungeons Destard and Shame]]''
The magic balls in both these dungeons raise strength (STR); the balls in Shame also raise intelligence (DEX).


'''Suggested companions:''' the characters with lowest strength are the mage (22), the druid (24) and the shepherd (24), followed by the bard (30). Since the cost to buy two magic wands for the mage and druid is prohibitive, consider taking only one of them (note that bard and druid wear different armors), and include the tinker.
Suggested party (upgrade companions with lowest dexterity):
* '''Wand wielder:''' <u>Jaana</u> has lower dexterity than Mariah.
* '''M. cloth or ring:''' to optimize armors, <u>Iolo</u> (m. cloth) goes with Jaana (ring), Shamino with Mariah.
* '''Magic axe wielder:''' <u>Dupre</u> has the lowest dexterity of all Companions.
* '''Zero magic:''' <u>Geoffrey</u> has far lower dexterity than katrina.


== Dungeons Despise and Covetous ==
{|{{prettytable|sortable=1|text center=1}}
! L. !! Map of the floor !! Walkthrough
|-
|-
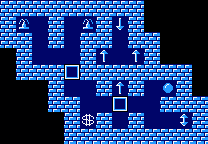
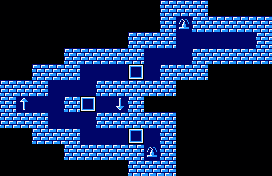
| D1 || [[File:U4_NES d4 Destard L1.png]] ||align=left| When the party enters, they are in at the cross of endless corridors (upper-left in the image). Use a gem and locate the secret passages. All stairs down connect to the same area.  
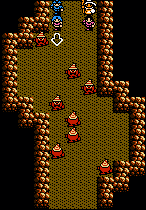
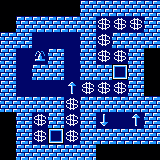
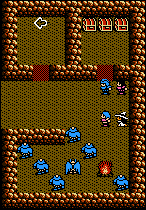
| D1 || [[File:U4_NES d3 Despise L1.png]] ||align=left| [[File:U4_NES d3 Despise L1rooms.png|left]] The east fountain refreshes all health, the west one is poisonous (inverted from the original computer ports). There are two rooms and three doors.
|-
|-
| D2 || [[File:U4_NES d4 Destard L2.png]] ||align=left| [[File:U4_NES d4 Destard L2rooms.png|left]] The northern fountain is poisonous, the southern one cures it.
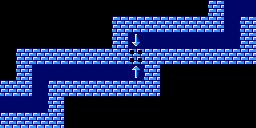
| D2 || [[File:U4_NES d3 Despise L2.png]] ||align=left| [[File:U4_NES d3 Despise L2rooms.png|left]] A floor without obstacles or secrets.
|-
|-
| D3 || [[File:U4_NES d4 Destard L3.png]] ||align=left| [[File:U4_NES d4 Destard L345rooms.png|left]] Two Magic Balls can be found on this floor. Each of them raises Strength by 5, but inflicts 200 damage.  
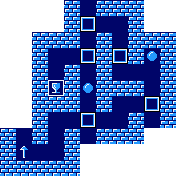
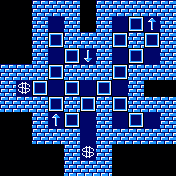
| D3 || [[File:U4_NES d3 Despise L3.png]] ||align=left| This is the cross-shaped portion of the floor. <br>Take the south stairs first, in order to reach the Stone on the 5th floor. <br><br> In the circular portion of the floor there are 4 chests.
|-
|-
| D4 || [[File:U4_NES d4 Destard L4.png]] ||align=left| [[File:U4_NES d4 Destard L345rooms.png|left]] This floor is free from dangers or puzzles. The 19 chests are the main treasure stash in the NES remake of Dungeon Destard.
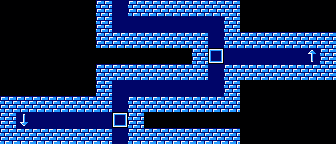
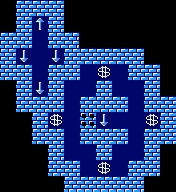
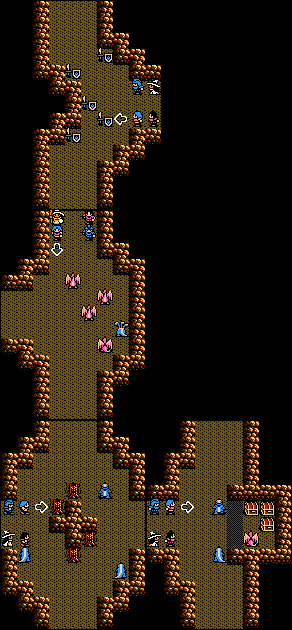
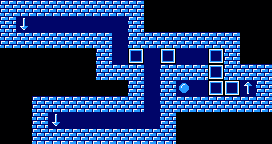
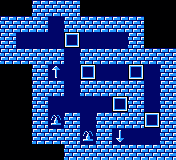
| D4 || [[File:U4_NES d3 Despise L4.png]] ||align=left| [[File:U4_NES d3 Despise L4rooms.png|left]] This is the larger portion of the floor. <br>There are secret passages in the central room; in order to reveal them, the triggers are at the same "height" in the middle, along opposite walls. Both fountains cure poison. The first magic orb is on this floor: it raises Dexterity by 5, but deals 200 damages. The stairs lead to two "dead-end areas" full of chests.
|-
|-
| D5 || [[File:U4_NES d4 Destard L5.png]] ||align=left| [[File:U4_NES d4 Destard L345rooms.png|left]] Take the west staircase first, then come back and take the north one.
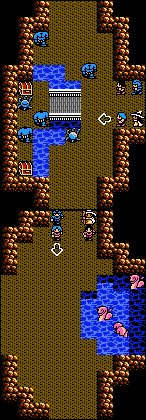
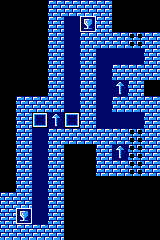
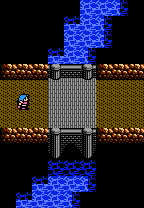
| D5 || [[File:U4_NES d3 Despise L5.png]] ||align=left| [[File:U4_NES d3 Despise L5rooms.png]] <br>It is easy to miss this floor. Coming from the larger area of the 4th floor, there is a secret passage on the north side of the single-tile stair room: the '''Yellow Stone of Compassion''' is hidden there. In the central room, defeat all enemies, then seek carefully for a black trigger in the wall: a northwards bridge will appear.
 
''Art thou willing to grant a blessing? <br>No? I cannot give the stone to one who lacks compassion! <br>Yes? How much do you give? There is none more worthy. Open the box and take as thy own [the] Yellow Stone of Compassion!''
|-
|-
| D6 || [[File:U4_NES d4 Destard L6.png]] ||align=left| [[File:U4_NES d4 Destard L6rooms.png|left]] The western area is a dead end with the third and fourth Magic Balls.
| D6 || [[File:U4_NES d3 Despise L6.png]] ||align=left| The fountain cures poison. There are 14 chests.
The eastern area presents another choice, apart from the two rooms. Once again, take the west staircase first, then come back and take the east one.
|-
|-
| D7 || [[File:U4_NES d4 Destard L7.png]] ||align=left| [[File:U4_NES d4 Destard L7rooms.png|left]] The western area repeats indefinitely, but it conceals the Red Stone of Courage. Answer "Yes" to the keeper's question (there is apparently a translation error).
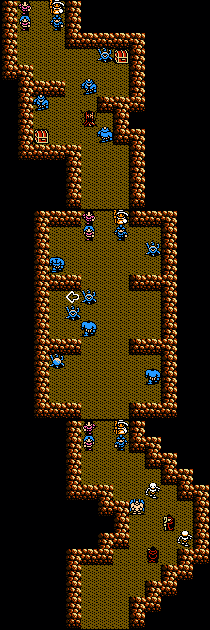
| D7 || [[File:U4_NES d3 Despise L7.png]] ||align=left| Climb back to floor 3, and take any of the other stairs. Short passages lead to this floor. <br>A secret passage allows to bypass the long corridor.
The eastern area has just a room without any enemy.
<br><br>''
"Dost thou flee from the malevolent face of danger?"
<br>No? "I cannot yield the stone unto thee! Depart!"
<br>Yes? "Open now the box and take the Red Stone of Valor!"''
|-
|-
| D8 || [[File:U4_NES d4 Destard L8.png]] ||align=left| [[File:U4_NES d4 Destard L8rooms.png|left]] Right next to the stairs to this floor there is a secret passage and a ladder that leads all the way up to a separate portion of the first floor.
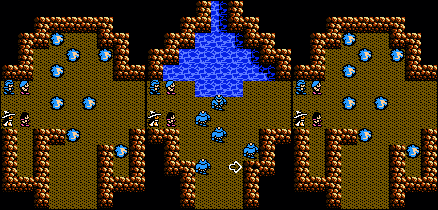
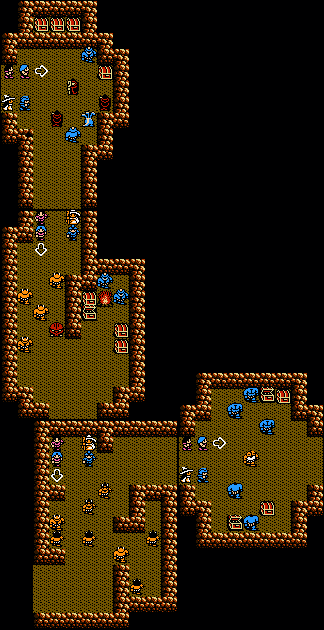
| D8 || [[File:U4_NES d3 Despise L8.png]] ||align=left| [[File:U4_NES d3 Despise L8rooms.png|left]] Two Magic Orbs are found on this floor. <br>There is a way to get through all rooms without backtracking (except from the Magic Balls). First, from the stairs, start by going east. In the first room, go north for the first Ball, then continue east. At the second room, exit to the north. Take the second orb, then take the passage westwards. The third "room" is actually just a door. In the fourth room leave to the south. In the fifth and last room, leave westwards. After that, the Companions will eventually reach the Altar Room.
The rooms on this floor are easy. After you looted the secret area on the first floor, a secret passage to the north leads to the altar room at the end of the corridor.  
|-
|-
| D1 || [[File:U4_NES d4 Destard L1.png]] ||align=left| [[File:U4_NES d4 Destard L1rooms.png|left]] With just 9 chests (instead of 64) and no puzzles at all, the rooms on this floor are a far cry from the original challenge.  
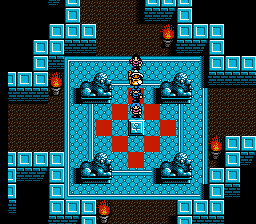
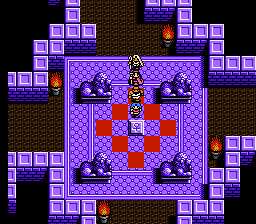
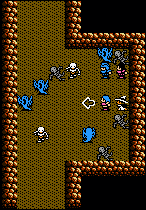
| A || [[File:U4 NES d0 Altar2.png]] ||align=left| The Companions enter the '''Altar Room of Love''' from Despise from the north. Covetous is to the west. <br>You lack one stone to use this altar.
|-
|-
| A || [[File:U4_NES d0 Altar3.png]] ||align=left| The north entrance is from Dungeon Destard. The west exit leads to Dungeon Shame. You need at least four Stones to use an Altar, but currently you own just two.
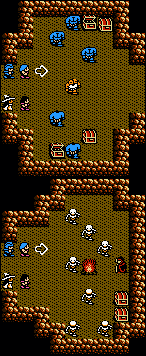
| C8 || [[File:U4_NES d6 Covetous L8.png]] ||align=left| [[File:U4_NES d6 Covetous L8rooms.png|left]] The Companions should come from the Altar Room of Love, that is to the north.
|-
|-
| S8 || [[File:U4_NES d7 Shame L8.png]] ||align=left| [[File:U4_NES d7 Shame L8rooms.png|left]] From the altar room fo courage, the Companions access Dungeon Shame from the north-east of this floor.
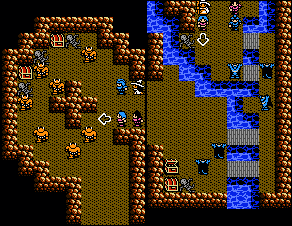
| C7-b || [[File:U4_NES d6 Covetous L7.png]] ||align=left| [[File:U4 NES d4 Destard L7rooms.png|left]] Peer at a gem to locate the secret passage that leads to the '''Orange Stone of Sacrifice'''. As usual, there is a translation error: answer "yes" to the keeper's question.
By crossing the three rooms to the south, the Companions will reach a fountain and one magic orb.
 
The magic orbs in Dungeon Shame raise Strength and Intelligence by 5, but they inflict 400 damages. The nearby fountain inflicts poison.  
''Art thou one who would withhold the gift of thy own blood from a dying companion? <br>No? Then it is hardly possible to grant thee the stone of sacrifice! <br>Yes? Then thou art worthy to receive the Orange Stone of Sacrifice. Please open the box.''
|-
|-
| S7 || [[File:U4_NES d7 Shame L7.png]] ||align=left| [[File:U4_NES d7 Shame L7room2.png|left]] Climbing up from level 8, the party will be in a corridor with two doors to their right. There is just one room on this floor, with a few chests and enemies.
| A || [[File:U4 NES d0 Altar3.png]] ||align=left| After getting the 7th stone, go back to the two '''altar rooms of Love and of Courage''' and collect the last two thirds of the '''Three-Parts Key'''.
|-
|-
| S6 || [[File:U4_NES d7 Shame L6.png]] ||align=left| A secret passage hides a vault with 22 chests. Apart from that, the two ladders up lead to the same area of the next floor.  
| C7-a || [[File:U4_NES d6 Covetous L7.png]] ||align=left| [[File:U4_NES d6 Covetous L7rooms2.png|left]] In the central room to the east, step on a tile in the center-left alcove to open a secret passage that goes upstairs.
|-
|-
| S5 || [[File:U4_NES d7 Shame L5.png]] ||align=left| This floor is free of dangers or puzzles.
| C6 || [[File:U4_NES d6 Covetous L6.png]] ||align=left| There are three magic orbs on this floor. Each of them raises Strength and Dexterity by 5, but deals 400 damages. <br>The single ladder up leads to corridors with 14 chests, and also one of the two double-ladders leads to a corridor with 15 chests.  
|-
|-
| S4 || [[File:U4_NES d7 Shame L4.png]] ||align=left| [[File:U4_NES d7 Shame L4rooms.png|left]] The Companions will enter the crossroads room from the west. To the east, a magic orb and a fountain. To the south, the upper three floors and the Stone, to the north the exit from the dungeon.
| C5 || [[File:U4_NES d6 Covetous L5.png]] ||align=left| Only the single-tile room allows to reach up to the 4th floor. There aare 29 chests on this floor.
Unfortunately, this fountain is poisonous, too.  
|-
|-
| S3 || [[File:U4_NES d7 Shame L3.png]] ||align=left| [[File:U4_NES d7 Shame L3rooms.png|left]] Access the central room from the south, and exit it to the west to reach the stairs up.
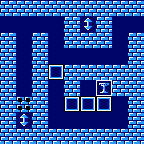
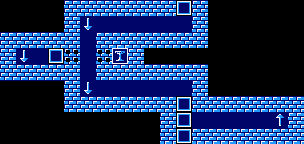
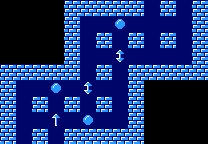
| C4 || [[File:U4_NES d6 Covetous L4.png]] ||align=left| [[File:U4_NES d6 Covetous L4rooms.png|left]] Coming from below, the way "up" in the room is in plain view. If you want to go back down, prepare a couple of "Dispel" spells and search for the trigger that open the secret passages. There is just one room on the floor, the rest are doors. Five chests to open.
|-
|-
| S2 || [[File:U4_NES d7 Shame L2.png]] ||align=left| The altar with the Purple Stone of Honor is at the end of the corridor going south. Answer honorably to the keeper's question.
| C3 || [[File:U4_NES d6 Covetous L3.png]] ||align=left| [[File:U4_NES d6 Covetous L3rooms.png|left]] The fourth Magic Orb is on this floor. If you want to backtrack downstairs, a trigger is in the south-east corner of the room.
<br><br>''"Seeker of Avatarhood, dost thou swear to guide Britannia along the path of honor, for so long as thou shalt draw breath?"
<br>NO? "I cannot yield the stone unto a tyrant. Depart."
<br>YES? "Then I shall grant thee the Purple Stone of Honor. Never forget thy oath! Open the box!"''
|-
|-
| S1 || [[File:U4_NES d7 Shame L1.png]] ||align=left| [[File:U4_NES d7 Shame L1rooms.png|left]] The third and last Magic Orb is well hidden on this floor. The fountain is harmful. In the southern room, the trigger is in the "dead-end" tile towards the north-east; in the northern room, the trigger is under the left-hand poison field.
| C2 || [[File:U4_NES d6 Covetous L2.png]] ||align=left| A floor without obstacles.
|-
|-
| S7 || [[File:U4_NES d7 Shame L7.png]] ||align=left| [[File:U4_NES d7 Shame L7room1.png|left]] Back to level 4, cross the room towards the north and reach the hidden staircase. The direction up is a dead end, whereas going down is the way out, after a change in direction on level 7.
| C1 || [[File:U4_NES d6 Covetous L1.png]] ||align=left| [[File:U4_NES d6 Covetous L1rooms.png|left]] The southern fountain fully restores health, the northern one cures poison. If you want to go back down through the room, the trigger is between the wall and the two bodies in the south-east.
If you want to backtrack through the crypt on level 7, the trigger is in the marsh tile in the south-east corner.
|}
|}
<references/>
== Dungeons Wrong and Deceit ==
{{sect-stub}}
:'' See also: [[Ultima IV: Quest of the Avatar/Six Dungeons#Dungeons Wrong and Deceit]]''
The magic balls in both these dungeons raise intelligence (DEX); the balls in Wrong also raise dexterity (INT).
'''Suggested companions:''' the characters with lowest intelligence (DEX) are the shepherd (23), the tinker (24), and the bard (32), followed by the ranger (34). Leave the fighter at the hostel, because he is unable to use magic (the shepherd has the exclusive sheep flute).
== Dungeons Despise and Covetous ==
{{sect-stub}}
:'' See also: [[Ultima IV: Quest of the Avatar/Six Dungeons#Dungeons Despise and Covetous]]''
The magic balls in both these dungeons raise dexterity (DEX); the balls in Shame also raise strength (STR).
'''Suggested companions:''' the characters with lowest dexterity (INT) are the paladin (23), the fighter (24), and the ranger (25), followed by the druid (26).


{{Footer Nav|game=Ultima IV: Quest of the Avatar (NES)|prevpage=Dungeon Hythloth|nextpage=The Great Stygian Abyss}}
{{Footer Nav|game=Ultima IV: Quest of the Avatar (NES)|prevpage=Dungeons Wrong and Deceit|nextpage=The Great Stygian Abyss}}

Latest revision as of 13:11, 17 July 2018

See also: Ultima IV: Quest of the Avatar/Dungeons Despise and Covetous
  • Enter from Despise, north of Britain.
  • Get the Yellow and the Orange stones.
  • Get the Key Parts from the Altars of Love and Courage.
  • Leave from Covetous and use a Gate spell.

The magic balls in both these dungeons raise dexterity (INT); the balls in Shame also raise strength (STR).

Suggested party (upgrade companions with lowest dexterity):

  • Wand wielder: Jaana has lower dexterity than Mariah.
  • M. cloth or ring: to optimize armors, Iolo (m. cloth) goes with Jaana (ring), Shamino with Mariah.
  • Magic axe wielder: Dupre has the lowest dexterity of all Companions.
  • Zero magic: Geoffrey has far lower dexterity than katrina.
Dungeons Despise and Covetous[edit]

L. Map of the floor Walkthrough
D1 U4 NES d3 Despise L1.png
U4 NES d3 Despise L1rooms.png
The east fountain refreshes all health, the west one is poisonous (inverted from the original computer ports). There are two rooms and three doors.
D2 U4 NES d3 Despise L2.png
U4 NES d3 Despise L2rooms.png
A floor without obstacles or secrets.
D3 U4 NES d3 Despise L3.png This is the cross-shaped portion of the floor.
Take the south stairs first, in order to reach the Stone on the 5th floor.

In the circular portion of the floor there are 4 chests.
D4 U4 NES d3 Despise L4.png
U4 NES d3 Despise L4rooms.png
This is the larger portion of the floor.
There are secret passages in the central room; in order to reveal them, the triggers are at the same "height" in the middle, along opposite walls. Both fountains cure poison. The first magic orb is on this floor: it raises Dexterity by 5, but deals 200 damages. The stairs lead to two "dead-end areas" full of chests.
D5 U4 NES d3 Despise L5.png U4 NES d3 Despise L5rooms.png
It is easy to miss this floor. Coming from the larger area of the 4th floor, there is a secret passage on the north side of the single-tile stair room: the Yellow Stone of Compassion is hidden there. In the central room, defeat all enemies, then seek carefully for a black trigger in the wall: a northwards bridge will appear.

Art thou willing to grant a blessing?
No? I cannot give the stone to one who lacks compassion!
Yes? How much do you give? There is none more worthy. Open the box and take as thy own [the] Yellow Stone of Compassion!

D6 U4 NES d3 Despise L6.png The fountain cures poison. There are 14 chests.
D7 U4 NES d3 Despise L7.png Climb back to floor 3, and take any of the other stairs. Short passages lead to this floor.
A secret passage allows to bypass the long corridor.
D8 U4 NES d3 Despise L8.png
U4 NES d3 Despise L8rooms.png
Two Magic Orbs are found on this floor.
There is a way to get through all rooms without backtracking (except from the Magic Balls). First, from the stairs, start by going east. In the first room, go north for the first Ball, then continue east. At the second room, exit to the north. Take the second orb, then take the passage westwards. The third "room" is actually just a door. In the fourth room leave to the south. In the fifth and last room, leave westwards. After that, the Companions will eventually reach the Altar Room.
A U4 NES d0 Altar2.png The Companions enter the Altar Room of Love from Despise from the north. Covetous is to the west.
You lack one stone to use this altar.
C8 U4 NES d6 Covetous L8.png
U4 NES d6 Covetous L8rooms.png
The Companions should come from the Altar Room of Love, that is to the north.
C7-b U4 NES d6 Covetous L7.png
U4 NES d4 Destard L7rooms.png
Peer at a gem to locate the secret passage that leads to the Orange Stone of Sacrifice. As usual, there is a translation error: answer "yes" to the keeper's question.

Art thou one who would withhold the gift of thy own blood from a dying companion?
No? Then it is hardly possible to grant thee the stone of sacrifice!
Yes? Then thou art worthy to receive the Orange Stone of Sacrifice. Please open the box.

A U4 NES d0 Altar3.png After getting the 7th stone, go back to the two altar rooms of Love and of Courage and collect the last two thirds of the Three-Parts Key.
C7-a U4 NES d6 Covetous L7.png
U4 NES d6 Covetous L7rooms2.png
In the central room to the east, step on a tile in the center-left alcove to open a secret passage that goes upstairs.
C6 U4 NES d6 Covetous L6.png There are three magic orbs on this floor. Each of them raises Strength and Dexterity by 5, but deals 400 damages.
The single ladder up leads to corridors with 14 chests, and also one of the two double-ladders leads to a corridor with 15 chests.
C5 U4 NES d6 Covetous L5.png Only the single-tile room allows to reach up to the 4th floor. There aare 29 chests on this floor.
C4 U4 NES d6 Covetous L4.png
U4 NES d6 Covetous L4rooms.png
Coming from below, the way "up" in the room is in plain view. If you want to go back down, prepare a couple of "Dispel" spells and search for the trigger that open the secret passages. There is just one room on the floor, the rest are doors. Five chests to open.
C3 U4 NES d6 Covetous L3.png
U4 NES d6 Covetous L3rooms.png
The fourth Magic Orb is on this floor. If you want to backtrack downstairs, a trigger is in the south-east corner of the room.
C2 U4 NES d6 Covetous L2.png A floor without obstacles.
C1 U4 NES d6 Covetous L1.png
U4 NES d6 Covetous L1rooms.png
The southern fountain fully restores health, the northern one cures poison. If you want to go back down through the room, the trigger is between the wall and the two bodies in the south-east.