WhosAsking (talk | contribs) (Created Summary.) |
WhosAsking (talk | contribs) (Added part showing where to find the Love Pendant.) |
||
| Line 20: | Line 20: | ||
The provisions in Joel aren't much, but at least it's a haven. While you're there, you'll learn that a Draygonian sorceress has taken someone from here; that someone turns out to be Mesia! That means you'll have to track this sorceress to Evil Spirit Island, to the northwest of Joel. You'll also learn that Clark, brother of town elder Ralph, has also gone to the island and is missing. | The provisions in Joel aren't much, but at least it's a haven. While you're there, you'll learn that a Draygonian sorceress has taken someone from here; that someone turns out to be Mesia! That means you'll have to track this sorceress to Evil Spirit Island, to the northwest of Joel. You'll also learn that Clark, brother of town elder Ralph, has also gone to the island and is missing. | ||
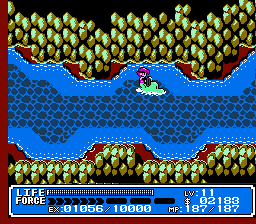
[[Image:Crystalis-LovePendant.png|thumb|right|The Location of the Love Pendant.]]Before going further, take a little detour to a cave at the south part of the sea. This cavern should look familiar. It's where you first met the Dolphin. Search the waters along this upper passage until you locate the Love Pendant. You'll need it later in Swan. | |||
== Evil Spirit Island == | == Evil Spirit Island == | ||
Revision as of 19:38, 8 May 2014
The boat will take you to a cabin on the edge of the Angry Sea. Inside are a watchman and a man named Kensu who seems preoccupied with something. To actually traverse the Angry Sea, step outside and blow the Shell Flute to call the Dolphin. You can ride the Dolphin until you touch land. Your first objective should be the island town of Joel, to the northwest.
Joel
| Item | Price |
|---|---|
| Medical Herb | 120 |
| Antidote | 150 |
| Fruit of Power | 180 |
| Alarm Flute | 300 |
| Inn | 120 |
The provisions in Joel aren't much, but at least it's a haven. While you're there, you'll learn that a Draygonian sorceress has taken someone from here; that someone turns out to be Mesia! That means you'll have to track this sorceress to Evil Spirit Island, to the northwest of Joel. You'll also learn that Clark, brother of town elder Ralph, has also gone to the island and is missing.

Before going further, take a little detour to a cave at the south part of the sea. This cavern should look familiar. It's where you first met the Dolphin. Search the waters along this upper passage until you locate the Love Pendant. You'll need it later in Swan.
Evil Spirit Island
Ride the Dolphin into the sea cave on the island northwest of Joel. Eventually, you'll reach a shore near a cave entrance and can proceed inside.
The caves here are full of twists and turns, and you'll be frequently breaking down walls with the Sword of Wind and making ice bridges with the Sword of Water. To begin, follow the path until you reach the underground streams, then follow the path down until you can make an ice bridge. Now follow this path until you make another one, then follow along the wall up and around until you reach some openings upward. The two to the right crisscross and house a Magic Ring if you want it, but the way ahead lies at the leftmost path.
A little exploring is advised in this next area because this cave houses the Iron Necklace, a valuable item that can double your melee defense. To find it, keep traveling to the left until you go down some stairs and freeze a bridge. Retrace your steps back to the entrance to the area and now take the right path and up and around until you reach a large gap. Falling into the gap will dump you back in the area where the Magic Ring is. To get across, wait for a platform that moves along the gap and ride it to the other side. Take a Lysis Plant along the way if you want it, then head down into Zombie Town.
Zombie Town
Zombie Town is deserted except for the occasional zombie: full of graves and dilapidated houses. But one house has a human inhabitant: none other than the missing Clark. He's in hiding from the sorceress, who he identifies as Sabera. She's inhabiting the castle to the north of the town. Proceed north into Sabera's Castle.
Sabera's Castle
Remember that Sabera serves Draygonia. Don't be surprised to run into Dragonian Soldiers here. There are two paths you can take from the entrance. However, the left path is a long and tortuous path just for a Fruit of Power. Better to make sure you build yourself to level 10 and take the right path where an old enemy awaits you. It's the Vampire Bat. He's not much different than before, but he can block Fire, so use the Sword of Wind or Water on him instead. He'll leave behind a Fruit of Power when he goes down for the second time. More importantly, the way forward will open.
Be careful going forward, as two enemies will be a real headache. The Killer Moth flies erratically and can drop paralyzing spores. Meanwhile, the invisible Wraith can only be seen from a shadow and casts Paralysis spells. Worse, the only thing that can break the invisibility is a magic-consuming level 3 attack. Take the left path from here and avoid the branch to the right later on; it's a lot of work just for a Medical Herb. Instead, follow the path straight and around until you climb upstairs. If you're not up to Level 11, though, fight some more before climbing up.

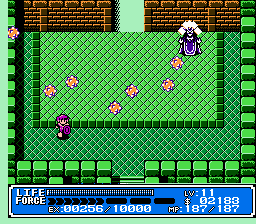
There will be a surprise waiting for you there: Mesia. She will claim there is a sorceress behind her. Given what you've learned from Joel, this seems too convenient. If you heed the words, you'll find yourself trapped with the real Mesia and forced to fall back to the entrance. Instead, get your Sword of Fire and Flame Bracelet ready and hit "Mesia" a few times. Eventually, she reveals herself to be Sabera, the second of Draygonia's Finest Four. Her attack pattern is to float around and cast a bunch of spiked balls in your general direction. Avoid her and the balls and charge up your Sword of Fire. Her spellcasting sessions are a good time to get in and unleash the explosion. Fire is her only weakness and only if you're level 11 or higher. Eventually, she'll concede defeat and reveal she still has the real Mesia as she vanishes. She will drop a chest, however, that contains the Broken Statue that once adorned the Sea Shrine. It's now safe to proceed up and fall down back toward the entrance. The Angry Sea won't accept the statue as it is. You need a way to fix it. Return to Zombie Town.
Calm the Angry Sea
Now that Sabera's gone, all the townspeople are back to normal. Find Clark and he'll give you Eye Glasses you can use to reveal a secret passage. Also, one of the townspeople will mention a Glowing Lamp that can fix stuff.
If you're feeling stingy, Teleport to Leaf to buy an Alarm Flute for only $50. Otherwise, just get it at Joel. Either way, return to Joel and to the woodshed next to Elder Ralph's house. Use the Eye Glasses here and a doorway will be revealed in the corner. This door leads to a passage to the Lighthouse.
There's a familiar person nodding off inside: Kensu. Use the Alarm Flute to wake him up. He'll leave in a huff but leave a treasure chest behind him. Inside is the Glowing Lamp. Use it at once and the Broken Statue will mend into the Statue of Gold. Find a shore and call the Dolphin to carry you to the Altar located north of Evil Spirit Island. Place the Statue of Gold on the Alter and the Angry Sea will be appeased. Namely, the whirlpool blocking passage north will disappear. As you cross the pass, Asina will reach you telepathically, rewarding your efforts with the sixth spell: Barrier. Proceed north until you reach shore, then follow the passage to Swan.
