If you're Raccoon or Tanooki Mario, you can fly over the ice structure to skip the entire level! At the top, there's a single Koopa Troopa guarding a 1-up mushroom. Get it if you want, then fall down behind and collect the goal card to finish this level.
In all other cases, enter the pipe ahead to get to part 2.
Part 2
You'll land in the water. Ahead, you'll find a new enemy: a Blooper Nanny. She releases her kids which then follow you around, even outside the water! At the beginning, it's best to get to the surface as soon as possible and jump onto the wooden block.
If you're Frog Mario, however, continue to the right. Dodge the Big Bertha and swim straight through the water currents. Go down the pipe at the end to arrive in a bonus area (see below).
At the surface, there are Munchers which you have to jump over. Afterwards, cross the pit when the Piranha Plant at the top is not out. The next jump must be very precise as you need to jump over six munchers, which is very hard. On the other side, the block contains a Fire Flower.
Run over the pits when the Piranha Plant is not out, then fall into the water. Again, get out of the water as soon as possible.
Jump over the Munchers, and at the top you'll see a brick block, jump at it to reveal a P-Switch. To get to it, you must find a hidden block just nearby, which allows you to get up. This P-Switch transforms all the Munchers into coins, so collect all the coins you see on the ground.
At the end, go down the upwards pipe before the pit to end up in the ending area. There, collect the goal card to end this level.
Bonus area
Jump at the giant ? box to get three 1-up mushrooms. Afterwards exit through the pipe to appear just before the second Blooper Nanny.
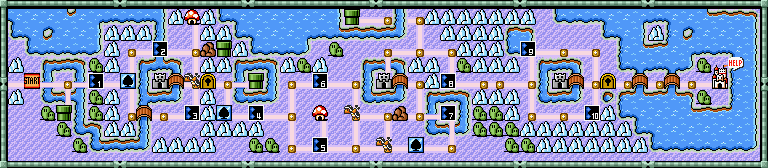
6-10
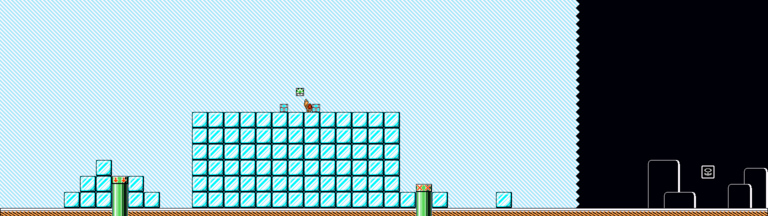
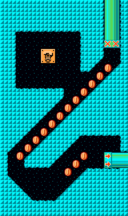
At the beginning there's a ? block with a Fire Flower inside. Afterwards, go down to the large wall, take an ice block and kick it against the rightmost brick block at the left to reveal a vine. Leave it alone for now because you'll come back there later.
Dig through the ice blocks until you get to the other side of the wall. There, Buster Beetles are throwing ice blocks at you, so be careful.
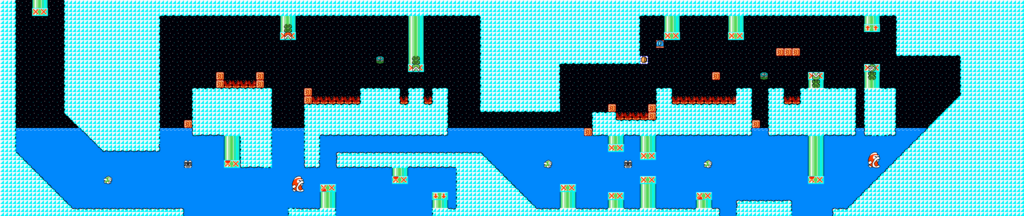
There are many frozen coins here which you can unthaw with fireballs. However, there are frozen Munchers here as well, which when brought alive will be able to hurt you, so watch out.
When you see a pipe blocked off by Munchers, unthaw them. Afterwards, return to the vine, climb it up, and at the top jump at the leftmost brick block to reveal a P-Switch. Step on it, then jump through the wall (which is a huge wall of coins now) and get back to the pipe. Since the Munchers have been turned into coins, you can now go down the pipe to get into the bonus area (see below).
At the end, there's a spinning lift, cross it when it's not spinning. Afterwards, jump over the pits and collect the goal card to end the level.
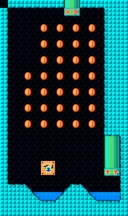
Bonus area
Slide down to collect all the coins here. Afterwards, return up and jump at the giant ? block to get a Hammer Suit! Exit the pipe to return near the wall.
Fortress 3
Part 1
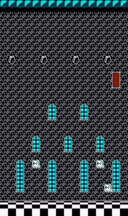
At the beginning, you will need to avoid a double Roto-Disc by jumping onto its middle and then jumping onto the conveyor belt. These push you into a certain direction, so watch out.
If you're Raccoon or Tanooki Mario, fly up to find a 1-up mushroom inside a brick block.
After the next double Roto-Disc, there will be many Boo Diddleys and Stretches. If you're Hammer Mario, you can kill both easily with your hammers. At the first stretch, there's a block with a raccoon leaf inside.
If you're Raccoon or Tanooki Mario, when you see the next Roto-Disc fly up to get to two brick blocks. Hit them with your tail to get a few coins.
On foot, this next part is very hard. On one side there's the Roto-Disc, on the other side the Thwomp, and then there's the conveyor belt which pushes you to the left. You need to be really careful here to not push to the right too long to run into the Thwomp.
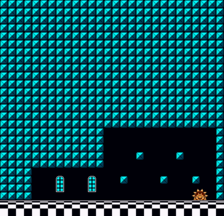
At the end, you're required to walk on the Stretches to cross the area. Just be sure to not hit the Boo heads and you should be fine. It can still be difficult, though. The door leads to part 2.
Part 2
You're in a room together with three Boo Diddleys as the floor starts to move up. Immediately get to the right and face the left so the Boo Diddleys won't chase you, then enter the door as it moves down to get to part 3.
Part 3
Go forward to face Boom-Boom. The blocks here can make the fight difficult. Stomp him three times, feed fim five fireballs or lob one hammer at him to defeat him.
Airship
After the cutscene where Mario discovers that the King has been transformed into a seal, Mario jumps on the airship to fight the boss of this world.
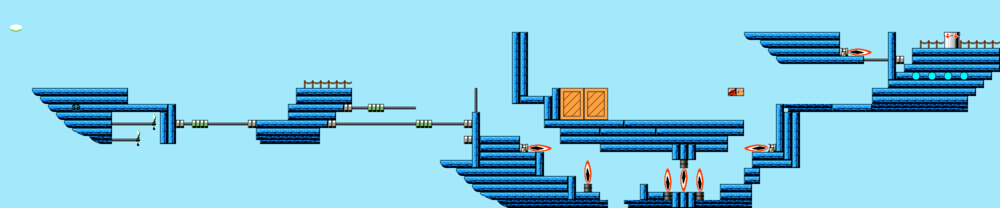
At the beginning, you'll need to jump on the nuts repeatedly to cross the pits safely. Jump on them as soon as you see them, and once you see the ground on the other side and think you can make it, jump over.
The next part requires you to dodge the rocket engines, which is really easy even if you're not Tanooki Mario (who can just kill them). Afterwards, you can jump at the leftmost block for a raccoon leaf.
After dodging one last rocket engine, get to the pipe to fight Lemmy Koopa. He releases balls which fly around and can hit you, but you can jump on them without harm. Stomp on him three times or feed him 10 fireballs to defeat him, afterwards collect the wand to be taken to the next world. Princess Toadstool gives you a P-Wing for beating this world.