(This may be factual, and even valuable information, but the writing is atrocious and must be cleaned up and better integrated into the guide before it's included.) |
|||
| (2 intermediate revisions by one other user not shown) | |||
| Line 280: | Line 280: | ||
This strategy involves moving your attacker back and forth between a Fighter and a Soldier a couple of times so you end up with a Solider that is as fast as a Hero. You'll also want to create two Sages, but that's just a matter of converting your other two allies into Sages whenever you feel like it and then just leaving them as Sages. For your attacker, have them swap classes when you reach Dhama (level 20), then again when you reach the Necrogond (level 25 or so). Once you finish most of the game and just have the final castle, have them swap again and then back again (you'll need to do a lot of leveling at this point anyway, so it doesn't take too much time). If you have the patience, have the attacker turn into a Pilgrim for a while (probably until you learn the [[Dragon Warrior III/Spells#Healus|Healus]] spell). So, if you started with a Soldier it would go Soldier->Fighter->Soldier->Pilgrim->Fighter->Soldier. In addition to the speed and power, this results in all four characters knowing all four of the healing spells. | This strategy involves moving your attacker back and forth between a Fighter and a Soldier a couple of times so you end up with a Solider that is as fast as a Hero. You'll also want to create two Sages, but that's just a matter of converting your other two allies into Sages whenever you feel like it and then just leaving them as Sages. For your attacker, have them swap classes when you reach Dhama (level 20), then again when you reach the Necrogond (level 25 or so). Once you finish most of the game and just have the final castle, have them swap again and then back again (you'll need to do a lot of leveling at this point anyway, so it doesn't take too much time). If you have the patience, have the attacker turn into a Pilgrim for a while (probably until you learn the [[Dragon Warrior III/Spells#Healus|Healus]] spell). So, if you started with a Soldier it would go Soldier->Fighter->Soldier->Pilgrim->Fighter->Soldier. In addition to the speed and power, this results in all four characters knowing all four of the healing spells. | ||
<!-- | |||
=== AHCKUALLY === | === AHCKUALLY === | ||
Changing classes multiple times as suggested above is nowhere near as effective as a theory-crafter may believe. Each time you reset your class it's stats are halved; changing classes more than once cuts the bonuses you gained from the initial classes down to 1/4, 1/8, etc. Furthermore, on level up... If the game decides the character has too high stats - higher than sum of base stats + 2*level + 15, then it gives 50/50 zero or one. You will find the resulting stat differences from multiple class changes to be negligible and likely less than the random variation in level up bonuses by the time you're back up to level 20-30. Therefore, the only real benefit of changing classes multiple times is to fill the character's spell book. | Changing classes multiple times as suggested above is nowhere near as effective as a theory-crafter may believe. Each time you reset your class it's stats are halved; changing classes more than once cuts the bonuses you gained from the initial classes down to 1/4, 1/8, etc. Furthermore, on level up... If the game decides the character has too high stats - higher than sum of base stats + 2*level + 15, then it gives 50/50 zero or one. You will find the resulting stat differences from multiple class changes to be negligible and likely less than the random variation in level up bonuses by the time you're back up to level 20-30. Therefore, the only real benefit of changing classes multiple times is to fill the character's spell book. | ||
If you don't care about the spells you'd be better served by class changing only once, for example changing a hyper/sexy/lucky fighter into valiant/tough warrior to compensate for the warrior's abysmal agi/luck. Realistically though, the Fighter is just better than the Warrior as long as it's a female. The warrior's advantage is a slightly better armor selection(nearly negated by female equipment alone) and higher stamina. The | If you don't care about the spells you'd be better served by class changing only once, for example changing a hyper/sexy/lucky fighter into valiant/tough warrior to compensate for the warrior's abysmal agi/luck. Realistically though, the Fighter is just better than the Warrior as long as it's a female. The warrior's advantage is a slightly better armor selection(nearly negated by female equipment alone) and higher stamina. The Fighter will have higher | ||
physical damage output due to having higher strength and a much higher critical chance, will act considerably faster and have similar defense due to having much higher agility, and will better resist debuffs/instant death attacks with much higher luck. | |||
To create a character with all available spells during a normal playthrough, the optimal sequence is: Female TOUGH Dealer > Ladylike(Golden Tiara) Jester > Sexy(Garter Belt)[Lv1-23] into Sharp(Smart Book) Sage[Lv24-41](or until all spells are learned) > Sexy(Garter Belt) Thief. GBC players will want to avoid ending on a thief due to monster medal mechanics and so would go dealer>thief>jester>sage>fighter. Your sequence should always end with Sage > Target Class because your MP will be halved and there is zero benefit in changing a Sage into a Mage or Cleric (or Jester). Warriors and Fighters will not be able to grow their MP pool but have better stamina and physical damage output. Thieves and Dealers will grow MP but the Dealer's stat growth is mediocre and there's nothing unique a high level dealer brings that using a level 1 at Ruida's wouldn't cover. Because Fighter is a better class than Warrior, the real choice is between a Fighter or Thief. The Thief will be slightly faster and have more MP on top of being able to steal seeds (but stealing prevents the monster medal check in the GBC version). The Fighter will have a much better crit chance for physical attacks but the multi-target weapons can't crit anyways. | |||
--> | |||
== A Different Approach == | == A Different Approach == | ||
This is a party that allows to defeat Divinegon/God Dragon (Game Boy Color/SNES exclusive boss) with an average level lower than 40, and to use all the character classes in one game: | This is a party that allows to defeat Divinegon/God Dragon (Game Boy Color/SNES exclusive boss) with an average level lower than 40, and to use all the character classes in one game: | ||
Latest revision as of 00:32, 18 July 2022
- See the player classes page for information on each class.
You start out with only the Hero, but you will almost immediately gain three more members, who can be from among six different classes (seven in the remakes). That leaves a lot of possibilities, however the vast majority of those combinations will leave your party horribly unbalanced. Unless you using a special team for a challenge (no magic, magic users only, low level, etc) then there are really only a few combinations that you want to use. You need a proper balance of physical attacking, offensive magic, and healing. While the Hero does have all three abilities, one character alone will not be enough to cover everything.
Your party should consist of:
The fourth slot can be taken up by a Wizard, however if you want extra healing use a second Pilgrim, or add a second attacker for extra power. Without a Wizard you'll have better defense, however you won't have the Increase spell or be able to hit groups of enemies (unless you use magic-casting equipment). Plan on having at least one character become a Sage, especially if this is your first time playing or if you decide not to bring along a Wizard. Just be aware that a Sage will only have about the same MP as a Pilgrim or a Wizard, so one Sage cannot replace both.
Starters[edit]
Hero, Soldier, Pilgrim, Wizard[edit]
-
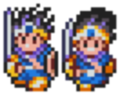
Hero
-

Soldier
-
Pilgrim
-

Wizard
- Combat - 7/10
- Offensive Magic - 7/10
- Healing - 7/10
- Speed - 6/10
- Defense - 8/10
- Overall - 8/10
- Pros - High defense, good attack, access to all possible spells, moderate cost to equip
- Cons - The Wizard's very low defense, speed of the Soldier
This is the classic party, and the one recommended by the game designers. Very versatile, but you may find your self having to level grind a lot to get the Wizard into something resembling fighting shape. The party can be fairly expensive to equip early on, but late in the game it evens out since the Wizard won't been able to use any of the more expensive equipment.
Hero, Fighter, Pilgrim, Wizard[edit]
-
Hero
-

Fighter
-
Pilgrim
-
Wizard
- Combat - 7/10
- Offensive Magic - 7/10
- Healing - 7/10
- Speed - 9/10
- Defense - 6/10
- Overall - 7/10
- Pros - Very fast, low cost to equip, very powerful
- Cons - Both the Wizard and Fighter's defenses may cause problems
Basically the same thing as the first setup, however you're trading a bit of defense for a lot of speed. The speed of the Fighter will allow you to get the first hit in more often and run away from more battles. However, the Fighter will take more damage than a Soldier, so both the Wizard and Fighter need immediate healing it means pulling the Hero off of combat to heal. It also means putting the Hero at the very front to absorb most of the damage and the Hero simply isn't as good of a meatshield as a Soldier.
Hero, Soldier, Soldier, Pilgrim[edit]
-
Hero
-
Soldier
-
Soldier
-
Pilgrim
- Combat - 10/10
- Offensive Magic - 4/10
- Healing - 7/10
- Speed - 5/10
- Defense - 9/10
- Overall - 8/10
- Pros - Very high defense and offense
- Cons - Speed and cost of equipment
This is an incredibly powerful party, however it is also incredibly slow. While you can absorb a lot more damage, you're going to need to since the enemies will often all get to attack before your team. This is also one of the most expensive parties to keep up to date, but having one Soldier using second-tier equipment won't be too much of an issue. If you go with this party, late in the game you might want to turn one of the Soldiers into a Pilgrim and then back to a Soldier so you can distribute the healing a bit more.
Hero, Fighter, Fighter, Pilgrim[edit]
-
Hero
-
Fighter
-
Fighter
-
Pilgrim
- Combat - 10/10
- Offensive Magic - 4/10
- Healing - 7/10
- Speed - 10/10
- Defense - 5/10
- Overall - 7/10
- Pros - Very high offense and speed, low cost to equip
- Cons - Defense
As with any party lacking a Soldier, it leaves the Hero on the front to absorb most of the damage. You'll also have a problem healing after enemies use magic and abilities that hit all four members of your party at once. On the other hand, this is a ridiculously fast team so you may be able to defeat most non-boss enemies before they can deal too much damage. It is also one of the cheapest teams to equip since none of the Fighters' equipment costs more than a few grand.
Hero, Soldier, Fighter, Pilgrim[edit]
-
Hero
-
Soldier
-
Fighter
-
Pilgrim
- Combat - 10/10
- Offensive Magic - 4/10
- Healing - 7/10
- Speed - 7/10
- Defense - 8/10
- Overall - 9/10
- Pros - Speed, defense, offense, pretty much everything
- Cons - Just a lack of attack magic
This team is pretty much the best of the two previous ones. You have two heavies (Soldier and Hero), two fast attackers (Hero and Fighter), and two healers (Hero and Pilgrim). With any given stat, even the character with the lowest isn't that low.
Hero, Soldier, Pilgrim, Pilgrim[edit]
-
Hero
-
Soldier
-
Pilgrim
-
Pilgrim
- Combat - 8/10
- Offensive Magic - 4/10
- Healing - 10/10
- Speed - 7/10
- Defense - 8/10
- Overall - 9/10
- Pros - Healing, fairly good defense and offense
- Cons - Not much
Healing will certainly be a non issue as the only character that can't heal themselves can usually wait a round to be healed by another. While not as strong as parties with two attackers, it is much stronger than parties with a Wizard, especially once you get the ship.
Hero, Fighter, Pilgrim, Pilgrim[edit]
-
Hero
-
Fighter
-
Pilgrim
-
Pilgrim
- Combat - 8/10
- Offensive Magic - 4/10
- Healing - 10/10
- Speed - 8/10
- Defense - 7/10
- Overall - 8/10
- Pros - Healing, fairly good defense and offense
- Cons - Not much
Again, not much different than the previous party; you just have more speed and less defense. However, with three healers available, even the Fighter can afford to take a lot of damage.
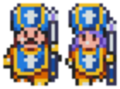
Hero, Merchant, Pilgrim, Fighter[edit]
-
Hero
-
Merchant
-
Pilgrim
-
Fighter
- Hero
- Merchant >>> Sage
- Pilgrim >>> Wizard >>> Fighter
- Fighter >>> Pilgrim >>> Wizard >>> Soldier
This party starts out almost as good as a Hero, Soldier, Fighter, Pilgrim party.
- The Merchant is able to wear almost everything the Soldier can wear, and thus is able to take front-line duty. He also generates extra gold, which can be used to keep him, the Hero, and the Pilgrim well equipped.
- Simultaneously, the Fighter provides the advantage of a cheap party, allowing the Merchant gold to be a genuine advantage. If you try a similar party that starts with a Soldier instead of a Fighter, you will find that the equipment needs eat up the extra gold advantage and that the Merchant and the Soldier are redundant in terms of what role they play.
The Merchant also has one of the better Intelligence progressions, making him a good Sage, though it does not get MP each level. Upgrading the Fighter to a Pilgrim provides a Pilgrim with good Strength and Agility, and between him and the Sage make up for the absence of a Soldier and will round out the lack of MP.
Meanwhile, the Pilgrim has the freedom to go Wizard, allowing for a "total bounce/vivify/beat" party similar to the one below (though the "beatdown" technique is less useful than indicated in an earlier game when comparing the NES variant of the party suggested below; still, having the entire party able to cast Vivify is very useful).
Both of the original rear-liners switch to weapon attackers in the end, allowing for a ridiculously robust and versatile party. Additional details necessary to describe end-game viability for this party.
The absence of an early wizard is both a strength and a weakness. On the one hand, you'll spend a lot less time running back and forth to resurrect the wizard again. On the other hand, once you start running into crab monsters, there's a bit of grinding necessary to get to the point where you can damage them without the help of offensive magic.
Advanced parties[edit]
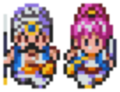
Hero, Merchant, Thief, Pilgrim[edit]
-
Hero
-
Merchant
-
Thief
-
Pilgrim
- Combat - 6/10
- Offensive Magic - 4/10
- Healing - 7/10
- Speed - 9/10
- Defense - 7/10
- Overall - 7/10
- Pros - High gold accumulation, great for item gathering.
- Cons - No heavy hitters, Hero will take the brunt of the damage.
This is an alternate party configuration that is only available in the remakes. It features a Thief who will boost the speed of the party as well as make it easy to find all those stubbornly hidden treasures and stealing items from enemies. That along with the extra gold found by your Merchant, will ensure that you'll be flush with cash throughout the lifetime of this party. Although the Merchant can wear a good deal of armor, for those who find the defense in the party lacking, the Merchant can be replaced with (or change professions to) a Soldier. Alternatively, replacing the Merchant with a Fighter will make your party even faster, and allow you to deal more damage. Merchants level up faster than most classes, so their short comings should be made up for by their faster rate of growth.
Hero, Fighter, Merchant, Jester[edit]
-
Hero
-
Fighter
-
Merchant
-

Jester
- Combat - 5/10
- Offensive Magic - 2/10
- Healing - 3/10
- Speed - 7/10
- Defense - 8/10
- Overall - 5/10
- Pros - High gold accumulation, extremely inexpensive, set up for fast Soldier and two Sages at Dhama.
- Cons - Your Hero is the only healer, extremely little magic support, Jester may not cooperate.
This is a party that only experts should attempt to start with. It makes some aspects of the early game easier, but many aspects of the later game much harder. For one thing, with no Pilgrim, your only healer is the Hero, and the Hero does not get a tremendous amount of magic points, so you'll need to stay at an Inn much more frequently, or stock up on Medical Herbs. Fortunately, this is a cheap party to buy equipment for (the Fighter needs very little, and the Jester can't use much). In addition, the Merchant will be finding extra gold after almost every battle. Naturally, this party has all the problems inherent with including a Jester. They aren't likely to do what you ask for in battle. The only purpose for the Jester is to level them up to 20 and turn them into a Sage. Furthermore, with the Book of Satori, you can turn the Merchant into a second Sage. The Fighter should become a Soldier when you create the two Sages (or after the Sages have leveled up a little).
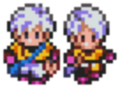
Hero, Thief, Jester, Pilgrim[edit]
-
Hero
-
Thief
-
Jester
-
Pilgrim
- Combat - 6/10
- Offensive Magic - 4/10
- Healing - 7/10
- Speed - 9/10
- Defense - 7/10
- Overall - 7/10
Hero, Fighter, Thief, Pilgrim[edit]
-
Hero
-
Thief
-
Fighter
-
Pilgrim
- Combat - 8/10
- Offensive Magic - 4/10
- Healing - 7/10
- Speed - 10/10
- Defense - 8/10
- Overall - 9/10
- Pros - Reasonable offense, reasonable defense, healing, can defeat some enemy parties before being hit, better drop rates.
- Cons - No wizard spells, non-hero party members overlap in defensive gear found, somewhat vulnerable to enemy spellcasters due to lower max HP.
Due to Dragon Quest III's use of Agility to determine base Defense, Thieves are deceptively durable without needing much equipment. One particular piece of equipment found relatively early will double their already high agility and grant a ever increasing defense boost along with it (this can result in a Thief having twice as much defense as the Hero at certain points of the game). The main weakness of this party is the relatively low max HP of its members, making them somewhat vulnerable to enemies that cast spells (which bypass Defense), lack of crowd clearing offensive spells (which can be mitigated by giving the thief whips), and the utility/buff spells exclusive to the Wizard. Many of these weaknesses will largely disappear if/when the Pilgrim becomes a Sage.
Class Changes[edit]
Ideally, you would end up with two Sages and a Fighter-turned-Pilgrim-turned-Wizard-turned-Soldier. This is, however, incredibly time consuming and often not worth the effort.
Sage[edit]
-

Sage
Regardless of which setup you use, you're probably going to be better off turning your weakest character into a Sage. Wizards will not only be able to heal but gain considerable strength in defense, attackers will lose a bit of offense but gain magic, and Pilgrims will basically remain the same but have offensive magic. The only thing is that you're going to need to level your Sage back up before you can continue on with your adventure. If you wait until you reach the Necrogond, it won't take very long to level up.
Two Sages[edit]
-
Sage
-
Sage
As the saying goes, why get one when you can have two for just twice the price? In order to have two Sages, you'll have to ditch one member and replace them with a Goof-Off. Get the Goof-Off up to level 20 and then have two characters become Sages at the same time. Chances are you'll end up converting your Pilgrim(s) to a Sage, so you'll be lacking in healing for a while. If you do this right when you reach Dhama, then you'll have to spend a lot of time level grinding. If you wait until you reach the Necrogond, it'll probably take under an hour to get your levels back up to what they need to be.
Overkill[edit]
-
Soldier
-
Sage
-
Sage
This strategy involves moving your attacker back and forth between a Fighter and a Soldier a couple of times so you end up with a Solider that is as fast as a Hero. You'll also want to create two Sages, but that's just a matter of converting your other two allies into Sages whenever you feel like it and then just leaving them as Sages. For your attacker, have them swap classes when you reach Dhama (level 20), then again when you reach the Necrogond (level 25 or so). Once you finish most of the game and just have the final castle, have them swap again and then back again (you'll need to do a lot of leveling at this point anyway, so it doesn't take too much time). If you have the patience, have the attacker turn into a Pilgrim for a while (probably until you learn the Healus spell). So, if you started with a Soldier it would go Soldier->Fighter->Soldier->Pilgrim->Fighter->Soldier. In addition to the speed and power, this results in all four characters knowing all four of the healing spells.
A Different Approach[edit]
This is a party that allows to defeat Divinegon/God Dragon (Game Boy Color/SNES exclusive boss) with an average level lower than 40, and to use all the character classes in one game:
| Start: | Hero |
Soldier |
Pilgrim |
Wizard |
| V | V | V | V | |
| Intermediate: | Hero |
Jester |
Wizard Thief |
Pilgrim |
| V | V | V | V | |
| Final: | Hero |
Sage |
Merchant |
Fighter |
It starts out as a very traditional party. By the time Dharma Temple (where classes can be changed) is reached, most of the characters will be at level 20. Change the class of only one character at a time, and continue to quest. Come back to Dharma Temple whenever the last character who changed class catched up with the level of the others and change the class of a different character. You can absolutely continue traveling without stopping for leveling up.
Change the class of the Pilgrims only after they learn Vivify and Beat, and change the class of the Wizards only after they learn Bounce. This way, every character will have good healing and support abilities.
A Merchant is useful until the end of the game because he/she can tell you what an item is for and who can use it. If you don't have a merchant at end game, you'll have to guess how to and who can use the last items you find. He/she also tells whether an item is cursed. Moreover, at end game you'll have enough money to pay the services from the "YellHelp" spell, especially the expensive inn that heals everyone. The Thief before the Merchant makes the latter faster than normal. On the other hand, a Thief at end game will make almost impossible to collect all the Monster Medals necessary to clear the Ice Cave and meet GranDragon, therefore this class is best in the intermediate stages of the game.
It's great to have all the characters casting Bounce on the first turn, and then watch powerful spellcasting enemies defeating themselves! If that's not enough, every character is able to heal and protect him/herself, thus bypassing the drawback of the Bounce spell. Another effective tactic is a shower of Beat spells from all the characters, that can very likely decimate the enemies in few turns.