
Your trip through the Travel Door in Aliahan deposits you on the southern tip of the peninsular kingdom known as Romaly (which represents this world's version of Italy's Rome). Above it lies as vast land far larger than your home continent. However, mountain and water barriers prevent travel to certain sections. In Romaly, you will learn the plight of a distressed king who has lost his crown. The villains who stole it appear to have absconded with it to Shanpane Tower (another real world reference to Champagne, France). In order to reach the tower, you will first visit a town far to the north known as Kanave. Powerful equipment can be purchased there, and investigative parties may even find a rare and useful item as well. You would do well to put all of this equipment to use, as the monsters which roam this territory are far more dangerous than the slimes and ravens you initially encountered.
Romaly

| Services | |
|---|---|
| Inn | 12 G/person |
| Healing | Yes |
| Tool Shop | |
| Medical Herb | 8G |
| Antidote Herb | 10G |
| Fairy Water | 20G |
| Wing of Wyvern | 25G |
| Full Moon Herb | 30G |
| Iron Apron | 700G |
| Leather Helmet | 80G |
| Equipment Shop | |
| Chain Sickle | 550G |
| Iron Spear | 750G |
| Broad Sword | 1500G |
| Leather Armor | 150G |
| Shell Armor | 300G |
| Chain Mail | 480G |
| Bronze Shield | 180G |
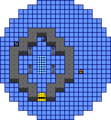
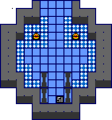
No one in Aliahan may have known about Romaly, but people in Romaly sure know about you. It's as if they've been expecting you to arrive for some time. Romaly is a kingdom, but it's not nearly as big as Aliahan. A few shops are found just outside the castle, which occupies the top portion of the map. Heading through the center of the courtyard, you'll reach a set of stairs which lead to the throne room where you'll find the king seated with his queen. Thing king will rejoice in your arrival, indicate the number of experience points you need, and offer to record your deeds. When he has finished all of that, he will explain that a thief named Kandar has managed to steal his crown. If you were to retrieve it for him, he will acknowledge you as a true hero.
Before you begin to pursue Kandar, you should gather information. The people here have a mix of interesting attitudes. Some are doubtful about the need to be concerned about Archfiend Baramos, while others think it's an outright fairy tale. There are two towers to climb on either side of the throne room. The left tower leads to a prison where the captive inside believes that Kandar may be holding up in the Tower of Shanpane. The right tower leads to the chambers of the king's father, who has some doubts about his son's ability to rule. The inhabitants of Romaly have good knowledge about the surroundings. You will receive a lot of encouragement to visit Kanave in the north, and a lot of discouragement from exploring the region to the east. The monster encounters take a sharp rise in difficulty once you cross the east bridge.
The shops in Romaly offer a good assortment of equipment that you should save up for. Any warrior capable of using the Broad Sword will do tremendous damage with one. Chain Mail and Bronze Shields offer the best available defense, although not every class will be able to take advantage of them. Outfit each character according to their class restrictions, and take advantage of special items, such as the Iron Apron which is an armor substitute for Merchants. Don't forget to sell back armor and weapons that you no longer need to item shops.
The gambling hall
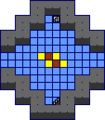
Romaly has one other important feature. It contains a gambling hall. It's not the only gambling hall in the world, as you will discover, but it is the first one that you have access too. Inside these halls, you can put a wager on the eventual winner of a set of monsters who duke it out with one another. In addition to the occupants who share their happiness or misery with you, there are two counters. The right counter offers tips on the likely winner of the next round for a price. The left counter is where to place your bet. Each monster in the next fight is listed, along with their odds. Stronger monsters get lower odds, and therefore offer a lower rate of return on your bet. Weaker monsters offer a much greater return, but the likelihood of their survival is considerably smaller. Only monsters which you have personally encountered will ever appear in a fight. Placing your bet will kick off the fight. Once initiated, the monsters will go into battle until only one remains standing. If you selected the winning monster, you will receive money for your winning bet. Otherwise, your gamble is lost. You can bet on as many fights as you like.
Venturing north
As explained in Romaly, you are advised not to explore too far to the east of Romaly, as the monsters that you will encounter are much stronger than you are prepared for. Instead, explore the regions north of Romaly. If you look to the west of the peninsula, you will find a shrine, but the attendant there says you can only visit Portoga if you have the Magic Key, so you will have to wait. Caterpillars, Poison Toads, and Killer Bees are quite common in the vicinity. At night, you may also encounter Putrepups which cast Slow, and Humanabats who possess the ability to cast StopSpell, although it won't always work. Further north, it's not uncommon to encounter the very thick shelled Army Crabs, and Avenger Ravens with their ability to attack twice. While hiking across the hills between Romaly and Kanave, your chance for encounters will rise, so be prepared to survive the trek between civilizations. These hills also make an excellent training area with Kanave as your base. Travel south for easier battles, and north for more challenges with greater rewards. To ensure your survival in later areas of the game, you should get all of your party members above level 10 before continuing with your quest.

| Services | |
|---|---|
| Inn | 12 G/person |
| Healing | Yes |
| Tool Shop | |
| Medical Herb | 8G |
| Antidote Herb | 10G |
| Fairy Water | 20G |
| Wing of Wyvern | 25G |
| Full Moon Herb | 30G |
| Iron Apron | 700G |
| Equipment Shop | |
| Iron Spear | 750G |
| Broad Sword | 1500G |
| Iron Claw | 770G |
| Half Plate Armor | 1100G |
| Fighting Suit | 800G |
| Bronze Shield | 180G |
| Iron Shield | 700G |
Like Reeve, the town of Kanave provides better equipment, and more information for you to gather. You will meet another person who is looking to capture Kandar, and you will learn that the Tower of Shanpane lies to the west of Kanave. The town's equipment shop sells considerably stronger armor than Romaly, including the Half Plate Armor. It's a big upgrade from Chain Mail, but it's very expensive. This is also a great location to outfit your fighters. The Training Suit will boost their defense, and though they choose not to fight with traditional weapons, the Iron Claw is one weapon they will actually equip. A woman can be found paying respects to the grave of a warrior who supposedly defeated a bear with his hands, but if you visit the grave at night, the warrior's spirit confesses that he was indeed using an Iron Claw.
The man on the small island speaks of the power of the Poison Needle to instantly defeat an enemy, and how the item shop used to sell them. The item shop has a door which, if opened, leads to the counter. Naturally, the shop keeper won't appreciate you speaking with him from behind, but if you visit at night, he will be asleep in his bed, leaving the chests at his side unguarded. If you don't have any problem with the ethics, you can sneak in and take the contents of the chests. One will be a Club, but the other will be the Poison Needle.
The eatery in the upper right corner of town contains a couple speaking about an entire town to the north which has reportedly been put to sleep, possibly by angry elves. At this time, you have a choice to make. Some players prefer to explore the region to the north, and deal with the problem in Template:~ first, before returning and tackling the tower. Others take on the tower first and return the crown before worrying about anything else. There's no right or wrong answer, the choice is yours. If you would like to explore Template:~ first, read that page and return here when you have completed the optional quest.
Tackling Shanpane Tower

Shanpane Tower is not unlike the Tower of Najima that you climbed earlier. It is composed of six floors, and you are not able to see the entire layout of every floor at one time. The tower is occupied by a few enemies like Gas Clouds, Demon Toadstools and Poison Silkworms, but the enemy that you will encounter the most by far are more Humanabats. Fortunately, they like to cast StopSpell on their first turn, so they are unlikely to do a lot of damage to you in that round.
You enter the first floor from the right side. The stairwell to the second floor is actually quite close to the entrance, so you'll have to skip it if you wish to explore the rest of the floor. You'll find a man at the top who confirms that this is indeed the Tower of Shanpane, and a treasure chest along the bottom that contains a Wing of Wyvern. The wing will come in handy if the only member of your party capable of casting Return is your Hero, as he is likely to need his magic points for other purposes. Climb up to the second floor when you're ready.
-

Floor 2
-

Floor 3
-
Floor 4
-
Floor 5
-
Floor 6


When you climb to the second floor, you will arrive in a center chamber. After stepping outside, you will have to decide whether to explore north or south first. However, a quick exploration to the south will reveal nothing of interest, so head north to the next set of stairs which will take you up to the third floor. In a similar fashion, the third floor will deposit you along the south side where you can choose between exploring to the left or right. This time, exploring the dead-end to the right will be worth your while; a treasure chest containing a decent amount of gold can be found inside. Then exit and walk past the stairwell to the room in the upper left portion of the floor and take the stairs to floor 4.
You will arrive on the left portion of the floor, outside of a central chamber. The door to the chamber is along the bottom, and you'll need to use the Thief Key to open it. Step inside, and you'll find the stairs to the fifth floor. Upon arriving on there, you'll two men seated at a table. You'll startle them as you approach, and they will retreat to the stairs in the back of the room. Follow them up to the sixth floor. There, Kandar and his men will be waiting for you. But when you step forward to approach him, he will laugh at you and claim that he's never been caught. At that moment, a trap door in the floor will open up and you will drop back down to the fifth floor.

Immediately climb back up to the sixth floor, and you will discover that Kandar and his men have already escaped with the contents in the two treasure chests. But how? The only means of escape from the floor are the stairs you took, and an open wall at the top. Walk off the edge of the floor, and you will fall down to the fourth floor, where you will catch Kandar and three henchmen trying to make their escape. At this time, heal up any members of your party who are wounded, and approach Kandar to initiate a fight.
The fight will be between you, and Kandar and his men. Each henchmen will be their own enemy group, so you can't rely on spells like Firebal or Infernos to hit all of them at once. The henchmen have considerably less health than Kandar does, but their all equally capable of doing a good amount of damage to you with each strike. Although Kandar is the primary target, you can cut down on how much damage you take by removing the Henchmen from the fight early on. Heal your team as much as you can while the fight proceeds. If you defeat all four enemies, Kandar will return the king's crown to you and beg for forgiveness. He will thank you and claim to change his ways, and then he and his crew will disappear off the right side of the tower.
Returning the crown
Once you exit the tower, return to Romaly in whatever fashion you prefer (casting Return, using a Wing of Wyvern, or simply walking back). When you visit the king, he will at first seem overjoyed with your success. Then he will make an unusual proposition and offer you the chance to rule Romaly in his place! You may not refuse this offer, so accept it and the scene will change. You will now be in the role of the king and just about everyone you speak to will acknowledge you as such. One exception is the king's father in the upper right tower, who laughs at his son's folly. You can explore Romaly just as you would ordinarily, and speak with all of the inhabitants. You won't hear a lot of knew information, but you can learn about the Wizards Wand and the Cloak of Evasion, which is reportedly sold in Noaniels.
You will find that the guards are especially protective of their king, and they will prevent you from setting foot outside of Romaly. In order to proceed with the game, you're going to have to locate the original king and talk him into trading place again. One customer in the shops noticed the king going down to the gambling hall. If you step inside, most people will inform you that the hall is no place for a king to be. However, the original king is down there, having a wonderful time. If you speak to him, he will ask if you've grown tired of being king. Say yes, and he will understand and trade places with you. You will return to being the hero. You can ask the king to save your game, but every time you do, he will ask if you'd like to trade places with him one more time. If you say yes, the entire process is repeated and ended in the same fashion.
At this time, if you have not explored Template:~ to the north of Kanave, you can do so now. It is not required, although it is highly recommended that you do so. If you've already done it, or you decide to skip it, your next destination should be Template:~ to the east.