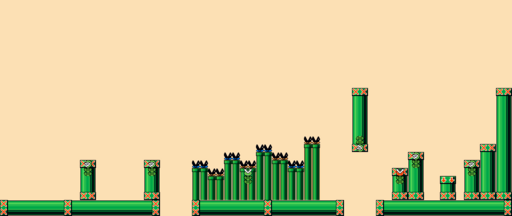
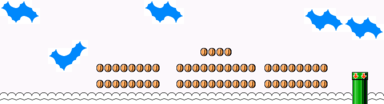
The first two pipes need a running jump to be crossed. Since they happen to have fireball shooting plants, you need to watch for the fireballs.
Next, you'll see two alternating groups of Munchers popping up and going back down. You must cross the area by standing on the pipes where the Munchers are inside. Slowly cross the group of pipes this way until you get to a pit.
This pit needs to be crossed with a jump, but there's a Piranha Plant overhead which can give you a lot of trouble. Watch its fireballs, wait until it retreats and then jump.
On the other side, go down the shortest pipe. Inside, open the treasure chest to get a P-Wing and to exit the level.
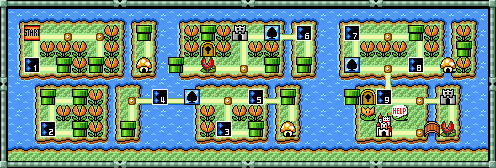
Fortress 1
Part 1
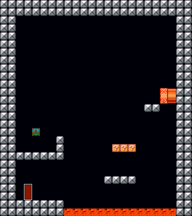
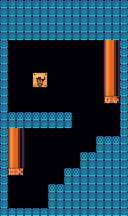
This fortress plays much differently depending on which form of Mario you are. If you are small Mario, or if you are Raccoon or Tanooki Mario, go through the door at the right to end up in part 2.
Otherwise, go to the lowermost point, and jump at the fourth column of brick blocks from the left. At the top you'll reveal a P-Switch, step on it. You can either have the joy of collecting all the coins here (it's a lot!) and go through the door at the bottom to get to part 2 as well, or you can jump to the door that appeared at the left to go to part 4.
Part 2
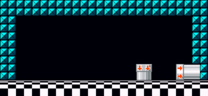
This is a typical fortress room with lots of enemies... but this time, it's eerily empty. If you're small Mario, go to the right and enter the door there to get to part 3.
If you're Raccoon or Tanooki Mario, however, run to the left and start flying. Go through the pipe at the top to go to part 5.
Part 3
You can get up to the block at the left, it contains a Fire Flower. Afterwards, go through the door to end up back in part 2. If you were small Mario, go back through the left door there to return to part 1.
Part 4
The pipe at the bottom leads to a bonus area. The other pipe leads to part 3.
Bonus area
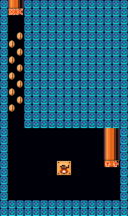
Even though this is technically a bonus area, it is required to complete this level if you cannot fly. Jump at the giant ? block to get a Tanooki Suit, then go through the pipe to return to part 4.
Part 5
Go to the right to meet Boom-Boom once again. He is no different from before. Stomp on him three times to defeat him, since you can only get here as flying Mario you cannot use either of the other options.
7-6
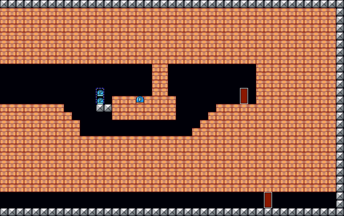
Part 1
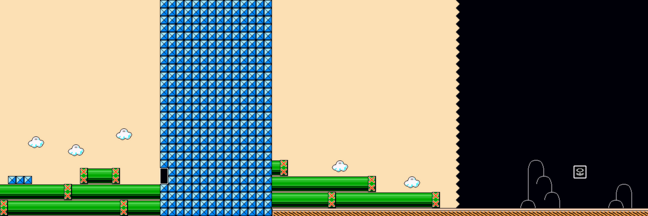
If you have a P-Wing, you can just fly over the blue wall to skip the entire level. You only need to collect the goal card. Otherwise, enter the door to get into the level to part 2.
Part 2
This is another vertical level where you have to get from the bottom to the top. Start off by running to the left to appear on the right, then climbing the stairs (but watch the Koopa Troopas).
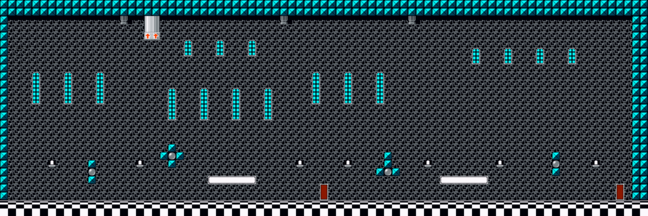
You'll see a lightbulb platform, but you don't actually need it. Use the donut blocks and pipes to get up to the up arrow block. Jump on it, and avoid the blocks on the way. Afterwards, don't go to the left arrow block (it's a trap), but jump to the right and get into the pipe to be taken to the top.
At the top, jump onto the left arrow block, then drop down onto the lightbulb block. Jump once so it moves left to avoid the ? blocks, then once you're beside them, jump again to be taken upwards. Once you've passed them jump again (there are spikes above you) so it moves to the right, and when you see a gap in the ceiling jump again to make it move up.
You can either use the left arrow block, or directly jump to the up arrow block. Jump from it to the right arrow block, then duck to get under the ? blocks. Once on the other side, jump onto the wooden blocks, and from there onto the lightbulb block.
Use it to pass the Piranha Plants, remember to stand at the very left side so you're not hurt by them. At the top, enter the pipe to be taken to the ending area, where you can take the goal card to end this level.
7-7
At the beginning, enter the pipe to get into the level. It is full of Munchers, and you have to use the starmen to run over them. It is similar to 7-3, except that this time, these aren't continuous starmen and you can pick them up anytime.
Get the first one, then start running across the Munchers. The next block is down so you need to duck to jump at it. The third block is no trouble again, but after that, you need to jump through pipes while keeping your momentum so you make it to the fourth block before your starman runs out.
After the fourth starman, you'll need to duck to get below a pipe. Afterwards, just run to the exit pipe to get to the ending room, where you can finally pick up the goal card.
7-8
Crossing the pit at the beginning can be difficult. Use the fact that the top and bottom Piranha Plants have different speeds, and jump across when they both move favorably. If you can fly, that is also an easy way to cross the pit.
On the other side, the leftmost ? block has a starman, which you can use to run through all the Piranha Plants and Ptooies here. You can also get a raccoon leaf if you get down and jump at the leftmost brick block.
When you see a Nipper standing on a platform made of brick blocks, the middle brick block has a 1-up mushroom.
As Raccoon or Tanooki Mario, you can fly up from here to get on top of the pipe. There, you can find a brick block with some coins in it.
When you see the white block, jump along the right side of the overhead pipe to reveal a pink note block. Bounce off it to appear in a coin heaven (see below).
When you see the Ptooie walking on top of the pipes, take the leftmost pipe to appear in a bonus area (see below).
At the end, you'll see a one-of-a-kind Nipper that spews fire, it only appears once in the entire game. Watch out for it, it's best to kill it from afar. If you do kill it, you can get the 1-up mushroom it guarded from the block above where it stood.
Coin Heaven
Simply follow the screen and collect all the coins you see. At the end, take the pipe to reappear where you entered this Coin Heaven from.
Bonus area
Climb up the stairs and jump at the giant ? block to get a Hammer Suit. Afterwards, go through the pipe to end up behind the bridge.