|contents=You need the Spark and Bomb combo to get the second shard. In section four, you must use the combo to see three pictures. In the next room, step on the same three images in order.
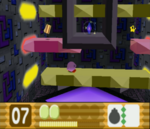
# The first shard is in the area with the red and yellow platforms and is reached by dropping down the middle.
# You need the Spark and Bomb combo to get the second shard. In section four, you must use the combo to see three pictures. In the next room, step on the same three images in order.
# The third shard is a reward for defeating Spark-i.
{{Footer Nav|game=Kirby 64: The Crystal Shards|nextpage=PIX|prevpage=Rock Star 3}}
{{Footer Nav|game=Kirby 64: The Crystal Shards|nextpage=PIX|prevpage=Rock Star 3}}
This pyramid has eight parts and several contraptions.
Crystal Shard
The first shard is in the area with the red and yellow platforms and is reached by dropping down the middle.
Crystal Shard 1
Crystal Shard
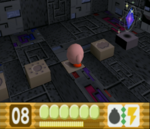
You need the Spark and Bomb combo to get the second shard. In section four, you must use the combo to see three pictures. In the next room, step on the same three images in order.
Crystal Shard 2
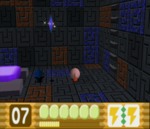
In part seven, you must fight against Spark-i.
Crystal Shard
The third shard is a reward for defeating Spark-i.
Crystal Shard 3
Spark-i
This section is a stub. Help us expand it, and you get a cookie.