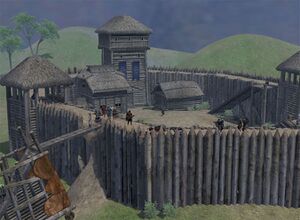
Watch a typical siege in action.
When you visit a town or castle belonging to an enemy of your faction you have the option of besieging it; note that you cannot besiege places owned by factions that your faction is not at war with, even if you reduce your personal reputation with that faction to the point where they are at war with your party.
When you choose to besiege a place you will see how much food they have left (and how many days the food can last for), and also what sort of equipment you need to besiege it. Ladders take only a few hours to build, but a siege tower may take several days. The type of equipment is determined by the location; you do not get a choice in the matter. Increasing your Engineer skill will lower the construction time of both types of siege equipment. On the battle map itself there will also be some trebuchets, but these are merely decorative and cannot be fired.
If some enemy leaders are waiting at a location when you besiege it their forces will be added to the defenders' already sizeable garrison, so you may want to wait for them to leave before attacking, or choose a different target altogether. As locations are conquered the number of places enemy leaders can retreat to keeps going down so it will become much harder to attack a location without fighting them as well.
If you "wait until tomorrow" while one or more enemy leaders are inside one of them may decide to attack you if his party is sufficiently larger than yours. When this happens the battle will take place on a regular field map rather than a siege map, and therefore your mounted troops will get to use their horses. If you don't want to fight him you can entice him to attack and then retreat, leading the party far enough away that you can circle around and get there before they catch you (if you get too far away from them they will stop chasing you and will head back to the siege). If your siege equipment is complete you can go straight into an attack and they won't be able to interrupt you. If it isn't you can repeat the process.
Starving them out
As well as attacking directly you also have the option of waiting to starve them out. Before attempting this, completely fill your inventory with food items, ideally picking ones that have quantity values of 50/50. Depending on the size of your army your food supplies may still run down quicker than those of the defenders. When this happens you will need to go get some food, but if you spend too long away from the siege the defenders will dismantle your equipment and you will have to build them again. Even if this happens their food supplies will still be depleted until they get a chance to replenish them, but you should still try to keep the attack as uninterrupted as possible to prevent their supplies increasing.
Attacking
Before actually leading the attack you will want to rearrange your forces (see Party); generally speaking you should arrange your men in order of how effective they are as ground troops (mounted troops will spawn without their horses).
The siege is broken up into several stages, each requiring different strategies.
Enemies sally forth
If the enemy outnumbers you, a portion of their forces will sally forth to stop your attack. The defenders only come out in one group; if you manage to defeat them no more will spawn. If you outnumber them or have mostly equal numbers they will stay behind the walls, and this stage will be skipped.
Attacking the walls

When you attack the walls you will have to make your way up the ladder or siege tower while braving the enemy's shafts. At the top will be a thick group of defenders (generally archers); if you just lead your infantry straight up you may take some losses, so if you have archers of your own you may want to get them to kill or weaken the group of defenders at the entrance before you lead your infantry go up the ramp.
Once you have gained the walls, quickly clear out the defenders before descending into the courtyard. There will also be one or more archers in each of the side tower areas as well as infantry on the walkways. These archers pose little threat once you're on the walls, but they will cause a lot of damage if you descend to the courtyard without wiping them out.
Enemy reinforcements will spawn in the compound, and they will be constantly spawning to meet the battle size as their comrades are defeated; unlike a normal field battle the combat is not broken up into rounds based on the number of combatants. It may take your troops some time to work their way down the stairs to the courtyard, especially if they are newly spawned. New enemies will always spawn just in front of the keep, so you will probably want to set that as a gathering point (with ).
Once almost all of the defenders have been killed the current stage of the battle will end, and the survivors will retreat to regroup.
Fight in the streets (towns only)
For towns, the next stage is to fight some of the defenders in the street. You only get a handful of men for this and the defenders slightly outnumber you, so you will want to gather up your forces with to ensure they stick together. When you have won back the streets, the survivors retreat to the castle's keep.
Fight in the keep
The remaining defenders make a desperate last stand in the castle's keep. Here you are fighting in a very small area and are slightly outnumbered, but the enemy's forces are far fewer in number than in previous stages. Once you defeat them the battle is over and you will be taken to the post-battle party screen.
Aftermath
When the defenders surrender or are defeated you will take the fortress (any enemy heroes present will escape) and receive the usual gold and experience, and you will then arrive at a menu with the usual exploration options. After you capture a location it will become the property of your faction along with one or more nearby villages. After a few hours or days the king will assign the town or castle and its village(s) to his vassals, possibly giving one to you (see Fiefs). From the exploration menu you can also specifically ask to be given this property, although you may not be successful.
