m (→The Happy Boar (Tavern): first floor >> ground floor to avoid ambiguity) |
Tags: Mobile edit Mobile web edit |
||
| (41 intermediate revisions by 21 users not shown) | |||
| Line 1: | Line 1: | ||
{{Header Nav|game=Mount&Blade}} | {{Header Nav|game=Mount&Blade}} | ||
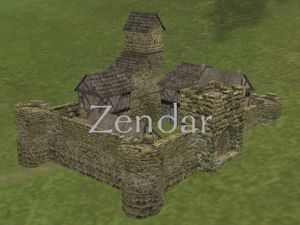
All towns share some common elements. | [[Image:Mount&Blade town icon.jpg|thumb|right|A town icon as seen on the world map.]] | ||
All towns share some common elements.__TOC__ | |||
{{-}} | |||
==Town menu== | ==Town menu== | ||
Whenever you enter a town | Whenever you enter a town you will be presented with a menu of various options: from this menu you can trade directly with merchants as well as assess trade prices (see [[Mount&Blade/Trade|Trade]]) or jump to various locations in the town. You can also choose to go to these places on foot. If you choose to 'Wait here for some time' it will cost you a certain amount of denars per night (depending on your army size). During this time you must still supply your troops with food (unless ownership of the town belongs to you) and there is no reduction in wages that are paid, but if you and/or any of your units are wounded, healing occurs faster. | ||
==Merchants== | ==Merchants== | ||
[[Image:Mount&Blade merchant sign.jpg|right]] | [[Image:Mount&Blade merchant sign.jpg|right]] | ||
Every town has | Every town has four dealers located somewhere along its streets. There is a merchant who sells [[Mount&Blade/Armor|armor]], a merchant who sells [[Mount&Blade/Weapons|weapons]] and [[Mount&Blade/Shields|shields]], a merchant who sells [[../Horses|Horses]], and a merchant who sells [[../Goods|Goods]]. They are usually located near to each other in the same section of a town. | ||
Unlike the goods and horse merchants, the arms and armor merchants can be accessed at any time of day—Mount&Blade employs an in-game time-of-day system (ex. Dawn, Morning, Noon, Dusk, Evening, Midnight, Late Night)—while walking around the town streets. However, whether by mistake or by design, one can still access all four merchants at any time of day via the text menu that is shown upon entering a town or when {{kbd|Tab}} is pressed (the default key for leaving a location). | |||
The [[../Goods|Goods]] merchant is located inside an actual shop, which is indicated by a sign depicting a bag of what is presumably money or perhaps one of the various goods that are traded in Calradia, such as spices, salt, and wheat grain, etc. This is as opposed to the other vendors which sell their merchandise from the streets, but interacting with the door leading to this "shop" merely brings you to the trading interface (i.e., the shop is not an actual enclosure that can be entered, unlike the Lord's Hall or Prison of a town or castle). (Note that in previous versions of the game, the goods merchant also sold horses, and a separate horse merchant did not exist.) | |||
{{-}} | {{-}} | ||
==Tavern== | ==Tavern== | ||
[[Image:Mount&Blade tavern sign.jpg|right]] | [[Image:Mount&Blade tavern sign.jpg|right]] | ||
The tavern is the place to recruit men and hear a few tales | The tavern is the place to recruit men and hear a few tales. The patrons are random, so you may find one or more of the following: | ||
* A | * A [[Mount&Blade/Neutral|mercenary]] soldier; talking to him allows you to find how many comrades he has with him seeking commission, and how much it costs to recruit them. If your party is too full to hire all of them or if you do not have enough money, you will have the option of recruiting the maximum number that you can afford or accommodate (but not less). Hired Blades and Mercenary Cavalry are among the toughest neutral units (units belonging to no particular faction) that can be found in the game and thus are generally considered good investments. | ||
* A | * A Traveller, who will update you on what has happened in Calradia and explain various opportunities that can be found. For a small fee, he can also tell you where the [[Mount&Blade/Companions|companions]] are, assuming they have joined your party at least once and subsequently left for some reason (ex. sometimes you and one or more of your companions become separated if you get captured by an enemy). | ||
* A Minstrel, who | * A Minstrel, who can tell you about the ladies of the faction that owns the town. He can also teach you poems and tell you about ongoing feasts. | ||
* A | * A Ransom Broker, who will buy prisoners for an amount determind by their social status, equipment and weapons they possess (oddly, these are retained by the unit even after being captured by you), or level of combat experience (ex. knight versus recruit). Additionally, Lords/Vassals cannot be sold to the ransom broker. | ||
* A | * Ramun, a slave trader who gives you some advice on capturing prisoners; he is not functionally identical to the Ransom broker as he buys prisoners off you for the same price regardless of their social status etc. He can only be found in the Nord Town of Tihr in all versions after 0.960 (This includes the retail/Steam versions, version 1.00 and later patches). He used to be found in the neutral town of Zendar, which has been removed from the game. | ||
* | * A [[Mount&Blade/Companions|companion]], who is willing to join your party, and can be equipped, trained, and completely customized in the same manner as your own character. See [[Mount&Blade/Companions|Companions]] for more information. | ||
* A Farmer, who offers you the [[Mount&Blade/ | * One of two Book Vendors, who sell [[Mount&Blade/Books|Books]] which can be read in order to permanently enhance your character's [[Mount&Blade/Skills|skills]]. Each vendor has a different set of books. Several of the books merely need to be in one's inventory and not actually read in order to receive their benefit. | ||
* A Farmer, who offers you the [[Mount&Blade/Special quests#Save the Village of ______ from Marauding Bandits|Save the Village of ______ from Marauding Bandits]] quest. | |||
* The tavern keeper. You can pay him 1000 denars to allow everyone to drink at your expense the entire evening, increasing your relation with the town by 1. | |||
Tavern patrons change almost every day, so check back every few days to see if anyone interesting has turned up. | Tavern patrons change almost every day, so check back every few days to see if anyone interesting has turned up. | ||
==Arena== | ==Arena== | ||
The arena is a safe way of | The [[Mount&Blade/Arena|arena]] is a safe way of gaining combat experience and a bit of money (the tournament master explains the rewards system; see [[Mount&Blade/Arena|Arena]] for more details), and it's a good place to start learning how combat works. You may also participate in the [[Mount&Blade/Tournaments|tournaments]] that take place in random towns every few days. The Tournament Master will inform you of the towns in which tournaments are going to be held in the near future (if any) when asked. | ||
==Town ownership== | |||
You can rest in a town you own for free. Your men will draw food from the town during this time. Each town you own has a chest you can access for storing items (not horses). | |||
== | ===Prosperity=== | ||
Town prosperity relies on arriving caravans ONLY. Ensure that caravans going to your town reach it safely. Caravans that leave a town will only affect the prosperity of their destination towns, not their towns of origin. | |||
=== | ===Garrisoning=== | ||
You can place or modify a garrison by choosing the "Station a garrison" option. In this interface, you can also place enemies you have captured (including Lords) in the town prison, or conversely, remove them from the dungeon and place them in your party as captives. Companions can not be garrisoned. Garrisoned troops draw their food from the town and the surrounding lands and thus do not require you to supply them with food. | |||
Men left in a town are paid only half wages as they are not on active duty, and their wages are automatically deducted (along with those of the men in your party) at the end of each week. (Note that these wages are not accounted for in the 'Weekly Wages' amount shown in the 'Party' screen; this quantity only shows the wages that you will pay to the active service units currently in your party.) | |||
If you place your entire party in a town's garrison before the day you pay wages, you will end up giving all your men only half the wages they would normally earn for active service. A much less tedious alternative is to simply invest in building a Manor in a [[Mount&Blade/Villages|village]] (see improvements) if you own one and to rest there at the end of a pay week. Allowing one's troops to rest at the end of a week forestalls having to pay them full wages each week, which can become quite significant as the size of one's party increases. | |||
=== | ===Declaring independence=== | ||
Under certain conditions, a town that has just changed hands may declare that it is independent. Despite this the town will be granted to a vassal within a few days. You can still interact with the town normally during this time. | |||
===Improvements=== | |||
The "Manage this town" menu option lets you build several improvements to enhance your town's effectiveness. The cost and construction time will be decreased if you or your [[Mount&Blade/Companions|companions]] have points in [[Mount&Blade/Skills#Engineer|Engineer]]. | |||
* Building a Messenger Post will let you be informed about enemy activity near your town even if you are far away. The Messenger Post has a base cost of 4000 denars and 43 days. | |||
* A Prisoner Tower significantly reduces the chance of imprisoned lords escaping. The escape chance is normally 30%, but a Prisoner Tower reduces it to 5%. The Prisoner Tower has a base cost of 7000 denars and 73 days. | |||
=== | {{Footer Nav|game=Mount&Blade|prevpage=|nextpage=}} | ||
Latest revision as of 18:37, 28 May 2019

All towns share some common elements.
[edit]
Whenever you enter a town you will be presented with a menu of various options: from this menu you can trade directly with merchants as well as assess trade prices (see Trade) or jump to various locations in the town. You can also choose to go to these places on foot. If you choose to 'Wait here for some time' it will cost you a certain amount of denars per night (depending on your army size). During this time you must still supply your troops with food (unless ownership of the town belongs to you) and there is no reduction in wages that are paid, but if you and/or any of your units are wounded, healing occurs faster.
Merchants[edit]

Every town has four dealers located somewhere along its streets. There is a merchant who sells armor, a merchant who sells weapons and shields, a merchant who sells Horses, and a merchant who sells Goods. They are usually located near to each other in the same section of a town.
Unlike the goods and horse merchants, the arms and armor merchants can be accessed at any time of day—Mount&Blade employs an in-game time-of-day system (ex. Dawn, Morning, Noon, Dusk, Evening, Midnight, Late Night)—while walking around the town streets. However, whether by mistake or by design, one can still access all four merchants at any time of day via the text menu that is shown upon entering a town or when is pressed (the default key for leaving a location).
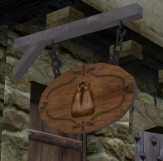
The Goods merchant is located inside an actual shop, which is indicated by a sign depicting a bag of what is presumably money or perhaps one of the various goods that are traded in Calradia, such as spices, salt, and wheat grain, etc. This is as opposed to the other vendors which sell their merchandise from the streets, but interacting with the door leading to this "shop" merely brings you to the trading interface (i.e., the shop is not an actual enclosure that can be entered, unlike the Lord's Hall or Prison of a town or castle). (Note that in previous versions of the game, the goods merchant also sold horses, and a separate horse merchant did not exist.)
Tavern[edit]

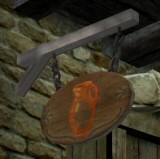
The tavern is the place to recruit men and hear a few tales. The patrons are random, so you may find one or more of the following:
- A mercenary soldier; talking to him allows you to find how many comrades he has with him seeking commission, and how much it costs to recruit them. If your party is too full to hire all of them or if you do not have enough money, you will have the option of recruiting the maximum number that you can afford or accommodate (but not less). Hired Blades and Mercenary Cavalry are among the toughest neutral units (units belonging to no particular faction) that can be found in the game and thus are generally considered good investments.
- A Traveller, who will update you on what has happened in Calradia and explain various opportunities that can be found. For a small fee, he can also tell you where the companions are, assuming they have joined your party at least once and subsequently left for some reason (ex. sometimes you and one or more of your companions become separated if you get captured by an enemy).
- A Minstrel, who can tell you about the ladies of the faction that owns the town. He can also teach you poems and tell you about ongoing feasts.
- A Ransom Broker, who will buy prisoners for an amount determind by their social status, equipment and weapons they possess (oddly, these are retained by the unit even after being captured by you), or level of combat experience (ex. knight versus recruit). Additionally, Lords/Vassals cannot be sold to the ransom broker.
- Ramun, a slave trader who gives you some advice on capturing prisoners; he is not functionally identical to the Ransom broker as he buys prisoners off you for the same price regardless of their social status etc. He can only be found in the Nord Town of Tihr in all versions after 0.960 (This includes the retail/Steam versions, version 1.00 and later patches). He used to be found in the neutral town of Zendar, which has been removed from the game.
- A companion, who is willing to join your party, and can be equipped, trained, and completely customized in the same manner as your own character. See Companions for more information.
- One of two Book Vendors, who sell Books which can be read in order to permanently enhance your character's skills. Each vendor has a different set of books. Several of the books merely need to be in one's inventory and not actually read in order to receive their benefit.
- A Farmer, who offers you the Save the Village of ______ from Marauding Bandits quest.
- The tavern keeper. You can pay him 1000 denars to allow everyone to drink at your expense the entire evening, increasing your relation with the town by 1.
Tavern patrons change almost every day, so check back every few days to see if anyone interesting has turned up.
Arena[edit]
The arena is a safe way of gaining combat experience and a bit of money (the tournament master explains the rewards system; see Arena for more details), and it's a good place to start learning how combat works. You may also participate in the tournaments that take place in random towns every few days. The Tournament Master will inform you of the towns in which tournaments are going to be held in the near future (if any) when asked.
Town ownership[edit]
You can rest in a town you own for free. Your men will draw food from the town during this time. Each town you own has a chest you can access for storing items (not horses).
Prosperity[edit]
Town prosperity relies on arriving caravans ONLY. Ensure that caravans going to your town reach it safely. Caravans that leave a town will only affect the prosperity of their destination towns, not their towns of origin.
Garrisoning[edit]
You can place or modify a garrison by choosing the "Station a garrison" option. In this interface, you can also place enemies you have captured (including Lords) in the town prison, or conversely, remove them from the dungeon and place them in your party as captives. Companions can not be garrisoned. Garrisoned troops draw their food from the town and the surrounding lands and thus do not require you to supply them with food.
Men left in a town are paid only half wages as they are not on active duty, and their wages are automatically deducted (along with those of the men in your party) at the end of each week. (Note that these wages are not accounted for in the 'Weekly Wages' amount shown in the 'Party' screen; this quantity only shows the wages that you will pay to the active service units currently in your party.)
If you place your entire party in a town's garrison before the day you pay wages, you will end up giving all your men only half the wages they would normally earn for active service. A much less tedious alternative is to simply invest in building a Manor in a village (see improvements) if you own one and to rest there at the end of a pay week. Allowing one's troops to rest at the end of a week forestalls having to pay them full wages each week, which can become quite significant as the size of one's party increases.
Declaring independence[edit]
Under certain conditions, a town that has just changed hands may declare that it is independent. Despite this the town will be granted to a vassal within a few days. You can still interact with the town normally during this time.
Improvements[edit]
The "Manage this town" menu option lets you build several improvements to enhance your town's effectiveness. The cost and construction time will be decreased if you or your companions have points in Engineer.
- Building a Messenger Post will let you be informed about enemy activity near your town even if you are far away. The Messenger Post has a base cost of 4000 denars and 43 days.
- A Prisoner Tower significantly reduces the chance of imprisoned lords escaping. The escape chance is normally 30%, but a Prisoner Tower reduces it to 5%. The Prisoner Tower has a base cost of 7000 denars and 73 days.
