(remove duplicate special fruit argument - chose to remove the one with fruits that matched the regular fruits section as it seemed more likely to be accidentally placed) |
Trig Jegman (talk | contribs) mNo edit summary |
||
| (7 intermediate revisions by one other user not shown) | |||
| Line 46: | Line 46: | ||
==North Pawville== | ==North Pawville== | ||
[[File: | [[File:PD2C2 North Pawville.jpg|thumb|right|Map of North Pawville.]] | ||
North Pawville is north of South Pawville. Although few characters live here, there's still the Police Station and an impressive mansion at the north of the area which belongs to millionaire [[../Characters#Godfrey|Godfrey]]. Stanly the carpenter also lives here, and you'll want to talk to Charlotte or Ambrose if you have the right ingredients for a special new food. | North Pawville is north of South Pawville. Although few characters live here, there's still the Police Station and an impressive mansion at the north of the area which belongs to millionaire [[../Characters#Godfrey|Godfrey]]. Stanly the carpenter also lives here, and you'll want to talk to Charlotte or Ambrose if you have the right ingredients for a special new food. | ||
{{-}} | {{-}} | ||
| Line 67: | Line 67: | ||
== Lappy Lake == | == Lappy Lake == | ||
[[File: | [[File:PD2C2 Lappy Lake.jpg|thumb|right|Map of Lappy Lake.]] | ||
Lappy Lake is a lake. You can't actually drink any of the water from it, but you can find a wide variety of species of fish. A traveler named Sai has also been seen here, and apparently he has the Legendary Pattern which the great designer Townsend left behind. At this lake, you can also find Thyme, Cotton, the monkey that escaped from the zoo, and a broken bridge which you'll need Stanley to fix for you. | Lappy Lake is a lake. You can't actually drink any of the water from it, but you can find a wide variety of species of fish. A traveler named Sai has also been seen here, and apparently he has the Legendary Pattern which the great designer Townsend left behind. At this lake, you can also find Thyme, Cotton, the monkey that escaped from the zoo, and a broken bridge which you'll need Stanley to fix for you. | ||
| Line 149: | Line 149: | ||
Jade Fields is a wide grassy area, which has the entrance to Lonesome Park. The vulture and the boar who have escaped from the zoo are here, so make sure you look out for them. You can also find one of [[Petz: Dogz 2 and Catz 2/Characters#Marin/Maria|Warren's pupils]], who will take you to her secret island so you can help her with her research. | Jade Fields is a wide grassy area, which has the entrance to Lonesome Park. The vulture and the boar who have escaped from the zoo are here, so make sure you look out for them. You can also find one of [[Petz: Dogz 2 and Catz 2/Characters#Marin/Maria|Warren's pupils]], who will take you to her secret island so you can help her with her research. | ||
[[File: | [[File:PD2C2 Jade Fields.jpg|thumb|right|Map of Jade Fields.]] | ||
{{-}} | {{-}} | ||
| Line 235: | Line 235: | ||
This is the first wild area encountered in the game. Here you can find a dolphin who will happily give you a ride in exchange for sardines, two fishing piers, a ship that sails to Monolith Isle, the Apollo's Flower, and a professor. There's lots to do at Dolphin Coast, including playing games with Victor or groundhogs! | This is the first wild area encountered in the game. Here you can find a dolphin who will happily give you a ride in exchange for sardines, two fishing piers, a ship that sails to Monolith Isle, the Apollo's Flower, and a professor. There's lots to do at Dolphin Coast, including playing games with Victor or groundhogs! | ||
[[File: | [[File:PD2C2 Dolphin Coast.jpg|thumb|right|Map of Dolphin Coast.]] | ||
{{-}} | {{-}} | ||
| Line 330: | Line 330: | ||
== Whisker Woods == | == Whisker Woods == | ||
[[File: | [[File:PD2C2 Whisker Woods.jpg|thumb|right|Map of Whisker Woods.]] | ||
Whisker woods is the forest to the north of the village. You'll encounter dark green snakes here. There's an egret patrolling the centre island, so you'll have to watch your back if you pass through there. There is also the Roaring Falls and a famous hot spring. You'll be spending lots of time here, and grab an apple or cherry while you're at it! | Whisker woods is the forest to the north of the village. You'll encounter dark green snakes here. There's an egret patrolling the centre island, so you'll have to watch your back if you pass through there. There is also the Roaring Falls and a famous hot spring. You'll be spending lots of time here, and grab an apple or cherry while you're at it! | ||
{{-}} | {{-}} | ||
| Line 404: | Line 404: | ||
Tail Heights is a land that separates you from Sky Heights. Here you'll find the Highlands Village and the windmill that opens the gates to Sky Heights. The giraffe that escaped the zoo is here, and will play ring toss with you. You can easily get poisoned by the snakes if you're not quick, you might be attacked by the boars or gorrilas if your not careful, and you can find the Bramble Eating Insect here. | Tail Heights is a land that separates you from Sky Heights. Here you'll find the Highlands Village and the windmill that opens the gates to Sky Heights. The giraffe that escaped the zoo is here, and will play ring toss with you. You can easily get poisoned by the snakes if you're not quick, you might be attacked by the boars or gorrilas if your not careful, and you can find the Bramble Eating Insect here. | ||
[[File: | [[File:PD2C2 Tail Heights.jpg|thumb|right|Map of Tail Heights.]] | ||
{{-}} | {{-}} | ||
| Line 468: | Line 468: | ||
Sky Heights is where the wizard, Theophilous, lives. There is also a poison bog, which you'll need to sniff around it in the first time coming - just make sure you don't fall in. After that, you can take the bridges without needing to sniff. | Sky Heights is where the wizard, Theophilous, lives. There is also a poison bog, which you'll need to sniff around it in the first time coming - just make sure you don't fall in. After that, you can take the bridges without needing to sniff. | ||
[[File: | [[File:PD2C2 Sky Heights.jpg|thumb|right|Map of Sky Heights.]] | ||
{{-}} | {{-}} | ||
| Line 505: | Line 505: | ||
To get to Monolith Isle, you'll need to trade Sai a swordfish for some fuel to repair the lighthouse. When you first arrive, the isle will be under an everlasting night. Help Noel by finding the magic mirror, which some vultures probably stole. He will escort you to the Bubble Cave, where you can find the Water Crystal. | To get to Monolith Isle, you'll need to trade Sai a swordfish for some fuel to repair the lighthouse. When you first arrive, the isle will be under an everlasting night. Help Noel by finding the magic mirror, which some vultures probably stole. He will escort you to the Bubble Cave, where you can find the Water Crystal. | ||
[[File: | [[File:PD2C2 Monolith Isle.png|thumb|right|Map of Monolith Island.]] | ||
{{-}} | {{-}} | ||
| Line 578: | Line 578: | ||
== Bubble Cave == | == Bubble Cave == | ||
In the Bubble Cave lies the Water Crystal, which you'll need to retrieve for Theophilous. It's an easy area and it's simple to get through, despite all the alligators, poisonous snakes, and bats. If you have a red sea bream, try and find the dolphin that will make a bridge for you over the river. You'll need to help Noel to get in. | In the Bubble Cave lies the Water Crystal, which you'll need to retrieve for Theophilous. It's an easy area and it's simple to get through, despite all the alligators, poisonous snakes, and bats. If you have a red sea bream, try and find the dolphin that will make a bridge for you over the river. You'll need to help Noel to get in. | ||
[[File:PD2C2 Bubble Cave.png|thumb|right|Map of Bubble Cave.]] | |||
{{-}} | |||
{{Dogz area info | {{Dogz area info | ||
| Line 613: | Line 616: | ||
== Crystal Caverns == | == Crystal Caverns == | ||
Crystal Caverns has the entrances to both Inferno Cave and Polar Fields. In here you'll find cobras and a bat if your looking for brass wire. There's also a komondo dragon, which will take more than a few rocks to stun. You'll need to be quick in here, but you can find some treasure chests or a Golden Butterfly in too! | Crystal Caverns has the entrances to both Inferno Cave and Polar Fields. In here you'll find cobras and a bat if your looking for brass wire. There's also a komondo dragon, which will take more than a few rocks to stun. You'll need to be quick in here, but you can find some treasure chests or a Golden Butterfly in too! | ||
[[File:PD2C2 Crystal Caverns.png|thumb|right|Map of Crystal Caverns.]] | |||
{{-}} | |||
{{Dogz area info | {{Dogz area info | ||
| Line 655: | Line 661: | ||
== Inferno Cave == | == Inferno Cave == | ||
Pass through Crystal Caverns to get here. A bulldog named Percy lives outside the cave. He'll help you by making a flame retardant suit, once you've found him some komondo dragon skin and brass wire. You'll need to come here to get the Earth Crystal, which Theophilous sent you for. Make sure you stop often for a drink of water so you don't overheat. | Pass through Crystal Caverns to get here. A bulldog named Percy lives outside the cave. He'll help you by making a flame retardant suit, once you've found him some komondo dragon skin and brass wire. You'll need to come here to get the Earth Crystal, which Theophilous sent you for. Make sure you stop often for a drink of water so you don't overheat. Move slowly so you don't wake the bats! | ||
[[File:PD2C2 Inferno Cave.png|thumb|right|Map of Inferno Cave.]] | |||
{{-}} | {{-}} | ||
| Line 690: | Line 698: | ||
== Polar Fields == | == Polar Fields == | ||
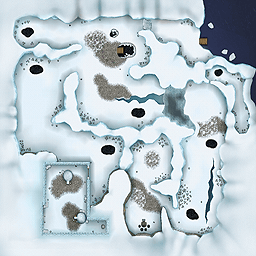
Get to Polar Fields by crossing the Crystal Caverns. Polar Fields is a magnificent sight! The snow on the ground, ice walls, polar bears... it's only here. Hugo will help you by giving you a warm suit if you bring him a ripe coconut from Dolphin Coast. You'll be sent here by Theophilous to get the Ice Crystal. If you have a hot stone handy, you can go fishing for a very [[Petz: Dogz 2 and Catz 2/Optional Missions#A New Breed of Trouble|rare fish]]. Make sure to bathe in the hot springs! | Get to Polar Fields by crossing the Crystal Caverns. Polar Fields is a magnificent sight! The snow on the ground, ice walls, polar bears... it's only here. Hugo will help you by giving you a warm suit if you bring him a ripe coconut from Dolphin Coast. You'll be sent here by Theophilous to get the Ice Crystal. If you have a hot stone handy, you can go fishing for a very [[Petz: Dogz 2 and Catz 2/Optional Missions#A New Breed of Trouble|rare fish]]. Make sure to bathe in the hot springs! | ||
[[File:PD2C2 Polar Fields.png|thumb|right|Map of Polar Fields.]] | |||
{{-}} | {{-}} | ||
| Line 747: | Line 757: | ||
== Lonesome Park == | == Lonesome Park == | ||
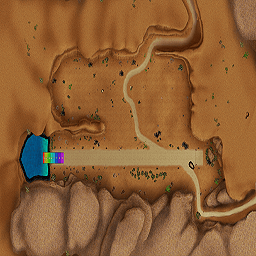
The first time you come here, Ivlet has caused whirlwinds to form, and they will suck you up if you stray near them. The buffalo here will challenge you to a chicken race. Once you find Bartholomew, he will teach you how to seal the whirlwinds away, angering Ivlet and spurring him to prepare for battle. Once the whirlwinds are gone it's an easy place to get through. The main point of the whirlwinds is so you can practice rock-throwing for the battle at Dimension Rift. | The first time you come here, Ivlet has caused whirlwinds to form, and they will suck you up if you stray near them. The buffalo here will challenge you to a chicken race. Once you find Bartholomew, he will teach you how to seal the whirlwinds away, angering Ivlet and spurring him to prepare for battle. Once the whirlwinds are gone it's an easy place to get through. The main point of the whirlwinds is so you can practice rock-throwing for the battle at Dimension Rift. | ||
[[File:PD2C2 Lonesome Park.png|thumb|right|Map of Lonesome Park.]] | |||
{{-}} | |||
{{Dogz area info | {{Dogz area info | ||
| Line 781: | Line 794: | ||
== Gongoro Peak == | == Gongoro Peak == | ||
[[File: | [[File:PD2C2 Bruce.jpg|120px|right|Bruce]] | ||
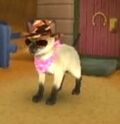
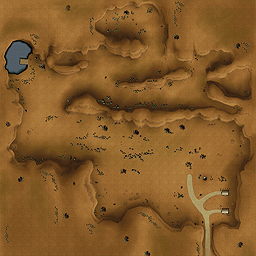
Gongoro Peak is home to the buffalo, which are hard to get around - you'll have to crawl through the undergrowth or run really fast. The lion who escaped the zoo is here. Bruce lives in the tiny village at the base of the peak as a pioneer. You will come here to find Bartholomew, and many spectacular fish swim in the pond. You can find many treasure chests here! Bruce lives in the section with the gates, so he's safe from all the buffallo! Bruce is a Doberman or Siamese and tells your character that there was a traveler that sealed away whirlwinds...Bartholemew! At this point of the game, you will find Bartholemew and seal the whirlwinds, and a showdown with Ivlet!!! | Gongoro Peak is home to the buffalo, which are hard to get around - you'll have to crawl through the undergrowth or run really fast. The lion who escaped the zoo is here. Bruce lives in the tiny village at the base of the peak as a pioneer. You will come here to find Bartholomew, and many spectacular fish swim in the pond. You can find many treasure chests here! Bruce lives in the section with the gates, so he's safe from all the buffallo! Bruce is a Doberman or Siamese and tells your character that there was a traveler that sealed away whirlwinds...Bartholemew! At this point of the game, you will find Bartholemew and seal the whirlwinds, and a showdown with Ivlet!!! | ||
[[File:PD2C2 Gongoro Peak.png|thumb|right|Map of Gongoro Peak.]] | |||
{{-}} | |||
{{Dogz area info | {{Dogz area info | ||
| Line 910: | Line 926: | ||
{{col|3|end}} | {{col|3|end}} | ||
}} | }} | ||
== Dimension Rift == | == Dimension Rift == | ||
| Line 927: | Line 942: | ||
{{col|3|end}} | {{col|3|end}} | ||
}} | }} | ||
{{Footer Nav|game=Petz: Dogz 2 and Catz 2|prevpage=Secrets|nextpage=Enemies}} | {{Footer Nav|game=Petz: Dogz 2 and Catz 2|prevpage=Secrets|nextpage=Enemies}} | ||
Latest revision as of 14:26, 19 September 2022
South Pawville[edit]
South Pawville is the major village on the island and its where you and your family live. There's plenty of activities to do once you have finished helping out the locals. You can buy new clothes for your character, view your fish at the Aquarium, play minigames at the zoo, or decorate the village with flowers and a little help from Clara.
| Characters | Enemies |
|---|---|
|
None |
| Bugs | Fish |
| None |
|
| Fruits/Vegetables | Flowers |
| None | None |
| Special Fruits/Vegetables | Special Items |
| None | None |
North Pawville[edit]
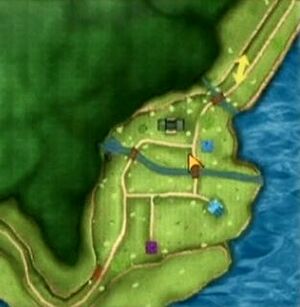
North Pawville is north of South Pawville. Although few characters live here, there's still the Police Station and an impressive mansion at the north of the area which belongs to millionaire Godfrey. Stanly the carpenter also lives here, and you'll want to talk to Charlotte or Ambrose if you have the right ingredients for a special new food.
| Characters | Enemies |
|---|---|
|
None |
| Bugs | Fish |
| None | None |
| Fruits/Vegetables | Flowers |
| None | None |
| Special Fruits/Vegetables | Special Items |
| None | None |
Lappy Lake[edit]
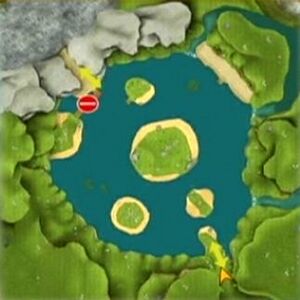
Lappy Lake is a lake. You can't actually drink any of the water from it, but you can find a wide variety of species of fish. A traveler named Sai has also been seen here, and apparently he has the Legendary Pattern which the great designer Townsend left behind. At this lake, you can also find Thyme, Cotton, the monkey that escaped from the zoo, and a broken bridge which you'll need Stanley to fix for you.
| Characters | Enemies |
|---|---|
| Bugs | Fish |
|
|
| Fruits/Vegetables | Flowers |
|
|
| Special Fruits/Vegetables | Special Items |
|
|
Jade Fields[edit]
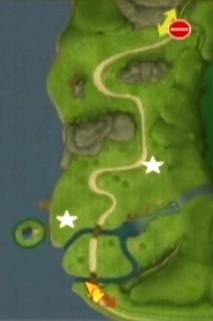
Jade Fields is a wide grassy area, which has the entrance to Lonesome Park. The vulture and the boar who have escaped from the zoo are here, so make sure you look out for them. You can also find one of Warren's pupils, who will take you to her secret island so you can help her with her research.
| Characters | Enemies |
|---|---|
|
|
| Bugs | Fish |
|
|
| Fruits/Vegetables | Flowers |
|
|
| Special Fruits/Vegetables | Special Items |
|
|
Dolphin Coast[edit]
This is the first wild area encountered in the game. Here you can find a dolphin who will happily give you a ride in exchange for sardines, two fishing piers, a ship that sails to Monolith Isle, the Apollo's Flower, and a professor. There's lots to do at Dolphin Coast, including playing games with Victor or groundhogs!
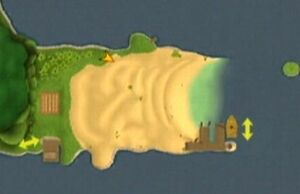
| Characters | Enemies |
|---|---|
|
|
| Bugs | Fish |
|
|
| Fruits/Vegetables | Flowers |
|
|
| Special Fruits/Vegetables | Special Items |
|
|
Whisker Woods[edit]
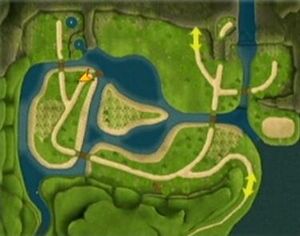
Whisker woods is the forest to the north of the village. You'll encounter dark green snakes here. There's an egret patrolling the centre island, so you'll have to watch your back if you pass through there. There is also the Roaring Falls and a famous hot spring. You'll be spending lots of time here, and grab an apple or cherry while you're at it!
| Characters | Enemies |
|---|---|
|
|
| Bugs | Fish |
|
|
| Fruits/Vegetables | Flowers |
|
|
| Special Fruits/Vegetables | Special Items |
| None |
|
Tail Heights[edit]
Tail Heights is a land that separates you from Sky Heights. Here you'll find the Highlands Village and the windmill that opens the gates to Sky Heights. The giraffe that escaped the zoo is here, and will play ring toss with you. You can easily get poisoned by the snakes if you're not quick, you might be attacked by the boars or gorrilas if your not careful, and you can find the Bramble Eating Insect here.
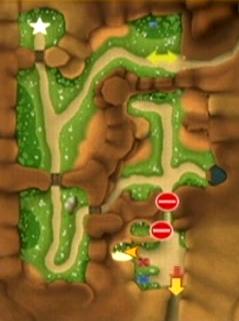
| Characters | Enemies |
|---|---|
|
|
| Bugs | Fish |
|
|
| Fruits/Vegetables | Flowers |
|
|
| Special Fruits/Vegetables | Special Items |
|
|
Sky Heights[edit]
Sky Heights is where the wizard, Theophilous, lives. There is also a poison bog, which you'll need to sniff around it in the first time coming - just make sure you don't fall in. After that, you can take the bridges without needing to sniff.
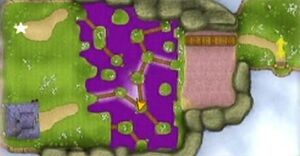
| Characters | Enemies |
|---|---|
|
|
| Bugs | Fish |
|
None |
| Fruits/Vegetables | Flowers |
|
|
| Special Fruits/Vegetables | Special Items |
| None |
|
Monolith Isle[edit]
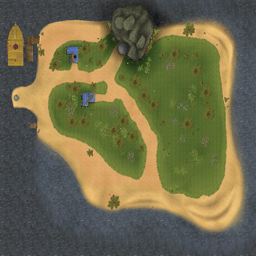
To get to Monolith Isle, you'll need to trade Sai a swordfish for some fuel to repair the lighthouse. When you first arrive, the isle will be under an everlasting night. Help Noel by finding the magic mirror, which some vultures probably stole. He will escort you to the Bubble Cave, where you can find the Water Crystal.
| Characters | Enemies |
|---|---|
|
|
| Bugs | Fish |
|
|
| Fruits/Vegetables | Flowers |
|
|
| Special Fruits/Vegetables | Special Items |
|
|
Bubble Cave[edit]
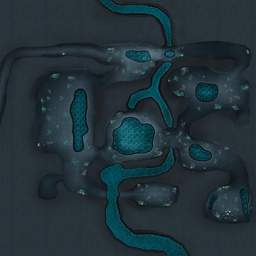
In the Bubble Cave lies the Water Crystal, which you'll need to retrieve for Theophilous. It's an easy area and it's simple to get through, despite all the alligators, poisonous snakes, and bats. If you have a red sea bream, try and find the dolphin that will make a bridge for you over the river. You'll need to help Noel to get in.
| Characters | Enemies |
|---|---|
| None |
|
| Bugs | Fish |
|
None |
| Fruits/Vegetables | Flowers |
|
None |
| Special Fruits/Vegetables | Special Items |
|
|
Crystal Caverns[edit]
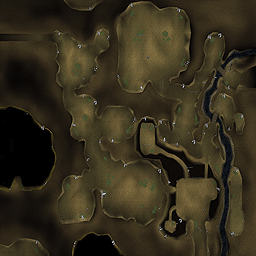
Crystal Caverns has the entrances to both Inferno Cave and Polar Fields. In here you'll find cobras and a bat if your looking for brass wire. There's also a komondo dragon, which will take more than a few rocks to stun. You'll need to be quick in here, but you can find some treasure chests or a Golden Butterfly in too!
| Characters | Enemies |
|---|---|
| None |
|
| Bugs | Fish |
|
None |
| Fruits/Vegetables | Flowers |
|
None |
| Special Fruits/Vegetables | Special Items |
|
|
Inferno Cave[edit]
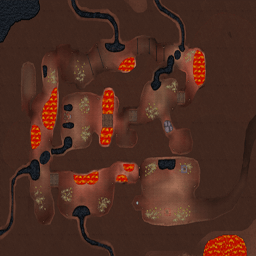
Pass through Crystal Caverns to get here. A bulldog named Percy lives outside the cave. He'll help you by making a flame retardant suit, once you've found him some komondo dragon skin and brass wire. You'll need to come here to get the Earth Crystal, which Theophilous sent you for. Make sure you stop often for a drink of water so you don't overheat. Move slowly so you don't wake the bats!
| Characters | Enemies |
|---|---|
|
|
| Bugs | Fish |
| None | None |
| Fruits/Vegetables | Flowers |
|
None |
| Special Fruits/Vegetables | Special Items |
|
|
Polar Fields[edit]
Get to Polar Fields by crossing the Crystal Caverns. Polar Fields is a magnificent sight! The snow on the ground, ice walls, polar bears... it's only here. Hugo will help you by giving you a warm suit if you bring him a ripe coconut from Dolphin Coast. You'll be sent here by Theophilous to get the Ice Crystal. If you have a hot stone handy, you can go fishing for a very rare fish. Make sure to bathe in the hot springs!
| Characters | Enemies |
|---|---|
|
|
| Bugs | Fish |
| None |
|
| Fruits/Vegetables | Flowers |
|
|
| Special Fruits/Vegetables | Special Items |
|
|
Lonesome Park[edit]
The first time you come here, Ivlet has caused whirlwinds to form, and they will suck you up if you stray near them. The buffalo here will challenge you to a chicken race. Once you find Bartholomew, he will teach you how to seal the whirlwinds away, angering Ivlet and spurring him to prepare for battle. Once the whirlwinds are gone it's an easy place to get through. The main point of the whirlwinds is so you can practice rock-throwing for the battle at Dimension Rift.
| Characters | Enemies |
|---|---|
| None |
|
| Bugs | Fish |
|
None |
| Fruits/Vegetables | Flowers |
|
|
| Special Fruits/Vegetables | Special Items |
|
None |
Gongoro Peak[edit]
Gongoro Peak is home to the buffalo, which are hard to get around - you'll have to crawl through the undergrowth or run really fast. The lion who escaped the zoo is here. Bruce lives in the tiny village at the base of the peak as a pioneer. You will come here to find Bartholomew, and many spectacular fish swim in the pond. You can find many treasure chests here! Bruce lives in the section with the gates, so he's safe from all the buffallo! Bruce is a Doberman or Siamese and tells your character that there was a traveler that sealed away whirlwinds...Bartholemew! At this point of the game, you will find Bartholemew and seal the whirlwinds, and a showdown with Ivlet!!!
| Characters | Enemies |
|---|---|
|
|
| Bugs | Fish |
|
|
| Fruits/Vegetables | Flowers |
|
|
| Special Fruits/Vegetables | Special Items |
|
|
Zoo[edit]
This is the only place in the game that you never have to go. Here, you can visit the animals that you have won against in minigame battles. Each game will give you eight colors of an accessory if you play the game a lot.
| Characters | Enemies |
|---|---|
|
None |
| Bugs | Fish |
|
|
| Fruits/Vegetables | Flowers |
| None | None |
| Special Fruits/Vegetables | Special Items |
| None |
|
Dimension Rift[edit]
The only way to get to Dimension Rift is for Theophilous and Bartholomew to take you there for the final battle with Ivlet and the Chaotic Dragon. The place is in the middle of nowhere, and its basically a floating platform. You'll see images of Dimension Rift when you are spying on Ivlet's whereabouts.
| Characters | Enemies |
|---|---|
|
|
| Bugs | Fish |
| None | None |
| Fruits/Vegetables | Flowers |
| None | None |
| Special Fruits/Vegetables | Special Items |
| None |
|
