Andrewm1234 (talk | contribs) (Edited the Pokemon encounter rates to be more accurate, according to information found from hacking the games, courtesy of Bulbapedia) |
m (cleanup) |
||
| (24 intermediate revisions by 18 users not shown) | |||
| Line 1: | Line 1: | ||
{{Header Nav|game=Pokémon Red and Blue}} | {{Header Nav|game=Pokémon Red and Blue}} | ||
[[ | After Mt. Moon, Route #4 will seem like a walk in the park. There are no trainers to challenge you and only one area where you can run into wild Pokémon. Be sure to collect Whirlwind (TM04) before you jump the hedge to reach Cerulean City. After you jump it, you won't be able to jump back over it to backtrack... | ||
__TOC__ | |||
[[File:Pokemon_RBY_Route 4.png|left|thumb|800px|Route 4]] | |||
{{-}} | {{-}} | ||
== Next stop: Cerulean City == | == Next stop: Cerulean City == | ||
{{sidebar|float=left|width= | {{sidebar|float=left|width=300px|title=No Going Back|contents=Once you jump over the ledge, you'll be stuck in Cerulean City. If you need to train your Pokémon further before facing Misty, there's a field just outside of the city that you can reach. This field is home to several species of wild Pokémon. Blue players can pick up a Sandshrew in the wild here.}} | ||
There's nothing particularly interesting on Route #4. All you'll find at this point is an item ball with '''TM04''' in it, which teaches a Pokémon the Whirlwind skill. However, it can only end wild Pokémon battles if it hits, and using them in a trainer or link battle will do nothing unlike the following generations. | |||
Be careful: When you jump down the wall to the southeast (and you'll have to in order to progress), you won't be able to go back! | There is a hidden '''Great Ball''' (not designated on the map), a powered-up Poké Ball. Look on the first plateau of sorts (formed by the ledges which one can jump on all sides); it will be around the middle of the highest level to the right as you exit Mt. Moon. Use this to catch an Abra soon. | ||
{{-| | |||
{| {{ | Be careful: When you jump down the wall to the southeast (and you'll have to in order to progress), you won't be able to go back! | ||
{{-}} | |||
| | |||
| | ===Pokémon found=== | ||
{{ContentBoxContainer}} | |||
{{Pokemon/Wild|RED}} | |||
{{Pokemon/Wild row|RB||019|8,10,12|40|bp=1}} | |||
{{Pokemon/Wild row|RB||021|8,10,12|35|bp=1}} | |||
{{Pokemon/Wild row|RB||023|6,8,10,12|25|bp=1}} | |||
{{Pokemon/Wild row}} | |||
|} | |} | ||
{{Pokemon/Wild|BLU}} | |||
{{Pokemon/Wild row|RB||019|8,10,12|40}} | |||
{{Pokemon/Wild row|RB||021|8,10,12|35}} | |||
{{Pokemon/Wild row|RB||027|6,8,10,12|25|bp=1}} | |||
{{Pokemon/Wild row}} | |||
|} | |||
{{Pokemon/Wild|YEL}} | |||
{{Pokemon/Wild row|YEL||019|10,12|15}} | |||
{{Pokemon/Wild row|YEL||021|8-12|55}} | |||
{{Pokemon/Wild row|YEL||027|8,10|15}} | |||
{{Pokemon/Wild row|YEL||056|9|15|bp=1}} | |||
|} | |||
</div> | |||
{{ContentBoxContainer}} | |||
{{Pokemon/New|title=#23 Ekans|contents={{PokePic|Ekans|left}} | |||
Ekans is interesting, because it comes with Wrap. Use it repeatedly against slower enemies to choke the life out of them while preventing them from ever getting an attack in (even when the opponent switches). On the downside, it doesn't really learn anything particularly interesting as it grows and evolves into {{bp|Arbok}}. | |||
}} | |||
</div> | |||
{{Footer Nav|game=Pokémon Red and Blue|prevpage=Mt. Moon | {{Footer Nav|game=Pokémon Red and Blue|prevpage=Mt. Moon|nextpage=Cerulean City}} | ||
Latest revision as of 01:40, 21 March 2024
After Mt. Moon, Route #4 will seem like a walk in the park. There are no trainers to challenge you and only one area where you can run into wild Pokémon. Be sure to collect Whirlwind (TM04) before you jump the hedge to reach Cerulean City. After you jump it, you won't be able to jump back over it to backtrack...

Next stop: Cerulean City[edit]
There's nothing particularly interesting on Route #4. All you'll find at this point is an item ball with TM04 in it, which teaches a Pokémon the Whirlwind skill. However, it can only end wild Pokémon battles if it hits, and using them in a trainer or link battle will do nothing unlike the following generations.
There is a hidden Great Ball (not designated on the map), a powered-up Poké Ball. Look on the first plateau of sorts (formed by the ledges which one can jump on all sides); it will be around the middle of the highest level to the right as you exit Mt. Moon. Use this to catch an Abra soon.
Be careful: When you jump down the wall to the southeast (and you'll have to in order to progress), you won't be able to go back!
Pokémon found[edit]
| Red | |||||||||||
|---|---|---|---|---|---|---|---|---|---|---|---|
| Pokémon | Level | Rate | |||||||||
| Rattata | 8,10,12 | 40% | |||||||||
| Spearow | 8,10,12 | 35% | |||||||||
| Ekans | 6,8,10,12 | 25% | |||||||||
| Blue | |||||||||||
|---|---|---|---|---|---|---|---|---|---|---|---|
| Pokémon | Level | Rate | |||||||||
| Rattata | 8,10,12 | 40% | |||||||||
| Spearow | 8,10,12 | 35% | |||||||||
| Sandshrew | 6,8,10,12 | 25% | |||||||||
| Yellow | |||
|---|---|---|---|
| Pokémon | Level | Rate | |
| Rattata | 10,12 | 15% | |
| Spearow | 8-12 | 55% | |
| Sandshrew | 8,10 | 15% | |
| Mankey | 9 | 15% | |

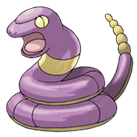
Ekans is interesting, because it comes with Wrap. Use it repeatedly against slower enemies to choke the life out of them while preventing them from ever getting an attack in (even when the opponent switches). On the downside, it doesn't really learn anything particularly interesting as it grows and evolves into Arbok.