Tag: Undo |
(finish adding inline images; remove inline images from sidebars and thumbnail captions; remove some excessive ellipses; Remove aftermath headings to improve flow; add info on Deku Sticks being more powerful that Kokiri Sword among other strategies) |
||
| Line 27: | Line 27: | ||
In the great entrance, you are greeted by {{im/oot|Enemies|Deku Babas|jpg}}. Unlike the withered ones you faced before, these Deku Babas are full of energy and will lunge at you. When you kill Deku Babas, be aware that sometimes they will regenerate. For every normal Deku Baba you kill, you can get a {{im/oot|Item|Deku Nut}}, an item that stuns enemies. Withered Deku Babas that do not lunge at you will yield {{im/oot|Item|Deku Sticks}}; you can also "stun" a normal Deku Baba after it lunges at you and chop it at the stem to get the sticks. Take note that the ones that regenerate and look blackened are the ones that are the {{im/oot|Enemies|withered Deku Babas}}. Deku Sticks will prove very useful throughout this dungeon. | In the great entrance, you are greeted by {{im/oot|Enemies|Deku Babas|jpg}}. Unlike the withered ones you faced before, these Deku Babas are full of energy and will lunge at you. When you kill Deku Babas, be aware that sometimes they will regenerate. For every normal Deku Baba you kill, you can get a {{im/oot|Item|Deku Nut}}, an item that stuns enemies. Withered Deku Babas that do not lunge at you will yield {{im/oot|Item|Deku Sticks}}; you can also "stun" a normal Deku Baba after it lunges at you and chop it at the stem to get the sticks. Take note that the ones that regenerate and look blackened are the ones that are the {{im/oot|Enemies|withered Deku Babas}}. Deku Sticks will prove very useful throughout this dungeon. | ||
When you have defeated the Deku Babas, take note of the plants growing on the ground. You can chop these with your sword to get {{im/oot|Pickups|rupees}}, {{im/oot|Item|Deku Nuts}}, and—most importantly—{{im/oot|Pickups|hearts}}! | When you have defeated the Deku Babas, take note of the plants growing on the ground. You can chop these with your sword to get {{im/oot|Pickups|rupees}}, {{im/oot|Item|Deku Nuts}}, and—most importantly—{{im/oot|Pickups|hearts}}! Grass like this that leaves its roots visible after cutting will regenerate after a short time. | ||
{{-}} | {{-}} | ||
| Line 55: | Line 55: | ||
=== To The Very Top === | === To The Very Top === | ||
{{OoT Skulltula|title=[[../Gold_Skulltulas|Gold Skulltula Sidequest]]|width=300px|contents= | {{OoT Skulltula|title=[[../Gold_Skulltulas|Gold Skulltula Sidequest]]|width=300px|contents= | ||
After activating the switch and platforms in the room with the compass, jump to the enclave to the left. Watch out for the Skulltula that drops from the ceiling. Inside the enclave is the {{im/oot|Enemy|Gold Skulltula | After activating the switch and platforms in the room with the compass, jump to the enclave to the left. Watch out for the Skulltula that drops from the ceiling. Inside the enclave is the {{im/oot|Enemy|Gold Skulltula}}. | ||
<div align=center>[[File:oot_deku_goldskulltula.jpg|150px|center|]]</div> | <div align=center>[[File:oot_deku_goldskulltula.jpg|150px|center|]]</div> | ||
| Line 69: | Line 69: | ||
Jump on the button near the lit torch to bring up three platforms. Quickly but carefully, jump across the platforms to the opposite end of the room. If you fall off the platforms during the jumping sequence, you'll have to start over—there isn't enough time to make a single mistake. Watch out for the {{im/oot|Enemy|Deku Baba|jpg}} in the pit and at the opposite end of the room, as well as the {{im/oot|Enemy|Skulltula}} guarding the side nook. Open the chest at the other end to find the {{im/oot|Item|Compass}}, ''which reveals the locations of all unopened treasure chests and the dungeon boss.'' | Jump on the button near the lit torch to bring up three platforms. Quickly but carefully, jump across the platforms to the opposite end of the room. If you fall off the platforms during the jumping sequence, you'll have to start over—there isn't enough time to make a single mistake. Watch out for the {{im/oot|Enemy|Deku Baba|jpg}} in the pit and at the opposite end of the room, as well as the {{im/oot|Enemy|Skulltula}} guarding the side nook. Open the chest at the other end to find the {{im/oot|Item|Compass}}, ''which reveals the locations of all unopened treasure chests and the dungeon boss.'' | ||
{{-|left}} | {{-|left}} | ||
[[File:oot_lantarn.jpg|thumb|left|Light the torch with a Deku Stick.]] | |||
On your way out, you may choose to begin a sidequest. In the nook to the left of the room as you entered, there is a {{im/oot|Enemy|Gold Skulltula}}. Read the sidebar for more information. | On your way out, you may choose to begin a sidequest. In the nook to the left of the room as you entered, there is a {{im/oot|Enemy|Gold Skulltula}}. Read the sidebar for more information. | ||
To leave the room, equip a {{im/oot|Item|Deku Stick}} and light it on fire with the lit torch. Carry the flaming stick to the unlit torch. Once the torch has been lit, the door will become unlocked. Be careful that your Deku Stick does not burn away. If you want to save a Deku Stick from burning after it has been lit, simply swing your sword, or stand still until the action button says "Put away". | To leave the room, equip a {{im/oot|Item|Deku Stick}} and light it on fire with the lit torch. Carry the flaming stick to the unlit torch. Once the torch has been lit, the door will become unlocked. Be careful that your Deku Stick does not burn away. If you want to save a Deku Stick from burning after it has been lit, simply swing your sword, or stand still until the action button says "Put away". | ||
{{-}} | {{-}} | ||
| Line 89: | Line 89: | ||
== The Basement == | == The Basement == | ||
{{OoT Skulltula|title=2 More Gold Skulltulas!|width=200px|contents=On the vine to get back to the top level, there is a {{im/oot|Enemy|Gold Skulltula | {{OoT Skulltula|title=2 More Gold Skulltulas!|width=200px|contents=On the vine to get back to the top level, there is a {{im/oot|Enemy|Gold Skulltula}}. Kill it with your {{im/oot|Item|Fairy Slingshot}} and then climb to get its token. | ||
<div align=center>[[File:LoZ_OOT_Skulltula_09.jpg|150px]]</div> | <div align=center>[[File:LoZ_OOT_Skulltula_09.jpg|150px]]</div> | ||
Next to the watergate, there is another {{im/oot|Enemy|Gold Skulltula | Next to the watergate, there is another {{im/oot|Enemy|Gold Skulltula}}. Again, kill it with your slingshot. You'll have to jump from one of the button switch ledges to get its token. | ||
<div align=center>[[File:LoZ_OOT_Skulltula_10.jpg|150px]]</div> | <div align=center>[[File:LoZ_OOT_Skulltula_10.jpg|150px]]</div> | ||
| Line 99: | Line 99: | ||
Once downstairs, there is a lot to do. As you probably landed in the water, you will notice three ledges circling you. On one side, there is a single large ledge with a block sitting atop it—ignore this one, it is inaccessible for now. On the opposite side, there are two other ledges: one large one, and one small one that barely sits above the waterline. Between the smaller ledges is a vine you can use to get back up to the main level of the dungeon. | Once downstairs, there is a lot to do. As you probably landed in the water, you will notice three ledges circling you. On one side, there is a single large ledge with a block sitting atop it—ignore this one, it is inaccessible for now. On the opposite side, there are two other ledges: one large one, and one small one that barely sits above the waterline. Between the smaller ledges is a vine you can use to get back up to the main level of the dungeon. | ||
[[File:LOZ_OOT_Stick-torch.jpg|thumb|left|Run with a lit stick to burn the web.]] | [[File:LOZ_OOT_Stick-torch.jpg|thumb|left|Run with a lit stick to burn the web.]] | ||
Climb onto the ledge with the button switch. Since there is shallow water, you can stand in it. Use this to climb onto the ledge. Press the switch to light the torch behind you. This will also catch the spider web on fire and reveal a small chest with a | Climb onto the ledge with the button switch. Since there is shallow water, you can stand in it. Use this to climb onto the ledge. Press the switch to light the torch behind you. This will also catch the spider web on fire and reveal a small chest with a {{im/oot|Pickup|Recovery Heart}} inside. | ||
You must light a | You must light a {{im/oot|Item|Deku Stick}} and carry it across the shallow water to the other end where you will light a spider web on fire. Beware of the single {{im/oot|Enemy|Deku Baba|jpg}}. Kill it if you need another Deku Stick. Once you have lit the web, go through the door it was previously blocking. | ||
{{-|left}} | |||
=== A Clue for Later === | === A Clue for Later === | ||
In this room there is another | [[File:LoZ_OOT_Shoot-eye.jpg|thumb|left|Shoot the eye to open the door.]] | ||
In this room there is another {{im/oot|Enemy|Deku Scrub}}. Use your shield to deflect its nuts back into it. Run after the scrub to get it to tell you how to defeat it's brothers. {{quote|The order is... 2 3 1. Twenty-three is number one! Do you think I'm a traitor?|Deku Scrub}} | |||
You'll have to defeat the scrub's brothers in that order. | You'll have to defeat the scrub's brothers in that order. | ||
Use your {{im/oot|Item|Fairy Slingshot}} to shoot the eye switch above the locked door. You'll see tons of these eye switches in later dungeons, so familiarize yourself with them. | |||
Use your | |||
{{-}} | {{-}} | ||
| Line 118: | Line 119: | ||
[[File:oot_deku_block1.jpg|thumb|right|Push the block, then climb it!]]{{-|left}} | [[File:oot_deku_block1.jpg|thumb|right|Push the block, then climb it!]]{{-|left}} | ||
At the other side, there is a Skulltula that you will need to defeat. You will notice that the door towers above you, and that there is a strange block just to the left of the door. Navi will tell you how to push and pull blocks, and this is your clue that you will need to push this block under the door, then climb it. In this room, there are shrubs that you may use to get items to replenish your health and ammo. You may need them for what lies ahead. | At the other side, there is a {{im/oot|Enemy|Skulltula}} that you will need to defeat. You will notice that the door towers above you, and that there is a strange block just to the left of the door. Navi will tell you how to push and pull blocks, and this is your clue that you will need to push this block under the door, then climb it. In this room, there are shrubs that you may use to get items to replenish your health and ammo. You may need them for what lies ahead. | ||
In the next room, there are two | In the next room, there are two {{im/oot|Enemy|withered Deku Babas}}, one lit torch, and two unlit torches. Light the unlit torches with a burning {{im/oot|Item|Deku Stick}} to open the locked door. Pretty easy fare, until… | ||
{{-}} | {{-}} | ||
=== A Heated Battle === | === A Heated Battle === | ||
{{OoT Skulltula|title=[[../Gold_Skulltulas|A Hidden Gold Skulltula!]]|width=300px|contents=<div align=center>[[File:LoZ_OOT_Skulltula_11.jpg|150px|center]]</div> Later in your quest, you will find a Bomb Bag and a Boomerang. When you obtain both of these items, come back to the room in the Deku Tree where the "dead end" is. Now that you can carry bombs, drop one right by the wall to blow open a path leading to a hidden door. Go inside this room and you will face a Big Skulltula. Kill it, then look at the wall on the left side of the room. A Gold Skulltula dwells there, but out of reach. Kill it with your Boomerang, then snag its token to add to your collection.}} | {{OoT Skulltula|title=[[../Gold_Skulltulas|A Hidden Gold Skulltula!]]|width=300px|contents=<div align=center>[[File:LoZ_OOT_Skulltula_11.jpg|150px|center]]</div> Later in your quest, you will find a {{im/oot|Upgrade|Bomb Bag}} and a {{im/oot|Item|Boomerang}}. When you obtain both of these items, come back to the room in the Deku Tree where the "dead end" is. Now that you can carry bombs, drop one right by the wall to blow open a path leading to a hidden door. Go inside this room and you will face a {{im/oot|Enemy|Big Skulltula}}. Kill it, then look at the wall on the left side of the room. A {{im/oot|Enemy|Gold Skulltula}} dwells there, but out of reach. Kill it with your Boomerang, then snag its token to add to your collection.}} | ||
As soon as you enter the next room, a Skulltula drops from the ceiling right in front of you! In the room there is a Deku Baba, and new enemies drop from the ceiling: {{im/oot|Enemy|Gohma Larva}}. The Gohma will actively follow you and try to jump on you — depending on where you run in the room, there will be 1-3 larvae trying to attack you, so be careful. The larvae won't drop unless you run underneath them. You can also shoot them before they hatch and fall to attack. If you stay inside the doorway that you first came in at, where the Skulltula once dropped down, aim your | As soon as you enter the next room, a {{im/oot|Enemy|Skulltula}} drops from the ceiling right in front of you! In the room there is a {{im/oot|Enemy|withered Deku Baba, and new enemies drop from the ceiling: {{im/oot|Enemy|Gohma Larva}}. The Gohma will actively follow you and try to jump on you — depending on where you run in the room, there will be 1-3 larvae trying to attack you, so be careful. The larvae won't drop unless you run underneath them. You can also shoot them before they hatch and fall to attack. If you stay inside the doorway that you first came in at, where the Skulltula once dropped down, aim your {{im/oot|Item|Fairy Slingshot}} towards the center of the ceiling. You will see three red-ish sacks hanging. Aim to hit these sacks right where they connect to the ceiling. If your aim is true, they will disintegrate and be rendered harmless. | ||
[[File:LoZ_OOT_Web-burn.jpg|thumb|left|Light the web with your Deku stick.]] | [[File:LoZ_OOT_Web-burn.jpg|thumb|left|Light the web with your Deku stick.]] | ||
In this same room, you have two spider webs to burn. One of them leads to a "dead end", but it can be opened later in the game when you have the right equipment ''(note: It contains another Gold Skulltula)''. The other path leads to a crawlspace tunnel back to the main underground chamber where you first entered, only this time you will be on the ledge that was impossible to reach before. | In this same room, you have two spider webs to burn. One of them leads to a "dead end", but it can be opened later in the game when you have the right equipment ''(note: It contains another {{im/oot|Enemy|Gold Skulltula}})''. The other path leads to a crawlspace tunnel back to the main underground chamber where you first entered, only this time you will be on the ledge that was impossible to reach before. | ||
{{-}} | {{-}} | ||
=== Yet Closer… === | === Yet Closer… === | ||
When you emerge from the tunnel, you will immediately notice a spider web in the floor as well as Deku Babas. You will have to light the web on fire, but you will notice that all of the torches on this ledge are too tall to reach. For now, ignore the web and run to the left—there is a block you can push into the water. It will form a sort of bridge you can use make it possible to get back up to this ledge without having to go through all of those puzzles again. | When you emerge from the tunnel, you will immediately notice a spider web in the floor as well as {{im/oot|Enemy|Deku Babas|jpg}}. You will have to light the web on fire, but you will notice that all of the torches on this ledge are too tall to reach. For now, ignore the web and run to the left—there is a block you can push into the water. It will form a sort of bridge you can use make it possible to get back up to this ledge without having to go through all of those puzzles again. | ||
Jump across the bridge that you just formed. Light a | Jump across the bridge that you just formed. Light a {{im/oot|Item|Deku Stick}} on the torch there, and quickly jump back across the gap. Swipe your deku stick on the web quickly, roll with it, or crouch by attempting to use your shield to light the web on fire. You will fall into the lowest level of the dungeon. | ||
<gallery> | <gallery> | ||
| Line 145: | Line 146: | ||
=== Twenty-three is Number One === | === Twenty-three is Number One === | ||
[[File:oot_deku_twostunned.jpg|thumb|left|Two stunned Deku Scrubs. Make sure you attack in the right order!]] | [[File:oot_deku_twostunned.jpg|thumb|left|Two stunned Deku Scrubs. Make sure you attack in the right order!]] | ||
You land in a pool of water. There is a vine behind you for you to crawl back up in case you need to. Here, there are hearts in the water. Dive to get them if you need them, then swim on to land. | You land in a pool of water. There is a vine behind you for you to crawl back up in case you need to. Here, there are {{im/oot|Pickup|hearts}} in the water. Dive to get them if you need them, then swim on to land. | ||
You'll need to remember what the earlier Deku Scrub told you: Twenty-three is Number One! You must attack the three deku scrubs in that order, counting from left to right. (That is, middle first, rightmost second, and leftmost third.) The scrubs turn a blue color when you have stunned them. After you defeat the last scrub, he will give you a hint on how to beat the "queen": attack when she's stunned. | You'll need to remember what the earlier {{im/oot|Enemy|Deku Scrub}} told you: Twenty-three is Number One! You must attack the three deku scrubs in that order, counting from left to right. (That is, middle first, rightmost second, and leftmost third.) The scrubs turn a blue color when you have stunned them. After you defeat the last scrub, he will give you a hint on how to beat the "queen": attack when she's stunned. | ||
Are you ready for what lies behind the next door…? | Are you ready for what lies behind the next door…? | ||
| Line 153: | Line 154: | ||
== Boss: Gohma == | == Boss: Gohma == | ||
The room will appear empty, but advancing to the center | The room will appear empty, but advancing to the center and looking at the ceiling with the {{im/oot|Item|Fairy Slingshot}} or in first-person view reveals the evil infecting the Great Deku Tree… | ||
{{boss|name=Parasitic Armored Arachnid: GOHMA | {{boss|name=Parasitic Armored Arachnid: GOHMA | ||
| Line 159: | Line 160: | ||
|imagesize=300px | |imagesize=300px | ||
|text=[[File:oot_gohma.jpg|thumb|right|Queen Gohma attacks!]] | |text=[[File:oot_gohma.jpg|thumb|right|Queen Gohma attacks!]] | ||
[[../Enemies#Gohma|Gohma]] ({{zw|Gohma|more info}}) is basically an over-sized version of the larva you fought previously. The eye of Gohma is her weak point, but only while it is flashing red. When it flashes, a hit from your | [[../Enemies#Gohma|Gohma]] ({{zw|Gohma|more info}}) is basically an over-sized version of the larva you fought previously. The eye of Gohma is her weak point, but only while it is flashing red. When it flashes, a hit from your {{im/oot|Item|Fairy Slingshot}} or a {{im/oot|Item|Deku Nut}} will render it vulnerable to your blade. | ||
You can't back out now, as the door behind you has shut. The only way forward is over Gohma's dead body — it's time to squash this bug. | You can't back out now, as the door behind you has shut. The only way forward is over Gohma's dead body — it's time to squash this bug. | ||
{{-}} | {{-}} | ||
=== Attack Strategy === | === Attack Strategy === | ||
{{sidebar|title=The stick is mightier than the knife|width=175px|float=left|contents=The {{im/oot|Item|Deku Sticks}} are actually twice as powerful as your {{im/oot|Equipment|Kokiri Sword}}. It is almost always more effective to use your Deku Sticks over your sword. Just keep in mind they are a limited resource you must continue to replenish left you run out.}} | |||
[[File:oot_gohma_stunned.jpg|thumb|right|Attack with your sword while Gohma is stunned!]] | [[File:oot_gohma_stunned.jpg|thumb|right|Attack with your sword while Gohma is stunned!]] | ||
* Wait until Gohma is on the ground and starts heading towards you. | * Wait until Gohma is on the ground and starts heading towards you. | ||
* Once Gohma's eye | * Once Gohma's eye changes color to red, shoot it with your {{im/oot|Item|Fairy Slingshot}} or a {{im/oot|Item|Deku Nut}} to stun Gohma. The slingshot will stun Gohma for a longer amount of time than a Deku Nut will. | ||
* Run up to Gohma and start slashing her eye while it's on the ground and stunned. Keep slashing it as many times as you can. | * Run up to Gohma and start slashing her eye while it's on the ground and stunned. Keep slashing it as many times as you can. | ||
* The most effective method to kill Gohma is to use | * The most effective method to kill Gohma is to use three jumping vertical chop with a {{im/oot|Item|Deku Stick}} when it is on the ground. Even if it survives the initial attack, it will not have much health left. | ||
{{-}} | {{-}} | ||
==== Avoid the Larval Eggs ==== | ==== Avoid the Larval Eggs ==== | ||
[[File:oot_gohma_eggs.jpg|thumb|left|While on the ceiling, Gohma tries to lay eggs. Stop her! If you fail, destroy the eggs quickly!]]{{-|right}} | [[File:oot_gohma_eggs.jpg|thumb|left|While on the ceiling, Gohma tries to lay eggs. Stop her! If you fail, destroy the eggs quickly!]]{{-|right}} | ||
After you attack Gohma, she will run off and start climbing up the wall. Keep an eye on Gohma, and when its eye is open, quickly shoot it with your Slingshot. If you don't hit Gohma when it is on the ceiling, she will lay three eggs that hatch into Gohma | After you attack Gohma, she will run off and start climbing up the wall. Keep an eye on Gohma, and when its eye is open, quickly shoot it with your {{im/oot|Item|Fairy Slingshot}}. If you don't hit Gohma when it is on the ceiling, she will lay three eggs that hatch into {{im/oot|Enemy|Gohma Larva}}—the tough critters you battled before. If eggs are dropped, try to slash or throw a {{im/oot|Item|Deku Nut}} at them before they hatch. Otherwise, quickly dispatch the larva. Obviously, it is wisest to prevent any of this from happening. | ||
If you shoot Gohma while she is on the ceiling preparing to drop eggs, she will fall to the ground stunned and ready to slash at again. Otherwise, if you aren't successful, just wait for Gohma to start chasing towards you again and hit her in the eye with the Slingshot or a Deku Nut before you start slashing again. Continue to attack Gohma when she is stunned until the monster is no more. | If you shoot Gohma while she is on the ceiling preparing to drop eggs, she will fall to the ground stunned and ready to slash at again. Otherwise, if you aren't successful, just wait for Gohma to start chasing towards you again and hit her in the eye with the Slingshot or a Deku Nut before you start slashing again. Continue to attack Gohma when she is stunned until the monster is no more. | ||
| Line 180: | Line 182: | ||
=== Vanquished! === | === Vanquished! === | ||
[[File:oot_deku_finish.jpg|thumb|right|You've finished the dungeon. Now snag that '''Heart Container'''!]] | [[File:oot_deku_finish.jpg|150px|thumb|right|You've finished the dungeon. Now snag that '''Heart Container'''!]] | ||
Now that you have killed Gohma, as her body disintegrates you will see a {{im/oot|Upgrade|Heart Container}} appear in its place. A blue light will appear in the room. Make sure you grab the heart container first to increase your life energy by one heart and then step into the blue light | Now that you have killed Gohma, as her body disintegrates you will see a {{im/oot|Upgrade|Heart Container}} appear in its place. As the door is still shut tight behind you since the beginning of the battle you need another way out. A blue light will appear in the room which will take you back outside. Make sure you grab the heart container first to increase your life energy by one heart and then step into the blue light. | ||
{{-}} | {{-}} | ||
== Aftermath == | == Aftermath == | ||
After all of this has transpired, you'd expect a great deal of revelation, wouldn't you? There's probably more than you expect. Either way, these answers will only lead to new | [[File:oot_kokiri_emerald.jpg|thumb|right|The Kokiri Emerald was what the desert man wanted...]] | ||
After all of this has transpired, you'd expect a great deal of revelation, wouldn't you? There's probably more than you expect. Either way, these answers will only lead to new questions. | |||
The first thing the Deku Tree does is congratulate Link after his safe return. Soon, however, he begins to tell the tale of the evil which has befallen him and the world. ''A tale of a wicked man of the desert who sought power…'' | The first thing the Deku Tree does is congratulate Link after his safe return. Soon, however, he begins to tell the tale of the evil which has befallen him and the world. ''A tale of a wicked man of the desert who sought power…'' | ||
The great tree further explains the origin of the land of Hyrule, as well as the origin of a great power – the Triforce – which was formed at the spot where the goddesses of creation left the world. | The great tree further explains the origin of the land of Hyrule, as well as the origin of a great power – the Triforce – which was formed at the spot where the goddesses of creation left the world. | ||
It is said that the Golden Triangles possess great | It is said that the Golden Triangles possess great power. | ||
After all Link has done, it is revealed that it is already too late for the Deku Tree. His fate was sealed even before Link entered his great mouth. Before he passes, however, the Deku Tree entrusts to Link the '''Kokiri Emerald''', which the desert man had sought to take. Now it is up to Link to protect it. | After all Link has done, it is revealed that it is already too late for the Deku Tree. His fate was sealed even before Link entered his great mouth. Before he passes, however, the Deku Tree entrusts to Link the '''Kokiri Emerald''', which the desert man had sought to take. Now it is up to Link to protect it. | ||
With his last words, the Deku Tree bids Link and Navi farewell, then dies. | With his last words, the Deku Tree bids Link and Navi farewell, then dies. | ||
| Line 203: | Line 201: | ||
=== Link Bids Farewell === | === Link Bids Farewell === | ||
[[File:oot_link_leaves.jpg|thumb|left|Saria bids farewell.]]{{-|right}} | [[File:oot_link_leaves.jpg|thumb|left|Saria bids farewell.]]{{-|right}} | ||
Link can no longer stay in the Kokiri | Link can no longer stay in the Kokiri village; so now the time has come for his journey to begin. Kokiri lore states that if a native Kokiri ever tried to venture into the world, they would surely die. It takes only a few steps to prove that Link is no native Kokiri. | ||
[[File:OOT fairyocarina.png|right|125px]] | [[File:OOT fairyocarina.png|right|125px]] | ||
Revision as of 04:53, 23 December 2018


The Deku Tree has granted Link a fairy and summoned them both to meet him. After obtaining both a sword and a shield, the equipment necessary to fight battles, Link stands before the huge tree.
The Deku Tree has become infected with a great evil, and he asks Link and Navi to venture inside him and kill it...
| Floor 1 | Floors 2 and 3 | Basement 1 |
|---|---|---|

|

|

|
Inside the Deku Tree

Be warned — you now face death! The inside of the Deku Tree opens up to reveal a large cavernous space filled with monsters!
In the great entrance, you are greeted by Deku Babas File:LoZ OoT enemy Deku Babas.jpg. Unlike the withered ones you faced before, these Deku Babas are full of energy and will lunge at you. When you kill Deku Babas, be aware that sometimes they will regenerate. For every normal Deku Baba you kill, you can get a Deku Nut ![]() , an item that stuns enemies. Withered Deku Babas that do not lunge at you will yield Deku Sticks File:OoT Items Deku Sticks.png; you can also "stun" a normal Deku Baba after it lunges at you and chop it at the stem to get the sticks. Take note that the ones that regenerate and look blackened are the ones that are the withered Deku Babas File:LoZ OoT enemy withered Deku Babas.png. Deku Sticks will prove very useful throughout this dungeon.
, an item that stuns enemies. Withered Deku Babas that do not lunge at you will yield Deku Sticks File:OoT Items Deku Sticks.png; you can also "stun" a normal Deku Baba after it lunges at you and chop it at the stem to get the sticks. Take note that the ones that regenerate and look blackened are the ones that are the withered Deku Babas File:LoZ OoT enemy withered Deku Babas.png. Deku Sticks will prove very useful throughout this dungeon.
When you have defeated the Deku Babas, take note of the plants growing on the ground. You can chop these with your sword to get rupees File:OoT Items rupees.png, Deku Nuts File:OoT Items Deku Nuts.png, and—most importantly—hearts File:OoT Items hearts.png! Grass like this that leaves its roots visible after cutting will regenerate after a short time.
Going Up

Take note of the spider web on the floor. You'll need to make use of it later. The only way to go is up for now, so begin to climb up the ladder or the vines. When you reach the top, begin heading right, as this leads upwards. If there are any gaps in the path, simply press the control stick in their direction and Link will jump—there will be areas ahead to familiarize yourself with jumping.
On your way up, there will be a chest that contains the Dungeon Map ![]() . Every dungeon has one of these, and they are really useful if you become lost.
. Every dungeon has one of these, and they are really useful if you become lost.
Getting the Fairy Slingshot


Do not climb the vines behind the map, as there are spiders called Skullwalltula ![]() that will knock you off if they face towards you. Instead, go forward, continuing your journey up. You'll come across a door you'll need to enter. Inside is a Deku Scrub File:OoT Items Deku Scrub.png, a type of hostile merchant. It is the mini-boss of this dungeon. You must use your shield to deflect its nuts back into the creature. When you hit him, he will try to run away—chase him. When caught, he offers advice and will unlock the door ahead.
that will knock you off if they face towards you. Instead, go forward, continuing your journey up. You'll come across a door you'll need to enter. Inside is a Deku Scrub File:OoT Items Deku Scrub.png, a type of hostile merchant. It is the mini-boss of this dungeon. You must use your shield to deflect its nuts back into the creature. When you hit him, he will try to run away—chase him. When caught, he offers advice and will unlock the door ahead.
Quickly jump across the platform to the other side. It will disintegrate below you, leaving no way to get back. In the chest is the dungeon item: the Fairy Slingshot ![]() . Note: in nearly every Zelda game, the dungeon item is used to defeat the dungeon's boss or solve its key puzzles. It is no different here.
. Note: in nearly every Zelda game, the dungeon item is used to defeat the dungeon's boss or solve its key puzzles. It is no different here.
On the left, there are vines you can climb to reach a chest containing a Recovery Heart ![]() . Use it if you need it.
. Use it if you need it.
Now, in order to get ammunition for your slingshot, chop the plants at the bottom of the main floor, the room you got the slingshot in, or any other grass outside of the dungeon until they drop Deku Seeds ![]() , hard seeds that hurt when they hit someone. You can buy them if you want from the shop in Kokiri Forest. Right now, you can carry up to 30 of them, but that limit can later be increased.
, hard seeds that hurt when they hit someone. You can buy them if you want from the shop in Kokiri Forest. Right now, you can carry up to 30 of them, but that limit can later be increased.
After this, turn around and look at the unreachable door. Just above it, there is a ladder that you will need to shoot with the slingshot. Make your way back to the main chamber to where you found the chest containing the map.
An alternate method for this room is to jump down from the door, ignoring the floating platform, and climbing up the vines to the slingshot chest. Then you can use the platform to quickly get back to the door, saving time and ammo.
To The Very Top

Gold Skulltulas make a scratching noise. Use this to find them. Shoot them and recover their tokens. There are a few more in this dungeon, and many in the overworld.

Remember where you couldn't proceed to climb before because of the Skullwalltulas File:LoZ OoT enemy Skullwalltulas.png blocking your way? Now you have a way to attack them! Target all three of them with your Fairy Slingshot ![]() , then make your way up the vines and head right. You can ignore the Big Skulltulas File:LoZ OoT enemy Big Skulltulas.png for now. Enter the lone door.
, then make your way up the vines and head right. You can ignore the Big Skulltulas File:LoZ OoT enemy Big Skulltulas.png for now. Enter the lone door.
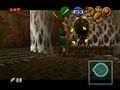
Jump on the button near the lit torch to bring up three platforms. Quickly but carefully, jump across the platforms to the opposite end of the room. If you fall off the platforms during the jumping sequence, you'll have to start over—there isn't enough time to make a single mistake. Watch out for the Deku Baba File:OoT Items Deku Baba.jpg in the pit and at the opposite end of the room, as well as the Skulltula File:OoT Items Skulltula.png guarding the side nook. Open the chest at the other end to find the Compass ![]() , which reveals the locations of all unopened treasure chests and the dungeon boss.
, which reveals the locations of all unopened treasure chests and the dungeon boss.

On your way out, you may choose to begin a sidequest. In the nook to the left of the room as you entered, there is a Gold Skulltula File:OoT Items Gold Skulltula.png. Read the sidebar for more information.
To leave the room, equip a Deku Stick ![]() and light it on fire with the lit torch. Carry the flaming stick to the unlit torch. Once the torch has been lit, the door will become unlocked. Be careful that your Deku Stick does not burn away. If you want to save a Deku Stick from burning after it has been lit, simply swing your sword, or stand still until the action button says "Put away".
and light it on fire with the lit torch. Carry the flaming stick to the unlit torch. Once the torch has been lit, the door will become unlocked. Be careful that your Deku Stick does not burn away. If you want to save a Deku Stick from burning after it has been lit, simply swing your sword, or stand still until the action button says "Put away".
Through the Spider Web
At the top of the Great Deku Tree, in the main hall, go to one of the three openings in the spiderweb. Big Skulltulas File:LoZ OoT enemy Big Skulltulas.png will plunge down from the ceiling, but they are easy to defeat. The spider will turn to reveal its soft belly, at this point strike it with your sword to kill it.
Peer over the edge back to the first floor. You need to jump towards the first floor log that is sticking out to fall to the giant spider web directly beneath the heart in the center of the room. If you do this correctly you will fall through the giant spiderweb you saw on the first floor. If you do not land in (or near) the center of the spiderweb, you will only bounce off instead of falling through. Climb to the top and try again!
-
Stab the big spider in its back.
-
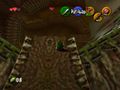
Jump towards the floating heart.
-
You'll fall through the spiderweb...
-
...and land in a new room.


The Basement

Next to the watergate, there is another Gold Skulltula File:OoT Items Gold Skulltula.png. Again, kill it with your slingshot. You'll have to jump from one of the button switch ledges to get its token.

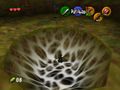
Once downstairs, there is a lot to do. As you probably landed in the water, you will notice three ledges circling you. On one side, there is a single large ledge with a block sitting atop it—ignore this one, it is inaccessible for now. On the opposite side, there are two other ledges: one large one, and one small one that barely sits above the waterline. Between the smaller ledges is a vine you can use to get back up to the main level of the dungeon.

Climb onto the ledge with the button switch. Since there is shallow water, you can stand in it. Use this to climb onto the ledge. Press the switch to light the torch behind you. This will also catch the spider web on fire and reveal a small chest with a Recovery Heart ![]() inside.
inside.
You must light a Deku Stick ![]() and carry it across the shallow water to the other end where you will light a spider web on fire. Beware of the single Deku Baba File:OoT Items Deku Baba.jpg. Kill it if you need another Deku Stick. Once you have lit the web, go through the door it was previously blocking.
and carry it across the shallow water to the other end where you will light a spider web on fire. Beware of the single Deku Baba File:OoT Items Deku Baba.jpg. Kill it if you need another Deku Stick. Once you have lit the web, go through the door it was previously blocking.
A Clue for Later

In this room there is another Deku Scrub File:OoT Items Deku Scrub.png. Use your shield to deflect its nuts back into it. Run after the scrub to get it to tell you how to defeat it's brothers.
The order is... 2 3 1. Twenty-three is number one! Do you think I'm a traitor?
—Deku Scrub
You'll have to defeat the scrub's brothers in that order.
Use your Fairy Slingshot ![]() to shoot the eye switch above the locked door. You'll see tons of these eye switches in later dungeons, so familiarize yourself with them.
to shoot the eye switch above the locked door. You'll see tons of these eye switches in later dungeons, so familiarize yourself with them.
Getting Dangerous


In the next room, you will notice a floating platform that is meant to carry you to the other side of a large pool of water. Unfortunately, exactly level with the waterline is a giant rotating bar of spikes that will most certainly do you harm if you touch it. Navi will tell you how to dive into the water. Surely this is a hint at how to solve this room's puzzle. In the water there is a timed switch that you can hit to lower the level of the water, and make it safe to use the platform to cross. There is plenty of time, so don't worry.

At the other side, there is a Skulltula File:OoT Items Skulltula.png that you will need to defeat. You will notice that the door towers above you, and that there is a strange block just to the left of the door. Navi will tell you how to push and pull blocks, and this is your clue that you will need to push this block under the door, then climb it. In this room, there are shrubs that you may use to get items to replenish your health and ammo. You may need them for what lies ahead.
In the next room, there are two withered Deku Babas File:OoT Items withered Deku Babas.png, one lit torch, and two unlit torches. Light the unlit torches with a burning Deku Stick ![]() to open the locked door. Pretty easy fare, until…
to open the locked door. Pretty easy fare, until…
A Heated Battle

As soon as you enter the next room, a Skulltula File:OoT Items Skulltula.png drops from the ceiling right in front of you! In the room there is a {{im/oot|Enemy|withered Deku Baba, and new enemies drop from the ceiling: Gohma Larva File:OoT Items Gohma Larva.png. The Gohma will actively follow you and try to jump on you — depending on where you run in the room, there will be 1-3 larvae trying to attack you, so be careful. The larvae won't drop unless you run underneath them. You can also shoot them before they hatch and fall to attack. If you stay inside the doorway that you first came in at, where the Skulltula once dropped down, aim your Fairy Slingshot ![]() towards the center of the ceiling. You will see three red-ish sacks hanging. Aim to hit these sacks right where they connect to the ceiling. If your aim is true, they will disintegrate and be rendered harmless.
towards the center of the ceiling. You will see three red-ish sacks hanging. Aim to hit these sacks right where they connect to the ceiling. If your aim is true, they will disintegrate and be rendered harmless.

In this same room, you have two spider webs to burn. One of them leads to a "dead end", but it can be opened later in the game when you have the right equipment (note: It contains another Gold Skulltula File:OoT Items Gold Skulltula.png). The other path leads to a crawlspace tunnel back to the main underground chamber where you first entered, only this time you will be on the ledge that was impossible to reach before.
Yet Closer…
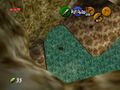
When you emerge from the tunnel, you will immediately notice a spider web in the floor as well as Deku Babas File:OoT Items Deku Babas.jpg. You will have to light the web on fire, but you will notice that all of the torches on this ledge are too tall to reach. For now, ignore the web and run to the left—there is a block you can push into the water. It will form a sort of bridge you can use make it possible to get back up to this ledge without having to go through all of those puzzles again.
Jump across the bridge that you just formed. Light a Deku Stick ![]() on the torch there, and quickly jump back across the gap. Swipe your deku stick on the web quickly, roll with it, or crouch by attempting to use your shield to light the web on fire. You will fall into the lowest level of the dungeon.
on the torch there, and quickly jump back across the gap. Swipe your deku stick on the web quickly, roll with it, or crouch by attempting to use your shield to light the web on fire. You will fall into the lowest level of the dungeon.
-
Carry the flame across the block bridge.
-
Swipe the stick, or roll over the web to set it ablaze.


Twenty-three is Number One

You land in a pool of water. There is a vine behind you for you to crawl back up in case you need to. Here, there are hearts File:OoT Items hearts.png in the water. Dive to get them if you need them, then swim on to land.
You'll need to remember what the earlier Deku Scrub File:OoT Items Deku Scrub.png told you: Twenty-three is Number One! You must attack the three deku scrubs in that order, counting from left to right. (That is, middle first, rightmost second, and leftmost third.) The scrubs turn a blue color when you have stunned them. After you defeat the last scrub, he will give you a hint on how to beat the "queen": attack when she's stunned.
Are you ready for what lies behind the next door…?
Boss: Gohma
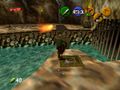
The room will appear empty, but advancing to the center and looking at the ceiling with the Fairy Slingshot ![]() or in first-person view reveals the evil infecting the Great Deku Tree…
or in first-person view reveals the evil infecting the Great Deku Tree…


Gohma (more info) is basically an over-sized version of the larva you fought previously. The eye of Gohma is her weak point, but only while it is flashing red. When it flashes, a hit from your Fairy Slingshot ![]() or a Deku Nut
or a Deku Nut ![]() will render it vulnerable to your blade.
will render it vulnerable to your blade.
You can't back out now, as the door behind you has shut. The only way forward is over Gohma's dead body — it's time to squash this bug.
Attack Strategy

- Wait until Gohma is on the ground and starts heading towards you.
- Once Gohma's eye changes color to red, shoot it with your Fairy Slingshot
 or a Deku Nut
  to stun Gohma. The slingshot will stun Gohma for a longer amount of time than a Deku Nut will.
 - Run up to Gohma and start slashing her eye while it's on the ground and stunned. Keep slashing it as many times as you can.
- The most effective method to kill Gohma is to use three jumping vertical chop with a Deku Stick
 when it is on the ground. Even if it survives the initial attack, it will not have much health left.
Avoid the Larval Eggs

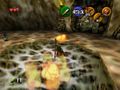
After you attack Gohma, she will run off and start climbing up the wall. Keep an eye on Gohma, and when its eye is open, quickly shoot it with your Fairy Slingshot ![]() . If you don't hit Gohma when it is on the ceiling, she will lay three eggs that hatch into Gohma Larva File:OoT Items Gohma Larva.png—the tough critters you battled before. If eggs are dropped, try to slash or throw a Deku Nut
. If you don't hit Gohma when it is on the ceiling, she will lay three eggs that hatch into Gohma Larva File:OoT Items Gohma Larva.png—the tough critters you battled before. If eggs are dropped, try to slash or throw a Deku Nut ![]() at them before they hatch. Otherwise, quickly dispatch the larva. Obviously, it is wisest to prevent any of this from happening.
at them before they hatch. Otherwise, quickly dispatch the larva. Obviously, it is wisest to prevent any of this from happening.
If you shoot Gohma while she is on the ceiling preparing to drop eggs, she will fall to the ground stunned and ready to slash at again. Otherwise, if you aren't successful, just wait for Gohma to start chasing towards you again and hit her in the eye with the Slingshot or a Deku Nut before you start slashing again. Continue to attack Gohma when she is stunned until the monster is no more.
Vanquished!

Now that you have killed Gohma, as her body disintegrates you will see a Heart Container ![]() appear in its place. As the door is still shut tight behind you since the beginning of the battle you need another way out. A blue light will appear in the room which will take you back outside. Make sure you grab the heart container first to increase your life energy by one heart and then step into the blue light.
appear in its place. As the door is still shut tight behind you since the beginning of the battle you need another way out. A blue light will appear in the room which will take you back outside. Make sure you grab the heart container first to increase your life energy by one heart and then step into the blue light.
Aftermath

After all of this has transpired, you'd expect a great deal of revelation, wouldn't you? There's probably more than you expect. Either way, these answers will only lead to new questions.
The first thing the Deku Tree does is congratulate Link after his safe return. Soon, however, he begins to tell the tale of the evil which has befallen him and the world. A tale of a wicked man of the desert who sought power… The great tree further explains the origin of the land of Hyrule, as well as the origin of a great power – the Triforce – which was formed at the spot where the goddesses of creation left the world.
It is said that the Golden Triangles possess great power.
After all Link has done, it is revealed that it is already too late for the Deku Tree. His fate was sealed even before Link entered his great mouth. Before he passes, however, the Deku Tree entrusts to Link the Kokiri Emerald, which the desert man had sought to take. Now it is up to Link to protect it. With his last words, the Deku Tree bids Link and Navi farewell, then dies.
Link Bids Farewell

Link can no longer stay in the Kokiri village; so now the time has come for his journey to begin. Kokiri lore states that if a native Kokiri ever tried to venture into the world, they would surely die. It takes only a few steps to prove that Link is no native Kokiri.
Saria meets Link at the bridge leading to the exit and presents him with her Fairy Ocarina ![]() as a memento.
as a memento.