(20 intermediate revisions by the same user not shown)
Line 1:
Line 1:
{{stub}}
{{Header Nav|game=Ultima IV: Quest of the Avatar}}
{{Header Nav|game=Ultima IV: Quest of the Avatar}}
== In-game hints ==
:'' See also: [[Ultima IV: Quest of the Avatar (NES)/Dungeons Despise and Covetous]]''
{|{{prettytable|notwide=1}}
* Enter from Despise, north of Britain.
|-
* Get the Yellow and the Orange stones.
|
* Get two Key Parts from the Altars of Courage and of Love.
LOOK? A guard (in Empath Abbey)
* Leave from Covetous and use a Blink spell.
<br> NAME? the pass guard (She)
<br> HEALTH? Fine.
<br> JOB? I guard the passages.
<br> PASSAGES? There is no danger.
<br> DANGER? Well not compared to a dungeon altar room!
<br> Hast thou solved the altars?
<br> N: From them a three part key is gained, needed to enter the chamber of the codex!
<br> Y: Good.
|-
|
LOOK? A flighty jester (in the Lycaeum)
<br> NAME? Zajac (he)
<br> JOB? To entertain!
<br> ENTERTAIN? Ah, not now.
<br> HEALTH? Unhappy.
<br> UNHAPPY? Because my friend Chuckles won't tell me his secret!
<br> Dost thou know chuckles?
<br> N: He lives in the castle Britannia ask him of his clue!
<br> Y: Why dost thou not ask him for his clue!
|-
|
LOOK? A bouncing jester (in Castle Britannia)
<br> NAME? Chuckles (he)
<br> HEALTH? Good, thanks.
<br> JOB? I am the royal jester
<br> JESTER? Welcome unto the castle Britannia!
<br> Hast thou an ankh?
<br> N: Then why art thou here?
<br> Y: Then enter in peace!
<br> CLUE? Speak ye unto the waters of the well and ask of altars!
|-
|
LOOK? Water (in Castle Britannia)
<br> NAME? Water (it)
<br> HEALTH? Fine.
<br> JOB? I hold a secret.
<br> SECRET? To what?
<br> ALTAR? There are three altar rooms which connect the bottom levels of all eight dungeons!
<br> More?
<br> N: Oh.
<br> Y: If the correct colors of stones are used in the altars, a key of three parts can be gained!
|}
=== The altar rooms ===
== Dungeons Despise and Covetous ==
{|{{prettytable|notwide=1}}
{|{{prettytable|sortable=1|text center=1}}
|-
! L. !! Map of the floor !! Walkthrough
|
LOOK? A stately wizard (in the Lycaeum)
<br> NAME? Tymus (He)
<br> HEALTH? Very well, thanks!
<br> JOB? To welcome thee!
<br> WELCOME? Yes, welcome to the Lycaeum, the keep of truth!
<br> Know ye how many cities follow the principles of truth?
<br> N: Travel and learn!
<br> Y: How many?
<br> FOUR? The dungeon altar rooms need four stones each!
|-
|
<br> LOOK? An injured warrior (in the Lycaeum).
<br> WARRIOR? No more!
<br> NAME? a fighter (He)
<br> JOB? None now!
<br> HEALTH? My wounds are grievous!
<br> WOUNDS? I lost in a dungeon altar room!
<br> Hast thou seen one?
<br> N: They connect the dungeons unto each other!
<br> Y: Notice that each of the three rooms connect to four dungeons each!
|-
|
LOOK? A wounded fighter (in Jhelom)!
<br> NAME? Bengrod (He)
<br> HEALTH? Poor.
<br> JOB? I search the dungeons!
<br> DUNGEON? I fell in the dungeon 'Destard'.
<br> Hast thou found its altar room?
<br> N: Find it!
<br> Y: It connects with Covetous, Shame and Hythloth!
<br> ROOM? Therein use the stones found in the connecting dungeons!
|-
|
LOOK? A ranger engrossed in training (in Serpent's Hold).
<br> NAME? a ranger. (He)
<br> HEALTH? Excellent.
<br> JOB? I am training!
<br> TRAINING? I train so that I might survive the dungeons!
<br> DUNGEON? I plan to conquer the secret of the altar rooms.
<br> Dost thou?
<br> N: Wimp.
<br> Y: Ask our teacher about the rooms for she knows much!
|-
|
LOOK? The training master (in Serpent's Hold).
<br> NAME? Shyra (She)
<br> HEALTH? Prime.
<br> JOB? I train warriors to fight with courage!
<br> TRAIN? Train well and thy courage can grow with confidence.
<br> Wilt thou train?
<br> N: Pity.
<br> Y: Bravo!
<br> ROOM? In the altar room of courage use the red, orange, purple and white stones!
|-
|
LOOK? A burly guard (in Serpent's Hold)
<br> NAME? a treasure guard (He)
<br> HEALTH? Excellent.
<br> JOB? We guard our lord's treasure.
<br> TREASURE? This treasure is not for thee.
<br> Dost thou intend to steal our lord's treasure?
<br> N: Wise move!
<br> Y: Fool!
<br> DUNGEONS? Seek out Durham for knowledge of dungeons.
|-
|
LOOK? A tall fighter (in Serpent's Hold).
<br> NAME? Durham (He)
<br> HEALTH? Fairly well.
<br> JOB? I quest for glory!
<br> QUEST? I feel that when on a quest my life has purpose!
<br> Art thou on a quest?
<br> N: What a loss.
<br> Y: Then thy life has meaning!
<br> DUNGEONS? The altar room of courage gives the third part of a key.
|}
=== The eight stones ===
{|{{prettytable|notwide=1}}
! Yellow stone of Compassion
|-
|
LOOK? A drunken fighter (in Britain)
<br> NAME? Joe (He)
<br> HEALTH? And a bottle of...
<br> JOB? Yo ho ho... and a bottle... of rum... hic...
<br> RUM? Rum... hic...
<br> Give me rum?...
<br> N: Ah, be a joe!
<br> Y: Thanxth... my friend Joe can help with the stones... hic...
<br> STONE? The yellow stone is in the dungeon Despise...
|-
! Blue stone of Honesty
|-
|
LOOK? A battered mage (in Moonglow).
<br> NAME? Tyrone (He)
<br> HEALTH? Fading.
<br> JOB? I used to search for the blue stone.
<br> STONE? The stone of honesty is found on an altar in the dungeon of Deceit.
<br> Wilt thou search?
<br> N: Hmm.
<br> Y: Know its uses!
<br> USE? It is used within the dungeon altar rooms and in the abyss.
|-
! Red stone of Valor
|-
|
LOOK? A grave fighter (in Jhelom).
<br> NAME? Gravnor (He)
<br> HEALTH? So so.
<br> JOB? I search the dungeons.
<br> DUNGEON? I seek the red stone.
<br> STONE? It is found on an altar!
<br> Dost thou have it?
<br> N: It lies in the dungeon Destard!
<br> Y: No wonder I can't find it!
|-
|
LOOK? A strange person (in Jhelom)
<br> NAME? X (He)
<br> HEALTH? O.K.
<br> JOB? I seek the stone
<br> STONE? The red stone.
<br> RED? Red is for valor a virtue of the avatar!
<br> Art thou an avatar?
<br> N: Then thou shalt need the red stone in one altar room to get the third part of a key!
<br> Y: Wow!
|-
! Green stone of Justice
|-
|
LOOK? A wandering druid (in Yew).
<br> NAME? Druid (She)
<br> HEALTH? Well.
<br> JOB? I seek justice.
<br> JUST? Learn at the shrine!
<br> SHRINE? The shrine is to the east then north!
<br> Dost thou have the rune?
<br> N: Ask Talfourd for he knows of the rune.
<br> Y: Now learn the mantra, and seek the green stone in 'Wrong'!
|-
! Orange stone of Sacrifice
|-
|
LOOK? A happy tinker (in Minoc).
<br> NAME? Mischief (She)
<br> HEALTH? O.K. I guess.
<br> JOB? This and that.
<br> THIS? And that...
<br> RUNE? The rune of sacrifice is hard to get. It lies within the fires of the forge!
<br> Hast thou the rune?
<br> N: Return when thou dost find it!
<br> Y: Then ask Alkerion of the stone!
|-
|
LOOK? An old ragged man (in Minoc).
<br> NAME? Alkerion (He)
<br> HEALTH? I am old and weak.
<br> JOB? I am a peasant, I hear many things.
<br> HEAR? What does thou wish to know?
<br> STONE? The stone of sacrifice is orange in color and used in the altar rooms of love and courage!
<br> Seeketh thou?
<br> N: Oh.
<br> Y: Good luck.
|-
! Purple stone of Honor
|-
|
LOOK? A wandering mage (in Trinsic)
<br> NAME? Quix (She)
<br> HEALTH? Adequate.
<br> JOB? I seek the skeleton!
<br> SKELETON? It knows a great secret.
<br> SECRET? About the purple stone of honor!
<br> Dost thou have the purple stone?
<br> N: Seek it for it is very useful!
<br> Y: Use it wisely!
|-
|
LOOK? A bony skeleton (in Trinsic)
<br> NAME? Skitle (It)
<br> HEALTH? What do you mean?
<br> JOB? I hail from dungeon deep.
<br> DUNGEON? I come from the dungeon 'Shame'!
<br> Ever been there?
<br> N: It holds items thou shalt need.
<br> Y: Good.
<br> STONE? I have seen the purple stone used in the altars of truth and courage!
|-
|-
! White stone of Spirituality
| D1 || [[File:U4_AMI d3 Despise L1.png]] ||align=left| [[File:U4_SMS d3 Despise L1rooms.png|left]] The west fountain refreshes all health, the east one is poisonous. There are two rooms and three doors.
|-
|-
|
| D2 || [[File:U4_AMI d3 Despise L2.png]] ||align=left| [[File:U4_SMS d3 Despise L2rooms.png|left]] In the first room, a trigger under a chest makes the bridge collapse; in order to restore it, all you have to do is to walk on the remaining west portion of the bridge itself.
LOOK? A radiant ranger (in Skara Brae).
<br> NAME? Mitre (She)
<br> HEALTH? I am fine.
<br> JOB? I am reading the wizard's journal.
<br> JOURNAL? It tells of the white stone.
<br> STONE? It is no longer in the dungeon Hythloth, it is gone!
<br> Wilt thou try to recover it?
<br> N: Too bad.
<br> Y: Ask of the stone at the Tap in Trinsic!
|-
|-
|
| D3 || [[File:U4_AMI d3 Despise L3.png]] ||align=left| This is the cross-shaped portion of the floor. <br>Take the south stairs first, in order to reach the Stone on the 5th floor. <br><br> In the circular portion of the floor there are 4 chests (6 in the Master System).
Terran (in Trinsic) says: "Welcome to the Grog Tap. What'll it be, food or grog?"
<br> FOOD? Our specialty is brown beans, which costs 3 GP. How many plates would you like?
<br> GROG? Here's a mug of our best. That'll be 2 GP.
<br> WHITE STONE? Hmmm, now let me see... Yes, it was the old hermit... Sloven! He is tough to find, lives near Lock Lake I hear.
|-
|-
|
| D4 || [[File:U4_AMI d3 Despise L4.png]] ||align=left| [[File:U4_SMS d3 Despise L4rooms.png|left]] This is the larger portion of the floor. <br>There are secret passages in the central room; in order to reveal them, the triggers are in the side "alcoves", along the walls. Both fountains cure poison. The first magic orb is on this floor: it raises Dexterity by 5, but deals 200 damages. The stairs lead to two "dead-end areas" full of chests.
LOOK? An old hermit (in Cove).
<br> NAME? Sloven (He)
<br> HEALTH? I am well.
<br> JOB? I am a recluse.
<br> RECLUSE? I have withdrawn from society.
<br> STONE? Only the ghost of Isaac who haunts the inn at Skara Brae can tell thee.
<br> Hast thou seen him?
<br> N: Stay at the inn until he shows himself!
<br> Y: Ask him!
|-
|-
|
| D5 || [[File:U4_AMI d3 Despise L5.png]] ||align=left| [[File:U4_SMS d3 Despise L5rooms.png]] <br>It is easy to miss this floor. Coming from the larger area of the 4th floor, there is a secret passage on the north side of the single-tile stair room: the '''Yellow Stone of Compassion''' is hidden there. In the central room, defeat all enemies, then seek carefully for triggers in the walls: one trigger activates the next one, until a northwards bridge appears.
LOOK? A ghostly figure (in Skara Brae)
<br> NAME? Isaac (He)
<br> HEALTH? I am many years dead.
<br> JOB? I haunt this inn!
<br> HAUNT? The quest is not complete!
<br> Art thou on the quest?
<br> N: Alas.
<br> Y: Hope!
<br> STONE? The white stone sits atop the Serpent's Spine. It can only be reached by one who floats within the clouds.
|-
|-
! Black stone of Humility
| D6 || [[File:U4_AMI d3 Despise L6.png]] ||align=left| [[File:U4_SMS d3 Despise L6rooms.png|left]] The fountain fully refreshes health. There are 20 chests (42 in the Master System).
|-
|-
|
| D7 || [[File:U4_AMI d3 Despise L7.png]] ||align=left| Climb back to floor 3, and take any of the other stairs. Short passages lead to this floor. <br>A secret passage allows to bypass the long corridor.
LOOK? A weeping skeleton (in Magincia ruins).
<br> NAME? Splot (It)
<br> HEALTH? Been better.
<br> JOB? I regret.
<br> REGRET? I was proud, strip thyself of conceits, only the humble are pure!
<br> HUMBLE? The root from which all virtues grow!
<br> Dost thou seek purity?
<br> N: Fool!
<br> Y: Then ask the snake of the rune and stone!
|-
|
LOOK? A mean looking viper (in Magincia ruins)!
<br> NAME? Nate (He)
<br> HEALTH? Bloodthirsty!
<br> JOB? I bring death to all life in Magincia!
<br> RUNE? The sacred rune of humility was banished from this city. Ask Barren in Paws!
<br> STONE? Those who seek the black stone need ask at the pub in Britain!
|-
|
Sam (in Britain) says: "Welcome to Jolly Spirits. What'll it be, food or grog?"
<br> FOOD? Our specialty is Lamb Chops, which costs 4 GP. How many plates would you like?
<br> GROG? Here's a mug of our best. That'll be 2 GP.
<br> BLACK STONE? Ah, the Black Stone. Yes, I've heard of it, but the only one who knows where it lies is the wizard Merlin.
|-
|
LOOK? A mystical wizard (in Cove).
<br> NAME? Merlin (He)
<br> HEALTH? Fine.
<br> JOB? I use magic.
<br> Dost thou study magic?
<br> N: Too bad.
<br> Y: Best of luck with thy studies!
<br> STONE? The black stone is caught in a moon gate!
<br> GATE? Stand where the gate of both moons dark shall appear. Search when the moons go dark!
| D8 || [[File:U4_AMI d3 Despise L8.png]] ||align=left| [[File:U4_SMS d3 Despise L8rooms.png]] <br>Three Magic Orbs are found on this floor. <br>There is a way to get through all rooms without backtracking (except from the Magic Balls). First, from the stairs, start by going east. In the first room, go north for the first Ball, then continue east. At the second room, exit to the north. In the third room, the obvious exit leads to the second orb, but you have to step on a series of four wall triggers in order to open the secret passage westwards (note that sleep cures poison). In the fourth room, the chest under the reaper activates a ring of fire fields. In the fifth room leave to the south. In the sixth and last room, go south for the last magic orb, then use several "Dispel" spells to leave westwards. After that, the Companions will eventually reach the Altar Room. <br><br>'''BUG ALERT:''' in the Master System, the last Magic Ball is unreachable.
|-
|-
| Truth
| A || [[File:U4 SMS d0 Altar3.png]] ||align=left| The Companions enter the '''Altar Room of Love''' from Despise from the north. Covetous is to the west. The enemies are always randomly generated. <br>You lack one stone to use this altar.
| C8 || [[File:U4_AMI d6 Covetous L8.png]] ||align=left| [[File:U4_SMS d6 Covetous L8rooms.png|left]] The Companions should come from the Altar Room of Love, that is to the north.
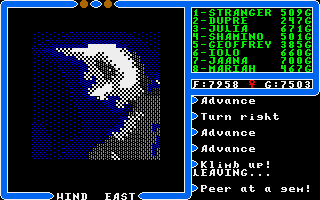
| C7-b || [[File:U4_AMI d6 Covetous L7.png]] ||align=left| [[File:U4_SMS d6 Covetous L7rooms1.png|left]] Peer at a gem to locate the secret passage that leads to the '''Orange Stone of Sacrifice'''.
Enter the dungeons from their mainland entrance, go through the Altar Room and emerge from a different dungeon with oversea entrance. From there, either backtrack or use the Gate spell. Start from Dungeon Hythloth, because the White stone is required in all of the three Altar Rooms.
<br>
=== Magic sphere locations ===
{|{{prettytable|notwide=1|text center=1}}
|-
|-
! Dungeon !! Attributes <br> raised !! Damage
| A || [[File:U4 SMS d0 Altar3.png]] ||align=left| After getting the 7th stone, go back to the two '''altar rooms of Love and of Courage''' and collect the last two thirds of the '''Three-Parts Key'''. The enemies are always randomly generated.
|-
|-
| Destard
| C7-a || [[File:U4_AMI d6 Covetous L7.png]] ||align=left| [[File:U4_SMS d6 Covetous L7rooms2.png|left]] In the central room to the east, step in the center-left tile to open a secret passage that goes upstairs <br><br>'''BUG ALERT:''' in some versions (Amiga, Atari ST) the secret passage is bugged, the second stairs up are missing, and the only way up is by casting a "Y-up" spell.
| Str
| 200
|-
|-
| Deceit
| C6 || [[File:U4_AMI d6 Covetous L6.png]] ||align=left| There are three magic orbs on this floor. Each of them raises Strength and Dexterity by 5, but deals 400 damages. <br>The single ladder up leads to corridors with 14 chests (28 in the Master System port), and also one of the two double-ladders leads to a corridor with 15 chests (30 in the Master System).
| Int
| 200
|-
|-
| Despise
| C5 || [[File:U4_AMI d6 Covetous L5.png]] ||align=left| Only the single-tile room allows to reach up to the 4th floor. There aare 29 chests on this floor (61 in the Master System).
| Dex
| 200
|-
|-
| Shame
| C4 || [[File:U4_AMI d6 Covetous L4.png]] ||align=left| [[File:U4_SMS d6 Covetous L4rooms.png|left]] Coming from below, the way "up" in the two rooms is in plain view. If you want to go back down, prepare four or more "Dispel" spells and search for the triggers that open the secret passages. There are just two rooms on the floor, the rest are doors. Eight chests in most ports, but sixteen in the Master System.
| Str/Int
| 400
|-
|-
| Covetous
| C3 || [[File:U4_AMI d6 Covetous L3.png]] ||align=left| [[File:U4_SMS d6 Covetous L3rooms.png]] <br>The fourth Magic Orb is on this floor. In order to get there, a trigger is in the north-east corner of the room next to it.
| Str/Dex
| 400
|-
|-
| Wrong
| C2 || [[File:U4_AMI d6 Covetous L2.png]] ||align=left| A floor without obstacles.
| Dex/Int
| 400
|-
|-
| Hythloth
| C1 || [[File:U4_AMI d6 Covetous L1.png]] ||align=left| [[File:U4_SMS d6 Covetous L1rooms.png|left]] One fountain is harmful, the other one cures poison. If you want to go back down through the room, the trigger is between the wall and the two bodies (under the ghosts) in the north-east.
| Str/Dex/Int
| 800
|}
|}
<br>
[[File:Ultima4_AST_peergem-Covetous.png|The area surrounding the entrance to Dungeon Covetous.|frame]]
When you emerge from the entrance of dungeon Shame, '''[P]'''eer at a gem. If you cast a "Blink" spell to the east, the party will teleport close to Vesper and its cheap inn.
== Dungeon Hythloth ==
[[File:Ultima4_DungeonHythloth.png|right|288px|thumb|Map of Dungeon Hythloth]]
* '''Goals:''' get the lighter-than-air device and the White stone.
Before entering the Dungeon Hythloth, make sure you have plenty of the following spells:
* '''Light''' (cheaper than torches)
* '''Cure''' (for the chests with poison traps)
* '''Dispell''' (to get past various energy fields)
* '''Resurrect''' (to recover companions that touch the four Magic Orbs)
* '''Wind''' (to drive the Lighter-Than-Air device)
Check the [[../Magic|Magic]] page for details on the reagents and the [[../Britannia Yellow Pages directory]] for the most convenient apothecaries.
Also purchase ten/twenty magic gems (you can use the "View" spell, but it's better to save nightshade and mandrake for other spells).
Access the Dungeon from Castle Britannia. You will be unable to exit from there, and a vertical shaft will lead you down to the 8th level
: '''Level 8'''
Right now, having no Stones yet, it would be useless to visit the Altar Rooms. Explore the other rooms, instead, to earn gold and experience, then head to the stairs that connect to the larger section of Floor 7.
: '''Level 7'''
Again, visit the rooms to earn gold and experience, then climb the stairs up.
: '''Level 6'''
A long and winding passage, with a few mandatory rooms in the middle. Actually, in some versions there is a bug that can be fixed with [http://www.ultimaaiera.com/ultima4/ultima-4-hythloth-fix/ this patch].
: '''Level 5'''
This level is further subdivided in two parts. Climb the second upwards stairs for a short passage that leads back on floor 5, but the section where two Magic Orbs can be found. Be careful: these orbs raise all three attributes, but they deal 700 HP of damage. Unless many companions are at level 8, you have to use some "Resurrection" spells.
: '''Level 4'''
This floor loops on itself, but there is just one ladder that leads upwards.
: '''Level 3'''
On this floor, you can find the third Magic Orb and a bit further on a Healing Fountain. Finally, both upwards ladders lead to the same area.
: '''Level 2'''
Nothing special to be done here: fight your way through the only room and climb the stairs.
: '''Level 1'''
Here you can find the fourth Magic Orb. Also, through a secret passage you cn find the altar of the White Stone, that is unfortunately empty. Anyway, you are near the exit of the dungeon.
=== The lighter-than-air device ===
Near the exit of Dungeon Hythloth lies the lighter-than-air device. get on it, and it will move according to the direction of the wind. It is therefore necessary to cast "Wind Change" spells to go in the direction you want. Actually, the exit of Dungeon Hythloth is quite faraway from the mainland in any direction, therefore you should just keep flying in the same direction.
=== The White Stone ===
Once you manage to get near the Serpent's Spine mountains (between Britain and Yew), locate the position of the White Stone shrine, align the balloon with it, then land on the hills near the mountains. Why? Because the wind is quite tricky; you should make sure you're aligned with the Stone, then cast the "Wind" spell in the required direction, then jump onto the balloon. When you're above the shrine, just Search it to grab the White Stone.
{{-}}
== Dungeons Destard and Shame ==
[[File:Ultima4_DungeonDestard.png|right|288px|thumb|Map of Dungeon Destard]]
[[File:Ultima4_DungeonShame.png|right|288px|thumb|Map of Dungeon Shame]]
* Enter from Destard, west of Trinsic.
* Get the Red and the Purple stones.
* Leave from Shame and use a Blink spell.
: '''Level 1'''
: '''Level 2'''
: '''Level 3'''
: '''Level 4'''
: '''Level 5'''
: '''Level 6'''
: '''Level 7'''
: '''Level 8'''
: '''Level 8'''
: '''Level 7'''
: '''Level 6'''
: '''Level 5'''
: '''Level 4'''
: '''Level 3'''
: '''Level 2'''
: '''Level 1'''
{{-}}
== Dungeons Despise and Covetous ==
[[File:Ultima4_DungeonDespise.png|right|432px|thumb|Map of Dungeon Despise]]
[[File:Ultima4_DungeonCovetous.png|right|304px|thumb|Map of Dungeon Covetous]]
* Enter from Despise, north of Britain.
* Get the Yellow and the Orange stones.
* Get Key Part from the Altar of Courage.
* Leave from Covetous and use a Gate spell.
: '''Level 1'''
: '''Level 2'''
: '''Level 3'''
: '''Level 4'''
: '''Level 5'''
: '''Level 6'''
: '''Level 7'''
: '''Level 8'''
: '''Level 8'''
: '''Level 7'''
: '''Level 6'''
: '''Level 5'''
: '''Level 4'''
: '''Level 3'''
: '''Level 2'''
: '''Level 1'''
{{-}}
== Dungeons Wrong and Deceit ==
[[File:Ultima4_DungeonWrong.png|right|304px|thumb|Map of Dungeon Deceit]]
[[File:Ultima4_DungeonDeceit.png|right|304px|thumb|Map of Dungeon Deceit]]
* Enter from Wrong, north of Lock Lake.
* Get the Green stone.
* Get the Key Part from the Altar of Love.
* Get the Blue stone.
* Get the Key Part from the Altar of Truth.
* Leave from Deceit and use a Gate spell.
: '''Level 1'''
: '''Level 2'''
: '''Level 3'''
: '''Level 4'''
: '''Level 5'''
: '''Level 6'''
: '''Level 7'''
: '''Level 8'''
: '''Level 8'''
: '''Level 7'''
: '''Level 6'''
: '''Level 5'''
: '''Level 4'''
: '''Level 3'''
: '''Level 2'''
: '''Level 1'''
{{Footer Nav|game=Ultima IV: Quest of the Avatar|prevpage=Side Quests|nextpage=The Stygian Abyss}}
{{Footer Nav|game=Ultima IV: Quest of the Avatar|prevpage=Dungeons Wrong and Deceit|nextpage=The Great Stygian Abyss}}
The west fountain refreshes all health, the east one is poisonous. There are two rooms and three doors.
D2
In the first room, a trigger under a chest makes the bridge collapse; in order to restore it, all you have to do is to walk on the remaining west portion of the bridge itself.
D3
This is the cross-shaped portion of the floor. Take the south stairs first, in order to reach the Stone on the 5th floor.
In the circular portion of the floor there are 4 chests (6 in the Master System).
D4
This is the larger portion of the floor. There are secret passages in the central room; in order to reveal them, the triggers are in the side "alcoves", along the walls. Both fountains cure poison. The first magic orb is on this floor: it raises Dexterity by 5, but deals 200 damages. The stairs lead to two "dead-end areas" full of chests.
D5
It is easy to miss this floor. Coming from the larger area of the 4th floor, there is a secret passage on the north side of the single-tile stair room: the Yellow Stone of Compassion is hidden there. In the central room, defeat all enemies, then seek carefully for triggers in the walls: one trigger activates the next one, until a northwards bridge appears.
D6
The fountain fully refreshes health. There are 20 chests (42 in the Master System).
D7
Climb back to floor 3, and take any of the other stairs. Short passages lead to this floor. A secret passage allows to bypass the long corridor.
D8
Three Magic Orbs are found on this floor. There is a way to get through all rooms without backtracking (except from the Magic Balls). First, from the stairs, start by going east. In the first room, go north for the first Ball, then continue east. At the second room, exit to the north. In the third room, the obvious exit leads to the second orb, but you have to step on a series of four wall triggers in order to open the secret passage westwards (note that sleep cures poison). In the fourth room, the chest under the reaper activates a ring of fire fields. In the fifth room leave to the south. In the sixth and last room, go south for the last magic orb, then use several "Dispel" spells to leave westwards. After that, the Companions will eventually reach the Altar Room.
BUG ALERT: in the Master System, the last Magic Ball is unreachable.
A
The Companions enter the Altar Room of Love from Despise from the north. Covetous is to the west. The enemies are always randomly generated. You lack one stone to use this altar.
C8
The Companions should come from the Altar Room of Love, that is to the north.
C7-b
Peer at a gem to locate the secret passage that leads to the Orange Stone of Sacrifice.
A
After getting the 7th stone, go back to the two altar rooms of Love and of Courage and collect the last two thirds of the Three-Parts Key. The enemies are always randomly generated.
C7-a
In the central room to the east, step in the center-left tile to open a secret passage that goes upstairs
BUG ALERT: in some versions (Amiga, Atari ST) the secret passage is bugged, the second stairs up are missing, and the only way up is by casting a "Y-up" spell.
C6
There are three magic orbs on this floor. Each of them raises Strength and Dexterity by 5, but deals 400 damages. The single ladder up leads to corridors with 14 chests (28 in the Master System port), and also one of the two double-ladders leads to a corridor with 15 chests (30 in the Master System).
C5
Only the single-tile room allows to reach up to the 4th floor. There aare 29 chests on this floor (61 in the Master System).
C4
Coming from below, the way "up" in the two rooms is in plain view. If you want to go back down, prepare four or more "Dispel" spells and search for the triggers that open the secret passages. There are just two rooms on the floor, the rest are doors. Eight chests in most ports, but sixteen in the Master System.
C3
The fourth Magic Orb is on this floor. In order to get there, a trigger is in the north-east corner of the room next to it.
C2
A floor without obstacles.
C1
One fountain is harmful, the other one cures poison. If you want to go back down through the room, the trigger is between the wall and the two bodies (under the ghosts) in the north-east.
The area surrounding the entrance to Dungeon Covetous.
When you emerge from the entrance of dungeon Shame, [P]eer at a gem. If you cast a "Blink" spell to the east, the party will teleport close to Vesper and its cheap inn.