(east/west mixup) |
m (→Boss: Octomammoth: snes names) |
||
| (10 intermediate revisions by the same user not shown) | |||
| Line 1: | Line 1: | ||
{{Header Nav|game=Final Fantasy IV}} | {{Header Nav|game=Final Fantasy IV}} | ||
{{control selector|Original/Remaster,GBA/PSP,3D}} | |||
==Underground Waterway== | ==Underground Waterway== | ||
[[File:FF4 | [[File:FF4 PSP 1l.jpg|504px|right]] | ||
{|{{prettytable|float=left|notwide=1}} | {|{{prettytable|float=left|notwide=1|style=font-size:0.9em}} | ||
!colspan= | !colspan=3|Area Info: | ||
|- | |- | ||
| | | | ||
;Enemies | |||
*{{control| {{s|Enemies|Jelly}} | {{s|Enemies|Red Mousse}} | {{s|Enemies|Red Mousse}} }} | |||
*{{control| {{s|Enemies|CaveToad}} | {{s|Enemies|Gigantoad}} | {{s|Enemies|Gigantoad}} }} | |||
*{{s|Enemies|Zombie}} | |||
*{{control| {{s|Enemies|EvilShel}} | {{s|Enemies|Fangshell}} | {{s|Enemies|Fangshell}} }} | |||
*{{control| {{s|Enemies|MadToad}} | {{s|Enemies|Toadgre}} | {{s|Enemies|Toadgre}} }} | |||
*{{control| {{s|Enemies|WaterHag}} | {{s|Enemies|Sahagin}} | {{s|Enemies|Sahagin}} }} | |||
*{{control| {{s|Enemies|Pike}} | {{s|Enemies|Killer Fish}} | {{s|Enemies|Killer Fish}} }} | |||
*{{control| {{s|Enemies|TinyMage}} | {{s|Enemies|Tiny Mage}} | {{s|Enemies|Tiny Mage}} }} | |||
*{{control| {{s|Enemies|WaterBug}} | {{s|Enemies|Amoeba}} | {{s|Enemies|Amoeba}} }} | |||
*{{control| {{s|Enemies|Aligator}} | {{s|Enemies|Alligator}} | {{s|Enemies|Alligator}} }} | |||
|| | |||
;Equipment | ;Equipment | ||
*Iron | *Iron Armlet | ||
*Ice Rod | *Ice Rod | ||
*Feathered Cap | *Feathered Cap | ||
| Line 15: | Line 27: | ||
*Hades Gloves | *Hades Gloves | ||
*Hades Armor | *Hades Armor | ||
|| | |||
;Items | ;Items | ||
*Potion | *Potion x2 | ||
*Maiden's Kiss | *Maiden's Kiss | ||
*Tent | *Tent | ||
*Phoenix Down | *Phoenix Down | ||
*X-Potion | *X-Potion | ||
*Dry Ether | *Dry Ether | ||
*Ether | *Ether x2 | ||
*Bomb Fragment | *Bomb Fragment | ||
*Antarctic Wind | *Antarctic Wind | ||
*Bronze Hourglass | *Bronze Hourglass | ||
*Hermes Sandals | *Hermes Sandals | ||
*{{control|700|580|580}} Gil | |||
|} | |} | ||
{{-}} | |||
Leave Kaipo and head northeast, through the desert, until you see a cave: the Underground Waterway. | |||
{{-}} | |||
===Underground Waterway South=== | |||
From the cave entrance, go north across a bridge and up a set of stairs for two chests with '''Potion''' and '''Maiden's Kiss'''. Return to the entrance, then head west, across a bridge. Take a detour to the south for another chest, with a '''Tent'''. Cross the bridge to the north to meet Tellah. He explains that he is on his way to Damcyan. However, he's not strong enough to defeat the monster blocking the way. He joins your party, figuring that if you combine your power, you can defeat it. | From the cave entrance, go north across a bridge and up a set of stairs for two chests with '''Potion''' and '''Maiden's Kiss'''. Return to the entrance, then head west, across a bridge. Take a detour to the south for another chest, with a '''Tent'''. Cross the bridge to the north to meet Tellah. He explains that he is on his way to Damcyan. However, he's not strong enough to defeat the monster blocking the way. He joins your party, figuring that if you combine your power, you can defeat it. | ||
[[File:FF4 PSP 2a.jpg|504px|right]] | |||
{{sidebar|float= | {{sidebar|float=right|width=250px|title=Rows|contents=Now's a good time to familiarize yourself with how the front and back rows work in this game. | ||
* Rydia has low maximum HP and doesn't have any physical purpose, so put her in the second party slot, which sticks her in the back row. | |||
* Tellah has high maximum HP but abysmal defense, and also has no physical purpose, so he should be in the fourth party slot, also sticking him in the back row.}} | |||
After Tellah joins your party, check out his equipment and have him equip anything you're not currently using that's better than what he has. | After Tellah joins your party, check out his equipment and have him equip anything you're not currently using that's better than what he has, which isn't much. You can choose to head back to Kaipo and pick him up a Leather Cap and Iron Armlet, but since you're going to get upgraded gear for Rydia soon, you may wish to just give him her old equipment afterwards instead. Stick the old man in the back row along with Rydia, and then cross the bridge to the west. If you're playing the Original version, the chest just across the bridge contains '''120 Gil'''. Continue across two bridges to the east, then go down the stairs to the south, and back up through the waterfall for a chest with '''Iron Armlet'''. | ||
[[Image:FF4 PSP 2b.jpg|504px|left|Entrance to Waterfall Grotto]] | |||
{{-}} | |||
Head back down the waterfall and walk around to the west. There is a hidden entrance in the middle tile of the waterfall. Inside the Waterfall Grotto are three chests with '''Phoenix Down''', '''X-Potion''', and '''Dry Ether'''. | Head back down the waterfall and walk around to the west. There is a hidden entrance in the middle tile of the waterfall. Inside the Waterfall Grotto are three chests with '''Phoenix Down''', '''X-Potion''', and '''Dry Ether'''. | ||
Exit the grotto, walk all the way back to the stairs on the eastern side of the room, and back to the west across the three bridges. Take the first set of stairs up and into the next area. | Exit the grotto, walk all the way back to the stairs on the eastern side of the room, and back to the west across the three bridges. Take the first set of stairs up and into the next area. | ||
===Underground Waterway B2=== | |||
Follow the ridge to the north, across a bridge, then head down the stairs. At the first branching path in the water, go east and up two short flights of stairs for a chest with '''Potion'''. Go back down the stairs and continue south through the water. Take the longer set of stairs up, and continue west on the ridge. At the end of the ridge is a chest with '''Ether'''. Go back east, and cross the bridge to the south. After you cross the bridge, go west, and across another bridge. Enter the door in the wall. | Follow the ridge to the north, across a bridge, then head down the stairs. At the first branching path in the water, go east and up two short flights of stairs for a chest with '''Potion'''. Go back down the stairs and continue south through the water. Take the longer set of stairs up, and continue west on the ridge. At the end of the ridge is a chest with '''Ether'''. Go back east, and cross the bridge to the south. After you cross the bridge, go west, and across another bridge. Enter the door in the wall. | ||
[[Image:FF4 PSP 2b2.jpg|504px|right]] | |||
When you enter this room, Tellah explains that this spot is a magic field that repels monsters, allowing you to rest in a '''Tent''' or '''Cottage''', and save the game. He talks some about his daughter, Anna, who eloped with a Bard to Damcyan. Tellah talks about the monster blocking the way to Damcyan - a creature with eight tentacles - before it's too late. Too late for what? Tellah doesn't know; he only hopes his instincts are wrong. | When you enter this room, Tellah explains that this spot is a magic field that repels monsters, allowing you to rest in a '''Tent''' or '''Cottage''', and save the game. He talks some about his daughter, Anna, who eloped with a Bard to Damcyan. Tellah talks about the monster blocking the way to Damcyan - a creature with eight tentacles - before it's too late. Too late for what? Tellah doesn't know; he only hopes his instincts are wrong. | ||
Exit the room to the north to come back out into the main room. Cross a bridge to the west and take a short detour north for a chest with '''Ice Rod'''. Go down both flights of stairs to the south, then walk east through the water. Head up the flight of stairs to the north and through the door. | Exit the room to the north to come back out into the main room. Cross a bridge to the west and take a short detour north for a chest with '''Ice Rod'''. Go down both flights of stairs to the south, then walk east through the water. Head up the flight of stairs to the north and through the door. | ||
{{-}} | |||
{{sidebar|float= | {{sidebar|float=right|width=300px|title=Ice Rod|contents=The Ice Rod functions the same as other items with similar names in the previous ''Final Fantasy'' titles. During battle, you can enter the Item menu, press up, and use the Ice Rod to cast Blizzard for free. This is great for when your mages get low on MP. Most weapons have an ability that can be cast this way, and are considered magical attacks for damage and counterattack purposes. They also are the only way to cast spells while turned into a Pig or Toad (aside from casting Pig or Toad)}} | ||
[[Image:FF4 | [[Image:FF4 PSP 2c.jpg|504px|left|Underground Waterway]] | ||
{{-}} | |||
===Underground Waterway B3=== | |||
Head south, then cross the bridge to the west. Go south until you come to a branching path. To the east you'll find two chests with 580 Gil and '''Bomb Fragment'''. Return to the branching path and continue west, then north up the stairs. | Head south, then cross the bridge to the west. Go south until you come to a branching path. To the east you'll find two chests with 580 Gil and '''Bomb Fragment'''. Return to the branching path and continue west, then north up the stairs. | ||
From the entrance of this room, go west into a secret passage. The passage goes north, east, | From the entrance of this room, go west into a secret passage. The passage goes north, east, north, east, south, and east to a chest just on the other side of the wall from where you entered, holding a '''Feathered Cap'''. Head back to the main room through the secret passage, and continue north up the stairs from the entrance. Grab the '''Potion''' from the chest on the way, then continue to the next floor. | ||
{{-}} | |||
===Underground Waterway North=== | |||
[[Image:FF4 PSP 2d.jpg|504px|right]] | |||
Follow the path north, then take the staircase to the west down. Follow the path around to the west for a chest with '''Ether'''. Take the short staircase to the north and grab the '''Antarctic Wind''' from the chest. Head back to the east and cross the bridge. You'll see the stairs to the next area, but don't go through them just yet. Instead, head south, down three flights of stairs, and grab the two chests with '''Bronze Hourglass''' and '''Shadow Blade'''. Be sure to equip the new sword to Cecil. | Follow the path north, then take the staircase to the west down. Follow the path around to the west for a chest with '''Ether'''. Take the short staircase to the north and grab the '''Antarctic Wind''' from the chest. Head back to the east and cross the bridge. You'll see the stairs to the next area, but don't go through them just yet. Instead, head south, down three flights of stairs, and grab the two chests with '''Bronze Hourglass''' and '''Shadow Blade'''. Be sure to equip the new sword to Cecil. | ||
Now, head back up the stairs and head to the next area. Tellah tells you that the stairs lead outside, and that the monster is in the cave beyond, reminding you that you can use a Tent on the overworld to heal up. And, don't forget to save, too! | Now, head back up the stairs and head to the next area. Tellah tells you that the stairs lead outside, and that the monster is in the cave beyond, reminding you that you can use a Tent on the overworld to heal up. And, don't forget to save, too! | ||
{{-}} | |||
===Underground Falls=== | |||
There is a large waterfall as soon as you enter. When you approach, you fall down the waterfall to the next level. Take the stairs and follow the path around to the south. When you come to a large staircase, go down it for two chests: '''Hades Helm''' and '''Hades Gloves''''. Again, equip these to Cecil right away. Go back up the stairs and cross the bridge, then go through the door. | There is a large waterfall as soon as you enter. When you approach, you fall down the waterfall to the next level. Take the stairs and follow the path around to the south. When you come to a large staircase, go down it for two chests: '''Hades Helm''' and '''Hades Gloves''''. Again, equip these to Cecil right away. Go back up the stairs and cross the bridge, then go through the door. | ||
[[Image:FF4 | ===Underground Lake B1=== | ||
[[Image:FF4 PSP 2e.jpg|504px|left]] | |||
Head east across the bridge and open the two chests for the last piece of armor for Cecil: '''Hades Armor'''. The other chest contains '''Hermes Sandals''', which is not equipment, despite the name. Cross the bridge to the north, take the stairs down into the water, and heal up before approaching the writhing mass of tentacles in the waterfall. | |||
Head east across the bridge and open the two chests for the last piece of armor for Cecil: '''Hades Armor'''. The other chest contains '''Hermes Sandals''', which is not equipment, despite the name. Cross the | |||
{{-}} | {{-}} | ||
===Boss: Octomammoth=== | ===Boss: Octomammoth (Octomamm)=== | ||
{|{{prettytable}} | {|{{prettytable|float=left|notwide=1}} | ||
| | !colspan=1|Boss Info: | ||
|- | |||
| | |||
;Name: {{control| {{s|Enemies|Octomamm}} | {{s|Enemies|Octomammoth}} | {{s|Enemies|Octomammoth}} }} | |||
;HP: 2350 | |||
;Weaknesses: Lightning, Dark | |||
|} | |} | ||
[[Image:FF4 | [[Image:FF4 PSP 2f.jpg|504px|right]] | ||
The Octomammoth only looks intimidating! With two strong magic users and a strong physical attacker, he should be no match for you. | The Octomammoth only looks intimidating! With two strong magic users and a strong physical attacker, he should be no match for you. | ||
| Line 93: | Line 121: | ||
==Damcyan== | ==Damcyan== | ||
{|{{prettytable|float=left|notwide=1}} | [[File:FF4 PSP 2g.jpg|504px|right]] | ||
!colspan= | {|{{prettytable|float=left|notwide=1|style=font-size:0.85em}} | ||
!colspan=3|Area Info: | |||
|- | |- | ||
| | | | ||
;Enemies | |||
*{{control| {{s|Enemies|Imp}} | {{s|Enemies|Goblin}} | {{s|Enemies|Goblin}} }} | |||
*{{control| {{s|Enemies|SwordRat}} | {{s|Enemies|Sword Rat}} | {{s|Enemies|Sword Rat}} }} | |||
*{{s|Enemies|Larva}} | |||
*{{control| {{s|Enemies|SandMan}} | {{s|Enemies|Desert Sahagin}} | {{s|Enemies|Desert Sahagin}} }} | |||
*{{control| {{s|Enemies|SandMoth}} | {{s|Enemies|Eyewing Moth}} | {{s|Enemies|Eyewing Moth}} }} | |||
*{{control| {{s|Enemies|SandPede}} | {{s|Enemies|Hundlegs}} | {{s|Enemies|Hundlegs}} }} | |||
*{{control| {{s|Enemies|SandWorm}} | {{s|Enemies|Sand Worm}} | {{s|Enemies|Sand Worm}} }} | |||
*{{control| {{s|Enemies|TinyMage}} | {{s|Enemies|Tiny Mage}} | {{s|Enemies|Tiny Mage}} }} | |||
|| | |||
;Equipment | ;Equipment | ||
*Feathered Cap | *Feathered Cap | ||
*Crossbow | *Crossbow | ||
*Ruby Ring | *Ruby Ring | ||
*Holy Arrows | *Holy Arrows x20 | ||
*Iron Arrows | *Iron Arrows x10 | ||
|| | |||
;Items | ;Items | ||
*Tent | *Tent | ||
| Line 112: | Line 152: | ||
*Gold Needle | *Gold Needle | ||
|} | |} | ||
{{Sidebar|title=Party Change|float=left|width=380px|contents=Before entering Dacyan Castle, unequip all items from Tellah. He will be leaving the party, but don't worry, we will be seeing him again soon.}} | |||
{{-}} | |||
Walk around to the northwest, where Damcyan Castle comes into view. Before you get too close, airships fly in and bomb the castle! The party was too late! | Walk around to the northwest, where Damcyan Castle comes into view. Before you get too close, airships fly in and bomb the castle! The party was too late! | ||
Enter the castle anyway, and walk up a few flights of stairs. On the second floor, there is a single, unplundered chest with a '''Tent'''. Continue on to the third floor, where you spy a woman lying on the ground. It is Anna, Tellah's daughter. Furious, Tellah attacks the bard standing nearby | Enter the castle anyway, and walk up a few flights of stairs. On the second floor, there is a single, unplundered chest with a '''Tent'''. Continue on to the third floor, where you spy a woman lying on the ground. It is Anna, Tellah's daughter. Furious, Tellah attacks the bard standing nearby. That spoony bard! <!-- quote from the game, as well as an inside joke in the Final Fantasy community --> | ||
Anna is hanging on for life, and begs Tellah to understand her love for Edward. Edward explains that Baron's Red Wings, led by Golbez, attacked Damcyan and took its crystal. Anna passes on, and Tellah vows to get his revenge on Golbez, then storms out of the castle. Cecil convinces Edward to join the party to search for the Sand Pearl. Edward says you can find Sand Pearls in the Antlion's Den to the east, and even lets you use his hovercraft. | Anna is hanging on for life, and begs Tellah to understand her love for Edward. Edward explains that Baron's Red Wings, led by Golbez, attacked Damcyan and took its crystal. Anna passes on, and Tellah vows to get his revenge on Golbez, then storms out of the castle. Cecil convinces Edward to join the party to search for the Sand Pearl. Edward says you can find Sand Pearls in the Antlion's Den to the east, and even lets you use his hovercraft. | ||
But before we go save Rosa, let's do a bit of looting, shall we? Head back into the castle, but don't go through the gate. Instead head around to the east and enter the small room - the Damcyan Castle Dungeon. Talk to the guard in front of the switch to open a room containing a secret passage that leads you into the dungeon cells. The chests contain '''Crossbow''', '''Feathered Cap''', and '''Ruby Ring'''. Exit the cells and head down the stairs for a whole lot more loot: '''Potion''', '''Antidote''', '''Eye Drops''', '''Gold Needle''', '''Phoenix Down''', and '''Ether'''. All but one pot contain treasure too: '''Holy Arrows''' | {{Sidebar|title=Edward|float=right|width=380px|contents=Edward is a Bard, a travelling musician who wields Harps, and whose role in battle is relegated mostly to support.<br>His main ability is '''Sing''', which {{control|randomly applies one of four effects on all enemies|randomly applies one of four effects on all enemies|lets him play Bard Songs to apple effects to the party and enemies}}, as long as he is wielding a harp. His other abilities are '''Hide''', which removes him from battle, and '''Salve''', which heals the party for the amount of a potion, at the cost of one potion.}} | ||
But before we go save Rosa, let's do a bit of looting, shall we? Head back into the castle, but don't go through the gate. Instead head around to the east and enter the small room - the Damcyan Castle Dungeon. Talk to the guard in front of the switch to open a room containing a secret passage that leads you into the dungeon cells. The chests contain '''Crossbow''', '''Feathered Cap''', and '''Ruby Ring'''. Exit the cells and head down the stairs for a whole lot more loot: '''Potion''', '''Antidote''', '''Eye Drops''', '''Gold Needle''', '''Phoenix Down''', and '''Ether'''. All but one pot contain treasure too: '''Holy Arrows''' x20 and '''Iron Arrows''' x10. | |||
If you return to the third floor of the castle, you can chat with a few of the survivors. There are also two magic pots in the east and the west wing. The east pot restores your MP and the west pot restores your HP and removes status effects. | If you return to the third floor of the castle, you can chat with a few of the survivors. There are also two magic pots in the east and the west wing. The east pot restores your MP and the west pot restores your HP and removes status effects. | ||
Before you head out, look at the party's equipment. Edward comes equipped with a Bard's Tunic, which has the same stats as Leather Clothing, but also prevents silence. Seeing as he has no magic and his Sing ability is random, it has little use on him, so swap it with Rydia instead. Put him in the back row, because he only has 60 HP right now. You may also wish to head west over the shortcut around the coast and return to Kaipo to restock on items. Now, it is time to head east in your new Hovercraft and enter the Antlion's Den. | |||
==Antlion's Den== | ==Antlion's Den== | ||
[[File:FF4 PSP 2h.jpg|504px|right]] | |||
{|{{prettytable|float=left|notwide=1}} | {|{{prettytable|float=left|notwide=1}} | ||
!colspan= | !colspan=2|Area Info: | ||
|- | |- | ||
| | | | ||
;Enemies | |||
*{{control| {{s|Enemies|Imp}} | {{s|Enemies|Goblin}} | {{s|Enemies|Goblin}} }} | |||
*{{control| {{s|Enemies|SandWorm}} | {{s|Enemies|Sand Worm}} | {{s|Enemies|Sand Worm}} }} | |||
*{{control| {{s|Enemies|Imp Cap.}} | {{s|Enemies|Domovoi}} | {{s|Enemies|Domovoi}} }} | |||
*{{control| {{s|Enemies|Cream}} | {{s|Enemies|Yellow Jelly}} | {{s|Enemies|Yellow Jelly}} }} | |||
*{{s|Enemies|Basilisk}} | |||
*{{control| {{s|Enemies|Weeper}} | {{s|Enemies|Leshy}} | {{s|Enemies|Leshy}} }} | |||
*{{control| {{s|Enemies|Turtle}} | {{s|Enemies|Adamantoise}} | {{s|Enemies|Adamantoise}} }} | |||
|| | |||
;Equipment | ;Equipment | ||
*Lamia Harp | *Lamia Harp | ||
;Items | ;Items | ||
*Potion | *Potion x3 | ||
*Spider Silk | *Spider Silk x2 | ||
*Tent | *Tent | ||
*Gold Needle | *Gold Needle | ||
| Line 138: | Line 193: | ||
*Emergency Exit | *Emergency Exit | ||
|} | |} | ||
{{-}} | |||
Use the hovercraft to fly to the northeast part of the desert, and travel across the shallow water to the other expanse of land. If you see a mountain with a curvy path leading up to it, you've gone too far east. The Antlion's | Use the hovercraft to fly to the northeast part of the desert, and travel across the shallow water to the other expanse of land. If you see a mountain with a curvy path leading up to it, you've gone too far east. The Antlion's Den is in a mountain range just north of a desert. Save, and head inside. | ||
===Antlion's Den B1=== | |||
Walk down the stairs, then go west, and north under a bridge for a chest with '''Potion'''. Then, pass back under the bridge and continue west, taking the stairs up to another chest with '''Spider Silk'''. If you're playing the SNES version of the game, you'll have to walk back up to the entrance of the cave and cross the bridge for that chest. | Walk down the stairs, then go west, and north under a bridge for a chest with '''Potion'''. Then, pass back under the bridge and continue west, taking the stairs up to another chest with '''Spider Silk'''. If you're playing the SNES version of the game, you'll have to walk back up to the entrance of the cave and cross the bridge for that chest. | ||
Head south, down a set of stairs, then around to the west and up another set of stairs for a '''Tent'''. Just beyond that chest is another, containing a '''Potion'''. Go back down the stairs, back to the north. Head east when you come to the staircase again, and continue east until you come to a path under a bridge to the north. The chest there contains '''Potion'''. Head south, then go east and up a set of stairs. All the way to the north is a chest with '''Gold Needle'''. Go south, and down the stairs to the next floor. | Head south, down a set of stairs, then around to the west and up another set of stairs for a '''Tent'''. Just beyond that chest is another, containing a '''Potion'''. Go back down the stairs, back to the north. Head east when you come to the staircase again, and continue east until you come to a path under a bridge to the north. The chest there contains '''Potion'''. Head south, then go east and up a set of stairs. All the way to the north is a chest with '''Gold Needle'''. Go south, and down the stairs to the next floor. | ||
{{-}} | |||
===Antlion's Den B2=== | |||
[[Image:FF4 PSP 2i.jpg|504px|left]] | |||
Go south, down two sets of stairs, and grab the '''Antarctic Wind''' from the chest. Continue down the next set of stairs, then go up the other set of stairs immediately to the west and through the door. Either staircase in this room takes you to a chest with '''Lamia Harp''', a good harp for Edward that can cause confusion when used to attack. Exit the room. | Go south, down two sets of stairs, and grab the '''Antarctic Wind''' from the chest. Continue down the next set of stairs, then go up the other set of stairs immediately to the west and through the door. Either staircase in this room takes you to a chest with '''Lamia Harp''', a good harp for Edward that can cause confusion when used to attack. Exit the room. | ||
| Line 155: | Line 210: | ||
Back on B2, head north up a set of stairs, then east, for a chest with '''Potion'''. Go back down the stairs, and west across a bridge for '''Spider Silk'''. There are two areas that you could explore in this room, to the west and south, but there aren't any hidden items or chests to be found. From the last chest you opened, just go back across the bridge, then south down a set of stairs. Head west, and south down another set of stairs, then through the stairs to the next floor. | Back on B2, head north up a set of stairs, then east, for a chest with '''Potion'''. Go back down the stairs, and west across a bridge for '''Spider Silk'''. There are two areas that you could explore in this room, to the west and south, but there aren't any hidden items or chests to be found. From the last chest you opened, just go back across the bridge, then south down a set of stairs. Head west, and south down another set of stairs, then through the stairs to the next floor. | ||
{{-}} | |||
===Antlion's Nest=== | |||
[[Image:FF4 PSP 2k2.jpg|504px|right]] | |||
Here, simply go south, down the stairs. Heal up before the fourth set of stairs, since you will be facing the owner of the nest soon... | Here, simply go south, down the stairs. Heal up before the fourth set of stairs, since you will be facing the owner of the nest soon... | ||
{{-}} | |||
===Boss: Antlion=== | ===Boss: Antlion=== | ||
{|{{prettytable}} | [[Image:FF4 PSP 2k.jpg|504px|left]] | ||
| | {|{{prettytable|float=left|notwide=1}} | ||
!colspan=1|Boss Info: | |||
|- | |||
| | |||
;Name: {{s|Enemies|Antlion}} | |||
;HP: 1100 | |||
|} | |} | ||
Any time you attack the Antlion with a weapon, it counters with a powerful needle attack. However, Rydia's magic and Edward's songs do not trigger the counterattack. Have Rydia use the Chocobo summon for a heavy-hitting physical strike that Antlion won't counter. | Any time you attack the Antlion with a weapon, it counters with a powerful needle attack. However, Rydia's magic and Edward's songs do not trigger the counterattack. Have Rydia use the Chocobo summon for a heavy-hitting physical strike that Antlion won't counter. | ||
When you have defeated the Antlion, use the '''Emergency Exit''' you found earlier, or | When you have defeated the Antlion, use the '''Emergency Exit''' you found earlier, use Rydia's Warp spell, or just walk back out of the Antlion's Den. | ||
{{-}} | {{-}} | ||
==Return to Kaipo== | ==Return to Kaipo== | ||
[[Image:FF4 | [[Image:FF4 PSP 2m.jpg|504px|right]] | ||
Fly the hovercraft west past Damcyan, and continue to the southwest of the desert. Cross the shallow water back to the desert where Kaipo is. | Fly the hovercraft west past Damcyan, and continue to the southwest of the desert. Cross the shallow water back to the desert where Kaipo is. | ||
Back in Kaipo, go to the house where Rosa is staying, and use the Desert Pearl on her. When she awakens, she will tell you more about the newly appointed Red Wings captain, Golbez, who appears to be manipulating the king to claim the crystals for himself. | Back in Kaipo, go to the house where Rosa is staying, and use the Desert Pearl on her. When she awakens, she will tell you more about the newly appointed Red Wings captain, Golbez, who appears to be manipulating the king to claim the crystals for himself. | ||
{{Sidebar|title=Rosa|float=left|width=380px|contents=Rosa is a White Mage, a magic user specialising in healing and support magic.<br>Her signature ability is '''Aim''', which is a normal attack that takes slightly longer but has a 100% accuracy. Her other ability is '''Pray''', which heals the entire party for roughly the same amount as a Cure spell, but doesn't always work. Because she is a mage, she should always be in the back row.}} | |||
{{-}} | {{-}} | ||
===Edward's fight=== | ===Edward's fight=== | ||
[[Image:FF4 | [[Image:FF4 PSP 3a.jpg|504px|left]] | ||
Edward goes outside alone to play some music and mourn the loss of his beloved Anna. His rumination is interrupted by a Sahagin attack! Edward must fight off the Sahagin alone, but the battle is fairly simple. Just attack with the harp | {|{{prettytable|float=left|notwide=1}} | ||
!colspan=1|Boss Info: | |||
|- | |||
| | |||
;Name: {{control| {{s|Enemies|WaterHag}} | {{s|Enemies|Sahagin2}} | {{s|Enemies|Sahagin}} }} | |||
;HP: ? | |||
;Note: Scripted fight | |||
|} | |||
The party will rest for the night, but Edward decides to go for a nighttime walk. | |||
Edward goes outside alone to play some music and mourn the loss of his beloved Anna. His rumination is interrupted by a Sahagin attack! Edward must fight off the Sahagin alone, but the battle is fairly simple. Just attack with the harp, it's impossible to lose this fight. | |||
{{Footer Nav|game=Final Fantasy IV|prevpage=Beginning to Kaipo|nextpage=Mt. Hobs to Fabul}} | {{Footer Nav|game=Final Fantasy IV|prevpage=Beginning to Kaipo|nextpage=Mt. Hobs to Fabul}} | ||
Latest revision as of 14:53, 28 January 2023
Underground Waterway[edit]
| Area Info: | ||
|---|---|---|
|
|
|
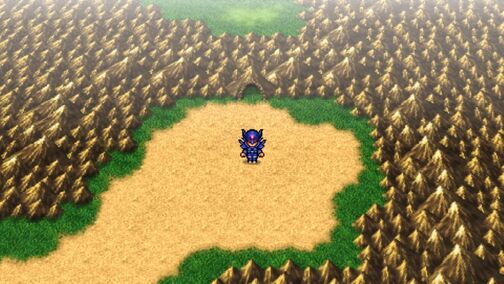
Leave Kaipo and head northeast, through the desert, until you see a cave: the Underground Waterway.
Underground Waterway South[edit]
From the cave entrance, go north across a bridge and up a set of stairs for two chests with Potion and Maiden's Kiss. Return to the entrance, then head west, across a bridge. Take a detour to the south for another chest, with a Tent. Cross the bridge to the north to meet Tellah. He explains that he is on his way to Damcyan. However, he's not strong enough to defeat the monster blocking the way. He joins your party, figuring that if you combine your power, you can defeat it.
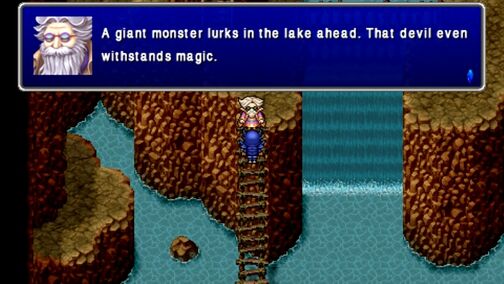
After Tellah joins your party, check out his equipment and have him equip anything you're not currently using that's better than what he has, which isn't much. You can choose to head back to Kaipo and pick him up a Leather Cap and Iron Armlet, but since you're going to get upgraded gear for Rydia soon, you may wish to just give him her old equipment afterwards instead. Stick the old man in the back row along with Rydia, and then cross the bridge to the west. If you're playing the Original version, the chest just across the bridge contains 120 Gil. Continue across two bridges to the east, then go down the stairs to the south, and back up through the waterfall for a chest with Iron Armlet.
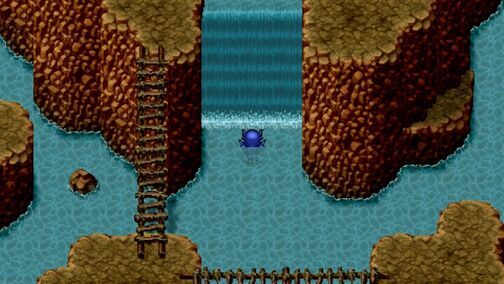
Head back down the waterfall and walk around to the west. There is a hidden entrance in the middle tile of the waterfall. Inside the Waterfall Grotto are three chests with Phoenix Down, X-Potion, and Dry Ether.
Exit the grotto, walk all the way back to the stairs on the eastern side of the room, and back to the west across the three bridges. Take the first set of stairs up and into the next area.
Underground Waterway B2[edit]
Follow the ridge to the north, across a bridge, then head down the stairs. At the first branching path in the water, go east and up two short flights of stairs for a chest with Potion. Go back down the stairs and continue south through the water. Take the longer set of stairs up, and continue west on the ridge. At the end of the ridge is a chest with Ether. Go back east, and cross the bridge to the south. After you cross the bridge, go west, and across another bridge. Enter the door in the wall.
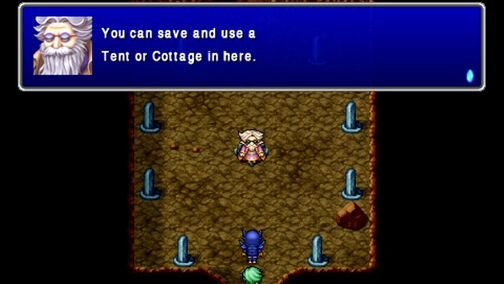
When you enter this room, Tellah explains that this spot is a magic field that repels monsters, allowing you to rest in a Tent or Cottage, and save the game. He talks some about his daughter, Anna, who eloped with a Bard to Damcyan. Tellah talks about the monster blocking the way to Damcyan - a creature with eight tentacles - before it's too late. Too late for what? Tellah doesn't know; he only hopes his instincts are wrong.
Exit the room to the north to come back out into the main room. Cross a bridge to the west and take a short detour north for a chest with Ice Rod. Go down both flights of stairs to the south, then walk east through the water. Head up the flight of stairs to the north and through the door.
Underground Waterway B3[edit]
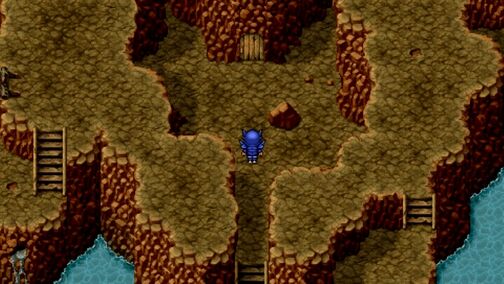
Head south, then cross the bridge to the west. Go south until you come to a branching path. To the east you'll find two chests with 580 Gil and Bomb Fragment. Return to the branching path and continue west, then north up the stairs.
From the entrance of this room, go west into a secret passage. The passage goes north, east, north, east, south, and east to a chest just on the other side of the wall from where you entered, holding a Feathered Cap. Head back to the main room through the secret passage, and continue north up the stairs from the entrance. Grab the Potion from the chest on the way, then continue to the next floor.
Underground Waterway North[edit]
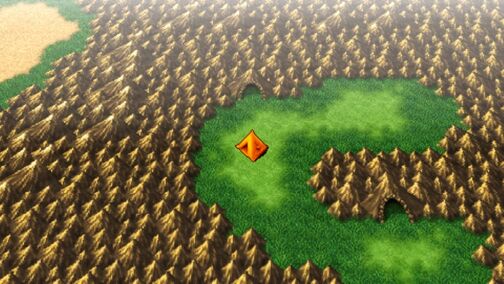
Follow the path north, then take the staircase to the west down. Follow the path around to the west for a chest with Ether. Take the short staircase to the north and grab the Antarctic Wind from the chest. Head back to the east and cross the bridge. You'll see the stairs to the next area, but don't go through them just yet. Instead, head south, down three flights of stairs, and grab the two chests with Bronze Hourglass and Shadow Blade. Be sure to equip the new sword to Cecil.
Now, head back up the stairs and head to the next area. Tellah tells you that the stairs lead outside, and that the monster is in the cave beyond, reminding you that you can use a Tent on the overworld to heal up. And, don't forget to save, too!
Underground Falls[edit]
There is a large waterfall as soon as you enter. When you approach, you fall down the waterfall to the next level. Take the stairs and follow the path around to the south. When you come to a large staircase, go down it for two chests: Hades Helm and Hades Gloves'. Again, equip these to Cecil right away. Go back up the stairs and cross the bridge, then go through the door.
Underground Lake B1[edit]
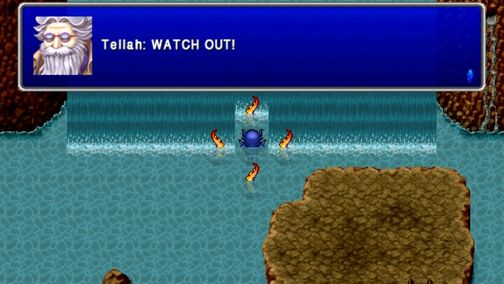
Head east across the bridge and open the two chests for the last piece of armor for Cecil: Hades Armor. The other chest contains Hermes Sandals, which is not equipment, despite the name. Cross the bridge to the north, take the stairs down into the water, and heal up before approaching the writhing mass of tentacles in the waterfall.
Boss: Octomammoth (Octomamm)[edit]
| Boss Info: |
|---|
|
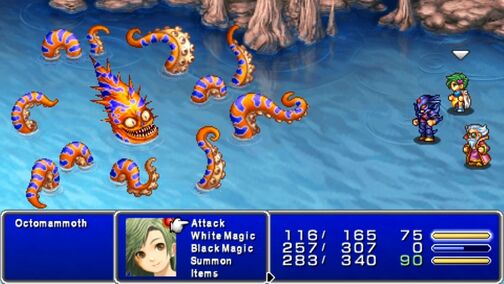
The Octomammoth only looks intimidating! With two strong magic users and a strong physical attacker, he should be no match for you.
Rydia probably knows Thunder by this point, but she can do more damage Summoning Chocobo each turn. Have Tellah cast Thunder to exploit Octomammoth's weakness, and heal the party as needed. Don't forget you can heal everyone in the party at once by pressing right while selecting a healing target.
Octomammoth is weak to Dark. You might think that Cecil's Darkness ability can exploit this weakness as well, but despite the name, it only deals non-elemental damage. Just have Cecil attack with his sword.
As you wear down Octomammoth, he loses his tentacles until he has just one left. After you defeat the Octomammoth walk through the waterfall that it had previously been guarding.
Damcyan[edit]
| Area Info: | ||
|---|---|---|
|
|
|
Walk around to the northwest, where Damcyan Castle comes into view. Before you get too close, airships fly in and bomb the castle! The party was too late!
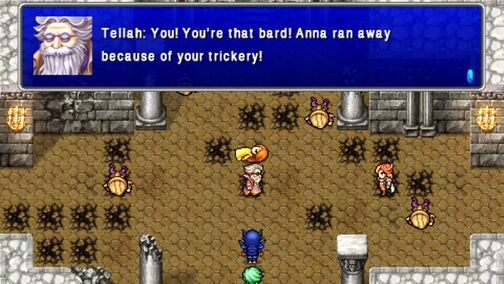
Enter the castle anyway, and walk up a few flights of stairs. On the second floor, there is a single, unplundered chest with a Tent. Continue on to the third floor, where you spy a woman lying on the ground. It is Anna, Tellah's daughter. Furious, Tellah attacks the bard standing nearby. That spoony bard!
Anna is hanging on for life, and begs Tellah to understand her love for Edward. Edward explains that Baron's Red Wings, led by Golbez, attacked Damcyan and took its crystal. Anna passes on, and Tellah vows to get his revenge on Golbez, then storms out of the castle. Cecil convinces Edward to join the party to search for the Sand Pearl. Edward says you can find Sand Pearls in the Antlion's Den to the east, and even lets you use his hovercraft.
But before we go save Rosa, let's do a bit of looting, shall we? Head back into the castle, but don't go through the gate. Instead head around to the east and enter the small room - the Damcyan Castle Dungeon. Talk to the guard in front of the switch to open a room containing a secret passage that leads you into the dungeon cells. The chests contain Crossbow, Feathered Cap, and Ruby Ring. Exit the cells and head down the stairs for a whole lot more loot: Potion, Antidote, Eye Drops, Gold Needle, Phoenix Down, and Ether. All but one pot contain treasure too: Holy Arrows x20 and Iron Arrows x10.
If you return to the third floor of the castle, you can chat with a few of the survivors. There are also two magic pots in the east and the west wing. The east pot restores your MP and the west pot restores your HP and removes status effects.
Before you head out, look at the party's equipment. Edward comes equipped with a Bard's Tunic, which has the same stats as Leather Clothing, but also prevents silence. Seeing as he has no magic and his Sing ability is random, it has little use on him, so swap it with Rydia instead. Put him in the back row, because he only has 60 HP right now. You may also wish to head west over the shortcut around the coast and return to Kaipo to restock on items. Now, it is time to head east in your new Hovercraft and enter the Antlion's Den.
Antlion's Den[edit]
| Area Info: | |
|---|---|
|
|
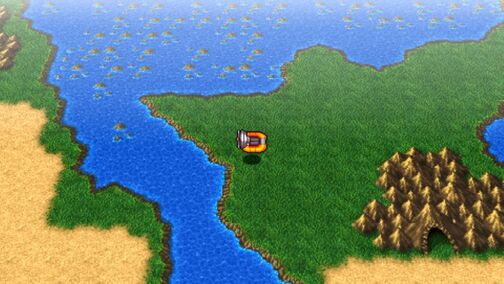
Use the hovercraft to fly to the northeast part of the desert, and travel across the shallow water to the other expanse of land. If you see a mountain with a curvy path leading up to it, you've gone too far east. The Antlion's Den is in a mountain range just north of a desert. Save, and head inside.
Antlion's Den B1[edit]
Walk down the stairs, then go west, and north under a bridge for a chest with Potion. Then, pass back under the bridge and continue west, taking the stairs up to another chest with Spider Silk. If you're playing the SNES version of the game, you'll have to walk back up to the entrance of the cave and cross the bridge for that chest.
Head south, down a set of stairs, then around to the west and up another set of stairs for a Tent. Just beyond that chest is another, containing a Potion. Go back down the stairs, back to the north. Head east when you come to the staircase again, and continue east until you come to a path under a bridge to the north. The chest there contains Potion. Head south, then go east and up a set of stairs. All the way to the north is a chest with Gold Needle. Go south, and down the stairs to the next floor.
Antlion's Den B2[edit]
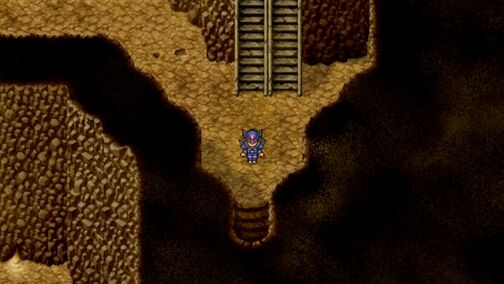
Go south, down two sets of stairs, and grab the Antarctic Wind from the chest. Continue down the next set of stairs, then go up the other set of stairs immediately to the west and through the door. Either staircase in this room takes you to a chest with Lamia Harp, a good harp for Edward that can cause confusion when used to attack. Exit the room.
From the main room, head west, then north up a long staircase. Continue north, and take the stairs to the next floor. Back on B1, follow the path to the west and go through the door. There is a rest area here, so heal up with a Tent, and save the game. There are three chests in the room as well, with Phoenix Down, Ether, and Emergency Exit. Exit the room, and go back to B2.
Back on B2, head north up a set of stairs, then east, for a chest with Potion. Go back down the stairs, and west across a bridge for Spider Silk. There are two areas that you could explore in this room, to the west and south, but there aren't any hidden items or chests to be found. From the last chest you opened, just go back across the bridge, then south down a set of stairs. Head west, and south down another set of stairs, then through the stairs to the next floor.
Antlion's Nest[edit]
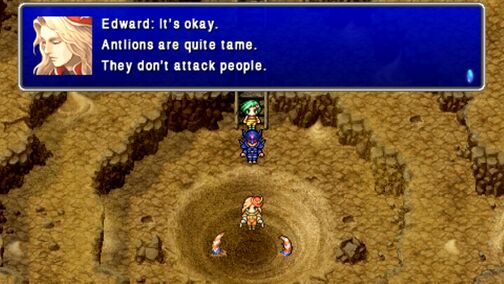
Here, simply go south, down the stairs. Heal up before the fourth set of stairs, since you will be facing the owner of the nest soon...
Boss: Antlion[edit]
| Boss Info: |
|---|
|
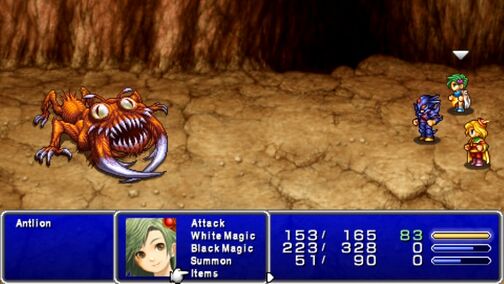
Any time you attack the Antlion with a weapon, it counters with a powerful needle attack. However, Rydia's magic and Edward's songs do not trigger the counterattack. Have Rydia use the Chocobo summon for a heavy-hitting physical strike that Antlion won't counter.
When you have defeated the Antlion, use the Emergency Exit you found earlier, use Rydia's Warp spell, or just walk back out of the Antlion's Den.
Return to Kaipo[edit]
Fly the hovercraft west past Damcyan, and continue to the southwest of the desert. Cross the shallow water back to the desert where Kaipo is.
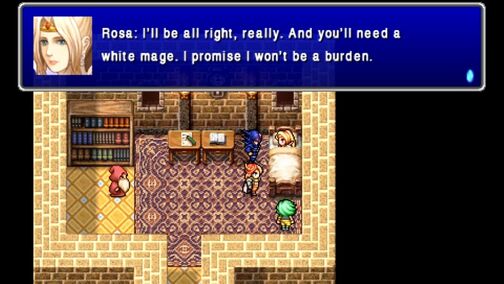
Back in Kaipo, go to the house where Rosa is staying, and use the Desert Pearl on her. When she awakens, she will tell you more about the newly appointed Red Wings captain, Golbez, who appears to be manipulating the king to claim the crystals for himself.
Edward's fight[edit]
| Boss Info: |
|---|
|
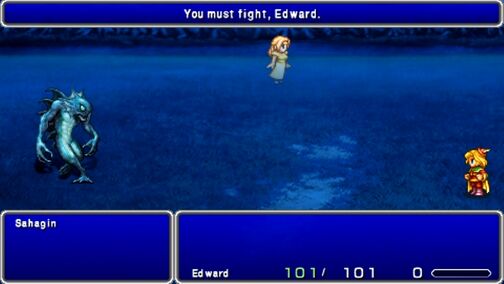
The party will rest for the night, but Edward decides to go for a nighttime walk.
Edward goes outside alone to play some music and mourn the loss of his beloved Anna. His rumination is interrupted by a Sahagin attack! Edward must fight off the Sahagin alone, but the battle is fairly simple. Just attack with the harp, it's impossible to lose this fight.
