(adjusted prev/next links, added note) |
(added missing boss tab (plus minor adjustments to punctuation)) |
||
| Line 18: | Line 18: | ||
|null=Gravity, Poison | |null=Gravity, Poison | ||
|absorb=None | |absorb=None | ||
|text=Overall, Diamond Weapon isn't a terribly difficult boss. Just let it taste your usual boss strategies. Diamond Weapon alternates between being immune to physical attacks and immune to magical attacks, and starts off being invulnerable to physical attacks. There's no way to tell except one attack type just doesn't work. Just fry the Weapon with Bolts and it will drop dead soon enough | |text=Overall, Diamond Weapon isn't a terribly difficult boss. Just let it taste your usual boss strategies. Diamond Weapon alternates between being immune to physical attacks and immune to magical attacks, and starts off being invulnerable to physical attacks. There's no way to tell except one attack type just doesn't work. Just fry the Weapon with Bolts and it will drop dead soon enough, though it does have some pretty nasty attacks. As usual, healing is important if you can't find a fast way to kill it, and Knights of the Round makes this battle much easier.}} | ||
In cutscene that follows, the Northern Crater barrier gets shot. Before you go back to the crater, Hojo starts going crazy, so you'll need to parachute in Midgar and take care of him first. | In cutscene that follows, the Northern Crater barrier gets shot. Before you go back to the crater, Hojo starts going crazy, so you'll need to parachute in Midgar and take care of him first. | ||
| Line 31: | Line 31: | ||
==Midgar tunnels== | ==Midgar tunnels== | ||
When you reach Midgar, you find that the city is under martial law, so you'll have to parachute in. Cait Sith is telling you where to go from here | When you reach Midgar, you find that the city is under martial law, so you'll have to parachute in. Cait Sith is telling you where to go from here: you need to use the tunnels. The side street with the manhole has a save point. | ||
After you go down, you end up in a really big room with lots of pipes and ladders. This place is somewhat confusing, but wandering around here shouldn't be too difficult | After you go down, you end up in a really big room with lots of pipes and ladders. This place is somewhat confusing, but wandering around here shouldn't be too difficult; just remember that the only way to get to some places is through a platform, ventilation pipe or a ladder somewhere else. The treasure chests here are green. You can, among other things, pick up Aegis Armlet, two Elixirs, a Megalixir, Starlight Phone (for Cait Sith), and Max Ray (for Barret). | ||
There's a save point next to the duct that leads out. You end up in the tunnels. Go all the way downward from here | There's a save point next to the duct that leads out. You end up in the tunnels. Go all the way downward from here (eight intersections down) to get some great items, like Power, Guard, Mind and Magic sources, and most importantly, the unique W-Item materia (lower right area of the screen) at the very end of the tunnel with the save point. The only bad thing about the place is that there are tons of Shadow Maker enemies here: you can steal Turbo Ethers from them, but the annoying thing about them is that they have ''really slow'' attacks, and they also make your party quite slow too, so the journey down will take forever. | ||
{{Final Fantasy VII/Boss|name=Reno, Rude and Elena | |||
|image= | |||
|level= | |||
|hp= | |||
|mp= | |||
|weak=None | |||
|null= | |||
|absorb= | |||
|text=}} | |||
==Shin-Ra building== | ==Shin-Ra building== | ||
Head all the back up the tunnels to where you entered. Once you go up from the rails section where you came through, the Turks will appear. If you did the Yuffie subquests, they give you the option of whether or not to fight them. Up from there, there's two passages. The right passage leads back to the Shin-Ra building (you'll find an air duct that leads there), and if you missed the Turtle's Paradise poster earlier, now's the time to go read it | Head all the back up the tunnels to where you entered. Once you go up from the rails section where you came through, the Turks will appear. If you did the Yuffie subquests, they give you the option of whether or not to fight them. Up from there, there's two passages. The right passage leads back to the Shin-Ra building (you'll find an air duct that leads there), and if you missed the Turtle's Paradise poster earlier, now's the time to go read it: it's on the first floor lobby, on the farthest wall, and you won't get another chance in the game! | ||
Things to do here: | Things to do here: | ||
| Line 61: | Line 71: | ||
|text=Proud Clod consists of two parts: The thing itself and Jamar Armor (second set of stats in the table). As usual, try Big Guard or set barriers, as those really help in the fight. Aside from that, this fight is relatively straightforward and doesn't have any big surprises. Just use the biggest and meanest spells and attacks you can think of. The boss will start using the big guns in the latter half of the fight though, so watch out for that. Like always, Knights of the Round can turn this into a first-turn knockout. If you don't have Knights of the Round, use the Phoneix Summon, which does a lot of damage.}} | |text=Proud Clod consists of two parts: The thing itself and Jamar Armor (second set of stats in the table). As usual, try Big Guard or set barriers, as those really help in the fight. Aside from that, this fight is relatively straightforward and doesn't have any big surprises. Just use the biggest and meanest spells and attacks you can think of. The boss will start using the big guns in the latter half of the fight though, so watch out for that. Like always, Knights of the Round can turn this into a first-turn knockout. If you don't have Knights of the Round, use the Phoneix Summon, which does a lot of damage.}} | ||
After the fight, head up. There are two boxes here with Mystile and an Elixir, along with a save point. Next go up the ladder. If Barret is in your party, you can find the Missing Score here, which is Barret's best weapon | After the fight, head up. There are two boxes here with Mystile and an Elixir, along with a save point. Next go up the ladder. If Barret is in your party, you can find the Missing Score here, which is Barret's best weapon; the box isn't here if he isn't in the party. Up in the uppermost platform, you'll find the mad scientist, who injects himself with Jenova cells and turns into a hideous monster. | ||
==Hojo== | ==Hojo== | ||
Revision as of 10:53, 13 August 2013
The point, as of now, is to go back to the Forgotten Capital with Bugenhagen. Bugenhagen will then show you how to use the machine and you will see the four Huge Materia floating if you managed to get them all. Also if you managed to get Bahamut and Neo Bahamut, you just walk up to the blue materia and pick the option go closer and you will receive Bahamut Zero.
In the Forgotten Capital, you find a lot of Ancients-related stuff, and when you head to the left city parts, you find some sort of round area with a lot of mysterious stuff in the center. Bugenhagen is very interested of it. After some cryptic talk, he tells you that the key to unlocking this place's mysteries can be found from where the sun doesn't shine. Take your submarine down by the northernmost continent and look for a hidden underwater cave at the end of a long tunnel. You'l find the Key to the Ancients there.
As you return, Bugenhagen shows you some more of the amazing cutscene videos. As you leave, Cait Sith calls and tell you that Shin-Ra has moved the Junon cannon to Midgar.
Diamond Weapon
As you leave in the Highwind, something big shows up. A gigantic Weapon appears out of nowhere and heads toward Midgar! Just head to the shore and wait for the Weapon to get there.
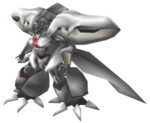
Overall, Diamond Weapon isn't a terribly difficult boss. Just let it taste your usual boss strategies. Diamond Weapon alternates between being immune to physical attacks and immune to magical attacks, and starts off being invulnerable to physical attacks. There's no way to tell except one attack type just doesn't work. Just fry the Weapon with Bolts and it will drop dead soon enough, though it does have some pretty nasty attacks. As usual, healing is important if you can't find a fast way to kill it, and Knights of the Round makes this battle much easier.
| Level | Hit Points | Magic | Weak against | Strong against | Absorbs |
|---|---|---|---|---|---|
| 49 | 30000 | 30000 | Lightning | Gravity, Poison | None |
In cutscene that follows, the Northern Crater barrier gets shot. Before you go back to the crater, Hojo starts going crazy, so you'll need to parachute in Midgar and take care of him first.
Before moving on
This is your absolute last chance to do most of the stuff that needs to be done in Disc 2, such as the Wutai sidequests. These can be saved for Disc 3, but if you want, you can also do the following:
- Raise Chocobos and get the four hidden materia.
- Obtain Omnislash, W-Summon and Final Attack from the Battle Arena in Gold Saucer.
- Get the maximum limit breaks for all your characters.
You can also take on Ultimate Weapon now if you want to, however, note that if the thing flies over Midgar, you end up in Midgar instead of fighting it, so it's better to save each time before you start engaging the Weapon.
Midgar tunnels
When you reach Midgar, you find that the city is under martial law, so you'll have to parachute in. Cait Sith is telling you where to go from here: you need to use the tunnels. The side street with the manhole has a save point.
After you go down, you end up in a really big room with lots of pipes and ladders. This place is somewhat confusing, but wandering around here shouldn't be too difficult; just remember that the only way to get to some places is through a platform, ventilation pipe or a ladder somewhere else. The treasure chests here are green. You can, among other things, pick up Aegis Armlet, two Elixirs, a Megalixir, Starlight Phone (for Cait Sith), and Max Ray (for Barret).
There's a save point next to the duct that leads out. You end up in the tunnels. Go all the way downward from here (eight intersections down) to get some great items, like Power, Guard, Mind and Magic sources, and most importantly, the unique W-Item materia (lower right area of the screen) at the very end of the tunnel with the save point. The only bad thing about the place is that there are tons of Shadow Maker enemies here: you can steal Turbo Ethers from them, but the annoying thing about them is that they have really slow attacks, and they also make your party quite slow too, so the journey down will take forever.
| Level | Hit Points | Magic | Weak against | Strong against | Absorbs |
|---|---|---|---|---|---|
| None |
Shin-Ra building
Head all the back up the tunnels to where you entered. Once you go up from the rails section where you came through, the Turks will appear. If you did the Yuffie subquests, they give you the option of whether or not to fight them. Up from there, there's two passages. The right passage leads back to the Shin-Ra building (you'll find an air duct that leads there), and if you missed the Turtle's Paradise poster earlier, now's the time to go read it: it's on the first floor lobby, on the farthest wall, and you won't get another chance in the game!
Things to do here:
- 1st floor: Read the Turtle's Paradise flyer.
- 2nd floor: Get Pile Banger for Barret and Master Fist for Tifa.
- 63rd floor: Pick up the Grow Lance for Cid.
- 64th floor: Bang on the vending machine to pick up a Mind and Speed Source, get HP Shout for Cait Sith, and have a rest if you need to.
- Fire escape (nearer top than bottom): Get Behomoth Horn for Red XIII.
- All floors: Pick up any items you missed on your first visit.
- Outside: There's a save point here.
The second underground passage takes you to the Sister Ray, but on the way Scarlet ambushes you in control of Heidegger's new mechanical boss.
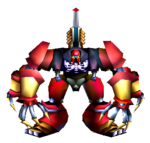
Proud Clod consists of two parts: The thing itself and Jamar Armor (second set of stats in the table). As usual, try Big Guard or set barriers, as those really help in the fight. Aside from that, this fight is relatively straightforward and doesn't have any big surprises. Just use the biggest and meanest spells and attacks you can think of. The boss will start using the big guns in the latter half of the fight though, so watch out for that. Like always, Knights of the Round can turn this into a first-turn knockout. If you don't have Knights of the Round, use the Phoneix Summon, which does a lot of damage.
| Level | Hit Points | Magic | Weak against | Strong against | Absorbs |
|---|---|---|---|---|---|
| 53/52 | 60000/20000 | 320/300 | None | Gravity | None |
After the fight, head up. There are two boxes here with Mystile and an Elixir, along with a save point. Next go up the ladder. If Barret is in your party, you can find the Missing Score here, which is Barret's best weapon; the box isn't here if he isn't in the party. Up in the uppermost platform, you'll find the mad scientist, who injects himself with Jenova cells and turns into a hideous monster.
Hojo
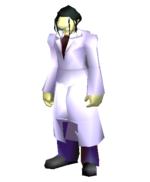
The following is a single fight, though Hojo goes through a few transformations. This is going to be a long fight with tons of different creatures and Hojo's forms, so whatever you do, don't waste Knights of Round on his first form.
Hojo is basically a sitting duck with no really big attacks. The only attack to watch out for is his Capsule ability, which summons a Bad Rap sample and a Poodler sample. The ability also heals the critter if one already exists, so don't waste your ammunition on the two flunkies.
| Level | Hit Points | Magic | Weak against | Strong against | Absorbs |
|---|---|---|---|---|---|
| 53 | 13000 | 250 | None | Gravity | None |
"Helletic" is a mispelling for "Heretic".
Once you smash Hojo for a while, the Jenova brew starts to have some odd effects on him, and turns him into a gigantic critter that has a body and two arms (stats in the table are for the body, left arm and the right arm). The body can recreate the missing limbs. This enemy is big and the arms can cause status effect changes against which there are some good remedies, like Ribbons or White Wind. Basically, all there is to this fight is a lot of good old-fashioned smashing.
| Level | Hit Points | Magic | Weak against | Strong against | Absorbs |
|---|---|---|---|---|---|
| 53 | 26000/24000/5000 | 200/400/300 | None | Gravity | None |
The last form is relatively easy, but watch out for the Combo attack, which inflicts more status effects than any of the previous attacks. You should give the character who has all of the nice spells and toys a Ribbon or Headband to make sure your entire party isn't sleeping through the whole fight. Just about everything else can be cured easily, but that trick makes this fight a piece of cake.
| Level | Hit Points | Magic | Weak against | Strong against | Absorbs |
|---|---|---|---|---|---|
| 58 | 30000 | 100 | None | Gravity | None |
Hojo is dead, Scarlet and Heidegger are stuck in a wreck, the Turks are scattered, and Rufus presumably perished in the Weapon attack. Thus, Shin-Ra is no more. A cutscene follows, and that concludes Disc 2.


