(Created page with "{{Header Nav|game=Kirby 64: The Crystal Shards}} Stage four takes place in a factory, with a hole in the ground leading to the interior. On the other side of this entrance is...") |
(rearrange and add images) |
||
| Line 3: | Line 3: | ||
Stage four takes place in a factory, with a hole in the ground leading to the interior. On the other side of this entrance is a piece of food. | Stage four takes place in a factory, with a hole in the ground leading to the interior. On the other side of this entrance is a piece of food. | ||
{{sidebar | |||
|width=300px | |||
|title=Crystal Shard | |||
|contents=On the last platform with the Shotzo, there is a path to the right leading to blocks with X's blocking a ladder. By using the Stone-Needle ability, Kirby can break the blocks and find the first Crystal Shard. | |||
[[File:Kirby64 ShiverStar4 Shard1.png|thumb|center|150px|Crystal Shard 1]] | |||
}} | |||
Inside, Kirby will have to climb down a ladder, avoiding Gordos and a Sawyer at the bottom. Ahead are platforms Kirby can drop through by crouching on them, though he needs to avoid the rockets that are deploying under each platform. Next, Kirby needs to drop through more platforms, this time with Shotzos firing cannonballs. Crossing a conveyor belt with a Hack will lead Kirby to the next area. | Inside, Kirby will have to climb down a ladder, avoiding Gordos and a Sawyer at the bottom. Ahead are platforms Kirby can drop through by crouching on them, though he needs to avoid the rockets that are deploying under each platform. Next, Kirby needs to drop through more platforms, this time with Shotzos firing cannonballs. Crossing a conveyor belt with a Hack will lead Kirby to the next area. | ||
| Line 8: | Line 15: | ||
The next area has several conveyor belts and valve pipes to traverse, along with Gordos and I<sup>3</sup> that need to be avoided. | The next area has several conveyor belts and valve pipes to traverse, along with Gordos and I<sup>3</sup> that need to be avoided. | ||
{{-}} | |||
{{sidebar | |||
|width=300px | |||
|title=Crystal Shard | |||
|contents=The second Crystal Shard is in the cage above the Big Burnis area. To open the cage, Kirby needs the Spark-Cutter ability. | |||
The mini-boss of this stage is a Big Burnis. The arena takes place in a lava pit, and the Big Burnis will drop flaming rocks as it flies around. Magoos also jump from the lava on either side of the main platform. After defeating the Big Burnis, the player has to fly up to reach the next door. | [[File:Kirby64 ShiverStar4 Shard2.png|thumb|center|150px|Crystal Shard 2]] | ||
}} | |||
{{Bossbar | |||
|title=Big Burnis | |||
|contents=The mini-boss of this stage is a Big Burnis. The arena takes place in a lava pit, and the Big Burnis will drop flaming rocks as it flies around. Magoos also jump from the lava on either side of the main platform. After defeating the Big Burnis, the player has to fly up to reach the next door. | |||
}} | |||
The next area has dropping ceilings, which can crush Kirby if he gets caught between them. To avoid getting crushed when trying to cross, Kirby needs to stand in openings where the ceilings cannot reach him. Shotzos are also found in this area. | The next area has dropping ceilings, which can crush Kirby if he gets caught between them. To avoid getting crushed when trying to cross, Kirby needs to stand in openings where the ceilings cannot reach him. Shotzos are also found in this area. | ||
{{-}} | |||
{{sidebar | |||
|width=300px | |||
|title=Crystal Shard | |||
|contents=The third Crystal Shard is in the hall with the Scarfies. It resides at the end of the hall, meaning the player needs to be quick in order to collect it and avoid getting Kirby crushed. | |||
The final area is an ascending platformer. On each floor is an approaching wall manned by giant robots, the wall being able to damage Kirby if it contacts him and | [[File:Kirby64 ShiverStar4 Shard3.png|thumb|center|150px|Crystal Shard 3]] | ||
}} | |||
The final area is an ascending platformer. On each floor is an approaching wall manned by giant robots, the wall being able to damage Kirby if it contacts him and instantly killing him if Kirby gets stuck between it and the wall at the end of the halls. In the final hall with the Mahalls, Kirby needs to stand on a platform while the two robots close him in to avoid getting hit. After fighting off some Zoos and going through the door, the level will end. | |||
{{-}} | |||
==Enemies== | ==Enemies== | ||
<gallery> | |||
File:K64 Gordo Enemy Info Card.png|Gordo | |||
File:K64 Sawyer Enemy Info Card.png|Sawyer | |||
File:K64 Burnis Enemy Info Card.png|Burnis | |||
File:K64 Shotzo Enemy Info Card.png|Shotzo | |||
File:K64 Bobo Enemy Info Card.png|Bobo | |||
File:K64 Bouncy Enemy Info Card.png|Bouncy | |||
File:K64 Cairn Enemy Info Card.png|Cairn | |||
File:K64 Fishbone Enemy Info Card.png|Fishbone | |||
File:K64 Turbite Enemy Info Card.png|Turbite | |||
File:K64 Flora Enemy Info Card.png|Flora | |||
File:K64 I3 Enemy Info Card.png|I<sup>3</sup> | |||
File:K64 Spark-i Enemy Info Card.png|Spark-i | |||
File:K64 Scarfy Enemy Info Card.png|Scarfy | |||
File:K64 Mahall Enemy Info Card.png|Mahall | |||
File:K64 Zoos Enemy Info Card.png|Zoos | |||
</gallery> | |||
{{Footer Nav|game=Kirby 64: The Crystal Shards|prevpage=Shiver Star 3|nextpage=HR-H}} | {{Footer Nav|game=Kirby 64: The Crystal Shards|prevpage=Shiver Star 3|nextpage=HR-H}} | ||
Latest revision as of 16:44, 20 May 2022
Stage four takes place in a factory, with a hole in the ground leading to the interior. On the other side of this entrance is a piece of food.
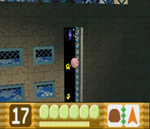
Inside, Kirby will have to climb down a ladder, avoiding Gordos and a Sawyer at the bottom. Ahead are platforms Kirby can drop through by crouching on them, though he needs to avoid the rockets that are deploying under each platform. Next, Kirby needs to drop through more platforms, this time with Shotzos firing cannonballs. Crossing a conveyor belt with a Hack will lead Kirby to the next area.
In the second area, King Dedede will appear and give Kirby a ride. They need to run against a conveyor belt, smashing walls and enemies on the way. Getting hit by the giant Hammers will cause an instant-kill on King Dedede. At the end, King Dedede will throw Kirby into the next area.
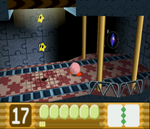
The next area has several conveyor belts and valve pipes to traverse, along with Gordos and I3 that need to be avoided.
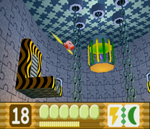
The next area has dropping ceilings, which can crush Kirby if he gets caught between them. To avoid getting crushed when trying to cross, Kirby needs to stand in openings where the ceilings cannot reach him. Shotzos are also found in this area.
The final area is an ascending platformer. On each floor is an approaching wall manned by giant robots, the wall being able to damage Kirby if it contacts him and instantly killing him if Kirby gets stuck between it and the wall at the end of the halls. In the final hall with the Mahalls, Kirby needs to stand on a platform while the two robots close him in to avoid getting hit. After fighting off some Zoos and going through the door, the level will end.
Enemies[edit]
-
Gordo
-
Sawyer
-
Burnis
-
Shotzo
-
Bobo
-
Bouncy
-
Cairn
-
Fishbone
-
Turbite
-
Flora
-
I3
-
Spark-i
-
Scarfy
-
Mahall
-
Zoos


