(Achievement, clarifications) |
(Added section "No Cheating SpeedRun".) |
||
| Line 6: | Line 6: | ||
{{quote|Please note that we have added a consequence for failure. Any contact with the chamber floor will result in an unsatisfactory mark on your official testing record, followed by death. Good luck.|GLaDOS}} | {{quote|Please note that we have added a consequence for failure. Any contact with the chamber floor will result in an unsatisfactory mark on your official testing record, followed by death. Good luck.|GLaDOS}} | ||
{{-}} | {{-}} | ||
== Walkthrough == | |||
[[Image:Portal_08_portal1.jpg|thumb|left|The first portal, to reorient the pellet.]] | [[Image:Portal_08_portal1.jpg|thumb|left|The first portal, to reorient the pellet.]] | ||
[[Image:Portal_08_portal2.jpg|thumb|right|The second portal, to feed the pellet receiver.]] | [[Image:Portal_08_portal2.jpg|thumb|right|The second portal, to feed the pellet receiver.]] | ||
| Line 15: | Line 16: | ||
{{quote|Very impressive. Please note that any appearance of danger is merely a device to enhance your testing experience.|GLaDOS}} | {{quote|Very impressive. Please note that any appearance of danger is merely a device to enhance your testing experience.|GLaDOS}} | ||
== No Cheating SpeedRun in One Segment for Mere Mortals == | |||
Once again, this chamber offers mere mortals no opportunity to bypass or finesse anything. Accelerated Back Hoppers can use the railing to jump directly to the platform and then the exit area. Some players can jump out of a portal on the wall to the right of the observation chamber and air-strafe around the corner to the exit area. Most of us will have to solve the puzzle. Move quickly to the railing and place the first blue portal to collect the pellet, whether or not there is a burn mark. As soon as the pellet appears out of the orange portal, move the blue portal to the red glow opposite the receiver. Move to the wall at the right of the entry area and watch the pellet. As soon as it is safely back through the orange portal, place the blue portal in the wall in front of you and step through. Move the blue portal to the wall over the moving platform, turn around and step back through the orange portal to get onto the platform before it starts moving. You don't want to have to wait while it goes all the way to the other end and then back. None of this is hard to do if you practice. You can give yourself a little more time by placing the last blue portal to the left of the moving platform and stepping through as it passes. As the platform nears the exit area, don't wait for it to get all the way there. Retreat to the back of the platform and time your rush and jump to get to the exit a few seconds earlier. | |||
{{Footer Nav|game=Portal|prevpage=Chamber 07|nextpage=Chamber 09}} | {{Footer Nav|game=Portal|prevpage=Chamber 07|nextpage=Chamber 09}} | ||
Revision as of 15:18, 1 December 2015
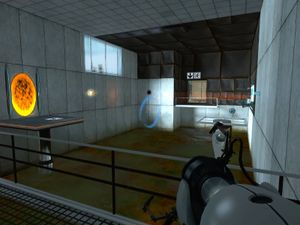
Chamber 8 is where you first start facing a little bit of danger; as GLaDOS puts it:
Please note that we have added a consequence for failure. Any contact with the chamber floor will result in an unsatisfactory mark on your official testing record, followed by death. Good luck.
—GLaDOS
Walkthrough
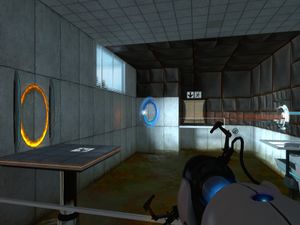
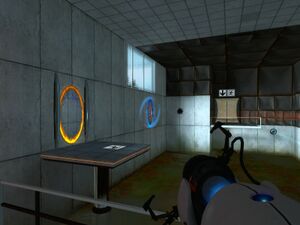
The first thing to do is to reorient the pellet on the left so that it's flying out of the orange portal. To do this, place a portal on the burn mark on the far wall where the pellet bounces. The pellet will fly through and come out of the fixed orange end of the portal. Now, before it bounces back through the portal towards the pellet launcher, re-place the blue end of the portal on top of the red area lit by the pellet receiver; thus when the pellet does bounce back into the orange end of the portal, it will come out the blue end heading straight towards the pellet receiver.
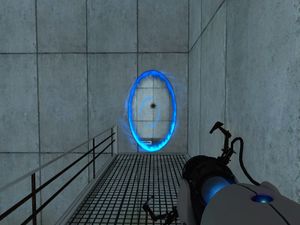
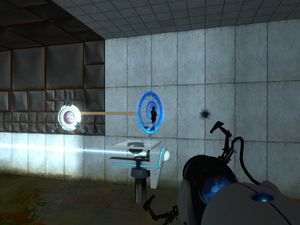
To get to the exit, you must get onto the platform, but this has to be a two-stage process, as the orange end of the portal is fixed. First, create a portal anywhere accessible from your current location, and go through it, bringing you to the ledge. Now, create a portal on the wall beside the near end of the platform's track, and wait until the platform is beside it before going through and riding to the chamberlock.
Very impressive. Please note that any appearance of danger is merely a device to enhance your testing experience.
—GLaDOS
No Cheating SpeedRun in One Segment for Mere Mortals
Once again, this chamber offers mere mortals no opportunity to bypass or finesse anything. Accelerated Back Hoppers can use the railing to jump directly to the platform and then the exit area. Some players can jump out of a portal on the wall to the right of the observation chamber and air-strafe around the corner to the exit area. Most of us will have to solve the puzzle. Move quickly to the railing and place the first blue portal to collect the pellet, whether or not there is a burn mark. As soon as the pellet appears out of the orange portal, move the blue portal to the red glow opposite the receiver. Move to the wall at the right of the entry area and watch the pellet. As soon as it is safely back through the orange portal, place the blue portal in the wall in front of you and step through. Move the blue portal to the wall over the moving platform, turn around and step back through the orange portal to get onto the platform before it starts moving. You don't want to have to wait while it goes all the way to the other end and then back. None of this is hard to do if you practice. You can give yourself a little more time by placing the last blue portal to the left of the moving platform and stepping through as it passes. As the platform nears the exit area, don't wait for it to get all the way there. Retreat to the back of the platform and time your rush and jump to get to the exit a few seconds earlier.