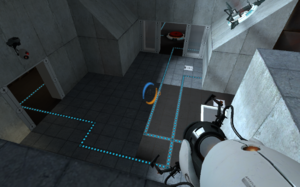
The weighted companion cube
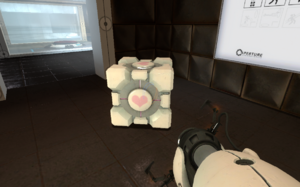
This is your introduction to the weighted companion cube. It will accompany you for the entire chamber, providing any assistance you require. Throughout the test, GLaDOS will make odd remarks about the companion cube, indicating how it is not alive, as if you are very attached to it and insisting that it is going to talk or do things.
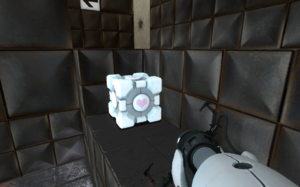
When it drops from the transport tube, pick it up. The first area is about using the companion cube to help get you through to the platform area. You will notice the steps are too high to jump on, so you will have to set the cube down, climb on it, continue to the step, and then grab the cube and do the same thing for the next step.
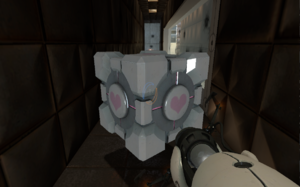
- Next to where the second pellet hits the wall.
- Above the doorway to the small pellet launcher room.
Once at the top, you should now see a corridor with energy pellets bouncing back and forth - hold the cube in front of you to deflect the pellets harmlessly. After going through both corridors, you should reach the main test area where you need to raise three platforms, by bringing pellets to the three receivers. These can be done in any order, but the way described here is probably from easiest to hardest.
Receiver 1
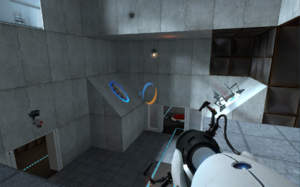
One of the platforms is easily raised without assistance from the cube. Place a portal within the second pellet corridor (the one easiest to get to from here, where the pellet hits the wall), and the other on the angled platform across from the angled platform with the pellet receiver. The pellet will bounce off the ceiling and hit the receiver.
Receiver 2
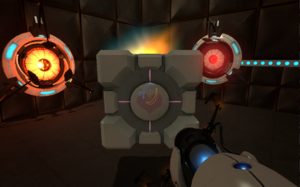
The doorway under the camera contains a pellet launcher firing a pellet perpendicular to the receiver, but there is no method to place a portal. However, you can bounce the pellet using the cube into the receiver.
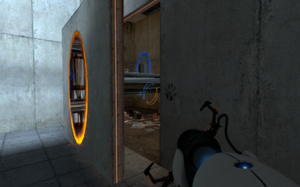

Before you travel back up to the ledge, notice that there is an area behind the ground-level extended panel. While you cannot crawl into this, you can create a portal inside the area and explore. Some interesting pictures and writings may make you wonder what all has gone on in these test chambers in the past.
Receiver 3
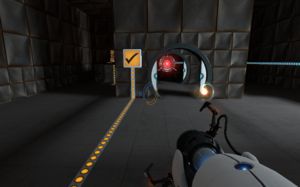
In the final side room, there is a pellet receiver blocked by 2 doors, each powered by a button. Go ahead and portal back up to the ledge, and shoot a portal on the wall where the remaining pellet is bouncing. Come back down and shoot the other color portal on the extended panel. You can place the cube on the raised button, however if you simply stand on the second button, the pellet will run into you. Either stand on the very side edge of the button, or wait until the pellet just passes, then quickly stand on the button to open the door before the pellet hits it.
Exit
Once all three platforms are raised, shoot a portal onto the ceiling or high wall, and bring the cube with you. Jump across all three platforms and onto the next level, and then place the cube on the next button.
GlaDOS will explain that you must euthanize the cube by placing it in the incinerator. Proceed into the open room and press the button to open the incinerator, then quickly grab the cube and drop it in. The chamberlock will then open.
Advanced
The weighted companion ball will assist you throughout the test.
- The first catcher isn't much different, since you still poolshark the pellet off the angled wall. (The glass barrier isn't much of an obstruction.)
- The second catcher has both buttons raised a bit higher. You need to knock down and stand on a camera to hold both buttons down.
- Or you can push down the first door button with the companion ball, and quickly let go of the button as it passes. Let it ping back and forth between the doors while you run behind the second door. Open that one with the companion ball.
- The side catcher requires you to bounce the pellet above a glass barrier.
Challenges
Portals
A 2 portal solution involves:
- Place gold portal at the end of the first corridor.
- Place blue portal on protruding wall facing double door.
Use the cube to bounce the pellet in the side room into its receiver.
Place the cube onto the button for the second door, and stand on the edge of the button for the first door, allowing the pellet to pass by without hitting you. It will be captured by the receiver, but the emitter will continue to produce more pellets.
In front of the protruding wall, place the cube on the floor such that it will ricochet the pellet off the ceiling and into the last receiver.
You can now use the already placed portals to get back up top and proceed to the exit.
---Alternate 2 Portal Solution---
Navigate with companion cube and enter room where the three Lifts are in the floor. Take cube to last lift and place in left corner if looking at exit direction. Jump on top of Cube and then proceed to Jump and Grab(E) alternatively till you get onto raised section(May take some practice) !*Possible if done right to get onto raised section with cube and complete level with 0 portals*!. Once on raised section proceed to area with button. Place portal on ground next to button and return for your cube. PLace opposite portal anywhere in Lift room and finish with 2 portals but not playing with pellets.
Awards are given at 4, 3, and 2 portals.
Steps
Awards at 215...
Time
Awards at 2:20, 1:45...