Chamber 18 is the hardest test chamber yet in Portal. I hope you have your fingers (and your in-screen portal gun) ready! Chamber 18 is cold, a bit inhuman, and a bit scary, but it's quite fun. Chamber 18 has a lot of tough challenges, but look on the bright side: you might get cake after you complete the next chamber!
The Enrichment Center is required to remind you that you will be baked, and then there will be cake.
—GLaDOS
- Next to the window at the entrance of the turret room.
- On the wall of the entrance of the final room.
Well... maybe...
Part 1

Lethal water to take note of here! To get past the lethal gap, put a portal across the gap on the ceiling, and put another one near you. Go ahead and crouch into the side room once you get over there. You’ll find a radio and a lot of miscellaneous objects, although not a whole lot to read this time.

Continuing on, there is again a nice portalable ceiling, but no way to simply walk into a portal. You can, however create one on the next platform’s wall, and get a running jump into it (put the portal a little low, as even if you jump too high, you can still get into a portal below you... unless you’re carrying the radio). The platform you’re aiming to land on does not cover as large of an area, so be sure to adjust your fall accordingly.
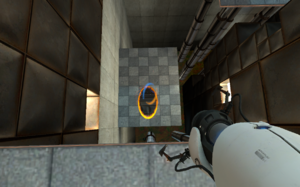
Another ceiling portal, and you’re off to platform 3, followed by wall placement to get you onto platform 4. Unfortunately, the door is closed, and tracing the wire leads to yet another platform. Some familiar sights are here, letting you know how you should get to it; there’s the extended panel showing your top portal placement, and a checkered floor on a level below you showing your bottom portal placement. Fling away!
Now you’ve got a big button... but nothing to put on it. And so we have to make our way into the next area we can go into. You get a lovely preview of what you’re about to run into through the glass.
Part 2

If you can manage to look through the glass and not get your view obstructed by turret fire, you’ll notice two laser beams indicating turrets facing away from the entrance, and two turrets facing to your right. Because of that, when you press the small button and open the entrance, go through on the left side by crouching under the support bar first to avoid any bullets.
Now that you’re safely in the room, let’s get rid of the real troublemakers in this situation. Unfortunately, you can’t reach most of them yourself, but there is something you can redirect at the turrets: the pellets! Very conveniently, the laser beam shows you exactly where the turret is looking straight ahead at, so simply take some time to place portals on a burn mark and a laser beam end (be careful, they can fire through portals if they see you!), and watch them fall into the watery abyss.

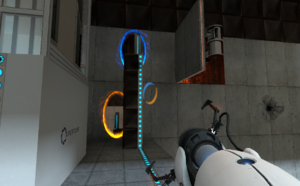
Now there’s still an active pellet launcher, and the receiver (inside the container on the left) will power a moving platform. You can redirect a pellet, placing your portals using a burn mark and the extended panel off to the left (the far one, not next to the small button). As soon as the pellet passes through the portal, recreate portals so that you can reach the small button to open the door to the receiver. You must press the button in this short span, as the door opens only very briefly.
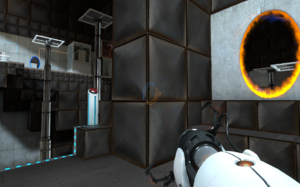
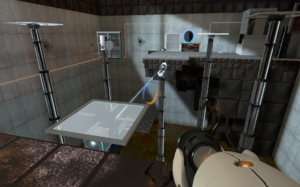
You can now take the moving platform over. You cannot jump to the cube, but you can jump to the lower area. Pressing this button, you will notice the entrance panel once again opens up, staying at an angle for a period of time before closing. Assessing the situation, the angle will be excellent for a long fling, and the checkered low floor on the water level creates the necessary momentum. Unfortunately, you have to get over there first, and so you must create portals to get back, press the button, go through, place a portal on the angled platform as soon as it stops moving, and fall, placing a portal below you. This will easily throw you to the cube. Finally!
But wait... now we have to get out of here with this cube. Go ahead and take the cube over to the entrance, but then go yourself back down to the small button. Portal placement, a push of the button, through the portals, grab the cube, and crawl back out of this terrible room. Cube on the button, portal back to platform 4, and through the door!
Part 3
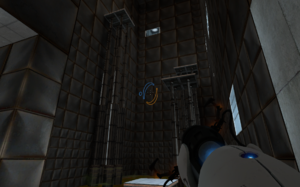
Yes, that’s right, you’re not done yet. This part is all about redirecting one single fling with many portals.

Now on your left, you see the floor on the bottom. Put a portal there and another on the platform you see straight ahead. Now once you jump, you may see the floor of the higher platform. What you want to do is shoot the color portal necessary so that you will now fly up through the next platform. It’s all back and forth as far as what color portals you will be placing. If you do mess up (but are still living), place a portal on the wall at the entrance so you can start over. If you happen to be on (or have a portal on) the platform with 3 dots, you can simply shoot one portal on the angled platform, another on the platform with 1 dot, and you can jump into that portal to get to the end. The last platform is slanted, which will fling you to the exit. Proceed to the elevator as GlaDoS talks to you.
Advanced
Floor 1 to 2 requires placement of the floor portal on #2 while doing the double fling.
In the arena, the lift is already active, but you need to avoid the turrets.
In the jump section, platforms will lower when you jump onto the next one.
Challenges
Portals
Part 1, 2 Portals Needed, 0 Portals Used
From the starting point, walk forward until you reach the ledge. Look at the ceiling on the far side of this area. If you look to your right, at the edge of the ceiling, you might be able to see a higher ceiling beyond the obvious ceiling you're looking at already. You may have to move around a bit to see it. Place an exit portal on the non-obvious ceiling then place an entrance portal on a wall behind you. Look through the portal and you'll see a surface you can land on to your right. You will have to move right while falling or you will fall into the liquid.
Part 2, 2 Portals Needed, 2 Portals Used
Looking around, you should be able to identify the area you were just at. Looking left of that area, you will see a platform higher than your present location. Place an exit portal at the ceilng above it and place an entrance portal where convenient. When going through the portal, you will be falling straight down.
Part 3, 2 Portals Needed, 4 Portals Used
Identify the area you were just at. Look right. You will see two elevated areas; one to the right and one to the left. In between those there will be a platform that is lower than where you are now. Place an exit portal at the high-left-area's wall. You will be using this in a moment to fling to the high-right area. Now jump down to the lower area and place a portal at the floor. IMPORTANT: DO NOT RE-CREATE THIS PORTAL - YOU WILL BE REUSING IT FROM ITS CURRENT LOCATION ON THE FLOOR. Walk and fall through the portal on the floor. You will be on the area previously identified as the high-left area. From here, jump down into the floor portal you made a moment ago to fling yourself to the opposite high-area. If all was done correctly, you should be standing right next to a button.
Part 4, 1 Portal Needed, 6 Portals Used
Quickness is important for this next part. You need to press the timer-button, run around the right side of the piston-door and place a portal on its wall surface when it has stopped moving (in the 45 degree position). Do not re-create the important floor portal mentioned earlier. Also, you will be shot at and likely hit while doing this. You must run back to the important floor portal and jump into it. You will be flung across the room of turrets to the far side of it and you will find a weighted storage cube. Pick it up; you will need it in a moment for the button you saw earlier. You may also need to use it to block the turrets from shooting you.
Part 5, 1 Portals Needed, 7 Portals Used
There is a room directly below where you're standing. This part can be tricky. You'll need to walk towards the ledge, fall off, and then immediately move backwards so that you land on the ledge of the room below you. If you fail to land on the ledge below you, you will fall into the liquid. From here, there will be a wall on your right. Put a portal on it - again, not the all-important floor portal. You can drop the cube off through the wall portal or jump with the cube. Take note that you will be jumping into a wall portal and coming out through a floor portal, so you must be sure to move sideways immediately or you will fall back in.
Part 6, 2 Portals Needed, 8 Portals Used
You are now standing next to the important floor portal. You will see two high areas above you (not the less-high platform). If you move around, you should see a wall that you can shoot a portal at. Place a portal on that wall - again, not the important floor portal. Step into the floor portal. You should land on the high area and there will be the other high area with a button on the other side. You can throw the cube through it first so that it lands on the other side or jump with the cube if you think you are able to do it. In either case, you want to be on the side that has the button with the cube in your possession. Place the cube on the button. Walk to the ledge and jump to the lower area that has the floor portal but do not jump through the portal. Instead, simply walk into the portal once you have landed. You should now be on the high area opposite of the high area with the button. The door is now open and you can walk through it.
Part 7, 5 Portals Needed, 10 Portals Used
Walk through the door and keep walking until you fall to a lower area. You will see platforms in front of you and a large drop to your left. If you have played this area before, you should know what to do and it should work fine. If not, continue reading. This part requires timing and thought. If you take a look at the platforms in front of you, you may notice that they progressively get higher. What you'll need to do here is put a portal on the bottom of the large drop you saw when you came in (that was on your left). You will also initially need to place another portal on the first platform. What will happen when you jump through the portal on the bottom of the large drop is you will be propelled upward high enough so, that at the peak of your launch upwards, you can send another portal to the next higher area. You must also alternate portals if you consider that if you just exited upwards from an orange portal, you will be falling back into the same orange portal when you come back down, which means you'd then need to place a blue portal on the next highest area (or place an orange portal if you just exited out of a blue portal). You will launch upwards out from four platforms this way. On the fourth one, there is an angled surface (45 degrees) on a far wall. When you are launched upwards from the fourth platform, you'll need to place another portal there as if it were the next platform. When you exit from that angled surface, you will be launched across the room to the exit.
If everything has been done correctly, you will have used 15 portals, which is 1 less than needed for the gold ranking.
Steps
Award at 150...
Time
Award at 2:10...