Air Section[edit | edit source]
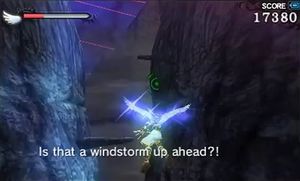
The beginning of the level pits the player against some old enemies flying by while the protagonists discuss their plan for this chapter: attacking the Reaper Fortress. Expect to deal with a mix of monoeyes, miks, handoras, and similar enemies. After seeing a bunch of red lights in the distance, you'll see a new enemy, Reapettes. Reapettes are the underlings of Reapers, and usually simply fly by. Other than their numbers, they pose no serious threat.
However, flying through the ravine does pose a risk. Hitting stone pillars while flying will hurt Pit, as will flying into enemies. And the windstorms, though not a direct threat, can disorient players by tossing them around. There are also some more poisonous shulms, so be sure to eaither leave them alone or kill them from a distance.
Four health orbs appear after emerging from a cave. You'll fly through some more similar terrain, but there should be no particular challenges. Even at the end of the level, when lasers come from all directions, none of them are particularly likely to hurt you.
Ground Section[edit | edit source]
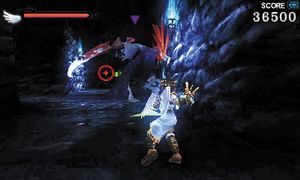
As you break the nearby pots for food, be careful about the guillotines; they aren't just for show. This level features Reapers, a fairly powerful enemy. They spawn the smaller reapettes and attack with a huge scythe. However, they only attack if they detect the player. When you see your first one, hide in the alcoves in the wall to avoid being detected. It's better than getting into a tough fight so early in the level.
If you do get into a fight with a Reaper, try and keep your distance. They only attack by spawning weaker enemies and using melee attacks, meaning that so long as you keep your distance, you should be fine. Do note, however, that they often lurk in smaller areas, meaning that close combat may be inevitable. Of course, never being seen is the safest option.
After a small fight in a courtyard, you'll see a spinning top of death. Similar to the Reaper before it, just hide in the alcoves until you get your chance to move. Be sure to dash. Here, you'll see a new enemy, a Shelbo. These poisonous enemies are only vulnerable at their mouths. Be sure to walk in the opposite direction when they try to suck in Pit. Ahead is a grind rail, a new sight for players. It lets Pit grind along a set path, providing quick transportation to another part of the level while leaving him capable of attacking.
Before you get on the grind rail, there is a secret area to the right behind a rock. Smash it and go through. There are two Zurees that disappear and reappear, and mess up your aiming if they slash you. Look through the door up ahead to find a souflee and quickly kill it for more hearts. Then knock the Boulder into the abyss with melee attacks to get a treasure later. Now go through the door, watching out for the sharp pendulum and drop down. Two Octos and a colorful skull called an Orne will appear. Ornes are among the most dangerous enemies in the game because they are invincible and it will instantly kill you on contact, so stay away from them. The good news is they follow you slowly, but sometimes roar to and skulls pop out of its mouth. If it does this, it is gaining a speed boost for a short time. Defeat the octos, get the treasure, and bash the rocks to find a jump pad and escape as fast as you can. Don't think you're safe yet, the Orne will float up and follow you. You are absolutely safe if you go back through the door. The pendulum could unfortunately knock you into the Orne if you're not careful. Note that the music changes if the Orne is present. Consider this a warning that an Orne is present as you play through the game. Also, not all ornes chase you, some move in patterns, so it's smart to slow down and plan a way to get around them. Now exit the area.
Travel along the grind rail and prepare for a fight against a few more powerful enemies. Before proceeding through the main gate, go into the smaller door to the left. Inside are a couple of ghost-like enemies that occasionally disappear, but should be easy enough to defeat. There is also a treasure chest that grants a weapon. Through the main doorway are a nest off shemums(two little Ornes circle the shemum jar if you're on intensity 7 or higher)and, eventually, an Eggplant Wizard. This wizard's projectiles turn Pit into an eggplant with legs, rendering him incapable of anything except running around for a few seconds. Later in the game, this can be very dangerous, as it leaves Pit very vulnerable. Here though, its mostly humiliating.
Ahead is a multifloored area, complete with swinging blades. Preferably, you should simply rush through without going to the lower level. Dangerous pits of acid and enemies lurk down there, Zurees and a clubberskull. This is a tough enemy, but it won't hurt you if you don't break its skull. If you do, it will quickly chase you and smother you with powerful punches. You can attack it from above if you want hearts. There is also a treasure chest nearby, but it requires one of a few mobility-based powers to reach. That said, you may want to descen to the subbasement. There is a Zodiac chamber here, meaning that coming here for the first time unlocks a new weapon. In most cases though, rushing through is your best bet.
At the next plaza is a door and a jump pad. The door eventually leads to a Level 5 Intensity Gate. The jump pad allows the player to proceed. The next room contains a patrolling Reaper, so be sure to remain out of its sight. However, if you want, you can grab food in this room before breaking the blocks in front of the next door.
A door appears to the left, but this simply holds an item, so it may not be worth going after. Ahead is a room with three waves of enemies to destroy. Defeat them, and unlock a new grind rail. This one requires the player to hit targets on the way up. This can be done with any sort of weapon, at a close or distant range, and can take however many tries the player needs. After ascending this rail and going down in an elevator, there will be an intersection. To the right is a poisonous hot spring with a Reaper. Avoid it. To the left is a regular hot spring. Recover in it; this will be your last chance to heal before the upcoming boss. The main path contains a pair of guillotines and a pack of Reapettes, but after that is your main target.
Boss: Great Reaper[edit | edit source]
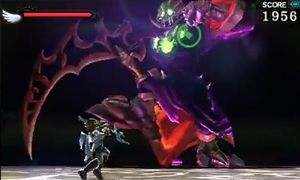
The Great Reaper fight consists of two parts. For the first part, remain on the ground floor to avoid his gargantuan scythe. Here, the only threats will be getting stomped and some smaller summoned enemies. Target his feet with either melee or ranged attacks. Eventually, the player will deal enough damage to the reaper to expose a weak spot on its head. Now its a good idea to head to the top floor, in order to gain a clear shot at the glowing target. Just be careful to dodge his scythe.
This fight should be fairly simple, so long as you are not intimidated by the Great Reaper's admittedly huge stature. Treat this as a simple two-part fight, and you'll be fine.
