m (Reverted edits by 75.69.117.129 (Talk) to last version by DeathWeasel) |
(adding images, numbering) |
||
| Line 1: | Line 1: | ||
{{Header Nav|game=Disgaea: Hour of Darkness}} | {{Header Nav|game=Disgaea: Hour of Darkness}} | ||
==Battle Basics 1== | ==Tutorial 1: Battle Basics 1== | ||
Follow the advice given in the tutorial, and this stage is very simple. | Follow the advice given in the tutorial, and this stage is very simple. | ||
Note: You may not return to this stage after its completion. | Note: You may not return to this stage after its completion. | ||
==Battle Basics 2== | ==Tutorial 2: Battle Basics 2== | ||
Follow the advice given in the tutorial, and this stage is very simple. | Follow the advice given in the tutorial, and this stage is very simple. | ||
Note: You may not return to this stage after its completion. | Note: You may not return to this stage after its completion. | ||
==Geo Symbols== | ==Tutorial 3: Geo Symbols== | ||
Near the blue Exp +50% Geo Symbol is a raised panel that is not affected by any Geo Panels. Destroying the Geo Symbol from here will leave you unaffected by the Geo chain. | Near the blue Exp +50% Geo Symbol is a raised panel that is not affected by any Geo Panels. Destroying the Geo Symbol from here will leave you unaffected by the Geo chain. | ||
Note: After this stage is completed, it is renamed "Practice Map" and the Exp +50% Geo Symbol will no longer appear. | Note: After this stage is completed, it is renamed "Practice Map" and the Exp +50% Geo Symbol will no longer appear. | ||
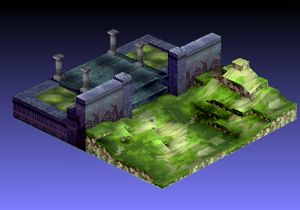
==Magnificent Gate== | ==1-1: Magnificent Gate== | ||
[[Image:Disgaea Episode 1-1.jpg|right|thumb]] | |||
Near the base panel are two geo symbols. One of them increases the enemy's strength and one increases the amount of experience you gain from defeating the enemies. Before destroying the Enemy Boost geo symbol, you should check the bonuses being offered for having a high combo count. If the bonuses include a lot of experience or good items, you may want to put the experience geo symbol on the [[Disgaea: Hour of Darkness/Geo Panels|Geo Panels]] before destroying the Enemy Boost symbol to create a large chain. Alternatively, destroy the Enemy Boost symbol and then place the Experience symbol on the colored tiles to increase the experience gained from defeating the enemies. | Near the base panel are two geo symbols. One of them increases the enemy's strength and one increases the amount of experience you gain from defeating the enemies. Before destroying the Enemy Boost geo symbol, you should check the bonuses being offered for having a high combo count. If the bonuses include a lot of experience or good items, you may want to put the experience geo symbol on the [[Disgaea: Hour of Darkness/Geo Panels|Geo Panels]] before destroying the Enemy Boost symbol to create a large chain. Alternatively, destroy the Enemy Boost symbol and then place the Experience symbol on the colored tiles to increase the experience gained from defeating the enemies. | ||
Once the Enemy Boost symbol is out of the way, you should have no problem defeating the foes. | Once the Enemy Boost symbol is out of the way, you should have no problem defeating the foes. | ||
{{-}} | |||
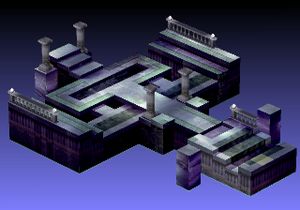
==Blessed Court== | ==1-2: Blessed Court== | ||
[[Image:Disgaea Episode 1-2.jpg|right|thumb]] | |||
The four ghosts near the Base Panel can be quickly destroyed. When they are killed, move two character onto the yellow Geo Panels which give them Attacks +1 and Def +50%. Line up your ranged attackers behind these two characters. The remaining enemies will attack, and the two characters on the yellow Geo Panels should be able to easily hold them off. | The four ghosts near the Base Panel can be quickly destroyed. When they are killed, move two character onto the yellow Geo Panels which give them Attacks +1 and Def +50%. Line up your ranged attackers behind these two characters. The remaining enemies will attack, and the two characters on the yellow Geo Panels should be able to easily hold them off. | ||
{{-}} | |||
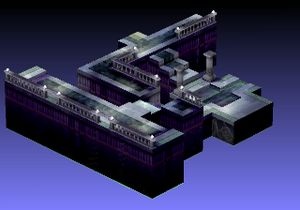
==Corridor of Love== | ==1-3: Corridor of Love== | ||
[[Image:Disgaea Episode 1-3.jpg|right|thumb]] | |||
The Boggarts near the entrance should be killed as soon as possible. Once this is accomplished, move the characters into the water which is affected by Recovery +20%. Standing in this water should make it easy to defeat the archers which come and attack you. After they are defeated, you may want to remain in the water until your characters are fully healed. Finally, proceed up the stairs and finish off the remaining forces. | The Boggarts near the entrance should be killed as soon as possible. Once this is accomplished, move the characters into the water which is affected by Recovery +20%. Standing in this water should make it easy to defeat the archers which come and attack you. After they are defeated, you may want to remain in the water until your characters are fully healed. Finally, proceed up the stairs and finish off the remaining forces. | ||
{{-}} | |||
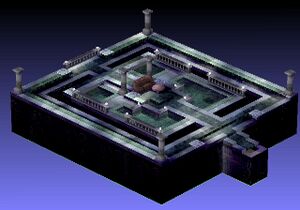
==Hall of Caresses== | ==1-4: Hall of Caresses== | ||
[[Image:Disgaea Episode 1-4.jpg|right|thumb]] | |||
Before rushing in to battle, keep in mind that up ahead is an enemy with a bow and an enemy with spells both on Geo Panels affected by Attacks +1 and Enemy Boost x6. These enemies will most likely be able to defeat one of your characters in a single attack. | Before rushing in to battle, keep in mind that up ahead is an enemy with a bow and an enemy with spells both on Geo Panels affected by Attacks +1 and Enemy Boost x6. These enemies will most likely be able to defeat one of your characters in a single attack. | ||
Revision as of 02:46, 2 May 2009
Tutorial 1: Battle Basics 1
Follow the advice given in the tutorial, and this stage is very simple.
Note: You may not return to this stage after its completion.
Tutorial 2: Battle Basics 2
Follow the advice given in the tutorial, and this stage is very simple.
Note: You may not return to this stage after its completion.
Tutorial 3: Geo Symbols
Near the blue Exp +50% Geo Symbol is a raised panel that is not affected by any Geo Panels. Destroying the Geo Symbol from here will leave you unaffected by the Geo chain.
Note: After this stage is completed, it is renamed "Practice Map" and the Exp +50% Geo Symbol will no longer appear.
1-1: Magnificent Gate

Near the base panel are two geo symbols. One of them increases the enemy's strength and one increases the amount of experience you gain from defeating the enemies. Before destroying the Enemy Boost geo symbol, you should check the bonuses being offered for having a high combo count. If the bonuses include a lot of experience or good items, you may want to put the experience geo symbol on the Geo Panels before destroying the Enemy Boost symbol to create a large chain. Alternatively, destroy the Enemy Boost symbol and then place the Experience symbol on the colored tiles to increase the experience gained from defeating the enemies.
Once the Enemy Boost symbol is out of the way, you should have no problem defeating the foes.
1-2: Blessed Court

The four ghosts near the Base Panel can be quickly destroyed. When they are killed, move two character onto the yellow Geo Panels which give them Attacks +1 and Def +50%. Line up your ranged attackers behind these two characters. The remaining enemies will attack, and the two characters on the yellow Geo Panels should be able to easily hold them off.
1-3: Corridor of Love

The Boggarts near the entrance should be killed as soon as possible. Once this is accomplished, move the characters into the water which is affected by Recovery +20%. Standing in this water should make it easy to defeat the archers which come and attack you. After they are defeated, you may want to remain in the water until your characters are fully healed. Finally, proceed up the stairs and finish off the remaining forces.
1-4: Hall of Caresses

Before rushing in to battle, keep in mind that up ahead is an enemy with a bow and an enemy with spells both on Geo Panels affected by Attacks +1 and Enemy Boost x6. These enemies will most likely be able to defeat one of your characters in a single attack.
With this in mind, there are two tactics that can be used to minimize the damage they cause.
- Throw a character with a sword skill high enough to use Blade Rush next to the Geo Symbols. Then use Blade rush to destroy all three in a single attack.
- Move two characters with a fist weapon skill high enough to use any Specials next two the enemies on the Geo Panels. The fist weapon skill will knock the enemies off it, and then you can move characters of your own on to it to prevent them from coming back.
Once the enemies on the Geo Panels are taken care of, focus your attention on Mid-Boss. He has powerful attacks that can cause a lot of damage. To make defeating him easier, leave the Attacks +1 Geo Symbol alone, and have your characters use it to their advantage. Make sure Mid-Boss doesn't get on these panels, or you will be in for a tough battle.
