(copyedit) |
m (Undo revision 957980 by 2600:1700:3364:12C0:B5FD:7939:FC21:1133 (talk)) Tag: Undo |
||
| (43 intermediate revisions by 30 users not shown) | |||
| Line 1: | Line 1: | ||
{{Header Nav|game=Castlevania: Circle of the Moon}} | {{Header Nav|game=Castlevania: Circle of the Moon}} | ||
{{floatingtoc}} | |||
The magic system ''Circle of the Moon'' (called "Dual Set-up System" or simply DSS) involves pairing magic cards in order to create an effect. Some pairs boost your stats, other modify your weapons, and others are more traditional magic spells. There are two types of cards: '''Action''' cards which determine the type of effect, and '''Attribute''' cards which determine the element associated with the effect. There are 10 of each type of cards, giving you 100 different effects (though many of them are the same thing, but with a different element). | The magic system in ''Circle of the Moon'' (called "Dual Set-up System" or simply DSS) involves pairing magic cards in order to create an effect. Some pairs boost your stats, other modify your weapons, and others are more traditional magic spells. There are two types of cards: '''Action''' cards which determine the type of effect, and '''Attribute''' cards which determine the element associated with the effect. There are 10 of each type of cards, giving you 100 different effects (though many of them are the same thing, but with a different element). | ||
Cards are randomly dropped by specific [[Castlevania: Circle of the Moon/Enemy data|enemies]], which means that you may have to fight 40 or 50 of the same enemy before you get the card you want. The easiest way to do this is to find a room near a save point where the only enemy in the room is the one you want (generally one of the many hidden rooms). For example, the best place to get the [[#Manticore|Manticore]] card is from the [[Castlevania: Circle of the Moon/Enemies#Demons|Thunder Demon]] in the hidden room nearest the [[Castlevania: Circle of the Moon/Bosses#Iron Golem|Iron Golem]] boss. It's the only enemy in the room so you don't have to fight through hordes of monsters just for your 1-in-40 chance of getting the card, it's near a save room so you can retreat once you get the card (or nearly killed), and the room is small so you can exit and re-enter quickly. This makes the rather tedious process go by much quickly. | Cards are randomly dropped by specific [[Castlevania: Circle of the Moon/Enemy data|enemies]], which means that you may have to fight 40 or 50 of the same enemy before you get the card you want. The easiest way to do this is to find a room near a save point where the only enemy in the room is the one you want (generally one of the many hidden rooms). For example, the best place to get the [[#Manticore|Manticore]] card is from the [[Castlevania: Circle of the Moon/Enemies#Demons|Thunder Demon]] in the hidden room nearest the [[Castlevania: Circle of the Moon/Bosses#Iron Golem|Iron Golem]] boss. It's the only enemy in the room so you don't have to fight through hordes of monsters just for your 1-in-40 chance of getting the card, it's near a save room so you can retreat once you get the card (or nearly killed), and the room is small so you can exit and re-enter quickly. This makes the rather tedious process go by much more quickly. | ||
Action cards are named after Roman gods and goddesses | Action cards are named after Roman gods and goddesses, and Attribute cards are named after mythical creatures. | ||
== Action Cards == | {{-}} | ||
==Action Cards== | |||
=== Mercury === | ===Mercury=== | ||
{{CotMcard|Mercury|[[Castlevania: Circle of the Moon/ | {{CotMcard|Mercury|[[Castlevania: Circle of the Moon/Gameplay#Elements|Elemental status]] added to the whip|Bone Head|First room of the [[Castlevania: Circle of the Moon/Locations#Catacomb|Catacomb]] that you come to after the vertical pit [[Castlevania: Circle of the Moon/Characters#Count Dracula|Dracula]] throws you into. You can whip their fireballs or just stand behind them and strike.|Mercury_%28mythology%29|was the Roman messenger god and god of trade. Equivalent to Hermes in Greek mythology.}} | ||
Somewhat useful, but not really, as most enemies aren't particularly affected by elemental attacks. It is generally more effective to use the [[Castlevania: Circle of the Moon/DSS#Venus/Salamander|Venus and Salamander]] cards instead to raise your base strength by 25%. | Somewhat useful, but not really, as most enemies aren't particularly affected by elemental attacks. It is generally more effective to use the [[Castlevania: Circle of the Moon/DSS#Venus/Salamander|Venus and Salamander]] cards instead to raise your base strength by 25%. | ||
{{-}} | |||
===Venus=== | |||
=== Venus === | |||
{{CotMcard|Venus|Stat modifiers|Slime|After getting the {{CotMitem|type=Items|name=Double}} you can get out of the [[Castlevania: Circle of the Moon/Locations#Catacomb|underground]]. Go up the left side and there is a hidden room with an {{CotMpowerup|type=mp|num=6}}. You can also get the card from the room directly under the first save room, however by going into the hidden room you can get the [[#Mandragora|Mandragora]] card at the same time.|Venus_%28mythology%29| was the Roman goddess of love and fertility. Equivalent to Aphrodite in Greek mythology. }} | {{CotMcard|Venus|Stat modifiers|Slime|After getting the {{CotMitem|type=Items|name=Double}} you can get out of the [[Castlevania: Circle of the Moon/Locations#Catacomb|underground]]. Go up the left side and there is a hidden room with an {{CotMpowerup|type=mp|num=6}}. You can also get the card from the room directly under the first save room, however by going into the hidden room you can get the [[#Mandragora|Mandragora]] card at the same time.|Venus_%28mythology%29| was the Roman goddess of love and fertility. Equivalent to Aphrodite in Greek mythology. }} | ||
Very useful as it | Very useful as it raises [[Castlevania: Circle of the Moon/Gameplay#Stats & leveling|stats]] without taking into account [[Castlevania: Circle of the Moon/Gameplay#Elements|elements]]. Six of the cards raise strength or defense — either by raising one by 25%, raising one based on how much of the map is complete, or by trading one for the other. The [[Castlevania: Circle of the Moon/DSS#Venus/Manticore|Venus and Manticore]] combination doubles the number of [[Castlevania: Circle of the Moon/Items#Hearts|hearts]] received (so 2 for a small, 10 for a large), which expedites replenishing hearts after a boss fight. The [[Castlevania: Circle of the Moon/DSS#Venus/Cockatrice|Venus and Cockatrice]] combination gives you free experience from walking. Sounds good, but since you only gain 1 exp for every five steps or so, it will talk hours to raise your levels, rendering the card combo useless. | ||
{{-}} | |||
===Jupiter=== | |||
=== Jupiter === | |||
{{CotMcard|Jupiter|Defensive barriers and enhancements|Heat Shade|In a hidden room in the [[Castlevania: Circle of the Moon/Locations#Audience Room|Audience Room]], right under the [[Castlevania: Circle of the Moon/Locations#Outer Wall|Outer Wall]], is an {{CotMpowerup|type=hp|num=9}} and a Heat Shade. You'll need the {{CotMitem|type=Items|name=Tackle}} to get to her. If you aren't having any luck in this room, the [[Castlevania: Circle of the Moon/Locations#Machine Tower|Machine Tower]] is infested with Heat Shades.|Jupiter_%28mythology%29|was the chief Roman god and patron saint of the Roman state. Equivalent to Zeus in Greek mythology.}} | {{CotMcard|Jupiter|Defensive barriers and enhancements|Heat Shade|In a hidden room in the [[Castlevania: Circle of the Moon/Locations#Audience Room|Audience Room]], right under the [[Castlevania: Circle of the Moon/Locations#Outer Wall|Outer Wall]], is an {{CotMpowerup|type=hp|num=9}} and a Heat Shade. You'll need the {{CotMitem|type=Items|name=Tackle}} to get to her. If you aren't having any luck in this room, the [[Castlevania: Circle of the Moon/Locations#Machine Tower|Machine Tower]] is infested with Heat Shades.|Jupiter_%28mythology%29|was the chief Roman god and patron saint of the Roman state. Equivalent to Zeus in Greek mythology.}} | ||
Several of these cards produce shields that, while they don't stop attacks, can damage enemies that get close. Others produce shields that block projectiles but not contact with an enemy. [[Castlevania: Circle of the Moon/DSS#Jupiter/Thunderbird|Jupiter and Thunderbird]] cuts all damage by 50%, and [[Castlevania: Circle of the Moon/DSS#Jupiter/Mandragora|Jupiter and Mandragora]] can heal you (making it possibly the most useful combo in the game, given the rarity of healing items). | Several of these cards produce shields that, while they don't stop attacks, can damage enemies that get close. Others produce shields that block projectiles but not contact with an enemy. [[Castlevania: Circle of the Moon/DSS#Jupiter/Thunderbird|Jupiter and Thunderbird]] cuts all damage by 50%, and [[Castlevania: Circle of the Moon/DSS#Jupiter/Mandragora|Jupiter and Mandragora]] can heal you (making it possibly the most useful combo in the game, given the rarity of healing items). | ||
{{-}} | |||
===Mars=== | |||
=== Mars === | |||
{{CotMcard|Mars|Elemental (non-whip) weapons|Bloody Sword|In the [[Castlevania: Circle of the Moon/Locations#Chapel Tower|Chapel Tower]], literally everywhere. The best place is right at the beginning since you'll be close to a save room if you need to heal.|Mars_%28mythology%29|was the Roman god of war. Equivalent to Ares in Greek mythology.}} | {{CotMcard|Mars|Elemental (non-whip) weapons|Bloody Sword|In the [[Castlevania: Circle of the Moon/Locations#Chapel Tower|Chapel Tower]], literally everywhere. The best place is right at the beginning since you'll be close to a save room if you need to heal.|Mars_%28mythology%29|was the Roman god of war. Equivalent to Ares in Greek mythology.}} | ||
Similar to the [[# | Similar to the [[#Mercury|Mercury]] card, but it replaces your whip with a different weapon such as a sword. Notable combos are the [[Castlevania: Circle of the Moon/DSS#Mars/Griffin|Griffin]] (a charge attack), [[Castlevania: Circle of the Moon/DSS#Mars/Thunderbird|Thunderbird]] (fast attack), [[Castlevania: Circle of the Moon/DSS#Mars/Unicorn|Unicorn]] (very powerful holy sword), and [[Castlevania: Circle of the Moon/DSS#Mars/Black Dog|Black Dog]] (slow but very powerful gun). | ||
{{-}} | |||
===Diana=== | |||
=== Diana === | |||
{{CotMcard|Diana|Projectiles added to whip|Man Eater|In the [[Castlevania: Circle of the Moon/Locations#Underground Gallery|Underground Gallery]], in the last long horizontal corridor before the [[Castlevania: Circle of the Moon/Bosses#Dragon Zombie|Dragon Zombies]]. Enter from the ''left'' side (so that you're closer to a save room). The trick is to get close enough to it so you can avoid its stream of pods but not so close that the second Killer Bee attacks. In the background is an alcove with a statue. Stand just in front of the left side of the alcove and you should be fine.|Diana_%28mythology%29|was the Roman goddess of the hunt. Equivalent to Artemis in Greek mythology.}} | {{CotMcard|Diana|Projectiles added to whip|Man Eater|In the [[Castlevania: Circle of the Moon/Locations#Underground Gallery|Underground Gallery]], in the last long horizontal corridor before the [[Castlevania: Circle of the Moon/Bosses#Dragon Zombie|Dragon Zombies]]. Enter from the ''left'' side (so that you're closer to a save room). The trick is to get close enough to it so you can avoid its stream of pods but not so close that the second Killer Bee attacks. In the background is an alcove with a statue. Stand just in front of the left side of the alcove and you should be fine.|Diana_%28mythology%29|was the Roman goddess of the hunt. Equivalent to Artemis in Greek mythology.}} | ||
Another [[Castlevania: Circle of the Moon/ | Another [[Castlevania: Circle of the Moon/Gameplay#Elements|elemental]] damage card, but gives you a long range projectile to throw at the enemy. Useful for enemies that are too far away to hit or bosses that you need to avoid at all costs, but the high MP cost of most of the weapons makes it something to save for special situations. | ||
{{-}} | {{-}} | ||
=== Apollo === | ===Apollo=== | ||
{{CotMcard|Apollo|Explosives thrown|Arch Demon| | {{CotMcard|Apollo|Explosives thrown|Arch Demon|There are no really good spots to find one, as most of them require you go through groups of enemies. Your best bet is to find one behind the heavy box at the very beginning of the game in the [[Castlevania: Circle of the Moon/Locations#Catacomb|Catacomb]]. The right room off of the entrance to the [[Castlevania: Circle of the Moon/Locations#Underground Warehouse|Underground Warehouse]] is your second best bet, as it is close to a save room and there's only weak enemies in your way. Regardless of where you go, this is the most annoying card to get, and can only be found after you get the {{CotMitem|type=Items|name=Heavy Ring}}. If you run into the room, jump immediately in front of the Zombie that appears first and then do a double jump, you can land in front of the Arch Demon and duck in the safe spot. |Apollo|was the Greek and Roman god of medicine.}} | ||
Objects are chucked at enemies in a similar fashion as the [[Castlevania: Circle of the Moon/Weapons#Axe|axe]], and most explode on impact. The exceptions are the [[Castlevania: Circle of the Moon/DSS#Apollo/Golem|Golem]], [[Castlevania: Circle of the Moon/DSS#Apollo/Cockatrice|Cockatrice]], and [[Castlevania: Circle of the Moon/DSS#Apollo/Unicorn|Unicorn]] combos, which act more like [[#Uranus|Uranus]]'s summon monsters. | Objects are chucked at enemies in a similar fashion as the [[Castlevania: Circle of the Moon/Weapons#Axe|axe]], and most explode on impact. The exceptions are the [[Castlevania: Circle of the Moon/DSS#Apollo/Golem|Golem]], [[Castlevania: Circle of the Moon/DSS#Apollo/Cockatrice|Cockatrice]], and [[Castlevania: Circle of the Moon/DSS#Apollo/Unicorn|Unicorn]] combos, which act more like [[#Uranus|Uranus]]'s summon monsters. | ||
{{-}} | |||
===Neptune=== | |||
=== Neptune === | {{CotMcard|Neptune|Full [[Castlevania: Circle of the Moon/Gameplay#Elements|elemental]] protection|[[Castlevania: Circle of the Moon/Enemies#Armors|Ice Armor]]|The first large room of the [[Castlevania: Circle of the Moon/Locations#Underground Waterway|Underground Waterway]] has numerous [[Castlevania: Circle of the Moon/Enemies#Armors|Ice Armors]] and is near the save room in the [[Castlevania: Circle of the Moon/Locations#Abyss Stairway|Abyss Stairway]]. Even though you should wait to clear the Underground Waterway until after you get the {{CotMitem|type=Items|name=Cleansing}} by defeating [[Castlevania: Circle of the Moon/Bosses#Death|Death]], you can (and should) get the card after defeating [[Castlevania: Circle of the Moon/Bosses#Adramelech|Adramelech]], as it will help you survive the numerous [[Castlevania: Circle of the Moon/Gameplay#Status|poisonous]] enemies in the [[Castlevania: Circle of the Moon/Locations#Underground Gallery|Underground Gallery]] and the [[Castlevania: Circle of the Moon/Enemies#Armors|Armor enemies]] in the [[Castlevania: Circle of the Moon/Locations#Underground Warehouse|Underground Warehouse]].|Neptune_%28mythology%29|was the Roman god of the sea. Equivalent to Poseidon in Greek mythology.}} | ||
{{CotMcard|Neptune|Full [[Castlevania: Circle of the Moon/ | |||
Absorbs all damage from a certain element, and restores 10% of the damage (so an attack that would normally take 100HP from you will instead take 100 MP and restore 10HP to you). Very useful, however note that some enemies have non elemental attacks, and running into an enemy won't necessary count as elemental damage. | Absorbs all damage from a certain element, and restores 10% of the damage (so an attack that would normally take 100HP from you will instead take 100 MP and restore 10HP to you). Very useful, however note that some enemies have non elemental attacks, and running into an enemy won't necessary count as elemental damage. | ||
{{-}} | {{-}} | ||
=== Saturn === | ===Saturn=== | ||
{{CotMcard|Saturn|[ | {{CotMcard|Saturn|[[wp:Familiar spirit|Familiar spirit]]|[[Castlevania: Circle of the Moon/Enemies#Fallen Angel|Fallen Angel]]|The tall tower outside the [[Castlevania: Circle of the Moon/Locations#Battle Arena|Battle Arena]] is the only place you can find him.|Saturn_%28mythology%29|was the Roman god of the harvest. Equivalent to Cronus in Greek mythology.}} | ||
An [[Castlevania: Circle of the Moon/Gameplay#Elements|elemental]] spirit appears and follows you around, firing when you whip. Fun, but not exceptionally useful since you can't control the familiar and most don't move around enough. They tend to stay a little above you, meaning that many of their attacks will pass right over an enemy. A couple are more useful however, such as a skeletal ghost that homes in on nearby enemies and attacks them in short quick bursts, or an eagle that dives at enemies. | |||
{{-}} | {{-}} | ||
===Uranus=== | |||
{{CotMcard|Uranus|Summoned monster|[[Castlevania: Circle of the Moon/Enemies#Candles|Scary Candle]]|After defeating [[Castlevania: Circle of the Moon/Bosses#Dragon Zombie|Dragon Zombie]] in the [[Castlevania: Circle of the Moon/Locations#Underground Gallery|Underground Gallery]], this fake candle will appear in the [[Castlevania: Circle of the Moon/Bosses#Iron Golem|Iron Golem]]'s room in the [[Castlevania: Circle of the Moon/Locations#Machine Tower|Machine Tower]].|Uranus_%28mythology%29|was a Greek god of the Sky. Equivalent to [[wp:Caelus|Caelus]] in Roman mythology.}} | |||
Pressing (down, forward, up, B) Then, a large creature appears on screen and unleashes a powerful magic attack that hits everything on screen. High MP cost, but still very, very useful against bosses. | |||
{{-}} | {{-}} | ||
=== Pluto === | |||
===Pluto=== | |||
{{CotMcard|Pluto|Misc.|[[Castlevania: Circle of the Moon/Enemies#Candles|Trick Candle]]|After defeating [[Castlevania: Circle of the Moon/Bosses#Camilla|Camilla]] this fake candle will appear in [[Castlevania: Circle of the Moon/Bosses#Cerberus|Cerberus]]' room in the [[Castlevania: Circle of the Moon/Locations#Catacomb|Catacomb]].|Pluto_%28mythology%29|was the Roman god of the Underworld. Equivalent to Hades in Greek mythology.}} | {{CotMcard|Pluto|Misc.|[[Castlevania: Circle of the Moon/Enemies#Candles|Trick Candle]]|After defeating [[Castlevania: Circle of the Moon/Bosses#Camilla|Camilla]] this fake candle will appear in [[Castlevania: Circle of the Moon/Bosses#Cerberus|Cerberus]]' room in the [[Castlevania: Circle of the Moon/Locations#Catacomb|Catacomb]].|Pluto_%28mythology%29|was the Roman god of the Underworld. Equivalent to Hades in Greek mythology.}} | ||
These are special effects that don't really fall into a category. Some affect [[Castlevania: Circle of the Moon/ | These are special effects that don't really fall into a category. Some affect [[Castlevania: Circle of the Moon/Gameplay#Stats & leveling|stats]], others how your [[Castlevania: Circle of the Moon/Weapons|sub-weapon]] works. The most useful ones are [[Castlevania: Circle of the Moon/DSS#Pluto/Mandragora|Pluto and Mandragora]] (+20% experience from all monsters – keep this one active when you aren't using anything else and switch to it when a boss is about to die), [[Castlevania: Circle of the Moon/DSS#Pluto/Unicorn|Pluto and Unicorn]] (complete invincibility, though you cannot attack – good for when you need to flee to a save room to heal), and [[Castlevania: Circle of the Moon/DSS#Pluto/Black Dog|Pluto and Black Dog]] (turns you into a skeleton). Be careful in skeleton form, since all damage you take becomes 9999, so you always die. When throwing bones, there is a small chance that a huge bone will be thrown, which does massive damage to everything on about half the screen. | ||
{{-}} | {{-}} | ||
=== Salamander === | ==Attribute Cards== | ||
{{CotMcard|Salamander|Fire|[[Castlevania: Circle of the Moon/Enemies#Skeletons|Skeleton Bomber]], Imp|Either the shaft in the [[Castlevania: Circle of the Moon/Locations#Catacomb|Catacomb]] or the first room after that. Both are overrun with Skeleton Bombers, so you should have no trouble getting this one.|Salamander_%28legendary_creature%29|s are a type of amphibian that was often given | ===Salamander=== | ||
{{CotMcard|Salamander|Fire|[[Castlevania: Circle of the Moon/Enemies#Skeletons|Skeleton Bomber]], Imp|Either the shaft in the [[Castlevania: Circle of the Moon/Locations#Catacomb|Catacomb]] or the first room after that. Both are overrun with Skeleton Bombers, so you should have no trouble getting this one.|Salamander_%28legendary_creature%29|s are a type of amphibian that was often given fantastic, fire-based powers in medieval literature, since they appeared when logs burned (escaping for their lives), and have come to be associated with fire and heat.}} | |||
The most notable use of this card is [[Castlevania: Circle of the Moon/DSS#Pluto/Salamander|with Pluto]], which lets you use [[Castlevania: Circle of the Moon/Weapons#Item Crush|Item Crushes]]. | The most notable use of this card is [[Castlevania: Circle of the Moon/DSS#Pluto/Salamander|with Pluto]], which lets you use [[Castlevania: Circle of the Moon/Weapons#Item Crush|Item Crushes]]. | ||
{{-}} | |||
===Serpent=== | |||
=== Serpent === | {{CotMcard|Serpent|Ice|[[Castlevania: Circle of the Moon/Enemies#Demons|Earth Demon]], [[Castlevania: Circle of the Moon/Enemies#Armors|Holy Armor]]|The first Earth Demon that you come to, in the room with the {{CotMitem|type=Items|name=Dash Boots}}. You may want to level up a bit first and get {{CotMitem|type=Equipment|name=Wrist Band|display=Wrist Bands}} from the bats first, as Demon enemies tend to be stronger than average.|Snake|s are common creatures given fantastical powers in various mythologies and folklores. This game's depiction refers to the Sea Serpents present in numerous myths, such as the Midgardsormr in Norse mythology; these serpents have been the first conceived image of dragons, the more popular Middle-Age European vision coming much later.}} | ||
{{CotMcard|Serpent|Ice|[[Castlevania: Circle of the Moon/Enemies#Demons|Earth Demon]], [[Castlevania: Circle of the Moon/Enemies#Armors|Holy Armor]]|The first Earth Demon that you come to, in the room with the {{CotMitem|type=Items|name=Dash Boots}}. You may want to level up a bit first and get {{CotMitem|type=Equipment|name=Wrist Band|display=Wrist Bands}} from the bats first, as Demon enemies tend to be stronger than average.|Snake|s are common creatures given fantastical powers in various mythologies and folklores.}} | |||
The most important use of this card is that some combinations let you freeze enemies like the Brain Floats, which is necessary to get certain items early in the game. Aside from that ice weapons are generally useless as most Serpent combinations results in significant strength penalties. | The most important use of this card is that some combinations let you freeze enemies like the Brain Floats, which is necessary to get certain items early in the game. Aside from that ice weapons are generally useless as most Serpent combinations results in significant strength penalties. | ||
{{-}} | |||
===Mandragora=== | |||
=== Mandragora === | |||
{{CotMcard|Mandragora|Plant/Forest|[[Castlevania: Circle of the Moon/Enemies#Armors|Axe Armor]], Lizard Man|Once you get the {{CotMitem|type=Items|name=Double}} and start climbing out of the [[Castlevania: Circle of the Moon/Locations#Catacomb|Catacomb]], head up the left side and there is a hidden room with a {{CotMpowerup|type=mp|num=6}}. You can also get the [[#Venus|Venus]] card here.|Mandragora_(demon)|are a type of demon familiar given to humans by the Devil.}} | {{CotMcard|Mandragora|Plant/Forest|[[Castlevania: Circle of the Moon/Enemies#Armors|Axe Armor]], Lizard Man|Once you get the {{CotMitem|type=Items|name=Double}} and start climbing out of the [[Castlevania: Circle of the Moon/Locations#Catacomb|Catacomb]], head up the left side and there is a hidden room with a {{CotMpowerup|type=mp|num=6}}. You can also get the [[#Venus|Venus]] card here.|Mandragora_(demon)|are a type of demon familiar given to humans by the Devil.}} | ||
[[Castlevania: Circle of the Moon/DSS#Jupiter/Mandragora|Jupiter and Mandragora]] can heal you. Get this combination as soon as possible as [[Castlevania: Circle of the Moon/Items#Potions|healing items]] are rare and save points can be far apart. [[Castlevania: Circle of the Moon/DSS#Pluto/Mandragora|Pluto and Mandragora]] gives you a 20% experience bonus for all enemies. When you aren't using another combination, keep this one on at all times. | [[Castlevania: Circle of the Moon/DSS#Jupiter/Mandragora|Jupiter and Mandragora]] can heal you. Get this combination as soon as possible as [[Castlevania: Circle of the Moon/Items#Potions|healing items]] are rare and save points can be far apart. [[Castlevania: Circle of the Moon/DSS#Pluto/Mandragora|Pluto and Mandragora]] gives you a 20% experience bonus for all enemies. When you aren't using another combination, keep this one on at all times. | ||
{{-}} | |||
===Golem=== | |||
=== Golem === | |||
{{CotMcard|Golem|Earth|[[Castlevania: Circle of the Moon/Enemies#Skeletons|Electric Skeleton]], Minotaur|Either in the long room that connects to the warp room in the [[Castlevania: Circle of the Moon/Locations#Audience Room|Audience Room]], or in the room right before the [[Castlevania: Circle of the Moon/Bosses#Necromancer|Necromancer]].|Golem|is a creature in Jewish folklore made of inanimate material and brought to life.}} | {{CotMcard|Golem|Earth|[[Castlevania: Circle of the Moon/Enemies#Skeletons|Electric Skeleton]], Minotaur|Either in the long room that connects to the warp room in the [[Castlevania: Circle of the Moon/Locations#Audience Room|Audience Room]], or in the room right before the [[Castlevania: Circle of the Moon/Bosses#Necromancer|Necromancer]].|Golem|is a creature in Jewish folklore made of inanimate material and brought to life.}} | ||
The big use is the [[Castlevania: Circle of the Moon/DSS#Jupiter/Golem|Jupiter]] combo which makes your invincibility after getting hit last four times as long. Besides that, the card isn't that great, though [[Castlevania: Circle of the Moon/DSS#Venus/Golem|Venus and Golem]] can be useful late in the game. | The big use is the [[Castlevania: Circle of the Moon/DSS#Jupiter/Golem|Jupiter]] combo which makes your invincibility after getting hit last four times as long. Besides that, the card isn't that great, though [[Castlevania: Circle of the Moon/DSS#Venus/Golem|Venus and Golem]] can be useful late in the game. | ||
{{-}} | {{-}} | ||
===Cockatrice=== | |||
{{CotMcard|Cockatrice|Stone|[[Castlevania: Circle of the Moon/Enemies#Armors|Stone Armor]], Death Mantis|In the [[Castlevania: Circle of the Moon/Locations#Machine Tower|Machine Tower]], right under the bridge that leads back to the [[Castlevania: Circle of the Moon/Locations#Audience Room|Audience Room]] is a hidden room.|Cockatrice|is a cross between a rooster and a serpent in English folklore. Their stare causes the victim to die. The pen and paper RPG Dungeons and Dragons popularized it having a petrifying gaze instead.}} | |||
Similar to [[#Serpent|Serpent]] combos, most Cockatrice combos results in the enemies being [[Castlevania: Circle of the Moon/Gameplay#Status|petrified]]. The big difference is that the combos generally give strength boosts as opposed to penalties. Still, most of the combinations are fairly useless as few enemies are weak against Earth. [[Castlevania: Circle of the Moon/DSS#Pluto/Cockatrice|Pluto and Cockatrice]] boosts your stats based on play time, but unless you are going ''very'' slowly through the game, it won't help as much as other defense boosting combos. | |||
{{-}} | {{-}} | ||
=== Manticore === | |||
===Manticore=== | |||
{{CotMcard|Manticore|Poison|[[Castlevania: Circle of the Moon/Enemies#Demons|Thunder Demon]], [[Castlevania: Circle of the Moon/Enemies#Succubus|Succubus]]|In the upper right corner of the large room that leads to the [[Castlevania: Circle of the Moon/Bosses#Iron Golem|Iron Golem]] is a hidden room with a {{CotMpowerup|type=mp|num=13}}. Thunder Demons are exceptionally powerful, so you should get the [[Castlevania: Circle of the Moon/DSS#Jupiter/Mandragora|Jupiter and Mandragora]] cards first.|Manticore|s are hybrid creatures from Persian mythology that poisoned humans.}} | {{CotMcard|Manticore|Poison|[[Castlevania: Circle of the Moon/Enemies#Demons|Thunder Demon]], [[Castlevania: Circle of the Moon/Enemies#Succubus|Succubus]]|In the upper right corner of the large room that leads to the [[Castlevania: Circle of the Moon/Bosses#Iron Golem|Iron Golem]] is a hidden room with a {{CotMpowerup|type=mp|num=13}}. Thunder Demons are exceptionally powerful, so you should get the [[Castlevania: Circle of the Moon/DSS#Jupiter/Mandragora|Jupiter and Mandragora]] cards first.|Manticore|s are hybrid creatures from Persian mythology that poisoned humans.}} | ||
The [[Castlevania: Circle of the Moon/DSS#Venus/Manticore|Venus]] combo doubles the amount of hearts you get, the [[Castlevania: Circle of the Moon/DSS#Jupiter/Manticore|Jupiter]] combo produces a gas shield that does a very good job of destroying projectiles and weak flying enemies, [[Castlevania: Circle of the Moon/DSS#Apollo/Manticore|Apollo and Manticore]] produces an effect similar to [[Castlevania: Circle of the Moon/Weapons#Holy Water|holy water]] over a larger area, [[Castlevania: Circle of the Moon/DSS#Neptune/Manticore|Neptune]] protects you from being [[Castlevania: Circle of the Moon/ | The [[Castlevania: Circle of the Moon/DSS#Venus/Manticore|Venus]] combo doubles the amount of hearts you get, the [[Castlevania: Circle of the Moon/DSS#Jupiter/Manticore|Jupiter]] combo produces a gas shield that does a very good job of destroying projectiles and weak flying enemies, [[Castlevania: Circle of the Moon/DSS#Apollo/Manticore|Apollo and Manticore]] produces an effect similar to [[Castlevania: Circle of the Moon/Weapons#Holy Water|holy water]] over a larger area, [[Castlevania: Circle of the Moon/DSS#Neptune/Manticore|Neptune]] protects you from being [[Castlevania: Circle of the Moon/Gameplay#Status|poisoned]], and [[Castlevania: Circle of the Moon/DSS#Pluto/Manticore|with Pluto]] you use MP instead of hearts for [[Castlevania: Circle of the Moon/Weapons|sub-weapons]]. Easily one of the best Attribute cards. | ||
{{-}} | |||
===Griffin=== | |||
=== Griffin === | |||
{{CotMcard|Griffin|Wind|[[Castlevania: Circle of the Moon/Enemies#Skeletons|Skeleton Athlete]], Siren|At the far east end of the [[Castlevania: Circle of the Moon/Locations#Audience Room|Audience Room]] is a very long room that you need the {{CotMitem|type=Items|name=Kick Boots}} to enter. The room is filled with Skeleton Athletes, so simply slide-kick your way across the room, repeating until you get the Card.|Griffin|s were considered to be the king of beasts in European mythology.}} | {{CotMcard|Griffin|Wind|[[Castlevania: Circle of the Moon/Enemies#Skeletons|Skeleton Athlete]], Siren|At the far east end of the [[Castlevania: Circle of the Moon/Locations#Audience Room|Audience Room]] is a very long room that you need the {{CotMitem|type=Items|name=Kick Boots}} to enter. The room is filled with Skeleton Athletes, so simply slide-kick your way across the room, repeating until you get the Card.|Griffin|s were considered to be the king of beasts in European mythology.}} | ||
The [[Castlevania: Circle of the Moon/DSS#Diana/Griffin|Griffin and Diana]] combo is by far the strongest of the [[#Diana|Diana]] combos. Also the most costly, so use it sparingly. | |||
{{-}} | {{-}} | ||
=== Thunderbird === | ===Thunderbird=== | ||
{{CotMcard|Thunderbird|Thunder/Lightning|Were-panther, Dullahan|The large room that connects the lower part of the [[Castlevania: Circle of the Moon/Locations#Chapel Tower|Chapel Tower]] to [[Castlevania: Circle of the Moon/Bosses#Adramelech|Adramelech]]'s room (it's the two floor one with bells). From the lower right door, the first enemy is a Were-panther. Timing is important when fighting them. When they go to attack (it's obvious), jump up and back a bit so you don't land on them and then swing. Keep a close eye on your HP since you will have to go through quite a few enemies to get to the save room on the other end. Once you get the timing down you shouldn't get hit at all.|Thunderbird_%28mythology%29|comes from Native American mythologies.}} | {{CotMcard|Thunderbird|Thunder/Lightning|Were-panther, Dullahan|The large room that connects the lower part of the [[Castlevania: Circle of the Moon/Locations#Chapel Tower|Chapel Tower]] to [[Castlevania: Circle of the Moon/Bosses#Adramelech|Adramelech]]'s room (it's the two floor one with bells). From the lower right door, the first enemy is a Were-panther. Timing is important when fighting them. When they go to attack (it's obvious), jump up and back a bit so you don't land on them and then swing. Keep a close eye on your HP since you will have to go through quite a few enemies to get to the save room on the other end. Once you get the timing down you shouldn't get hit at all.|Thunderbird_%28mythology%29|comes from Native American mythologies.}} | ||
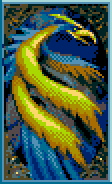
Another not-great card, however the [[Castlevania: Circle of the Moon/DSS#Uranus/Thunderbird|Uranus and Thunderbird summon]] is one of the most powerful summons in the game, making it exceptionally useful for boss fights. | Another not-great card, however the [[Castlevania: Circle of the Moon/DSS#Uranus/Thunderbird|Uranus and Thunderbird summon]] is one of the most powerful summons in the game, making it exceptionally useful for boss fights. | ||
{{-}} | |||
===Unicorn=== | |||
=== Unicorn === | |||
{{CotMcard|Unicorn|Holy|[[Castlevania: Circle of the Moon/Enemies#Armors|White Armor]]|[[Castlevania: Circle of the Moon/Battle Arena#Room 16|Room 16]] of the [[Castlevania: Circle of the Moon/Locations#Battle Arena|Battle Arena]]|Unicorn|s appear in several mythologies, as far back as the ancient Greeks.}} | {{CotMcard|Unicorn|Holy|[[Castlevania: Circle of the Moon/Enemies#Armors|White Armor]]|[[Castlevania: Circle of the Moon/Battle Arena#Room 16|Room 16]] of the [[Castlevania: Circle of the Moon/Locations#Battle Arena|Battle Arena]]|Unicorn|s appear in several mythologies, as far back as the ancient Greeks.}} | ||
Insanely hard to get, but it gives you two very useful abilities. [[Castlevania: Circle of the Moon/DSS#Venus/Unicorn|Venus and Unicorn]] lets you trade half your strength for double defense, and [[Castlevania: Circle of the Moon/DSS#Pluto/Unicorn|Pluto and Unicorn]] makes you completely invincible (though you cannot damage enemies in this state). | Insanely hard to get, but it gives you two very useful abilities. [[Castlevania: Circle of the Moon/DSS#Venus/Unicorn|Venus and Unicorn]] lets you trade half your strength for double defense, and [[Castlevania: Circle of the Moon/DSS#Pluto/Unicorn|Pluto and Unicorn]] makes you completely invincible (though you cannot damage enemies in this state). | ||
{{-}} | |||
===Black Dog=== | |||
=== Black Dog === | |||
{{CotMcard|Black Dog|Dark|[[Castlevania: Circle of the Moon/Enemies#Armors|Devil Armor]]|[[Castlevania: Circle of the Moon/Battle Arena#Room 15|Room 15]] of the [[Castlevania: Circle of the Moon/Locations#Battle Arena|Battle Arena]]|Black_dog_%28ghost%29|s are specters in British folklore.}} | {{CotMcard|Black Dog|Dark|[[Castlevania: Circle of the Moon/Enemies#Armors|Devil Armor]]|[[Castlevania: Circle of the Moon/Battle Arena#Room 15|Room 15]] of the [[Castlevania: Circle of the Moon/Locations#Battle Arena|Battle Arena]]|Black_dog_%28ghost%29|s are specters in British folklore.}} | ||
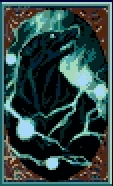
The second most difficult card to get (simply because you have fewer enemies to defeat before you get it, but some very useful abilities. [[Castlevania: Circle of the Moon/DSS#Venus/Black Dog|Venus and Black Dog]] swaps half your defense | The second most difficult card to get (simply because you have fewer enemies to defeat before you get it), but some very useful abilities. [[Castlevania: Circle of the Moon/DSS#Venus/Black Dog|Venus and Black Dog]] swaps half your defense to double your strength, [[Castlevania: Circle of the Moon/DSS#Mars/Black Dog|Mars and Black Dog]] gives you a low-cost, powerful projectile attack, and [[Castlevania: Circle of the Moon/DSS#Pluto/Black Dog|Pluto and Black Dog]] transforms you into a skeleton. | ||
{{-}} | {{-}} | ||
== Combinations == | ==Combinations== | ||
:''For more on the card combinations, see the [[Castlevania: Circle of the Moon/DSS|DSS]] page.'' | :''For more on the card combinations, see the [[Castlevania: Circle of the Moon/DSS|DSS]] page.'' | ||
{| {{prettytable}} | {| {{prettytable|style=font-size:95%}} | ||
!Card | ! Card | ||
! [[#Mercury|Mercury]] | |||
! [[#Venus|Venus]] | |||
! [[#Jupiter|Jupiter]] | |||
! [[#Mars|Mars]] | |||
! [[#Diana|Diana]] | |||
! [[#Apollo|Apollo]] | |||
! [[#Neptune|Neptune]] | |||
! [[#Saturn|Saturn]] | |||
! [[#Uranus|Uranus]] | |||
! [[#Pluto|Pluto]] | |||
|- | |- | ||
![[#Salamander|Salamander]] | ![[#Salamander|Salamander]] | ||
| Line 189: | Line 198: | ||
|Exp from walking | |Exp from walking | ||
|Prevents petrification | |Prevents petrification | ||
| | |Tonfa Strike | ||
|3-way stone attack | |3-way stone attack | ||
|Comet summon | |Comet summon | ||
| Line 205: | Line 214: | ||
|Gas bomb | |Gas bomb | ||
|Absorbs Poison | |Absorbs Poison | ||
| | |Ghost familiar | ||
|Poison based summon | |Poison based summon | ||
|MP used for sub-weapons | |MP used for sub-weapons | ||
| Line 256: | Line 265: | ||
|Dark based summon | |Dark based summon | ||
|Transforms into a skeleton | |Transforms into a skeleton | ||
|} | |} | ||
{{Footer Nav|game=Castlevania: Circle of the Moon|prevpage=Locations|nextpage=DSS}} | |||
Latest revision as of 00:05, 7 March 2022
The magic system in Circle of the Moon (called "Dual Set-up System" or simply DSS) involves pairing magic cards in order to create an effect. Some pairs boost your stats, other modify your weapons, and others are more traditional magic spells. There are two types of cards: Action cards which determine the type of effect, and Attribute cards which determine the element associated with the effect. There are 10 of each type of cards, giving you 100 different effects (though many of them are the same thing, but with a different element).
Cards are randomly dropped by specific enemies, which means that you may have to fight 40 or 50 of the same enemy before you get the card you want. The easiest way to do this is to find a room near a save point where the only enemy in the room is the one you want (generally one of the many hidden rooms). For example, the best place to get the Manticore card is from the Thunder Demon in the hidden room nearest the Iron Golem boss. It's the only enemy in the room so you don't have to fight through hordes of monsters just for your 1-in-40 chance of getting the card, it's near a save room so you can retreat once you get the card (or nearly killed), and the room is small so you can exit and re-enter quickly. This makes the rather tedious process go by much more quickly.
Action cards are named after Roman gods and goddesses, and Attribute cards are named after mythical creatures.
Action Cards[edit]
Mercury[edit]
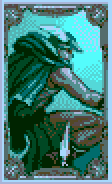
|
Effect | Elemental status added to the whip |
|---|---|---|
| Enemy it drops from | Bone Head | |
| Best location | First room of the Catacomb that you come to after the vertical pit Dracula throws you into. You can whip their fireballs or just stand behind them and strike. | |
| Etymology | Mercury was the Roman messenger god and god of trade. Equivalent to Hermes in Greek mythology. |
Somewhat useful, but not really, as most enemies aren't particularly affected by elemental attacks. It is generally more effective to use the Venus and Salamander cards instead to raise your base strength by 25%.
Venus[edit]
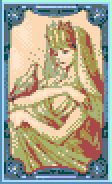
|
Effect | Stat modifiers |
|---|---|---|
| Enemy it drops from | Slime | |
| Best location | After getting the Double | |
| Etymology | Venus was the Roman goddess of love and fertility. Equivalent to Aphrodite in Greek mythology. |
Very useful as it raises stats without taking into account elements. Six of the cards raise strength or defense — either by raising one by 25%, raising one based on how much of the map is complete, or by trading one for the other. The Venus and Manticore combination doubles the number of hearts received (so 2 for a small, 10 for a large), which expedites replenishing hearts after a boss fight. The Venus and Cockatrice combination gives you free experience from walking. Sounds good, but since you only gain 1 exp for every five steps or so, it will talk hours to raise your levels, rendering the card combo useless.
Jupiter[edit]
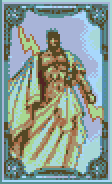
|
Effect | Defensive barriers and enhancements |
|---|---|---|
| Enemy it drops from | Heat Shade | |
| Best location | In a hidden room in the Audience Room, right under the Outer Wall, is an HP Plus | |
| Etymology | Jupiter was the chief Roman god and patron saint of the Roman state. Equivalent to Zeus in Greek mythology. |
Several of these cards produce shields that, while they don't stop attacks, can damage enemies that get close. Others produce shields that block projectiles but not contact with an enemy. Jupiter and Thunderbird cuts all damage by 50%, and Jupiter and Mandragora can heal you (making it possibly the most useful combo in the game, given the rarity of healing items).
Mars[edit]
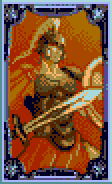
|
Effect | Elemental (non-whip) weapons |
|---|---|---|
| Enemy it drops from | Bloody Sword | |
| Best location | In the Chapel Tower, literally everywhere. The best place is right at the beginning since you'll be close to a save room if you need to heal. | |
| Etymology | Mars was the Roman god of war. Equivalent to Ares in Greek mythology. |
Similar to the Mercury card, but it replaces your whip with a different weapon such as a sword. Notable combos are the Griffin (a charge attack), Thunderbird (fast attack), Unicorn (very powerful holy sword), and Black Dog (slow but very powerful gun).
Diana[edit]
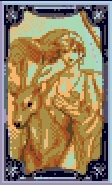
|
Effect | Projectiles added to whip |
|---|---|---|
| Enemy it drops from | Man Eater | |
| Best location | In the Underground Gallery, in the last long horizontal corridor before the Dragon Zombies. Enter from the left side (so that you're closer to a save room). The trick is to get close enough to it so you can avoid its stream of pods but not so close that the second Killer Bee attacks. In the background is an alcove with a statue. Stand just in front of the left side of the alcove and you should be fine. | |
| Etymology | Diana was the Roman goddess of the hunt. Equivalent to Artemis in Greek mythology. |
Another elemental damage card, but gives you a long range projectile to throw at the enemy. Useful for enemies that are too far away to hit or bosses that you need to avoid at all costs, but the high MP cost of most of the weapons makes it something to save for special situations.
Apollo[edit]
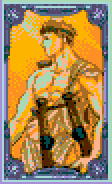
|
Effect | Explosives thrown |
|---|---|---|
| Enemy it drops from | Arch Demon | |
| Best location | There are no really good spots to find one, as most of them require you go through groups of enemies. Your best bet is to find one behind the heavy box at the very beginning of the game in the Catacomb. The right room off of the entrance to the Underground Warehouse is your second best bet, as it is close to a save room and there's only weak enemies in your way. Regardless of where you go, this is the most annoying card to get, and can only be found after you get the Heavy Ring | |
| Etymology | Apollo was the Greek and Roman god of medicine. |
Objects are chucked at enemies in a similar fashion as the axe, and most explode on impact. The exceptions are the Golem, Cockatrice, and Unicorn combos, which act more like Uranus's summon monsters.
Neptune[edit]
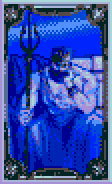
|
Effect | Full elemental protection |
|---|---|---|
| Enemy it drops from | Ice Armor | |
| Best location | The first large room of the Underground Waterway has numerous Ice Armors and is near the save room in the Abyss Stairway. Even though you should wait to clear the Underground Waterway until after you get the Cleansing | |
| Etymology | Neptune was the Roman god of the sea. Equivalent to Poseidon in Greek mythology. |
Absorbs all damage from a certain element, and restores 10% of the damage (so an attack that would normally take 100HP from you will instead take 100 MP and restore 10HP to you). Very useful, however note that some enemies have non elemental attacks, and running into an enemy won't necessary count as elemental damage.
Saturn[edit]
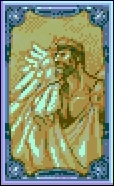
|
Effect | Familiar spirit |
|---|---|---|
| Enemy it drops from | Fallen Angel | |
| Best location | The tall tower outside the Battle Arena is the only place you can find him. | |
| Etymology | Saturn was the Roman god of the harvest. Equivalent to Cronus in Greek mythology. |
An elemental spirit appears and follows you around, firing when you whip. Fun, but not exceptionally useful since you can't control the familiar and most don't move around enough. They tend to stay a little above you, meaning that many of their attacks will pass right over an enemy. A couple are more useful however, such as a skeletal ghost that homes in on nearby enemies and attacks them in short quick bursts, or an eagle that dives at enemies.
Uranus[edit]

|
Effect | Summoned monster |
|---|---|---|
| Enemy it drops from | Scary Candle | |
| Best location | After defeating Dragon Zombie in the Underground Gallery, this fake candle will appear in the Iron Golem's room in the Machine Tower. | |
| Etymology | Uranus was a Greek god of the Sky. Equivalent to Caelus in Roman mythology. |
Pressing (down, forward, up, B) Then, a large creature appears on screen and unleashes a powerful magic attack that hits everything on screen. High MP cost, but still very, very useful against bosses.
Pluto[edit]
|
Effect | Misc. |
|---|---|---|
| Enemy it drops from | Trick Candle | |
| Best location | After defeating Camilla this fake candle will appear in Cerberus' room in the Catacomb. | |
| Etymology | Pluto was the Roman god of the Underworld. Equivalent to Hades in Greek mythology. |
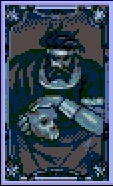
These are special effects that don't really fall into a category. Some affect stats, others how your sub-weapon works. The most useful ones are Pluto and Mandragora (+20% experience from all monsters – keep this one active when you aren't using anything else and switch to it when a boss is about to die), Pluto and Unicorn (complete invincibility, though you cannot attack – good for when you need to flee to a save room to heal), and Pluto and Black Dog (turns you into a skeleton). Be careful in skeleton form, since all damage you take becomes 9999, so you always die. When throwing bones, there is a small chance that a huge bone will be thrown, which does massive damage to everything on about half the screen.
Attribute Cards[edit]
Salamander[edit]
|
Effect | Fire |
|---|---|---|
| Enemy it drops from | Skeleton Bomber, Imp | |
| Best location | Either the shaft in the Catacomb or the first room after that. Both are overrun with Skeleton Bombers, so you should have no trouble getting this one. | |
| Etymology | Salamander s are a type of amphibian that was often given fantastic, fire-based powers in medieval literature, since they appeared when logs burned (escaping for their lives), and have come to be associated with fire and heat. |
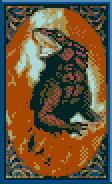
The most notable use of this card is with Pluto, which lets you use Item Crushes.
Serpent[edit]
|
Effect | Ice |
|---|---|---|
| Enemy it drops from | Earth Demon, Holy Armor | |
| Best location | The first Earth Demon that you come to, in the room with the Dash Boots | |
| Etymology | Serpent s are common creatures given fantastical powers in various mythologies and folklores. This game's depiction refers to the Sea Serpents present in numerous myths, such as the Midgardsormr in Norse mythology; these serpents have been the first conceived image of dragons, the more popular Middle-Age European vision coming much later. |
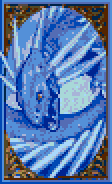
The most important use of this card is that some combinations let you freeze enemies like the Brain Floats, which is necessary to get certain items early in the game. Aside from that ice weapons are generally useless as most Serpent combinations results in significant strength penalties.
Mandragora[edit]
|
Effect | Plant/Forest |
|---|---|---|
| Enemy it drops from | Axe Armor, Lizard Man | |
| Best location | Once you get the Double | |
| Etymology | Mandragora are a type of demon familiar given to humans by the Devil. |
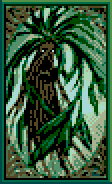
Jupiter and Mandragora can heal you. Get this combination as soon as possible as healing items are rare and save points can be far apart. Pluto and Mandragora gives you a 20% experience bonus for all enemies. When you aren't using another combination, keep this one on at all times.
Golem[edit]
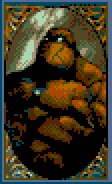
|
Effect | Earth |
|---|---|---|
| Enemy it drops from | Electric Skeleton, Minotaur | |
| Best location | Either in the long room that connects to the warp room in the Audience Room, or in the room right before the Necromancer. | |
| Etymology | Golem is a creature in Jewish folklore made of inanimate material and brought to life. |
The big use is the Jupiter combo which makes your invincibility after getting hit last four times as long. Besides that, the card isn't that great, though Venus and Golem can be useful late in the game.
Cockatrice[edit]
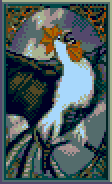
|
Effect | Stone |
|---|---|---|
| Enemy it drops from | Stone Armor, Death Mantis | |
| Best location | In the Machine Tower, right under the bridge that leads back to the Audience Room is a hidden room. | |
| Etymology | Cockatrice is a cross between a rooster and a serpent in English folklore. Their stare causes the victim to die. The pen and paper RPG Dungeons and Dragons popularized it having a petrifying gaze instead. |
Similar to Serpent combos, most Cockatrice combos results in the enemies being petrified. The big difference is that the combos generally give strength boosts as opposed to penalties. Still, most of the combinations are fairly useless as few enemies are weak against Earth. Pluto and Cockatrice boosts your stats based on play time, but unless you are going very slowly through the game, it won't help as much as other defense boosting combos.
Manticore[edit]
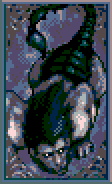
|
Effect | Poison |
|---|---|---|
| Enemy it drops from | Thunder Demon, Succubus | |
| Best location | In the upper right corner of the large room that leads to the Iron Golem is a hidden room with a MP Plus | |
| Etymology | Manticore s are hybrid creatures from Persian mythology that poisoned humans. |
The Venus combo doubles the amount of hearts you get, the Jupiter combo produces a gas shield that does a very good job of destroying projectiles and weak flying enemies, Apollo and Manticore produces an effect similar to holy water over a larger area, Neptune protects you from being poisoned, and with Pluto you use MP instead of hearts for sub-weapons. Easily one of the best Attribute cards.
Griffin[edit]
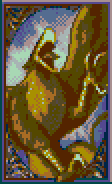
|
Effect | Wind |
|---|---|---|
| Enemy it drops from | Skeleton Athlete, Siren | |
| Best location | At the far east end of the Audience Room is a very long room that you need the Kick Boots | |
| Etymology | Griffin s were considered to be the king of beasts in European mythology. |
The Griffin and Diana combo is by far the strongest of the Diana combos. Also the most costly, so use it sparingly.
Thunderbird[edit]
|
Effect | Thunder/Lightning |
|---|---|---|
| Enemy it drops from | Were-panther, Dullahan | |
| Best location | The large room that connects the lower part of the Chapel Tower to Adramelech's room (it's the two floor one with bells). From the lower right door, the first enemy is a Were-panther. Timing is important when fighting them. When they go to attack (it's obvious), jump up and back a bit so you don't land on them and then swing. Keep a close eye on your HP since you will have to go through quite a few enemies to get to the save room on the other end. Once you get the timing down you shouldn't get hit at all. | |
| Etymology | Thunderbird comes from Native American mythologies. |
Another not-great card, however the Uranus and Thunderbird summon is one of the most powerful summons in the game, making it exceptionally useful for boss fights.
Unicorn[edit]

|
Effect | Holy |
|---|---|---|
| Enemy it drops from | White Armor | |
| Best location | Room 16 of the Battle Arena | |
| Etymology | Unicorn s appear in several mythologies, as far back as the ancient Greeks. |
Insanely hard to get, but it gives you two very useful abilities. Venus and Unicorn lets you trade half your strength for double defense, and Pluto and Unicorn makes you completely invincible (though you cannot damage enemies in this state).
Black Dog[edit]
|
Effect | Dark |
|---|---|---|
| Enemy it drops from | Devil Armor | |
| Best location | Room 15 of the Battle Arena | |
| Etymology | Black Dog s are specters in British folklore. |
The second most difficult card to get (simply because you have fewer enemies to defeat before you get it), but some very useful abilities. Venus and Black Dog swaps half your defense to double your strength, Mars and Black Dog gives you a low-cost, powerful projectile attack, and Pluto and Black Dog transforms you into a skeleton.
Combinations[edit]
- For more on the card combinations, see the DSS page.
| Card | Mercury | Venus | Jupiter | Mars | Diana | Apollo | Neptune | Saturn | Uranus | Pluto |
|---|---|---|---|---|---|---|---|---|---|---|
| Salamander | Fire whip | Strength +25% | 2 fireballs (shield) | Flame sword | Fireball projectile | Bomb | Absorb fire | Bat familiar | Fire based summon | Item Crush |
| Serpent | Ice whip | Defense +25% | 4 ice blocks (shield) | Ice sword | 3-way ice shot | Ice ball | Absorbs ice | Ghost familiar | Ice based summon | 2x sub-weapons at once |
| Mandragora | Thorn whip | Luck +25% | Restores HP | Rose sword | 3-way shot | Rose bomb | Absorbs plant | Owl familiar | Plant based summon | Exp + 20% |
| Golem | Long Earth whip | Def based on map exploration | Invincibility x4 | Hammer/Quake attack | Ground based attack | Spear summon | Absorbs Earth | Hawk familiar | Earth based summon | Creates duplicate |
| Cockatrice | Stone whip | Exp from walking | Prevents petrification | Tonfa Strike | 3-way stone attack | Comet summon | Absorbs stone | Medusa familiar | Stone based summon | Def based on game time |
| Manticore | Poison mist | 2x hearts | Poison cloud (shield) | Poison claws | Poison rain | Gas bomb | Absorbs Poison | Ghost familiar | Poison based summon | MP used for sub-weapons |
| Griffin | Continuous whip | Int +25% | Shield while running | Charged attack | Wind based attack | Creates tornado | Absorbs Wind | Spirit familiar | Wind based summon | Faster movement |
| Thunderbird | Whip held out for damage | Damage based on map exploration | 1/2 damage, but thrown more | Martial arts attack | Electric spin | Electric ball | Absorbs Lightning | Crow familiar | Thunder based summon | Damage based on game time |
| Unicorn | Restores HP | Def x2, 1/2 Attack | Shield from projectiles | Holy sword | Homing ball of light | Light arrow | Absorbs Holy | Angel familiar | Holy based summon | Invincibility |
| Black Dog | Dark attack | Attack x2, 1/2 Def | Shield that drains HP | Attack with gun | 8-way short range attack | Black hole | Absorbs Dark | Imp familiar | Dark based summon | Transforms into a skeleton |