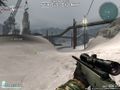
Snow Valley is the largest map currently available, with a great variety of different situations that favor campers, rushers, snipers, and sprayers all alike. Snow Valley is quite beautiful and easy on your eyes, as the colors are very bright and pretty much nobody wearing the default camo can blend in. There a huge amount of sniping spots for those that enjoy the satisfaction of long-range domination. Be careful to not jump off any high-up place, as Snow Valley has one of the highest suicide rate out of all the maps, comparable only the high rooftops of Waverider.
Below is a map of Snow Valley, with the spawn points for Alpha and Bravo teams labeled (there are four for each team) in red and blue, and also special locations and features in the map to note. These features are numbered in green and detailed below. The semi-transparent purple line shows the split of "area possession" by Alpha and Bravo teams. Bravo team has main control over anything above the purple, Alpha team has main control over areas below the purple.

Main Features
These will be detailed in order of the numbering in the map. Features 1 through 10 are mainly used by Alpha, 11 through 21 by Bravo, and 22 is of ambiguous possession.
Alpha Team
Although Alpha Team has fewer sniping spots than does Bravo Team, the spots that they do have seem to have better cover. All of Alpha Team's area is made up of three main areas: The Fenced-In Path, the Trench, and the Alpha Hill. Stay away from designated sniping areas as they are prone to counter-sniping and grenades. Instead, use the hills themselves as cover.
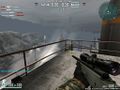
(1) Alpha Hillside
This area is right near one of Alpha Team's spawns, and Alpha Team will very often be hanging around here. There is a rock that can give you cover. Since the Alpha Hill gives cover on the side, it isn't likely that Bravo Team will find and snipe you unless you actually go on the hill. From Alpha Hillside, you can snipe spawners at Bravo Far Endpoint or campers around the mid-field bunker. Stepping up onto the hill and using the rock as cover will let you snipe at the Tower.
-
Sniping towards the barrier
-
Using the rock as cover


(2) Alpha Endpoint
There are three "endpoints" in Snow Valley, shown by the dark squares at the corners of the map. The Alpha Endpoint is hardly useful for Elimination, but in Capture the Flag, Alpha Team's flagbearer can hide at this endpoint during a recovery war. Bravo Team members also sometimes takes over the Alpha Endpoint in order to kill enemies spawning at A1, but this is not very common.

(3) Alpha Flag Hill
This is the lower area of the entire Alpha Hill. Alpha Team's flag is located right inside the u-shaped barrier in Capture the Flag. The barrier can also be used for sniping, but because your head still shows when you crouch, it isn't a very safe spot. The Alpha Flag Hill is also very visible to people on the Tower. From here, you can see and snipe to many places.

(4) The Cliff
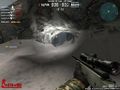
The Cliff is the highest part of the Alpha Hill. Along with a great view of about 60% of Snow Valley, you can also spot many enemies if you choose to snipe here. However, since the spot is so high up, other people will quickly notice you. Crouching behind the barrier still leaves your head visible, so a better tactic is to back up and possibly peek out the sides of the hill. Also, your view will be obscured by lots of fog. The only perk is that l96 users will not be able to hit you while sniping from their territory.
With such high up views like the Cliff, sniping from there is risky if you do not do it properly. You will see lots of people, but lots of people will notice you.
(5) The Useless House

This small shelter is as it is - pretty much useless in terms of combat. Alpha Team will often use this place to go AFK, and in Capture the Flag it can be a good hiding spot for the flagbearer during recovery wars. There is a square hole in the roof of the Useless House, so you can just drop in.
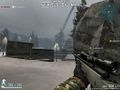
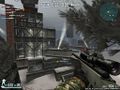
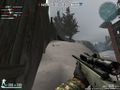
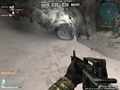
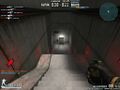
(6) Ruined House
There are three entrances to the ruined house: two doorways on the north and west walls, and a giant cracked hole on the south wall. One of Alpha Team's spawn points is on the steps that lead up to the ruined house. This area can be very easily invaded by Bravo Team, and people often hide or camp in the corners of the house because of the darkness.
By backing against the south wall and looking up, you can snipe somebody using the Tower, and it is relatively safe because tower snipers almost never look inside the ruined house.
Players on Bravo should also note that the door to the ruined house leading to the sniping wall is a good place for mines; they never see them until they're already stepping on them.
-
The ruined house from outside
-
The corner where enemies often camp


(7) Concrete Sniping Wall
North of the ruined house is a solid wall that you can stand behind. Crouching behind this wall will hide your entire body from view, but you can't snipe anything but the wall either. If you stand normally and as close to the wall as you can, only your head will be visible, and you can snipe very well to the Tower, Bravo Flag Hill, or mid-field bunker.
Note that people often throw grenades to this common sniping wall. If you hear a tingling sound, quickly run into the ruined house for cover.

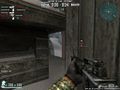
(8) Fenced-In Path
This path is one of Alpha Team's strongholds. It contains one of Alpha Team's spawn points, and since the path is basically straight, it is very easy to snipe an enemy trying to invade from the Tunnel, which is common.
A wooden fence separates this path from the rest of Snow Valley, but note that bullets can go through the fence. An enemy on the other side of the fence could take a lucky guess that somebody just spawned at the path, spray randomly through the fence, and actually get a kill.
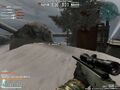
(9) The Platform & Rock
Easily accessible especially by people that spawn on the Fenced-In Path, the Platform & Rock is one of Alpha Team's best sniping spots. Basically, you jump over the platform and then crouch beside the rock. You can pop out of the left and right sides of the rock to snipe at Bravo Team's entire building, and then hide behind the rock again for cover.
Also, the platform has two small holes on either side of it that can be peeked through for a limited, but very safe, view. If you manage to spot an enemy through the holes, it is likely that you will get the kill.
-
View from the platform & rock
-
Peek through this hole to occasionally spot an enemy.


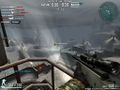
(10) The Trench
The Trench is the lowest place apart from the underground facility in Snow Valley. It is one of Alpha Team's spawn points and is very accessible by anybody. To the west is an incline up to Bravo's Flag Hill. You can also run up along the fence and jump around the platform to get to the Fenced-In Path.
The Trench has three small shelter-like things that will hide you from view, but if anybody finds out that you are there, you will be quickly blown up by a grenade. The shelter nearer the building is special in that you can run up the side of it to get onto Bravo's building very quickly. This is probably Alpha Team's main tactic to invade Bravo's Team's area.
-
Alpha Team members may spawn in the Trench
-
Run up the side of the small shelter-thing, then jump over the railing to quickly get on Bravo's territory.
-
Run up this slope to get to the Platform & Rock.


Bravo Team
Bravo Team has more sniping areas than Alpha Team does, but mostly not as much cover. Bravo Team can also make use of a large concrete building that has many levels of elevation.

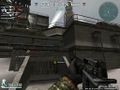
(11) Bravo Wall-In
This is considered Bravo Team's safe haven, but enemies from Alpha Team will commonly try to camp and spawnkill at this area. There are two tents that you can AFK behind (comparable to Alpha Team's Useless House). The Bravo Wall-In has a higher elevation on the north wall, so by backing up you can get a good view of the tower and Bravo Flag Hill.
Besides the opening in the south wall of the Bravo Wall-In, there is another way out. Behind the Twin Towers is a humongous hole in the east wall that you can jump straight out of. This is a one-way exit.

This is also a spot that Bravo most usually spawns in, and offers 3 exits:
- The Giant Hole behind the twin towers that lets you jump out instantly.
- A set of stairs that will let you into the "underground". This part of the map makes it very large, but commonly ignored by many players. Also a great set of computers to let you go A.F.K inside the missile silo.
- An obvious walkway out into the open. You should run to a cover spot immediately to prevent an Alpha sniper from getting to you.
(12) Twin Towers
Within the Bravo Wall-In are two red oil rigs, with ladders on both to get to the top. This provides you with a very good view of Bravo's area, but as the only people who are likely to get on the Twin Towers are people on Bravo Team, camping on the Twin Towers is only for defense. You can jump between the two rigs too. Make sure you use the ladder to get back down or else you will fall to your death.
Alpha Team may occassionally attempt to spawnkill by camping on the Twin Towers, but they are usually very quickly noticed.

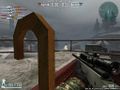
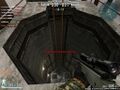
(13) Bravo Flag Hill
Named so because Bravo Team's flag will be right inside the u-shaped barrier in a game of Capture the Flag, this area is also a good vantage point. You can crouch behind the barrier to snipe people spawning in the Trench or people sniping from the Concrete Sniping Wall.
The Bravo Flag Hill is too steep to walk up from the middle but you can sprint up a very thin section of the hill, so usually you must circle around it from either side to get to the top where the barrier is. Also watch out for any Alpha Team members rushing the Tunnel.
East of the Bravo Flag Hill is a portion of the concrete perimeter jutting out. You can jump onto it by sprinting down the hill. Also, at the base of the Bravo Flag Hill is an enclosed room with a door leading to the underground. This is a useful hiding spot, but if someone throws a grenade into the room, you have a low chance of getting out alive.
-
Spring and jump to get on the building.
-
A view of the enclosed room from outside
-
One view from the room


(14) Bravo Near Endpoint
One of Bravo Team's spawn points is right in front of this endpoint. Because this endpoint is right next to the tunnel, Alpha Team will often camp straight on it to kill spawners. Often times they aren't discovered for a while because the endpoint is dark and matches the default camo.
Backing up against the endpoint, you have a good view directly forwards. You might also kill Alpha Team members rushing the tunnel, because they usually don't look to their left upon doing so.
(15) Concrete Perimeter
One of Bravo Team's spawn points is on the steps that lead up to the Concrete Perimeter, which surrounds the Concrete Ditch on every side except the south. Although standing upon the Perimeter gives you a very good view of almost all of Alpha Team's area, you are prone to being sniped from the Cliff or the Platform & Rock.
The east side of the Perimeter contains an octagonal hole that leads to the Underground. By camping and crouching right next to the hole, you can easily countersnipe people on the Alpha Hill. Be careful not to fall down the hole, because you will die. The west side of the Perimeter is a tunnel. By standing within, you are shielded from all of Alpha's sniping areas except for the Platform & Rock. Be very wary of snipers in that place when going through this small tunnel.
Both sides of the Perimeter have a short ladder going down to the Ditch. You can camp on these ladders for a different view and a lot of cover.
-
The east perimeter doesn't have any cover besides the wall to the left.
-

This tunnel is a good spot to countersnipe the Platform & Rock.
-
People hardly ever suspect that you would camp on a ladder.


(16) Stone Sniping Wall
Both the east and west sides of the Concrete Perimeter have a short ladder leading down to the Stone Sniping Wall. This wall is very low and has a lot of holes in it, so you will not be fully concealed even by crouching. However, it has an extremely good view of the Alpha Hill, the Cliff, and the Platform & Rock. You can even countersnipe the Concrete Sniping Wall.
When people realize that you are camping at the Stone Sniping Wall, they will quickly toss a grenade there. If you hear a tingling sound, quickly climb up one of the short ladders to get back onto the Concrete Perimeter.

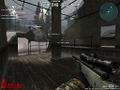
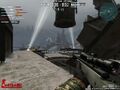
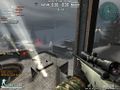
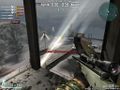
(17) Tower
The green number 17 on the map shows the position of the extremely long ladder leading to the tower. The tower has two floors: the middle floor and the top floor. Both are good sniping spots, but require skill to master.
The middle floor of the tower has three sides only: the north, the south, and the west. If you are on Bravo Team, camping on the north side is defensive, while camping on the south side is offensive. If you are on Alpha Team, the reverse is true. The west side is quite useless because it provides no cover and no good view.
The top floor of the tower is flat and spans a large area. You will have the best sight-seeing spot in all of Snow Valley. Campers on the tower can snipe to every single place in Snow Valley except for Alpha Hillside, the Fenced-In Path, and the areas directly under the Tower. But if you can see everyone, then everyone can see you, which makes the Tower a very unsafe sniping spot for non-skilled users. Use the metal railings to your advantage as cover, and immediately get off the tower if you know you have been noticed.
Note also that the top of the ladder makes a very good place to put mines, especially if you are on Alpha; people don't see the mines until they're already stepping on them. Just make sure you warn your own team!
If you can get there without being noticed, kill any campers that may be unaware of your presence.
There is a 100% chance of finding campers on the Tower. Any camper using an L96 will almost certainly try to attack your team. You must defeat as many of these as possible. If any are hiding to attack, you must climb the Tower to defeat them. Once up there, you must also watch out for mines. Try not to explode them, as they will alert the campers to your presence. If this occurs, you must attack quickly to ensure your survival. Guns are preferred to knives, as guns allow an attack from a distance. Ignore anyone running into the Tunnel, since this will distract you from your goal of killing the sniper, and may alert campers to your presence.
If you are defending, make sure to have a sufficient supply of mines. Plant them by any nearby ladders, as, if they do not kill, they act as an alarm to anyone approaching your location. If you hear one exploding, investigate immediately, but do not return to your post for at least 30 seconds, in case the attacker is in hiding, waiting for you to look away. As soon as you have fended off an attack, look for another area to hide out in, as unsuccessful attackers may attack you again.
-
The middle floor view of Alpha territory
-
The middle floor view of Bravo territory
-
Top of the tower
-
Another view from the top of the tower


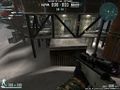
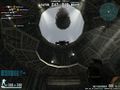
(18) Concrete Ditch

Surrounded by the high Concrete Perimeter on three sides, being in the Concrete Ditch is pretty safe. It contains a large hole, known as the Missile Silo, which leads to the underground. Camping behind the lid of the missile silo makes you even more obscured from everybody's view, and you can use it for a quick break.
A notable part of the Concrete Ditch is one of the hinges that connect the lid to the edge of the missile silo. By hiding inside this hinge, you have a good sniping view of one point only: the Platform & Rock. If you crouch, your body is completely concealed by the hinge.
(19) Bravo Far Endpoint

This endpoint is very distant from the rest of Snow Valley, and the only significance of it is that one of Bravo Team's spawn points is right in front of it. Enemies sometimes camp directly on the endpoint to kill these spawners. From the Bravo Far Endpoint, you have a view of the Tower and the Concrete Perimeter, but since these are mainly Bravo Team's possessions anyways, the Bravo Far Endpoint isn't that useful.
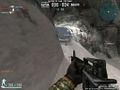
(20) Near the Ridge
Just northeast of the concrete area is a ridge that pops up very high. You can step up to the ridge to countersnipe people on the Alpha Hill, and since you can make it so that only your head shows, it is very safe. Next to the ridge is a rock that you can use for additional cover.
A bit farther past the ridge is a single red oil rig with a ladder to the top of it. Although you get a fantastic view of all of Alpha Team's areas except the Fenced-In Path, there is no cover and you will be quickly found. Use this rig for sniping at your own risk.
-
A great defensive spot, only a very small portion of your head shows
-
Good for a quick temporary snipe, but if you camp on the rig you will be found very quickly


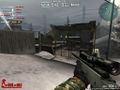
(21) Mid-Field Bunker
This U-shaped barrier is used mainly by Bravo Team to have long-range control of the Alpha Hill. Because the ground dips down right behind the barrier, there is naturally a lot of cover. You can also snipe Alpha Team members spawning on the stairs of the Ruined House.
To the west of the bunker is a rectangular hole in the concrete. People often hide here for a safe break, because you are covered on three sides.
Ambiguous Possession
These spots don't really belong to either team and are therefore the site of many interesting conflicts.
(22) The Tunnel
The Tunnel is an infamous location in Snow Valley that connects the Bravo Flag Hill area to Alpha's Fenced-In Path. Because both are also spawn points for the teams, and many people choose to go through the tunnel upon spawning, there are lots and lots of fights in the tunnel.
A good strategy is to always have at least one person on your team watching over your side of the tunnel, because you never know when an enemy will appear around the bend. People will very often throw grenades through the Tunnel, but a less well-known fact is that you can throw a grenade over the tunnel.
In Alpha's side of the Tunnel, there is a little crevice that you can hide in. It covers around three-fourths of your body.
-
Alpha Team's side of the tunnel
-
Bravo Team's side of the tunnel
-
Hiding in the crack


The Underground
As if Snow Valley wasn't big enough above ground, this map also features a relatively large underground structure. Although rarely used in Elimination battles, this area is relevant to all the other game modes. Don't be fooled though, even in elimination, there are many ways to utilize the underground passages, most of which involve invading the enemy camp and sniping them from the rear, where they least expect it.
A map of the Underground is shown below. There are five entrances, but only four exits.

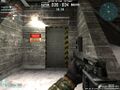
Bravo Team has very easy access to the underground. In the Bravo Wall-In, there are steps down to a door that can be opened by pressing . A wide hallway leads to the Control Room, which is extremely crucial to Search & Destroy. The main room has two levels, and the upper level is split into two parts: A walkway that borders half the Control Room, and a small room to the south commonly known as the Bomb Room.

Heading further south, the Control Room connects via a twisty hallway to another door that serves as both an entrance and an exit. The door is located in the enclosed room at the base of Bravo Flag Hill.
The Main Room also connects to a large circular room, known as the Missile Silo. One of the ways to enter the Underground is by jumping into the Silo, which is located beneath the Concrete Ditch. Make sure that you land on the middle platform first, or else you will die. The Silo is a one-way passage.
From the Missile Silo, there is a very long path that leads to Alpha Team's main door to the Underground. The wide part of the hallway running north/south is dark and has water on the floor. Anybody tramping through here makes a puddle-splashing sound, and it can give you away.
Lastly, an octagonal hole in the Concrete Perimeter leads down to a small area, which also feeds into the Control Room. You can use the ladder to climb up this octagonal hole. Make sure you use the ladder to climb down also, because if you just jump down you will fall to death. There is also a small hole under the ladder that you can use to hide, as it completely conceals your body except for people looking down from the Concrete Ditch.
-
Alpha Team's main entrance
-
Bravo Team's main entrance
-
Don't fall!
-
Looking up from the silo


Capture the Flag
As such a large map, Snow Valley provides for very interesting Capture The Flag games. The flags are placed at the Alpha Flag Hill and the Bravo Flag Hill, respectively, and there is quite a lot of distance between them. It will take at least 1 minute to score a flag, depending on the route taken.
Alpha Team
All Alpha Team members will spawn on the Alpha Hillside. The most common route for Alpha Team's offense is to run down the Fenced-In Path and through the Tunnel, but since this is such a well known route there are often enemies guarding the tunnel on the other side. Other routes to the flag include running through the Trench, or cutting across the concrete building. A trip through the Underground may also help you avoid detection on the way, but Bravo Team can easily intercept you by jumping into the missile silo.
Once an Alpha Team member has gotten the flag, the safest way back is back through the Tunnel and down the Fenced-In Path. Cutting through the Trench may be faster, but it is not as safe. Watch out for Bravo Team's attempts to recover, and always have the flagbearer backed up with one to three people.
To defend the Alpha flag, you can camp anywhere on the hill or beside it. Also watch out for snipers on the building or tower. During a recovery war, the Alpha flagbearer should either stay in the Useless House or back up around the Endpoint.
Bravo Team
All Bravo Team members spawn in the Wall-In. There are several ways to access the Alpha Flag. The most common route is to run south toward the Alpha Hill head-on, take the flag, and sprint the same route back. Snipers on the Alpha Hill will be trying to shoot you while you run back, but once you round the corner of the building, you are mostly safe. You can also cut through the Trench for a faster but riskier trip, or go through the Underground.
Bravo Team can use the Underground for capturing flags much more efficiently than Alpha Team can, because Alpha Team has control of only one entrance to it, while Bravo Team has all the others.
To defend the Bravo flag, have a few people camp near the Tunnel or on the Tower. Although the Plaform & Rock is Alpha Team possession in Elimination, Bravo Team can use it as a powerful sniping point in Capture the Flag because you will be able to see people getting off the Alpha Hill on both sides. During recovery wars, Bravo Team's flagbearer should hide as far inside the Wall-In as possible.