Chapter 3: The Queen is Gone (600 A.D. first time)
The Queen is Gone, and Lucca is Here!

Marle has mysteriously disappeared, yet again, into nothingness. Crono wasn't able to do anything to save her. Now what? Head down the stairs and receive a greeting from Lucca. It seems she figured out everything. The next scene explains that Crono, Marle, and Lucca have actually traveled 400 years into the past, to the year 600 A.D. No wonder Truce and Guardia Castle look so different.
Lucca goes on to say that, when Marle arrived, the castle occupants must have mistaken her for the real queen, who was kidnapped shortly before. Marle just played along. We discover Marle is actually Princess Nadia, of the royal Guardia bloodline; meaning that Queen Leene of 600 A.D is her ancient ancestor. The real queen has been kidnapped... and if she is killed, then the bloodline will never be able to continue, and Marle would never have been born. The rules of time say that Marle will simply disappear.
When Lucca joins you, she is equipped with the Sight scope. It doesn't increase any stats, but its useful effect displays and enemy's remaining and max HP during battle. You can buy Lucca some stronger equipment to increase her attack and defense, but when replacing the scope remember that her attack is not modified by power, so don't have her equip accessories like the bandana. As a girl who sits in her house all day making inventions, she isn't very physically strong. She carries a gun with her for primary attack, and a mallet for whacking things that get too close. Both weapons are very weak at this point in the game, but Lucca makes up for it with her Techs. Don't worry though, she gets much more powerful guns later in the game!

This is a good point in the game to spend some time in Guardia Forest getting some experience and Techs. I highly recommend you train Lucca until she gains a level or two and learns her first Tech, Flame Toss. It is a pretty important thing to have later on at the first boss fight. Crono and Lucca can also team up and do what's called a Dual Tech, where two characters combine one of their Techs into one attack. Flame Whirl is Lucca and Crono's first Dual Tech (a combination of Cyclone and Flame Toss) which is very deadly against the upcoming monsters. If you trained Marle in Guardia Forest back home earlier in the game, you may have tried out Aura Whirl, a combination of Crono's Cyclone and Marle's Aura.
Tip: For an unlimited supply of Shelters (restores all HP and MP at save points and the field), touch the bush in Guardia Forest which reveals some monsters and a single Shelter. You can leave, come back, and repeat to get more and more Shelters. You can also buy them at the item shop, but they're pretty expensive right now.
When you're all set and prepared for some stronger monster fights, head west into the Cathedral.
The Cathedral
Something's Amiss...
Inside the Cathedral are some kindly-looking nuns. They say some pretty odd things about "killer" organ recitals. To progress, talk to the nun standing at the organ. All of the sudden, you will see a sparkle in the middle of the room. Is that a power tab? Wait, no... it's...

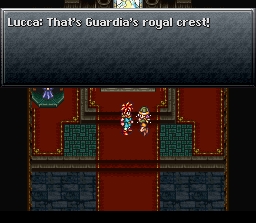
It appears that a hair pin from Guardia's royal crest that Queen Leene guarded with her life (according to the king), has been dropped on the floor. Maybe there was a struggle? Before you can think, the nuns crowd around you, burst into blue flames, and reveal themselves to be Naga-Ettes, fierce Egyptian-looking pink-haired beasts. They attack, determined to not let you go any further.

This fight can be a real pain if you haven't bothered to fight any monsters previously. Flame Whirl really comes in handy here. If Crono is at around level 4 or 5, you can take all of them out at once with only one attack. Wait until they approach you and group together, then smash them with your Dual Tech. If for some reason you haven't learned your Techs (if you're rushing or trying to get to Spekkio at a low level), you may need to have purchased some Heals and Tonics from the item shop. The Naga-Ettes will use an annoying spell that inflicts the Slow status ailment, doubling the time it takes for the ATB gauge to fill up. Use a Heal to cure the status effect. At levels 1-2, their slash attacks can reduce your health significantly, so use some Tonics if need be. At level 1 you'll have to rely on items, but at level 2, Crono's Cyclone can get you through the fight without the help of any items.
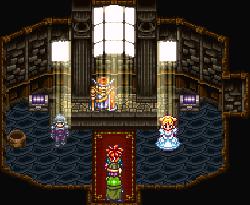
Lucca is relieved after the battle is over, and takes a seat on the steps. A Naga-Ette appears out of some blue flames from behind for a surprise attack, but is soon killed by a frog with a sword. It appears this frog is the one who was "supposed" to save the queen, but came at the wrong time. Whether you choose to "go with the frog" or not will not matter, he comes with you anyway.

Now you get to name your new ally. The default is Frog, though he does have a real name, which is revealed later. He comes equipped with some pretty strong weapons and armor, and he already has a Tech learned, Slurp, which heals some HP. Frog is just as strong as Crono, or even a bit stronger. He can take out a lot of enemies with one hit.
To progress, approach the organ and press ![]() to play it. A door will suddenly appear to the right. Before heading through the door, you may want to return to town and rest.
to play it. A door will suddenly appear to the right. Before heading through the door, you may want to return to town and rest.
Rescue the Queen
The next area is fairly straightforward: there are two chests to the left, and a long hallway to the north. Either sneak past the three Diablos, or head up through the door. In the long hallway, there are two Diablos sliding around, and a pack of Gnashers at the top that you can't sneak by. If you want a small upgrade, head to the left side of the room and run up the staircase and into the first room. You'll find a MaidenSuit and two items in the chests; in the drawer on the left is a special item, called the Naga-ette bromide, for a side quest later on, but if you decide to grab it, you'll have to fight three Henches. Note that the Naga-ette bromide does not appear in your inventory.

Still on the left side of the room, head to the very top and pick up the SteelSaber in the chest, then go around the spikes next to the northwest door and press the skull on the wall. Enter the door to find some soldiers and a power tab in the left pot.
Exit and move to the right side of the main room, where you'll fight two Gnashers and a Diablos.
The lower door (south east) has some monsters sitting around, and if you speak to all three and then wait, one of them will leave to go into the north east door to worship a statue of Magus they have set up. Follow him, you'll notice a fake King, Queen Leene and soldier are standing around within. You can talk to or ignore them. Pick up the items, head into the room to the right (notice the tiny alcove that you can move into, semi-secret) with the Magus statue. There are two chests next to the statue at the north end, but if you want to fight, talk to the southernmost Diablo. You'll have to fight all five enemies at once so be prepared. If you fight them, the fake Guardia people will also want to fight you (3 Gnashers!). Remember you can have Frog use the slurp technique in or out of battle to heal you.

Head back into the main room, this time head straight up the middle. Avoid monsters if you wish, but you'll have to fight two battles no matter what. The first being two Gnashers and two Diablos, the second made up of two Gnashers and two Naga-ettes. Enter through the door at the end.
You'll be greeted by a save point, stop to rest and save, then continue up the stairs and to the far left where you can find a shelter within a chest. The room is one giant circle. It can be explored either way (left or right). Note that once you choose a stairway, it will become a slide and you will have to go around the room from one side to the other (to reach the stairway that isn't a slide).

On both sides of the room you'll see a skull switch on the wall. Don't hit the one on the left unless you want to spawn two extra Mad Bats (they can still be avoided). Press the skull switch on the right side to lower the spikes in the center area. Head to the center area and kill the three Henches and two Diablos, then pick up the Iron Sword. Play the organ on the left to open a secret door located at the very northern part of the room (by the note that says "No entry.", then go around and head through it.
In this little hallway area, there are three pairs of enemies: first two Henches, then two Naga-ettes, then another two Henches. If you get in a fight with the Naga-ettes, you'll be required to fight one of the pairs of Henches at the same time. However, it is possible to sneak past all six enemies by running quickly along the left side. Use the save point and a shelter if you're not rested, because the next room is the boss fight.
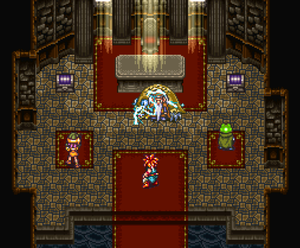
As you enter, tense music will be playing and you'll find the real Queen and the Chancellor sitting at a table. The Chancellor will notice you when you get close enough and start a cutscene where the Queen will run away while your party stands up to fight. You'll be threatened by him, then he'll transform into his true form, Yakra.
Boss Fight
| Yakra File:Chrono Trigger Boss Yakra.png | ||||
|---|---|---|---|---|
| HP 920 |
Weaknesses None |
Strengths None |
Absorbs None |
Suggested Level 7-10 |
| Charmables None |
Drops None |
XP 50 |
TP 5 |
Gold 600 |
Attacks
{{{attacks}}} | ||||
Description/Strategy
Yakra only has 920 HP but that's a lot at this stage of the game. It's recommended that Frog heal with slurp when necessary and that you use your best techniques or double techs. Using X-Strike will deal the most damage, hopefully you've trained enough to have unlocked it. Try to keep your HP above 20 if you can help it. He has three attacks; the first is a pounce, a normal attack. The second is one where he says, "Drrrrrooooo..." and then rushes around the room striking everyone in your party for 10-30 damage. His final attack is NeedleSpin, where he'll fire out a spurt of needles that will target one character, dealing over 40 damage! If you've trained enough to get Chrono to level seven, you probably will only have to heal once or twice during the fight because you'll be so strong. | ||||
Farewell
After you've kicked Yakra's yellow ass, the Queene comes, thanks Frog, and invites the group back to the castle. Before you leave, open the chest on the right for a Mid Ether and the chest on the left for... the Chancellor! It turns out Yakra tied up the real one and stuffed him in this chest.

Back at the castle, Frog feels bad for not being able to protect Queen Leene and walks to the door. Approach him for a dialogue scene where Frog says farewell to the party. He compliments Crono's sword skills and leaves. After that's over with, it's time to see what happened to Marle. Head back up the east wing to the Queen's room. Marle suddenly appears and dialogue ensues. Lucca reveals to Marle that she has discovered her real identity and Marle confesses. Now it's time to go home.
Head through Guardia Forest and make your way back to the mountains we came from. There will be some new monsters here. This may be the first time you've had Marle in battle, and it won't be for long, so it's a good idea to at least fight until she learns her Aura Tech and gains a level or two.

Go across the bridge and into the forested area Crono first came to. You will see a small blue orb sitting there. Lucca pulls out some strange device, spins around, and the orb turns into a portal like the one we saw back at the Millennial Fair. We learn that these are called "Gates", holes in space which will warp a person to a certain period of time. How the Gate got here in the first place, Lucca doesn't even know.
The party steps in, and off we go...
Challenging Lavos
Impossible during this stage of the game since you have no access to a time gate.
