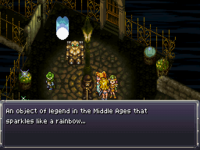
Gaspar's hint: "There's an object in the Middle Ages that sparkles like a rainbow..."
Before you proceed with this sidequest, you may want to visit Guardia Castle for a few extra scenes that are available as soon as you defeat Magus. You'll be allowed back inside the castle if Marle is in your party when you try to enter, and you'll find out that your sentence has been suspended. The Chancellor will talk to you about how King Guardia was heartless towards Marle's mother when she was dying. The King and Marle will exchange some harsh words, and the King will snap at her and tell her to do whatever she likes. Talk to the Chancellor again and he'll suggest giving the king some jerky to cheer him up. You can buy some in the Snail Stop at Porre and give it to him for a hefty fee, but he'll get even madder because he'll think you're trying to give him a heart attack. The Chancellor also gives three different responses depending on whether you talk to him with Marle, without her and with Crono, or without either.
This particular quest begins In 600 AD on Choras, the island with the northern ruins to the southeast. You'll make things easier if you keep Marle in your party for this whole section. Talk to Toma in the bar to pick up the Toma Pop, which he asks you to pour on his grave if he doesn't find the Rainbow Shell. Head forward 400 years to 1000 AD and locate Toma's grave stone on the western most part of the island. Here Toma will point you towards the Rainbow Shell's location, at the Giant's Claw to the northwest. Check behind the gravestone for a Speed Tab as well. Head back to the Middle Ages (600 AD) and land on the island near Choras to enter the now accessible Giant's Claw.
Head inside and read Toma's first diary page, and you'll walk through Azala's throne room (any character in the lead can interact with the throne for an easter egg). Bring Crono or Magus along for this part so you have access to Lightning magic. After heading through the Giant's Claw for a little while it should begin to look very familiar to you as it is the Tyrano Lair from 65,000,000 BC. You can grab a Time Hat or Sight Hat down the left path, but don't follow it all the way since it's just a dead end you use to return to this area later. Instead, head down the right path and it should look familiar. The center switch activates a save point, the left one opens up the floor, and the right one summons some monsters. You'll need to fall in the pit, so you'll fight the monsters for sure if you hit the right switch. Fall in the pit in any case and step on the right switch to summon some monsters, and the left one to open the skull to find a Power Tab. Head south and out once you are done.
Head down the ladder and to the right for another Power Tab, and a Full Ether to the left. Head up and around the room for a few more fights, you may want a healer on full time duty. Check out the northeast area by the door for a Blue Rock which activates still another triple-tech. If you want, head north in the next area and take the ladder off screen to return to the upper level of the Giant's Claw (the deadend we ignored earlier). To continue, head down the ladder and to the left to find a Zodiac Cape. Head right, and grab a Lapis from the chest. Next, head out through the cave to the southwest. You can sneak up behind the enemies here to scare them away or fight them. Head through the open left skull, to find a familiar area with a couple switches you can step on to get rid of the monsters. Head through the left exit to find a Frenzy Band, which offers an 80% counter-attack rate, eclipsing the feeble 50% of the Rage Band. A must have from now on.
Head back to the switch room and this time go through the right passage. Fight some rubbles for easy tech and experience points which will help everyone finish learning all their single techs. Head into another area and open the right egg switch to fall into the jail cell where Kino was held captive earlier in the game. Head through the left exit to open up the right skull you passed by earlier and grab a Power Tab nearby. Return to the room with Kino's cell and go through the new path to the right. Save and heal up if you need it, and equip fire resistant armor because you are about to rumble with... the Rust Tyrano.
After you have defeated Tyrano, head northward to discover the Rainbow Shell. It turns out that the Rainbow Shell is too heavy for your party to carry so they will ask King Guardia for help. He agrees and decides to keep it in his castle as a family heirloom.
However, that's just the first part of this particular quest. Head back to the present (1000 AD), put Marle in your party, and enter Guardia Castle to learn that the trial of the century is about to take place. King Guardia is accused of selling off the royal treasures. Go to the right and head up the stairs to the council room where Crono was tried earlier in the game. Speak to the guards to have Marle barge her way into the courtroom. You'll learn you need proof of the Rainbow Shell in order to save the king.
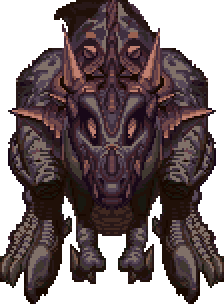
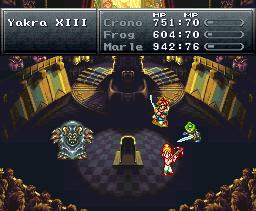
Head back downstairs into the main room and go down the right stairway this time (odd, that wasn't there before). You will need to head down to the basement and fight your way through a bunch of monsters to the Rainbow Shell. Apparently the forces of evil haven't found any new goons in the last 400 years; they'll be the same weak ones you fought in the Cathedral. Pick up 3 chests in a small room (Lapis, Hyperether, Elixir) on your way. You'll find the Rainbow Shell at the end of the hallway at the northernmost point of the basement in a room with 3 more treasure chests (Hyperether, Lapis, Elixir). Once you have picked up a shard of the Rainbow Shell and read the queen's letter, head back to the courtroom and talk to the guards. You will be denied entry but just as the Judge is pronouncing the King guilty, Marle will smash through the window to make a stunning entrance. She will show the shard of the Rainbow Shell to the Judge and Jury and the Chancellor will reveal that he is actually Yakra XIII, a descendant of the Yakra defeated in 600 AD, and that he has come for revenge.
Prepare to do battle with a fake chancellor again, Yakra XIII. Who knew the guy had kids?
After you are victorious, you'll be treated to a mushy scene where Marle and the King make up. Then Melchior will come in and tell you that he is ready to make you some new weapons and equipment. The king will give you permission to leave the castle, and you can explore the castle to talk to people if you want. Head into the kitchen if you'd like a "Crono Special" to heal your HP/MP for free, and make sure you head up to the courtroom to pick up the Yakra Key from off the floor where the glowing blue dot is. This can be used to unlock a previously locked chest just a level or two down in the castle. Open the chest to free the real Chancellor who will show up in the ending of the game.
Head down to the basement treasury where you found the Rainbow Shell to find and talk to Melchior who's willing to make some armor from the Rainbow Shell. You can have a Prism Dress which blocks 1/3rd of all magic and is extremely effective or three Prism Helms which are slightly less useful but they do protect status. Make your choice and he will give you the armor of your choice. He will also make you the Prism Specs accessory which greatly raise a character's attack power. Providing you have done the sidequests in the order suggested, and have already gotten the Sun Stone from Lucca's quest, Melchior will also make you Crono's ultimate weapon, the Rainbow Sword!
Additionally, note that you can receive an additional Prism Dress and Prism Helm from the final boss of the Black Omen, so you'll have at least one of each by the end of the game if you finish this quest and use Ayla to charm in the final battles. Unfortunately, to equip every character with rainbow equipment you'll have to beat the game at least one time - however most parties don't use multiple girls, so getting the three Prism Helms and a single Prism Dress should suffice. This all depends on your personal preference of which characters you use.


