Tata and the Frog (600 A.D. second time)
Denadoro Mountains[edit]
This chapter technically begins when you run into Tata at the Denadoro mountains, so we'll just take it from there. Make sure you have Lucca along in your party so you can burn the hammers of the Ogans you meet. Before heading up the first ladder, walk into the water on the right and follow it up. This hidden passageway will take you to a chest tucked under some branches. Inside is Robo's third weapon: Mirage Hand. now go back and head up the ladder in the first area, and head through a south exit to pick up a chest with Revive you saw earlier. This next area is fairly linear, just fight all the monsters and exit to the north-east.
The next area is pretty linear as well, just mosy around until you pick up all the chests, and I'd recommend fighting all the monsters as well just to level up. Watch out for the free lancer throwing rocks in the area after that, they actually do lower your health. Go west from the sleeping Goblin and get Ether from the chest. Go North over the first Bridge, but don't cross the second Bridge yet instead get 500 G from the Chest north. In the next Scene are 4 chests to find with Revive, Mid Ether, Mid Tonic, Gold Helm. Go in next Area where you can find Mid Ether on the way in next Area. Get 600 G and walk through another short area, and heal up because the next area you fight in will be a cliff where you have to fight through four consecutive groups of monsters. Have Lucca burn the Goblins with hammers as always, and heal with Aura Whirl or whatever you have available.

The next area will look like a giant waterfall. After one brief fight, you'll discover you can jump down the river down the center or the bottom left. Head down the bottom left path to jump to some ledges with two awesome items, a SilverStud and a SilverErng. The Stud cuts MP use by 50%, and the Earring raises your HP by 25%. You'll walk around to where the cliff was and return to the waterfall area. Get 300 G and Mid Tonic and talk to the free lancer if you want, then you'll fight him and exit to the left, but not before taking Mid Ether near the exit. The next area just has a Kilwala that will give you a Magic Tab if you talk to him three times.
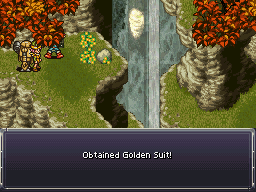
After that you'll come to a save point, although you have a few more fights before you can reach the boss. Check the bottom left area for an easily missed Speed Tab then head to the right. In the next area, don't jump down yet; instead look for a hidden chest with a Gold Suit. Now go down the ladder and get Mid Ether from the chest. Move on, jump down a ladder and get Shelter from the chest and climb up another one to find a cave where the boss is. Make sure your MP is high before you begin.
Masa & Mune
| ||||
|---|---|---|---|---|
| HP 1000 each |
Weaknesses None |
Strengths None |
Absorbs None | |
| Charmables None |
Drops None |
XP 400 |
TP 4 |
Gold 400 |
Attacks
| ||||
Description/Strategy
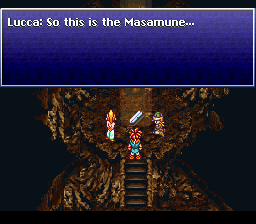
Masa and Mune want to test you. For this battle you'll fight Masa and Mune separately. As soon as one brother is defeated, the fight will move on to the next stage. The trick, then, is to concentrate your efforts on one brother. Target Mune, the one with the purple collar, on the left. Attacking Masa, on the right, will prompt a powerful X-Strike counter-attack. Alternatively, you can use Lucca's Hypno Wave on her first turn; as long as it immobilizes one of the brothers, simply attack the other and they won't be able to counter-attack. If you don't have anyone with cure magic, use Mid Tonics instead. They'll do just as well. Beat one of them, and that battle's over. But don't get up just yet! Upon victory, you will see this message: "Apart, Masa & Mune are powerless." Then Masa and Mune will fuse together to create Masamune! | ||||
Masamune
| ||||
|---|---|---|---|---|
| HP 3600 |
Weaknesses None |
Strengths None |
Absorbs None | |
| Charmables None |
Drops None |
XP 500 |
TP 10 |
Gold 1,500 |
Attacks
| ||||
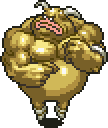
Description/Strategy
Once the brothers combine, the fight truly begins. This boss's high damage and extremely high health necessitate the use of your best Techs — Fire Sword, Ice Sword, Ice Tackle, and Robo Tackle work nicely — and regular healing. When the boss clenches his fists and the text reads "Storing tornado energy", have Crono use Slash to neutralize the attack. If you attack with anything else while he's storing energy, he'll execute a nasty counter attack. Be prepared to use Ethers, as regular attacks are a waste of your turns here. | ||||
On Quest to repair Masamune[edit]

When you finally beat the boss, you'll get the Broken Sword of the Masamune and ride the wind to the base of the mountain. Go to Tata's house to the south to learn the truth about him and the Hero Medal, and make sure to rest since the game isn't nice enough to restore your health after boss battles. Head into the Cursed Woods, and show the medal to Frog. He'll give you the Broken Hilt of the Masamune, which you'll learn was made by Melchior, a man living in 1000 A.D. at Medina Village. Head out through the woods, remembering to attack the snakes to make them eat the frogs.
Go back to the time gate in Truce Canyon, and take the time gate to Medina Village to speak with Melchior. He'll explain that his story involving the sword is a very complicated one, but he could reforge it if you could bring him some Dreamstone. Unfortunately Dreamstone hasn't existed for millions of years now. Sounds like the time is right to take a trip into the past, doesn't it? After talking to him, you'll be in the next chapter for your save file, so let's move on.
Challenging Lavos[edit]
While the save file still reads, Tata and the Frog, head to the Millennial Fair if you want to fight Lavos at this point and get The Unknown Past Ending. This ending shows a few scenes from 65M B.C., since you haven't had the chance to go there yet if you beat the game at this point.
