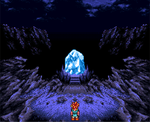
The Guru on Mt. Woe (12,000 B.C. second time)

You begin this chapter when you climb the chain to Mt. Woe; after beating the Mud Imp and the two beasts. You can head back to the Earthbound Village to save and rest for free or to stock up on some more weapons, but head up the chain link when you're ready to move on.
Make note of the awesome rewards given for defeating the Rubbles up here. Each Rubble offers a whopping 1000 experience and 100 tech points, and while they disable you from using techs and items (using a "lock" ability), they're easy enough to kill if you just keep attacking. Rubbles only have 515 HP, but they have the ability to flee so make it quick. Only one of the Rubbles in all of Mt. Woe respawns; it's located in the top right of the second screen, on an island along with two chests.
Unless you want to run in and out of zones, you should focus on defeating them all. You can charms good items of those monsters: Gargoyle (Big Hand for Robo), Man Eater (Pearl Edge for Frog), Bantam Imp (AlloyBlade for Crono)
Mt. Woe[edit]

The first area has two Rubbles, an exit to the west then north, and a Lode Helm if you walk around the cliffs (north, then loop back down to the bottom left corner).
In the second area, you'll fight three Rubbles scattered about. The first is to the left of the chain you entered on. Follow the path to the right then fight the Gargoyles; save if you like but continue north after them. Cross the chain in the northeast to find the second Rubble, a Lode Vest and a Shield. Head back over the chain to the west, go to the top left corner and grab the Barrier. Climb the cliff just a little east of the chest, follow it around to the left and then south. Climb up onto the plateau and head directly north where you saw the chest (contains a Lapis); you'll have to fight two Bantam Imps to get it.

From there cross the chain to the right, fight the two Stone Imps and two Gargoyles, then follow the cliff around to the right and then down and back to the left where you'll fight two Bantam Imps and two Gargoyles at the same time. Climb down the chain directly south, head to the right and fight the four Gargoyles and then grab the Barrier out of the chest. Run to the southwest corner of this area to fight the final (third) Rubble of the area. Go back up to where you just picked up that last Barrier, walk up the cliff and cross the chain to exit the area to the east.
In the third area, grab the Lapis before moving towards the Man Eaters. They won't attack you until you try to cross the chain to the north, so head to the southeast first and grab the Full Ether in the south and Barrier in the north; return and fight the Man Eaters if you haven't done so yet. Cross the chain, follow the path and fight the Rubble (the 6th so far). Continue and climb up a level, head south if you want a Shield and a Shelter, you'll have to fight three Gargoyles and two Man Eaters at the same time. Follow the path north, across the chain and around the last little "island" of the area containing a save point; cross the chain to the north when you're ready.
The fourth and final area is surprisingly empty, just pick up a Time Hat and Full Ether on your way and grab the Magic Tab in the bottom right corner before (you might want to read the beginning of the next section if you want to do well against the boss) climbing the giant chain to face the boss.
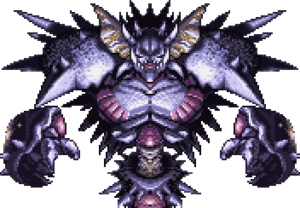
Giga Gaia
| ||||
|---|---|---|---|---|
| HP 9,500 (Head), 1,000-2,000 (each hand, depending on the version you are playing) |
Weaknesses None |
Strengths None |
Absorbs None | |
| Charmables Speed Tab (Head) |
Drops None |
XP 3,000 |
TP 30 |
Gold 3,000 |
Attacks
| ||||
Description/Strategy
First of all, you can charm the head of Giga Gaia to get a Speed Tab. Giga Gaia will do some nasty Fire and Shadow attacks with both hands, so equipping one or more of the following will come in handy if you have them (to absorb/reduce damage): the Red Mail, Red Vest, Black Mail, or Black Vest (use one of them on all three party members if possible). The hands attack twice in a row: a fire attack first, then a shadow attack. Sometimes the right hand will heal the head for 250 HP. It's recommended that you have a group healer (Frog or Robo) to heal the party periodically after taking significant target or AOE damage. Remember that Dual Tech healings are extremely good, especially Ayla and Frog's Slurp Kiss which only costs two MP. Attack with your best multi-enemy techs when the arms are both alive, such as Lightning 2, Fire 2, etc. or even Frog Squash/Luminaire if you have them. Attack with your best single-enemy techs when only the head is alive. Chrono's Spincut is a good attack, as well as Frog's Leap Slash. Ayla is a goddess with her physical attacks and Cat Attack, but the rest of the party members don't have many effective attacks. Chrono and Ayla's dual tech Falcon Hit is an excellent way to kill the arms because it will hit both of them for around 900-1200 damage (note: in the DS version the hands appear to have only about 1000 HP, so this can one shot both of them). When the arms are revived they should be weaker than before so just a few techs should finish them off. Try to use physical attacks more than magic, but if you've got powerful magic then go right ahead. Dual techs, especially with Ayla and Crono are a good choice. If you choose heavy attacks and choose them quickly, this battle should be a breeze for you. After a couple rounds of defeating the arms, you can say goodbye to Giga Gaia. Second Strategy: If you have it, you can just plow through the hand attacks and use 3D-attack on the head. Doing so kills him in 4-5 hits. If you do, make sure to use the gold stud accessory on Ayla to save a lot of MP. Third Strategy: With Crono, Marle, and Lucca in the party all around level 38, use their Triple Tech of Delta Force 6 times back to back defeating Giga Gaia. | ||||

It's now time to say hello, once again, to Melchior. You'll escape to the Earthbound Village as the mountain collapses, and Schala and Janus will come to help you, only to be abducted by Dalton. Melchior will give you a Ruby Knife to help destroy the Mammon Machine. Don't bother buying any armor before you head out, as you'll be able to pick up some better ones in Kajar soon. Rest and save before you head out, and you'll be in the next chapter.
Challenging Lavos[edit]
If you go back and challenge Lavos at this point, you should get The Prophet Ending. There will be a few scenes involving "the Prophet" from this period and a particularly nice speech from him, hinting that he would have gotten the chance to do what he wanted without your interference.
